The day the sun turned black over Zululand!
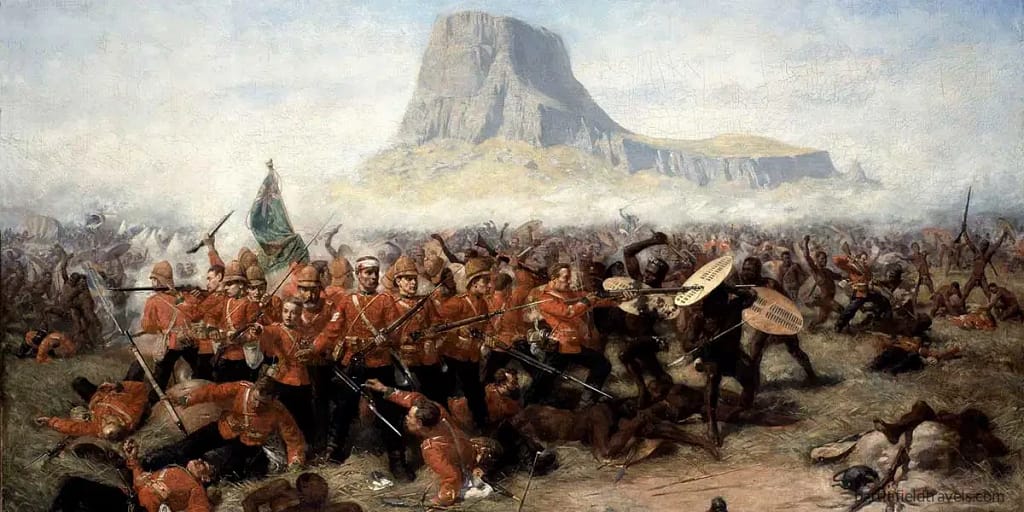
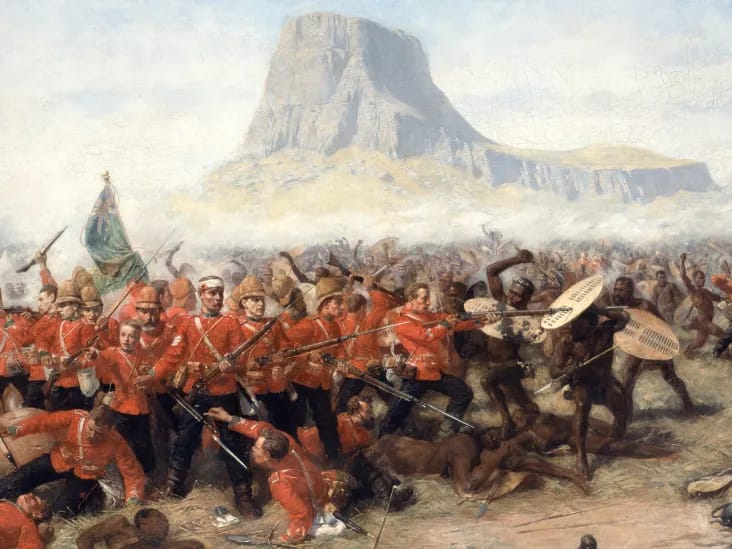
At the Battle of Isandlwana, on 22 January 1879, a Zulu army of 20,000 warriors descended upon the British camp at Isandlwana. Within hours, nearly 1,300 British soldiers and colonial troops lay dead — a stunning reversal that shook Victorian confidence and reshaped Britain’s colonial ambitions in southern Africa.
Key facts
You may also be interested in these firsthand battlefield studies covering the Anglo-Zulu War: Anglo-Zulu War (1879) ♦ Battle of Isandlwana (1879) ♦ Battle of Rorke’s Drift (1879) ♦ Battle of Ulundi (coming soon)
If you ever wondered what Britain’s arch-rival France was up to at that time, try these battlefield studies: Ambush at Bắc Lệ (1884) ♦ Siege of Tuyên Quang (1884-85) ♦ Battle of Hòa Mộc (1885)
Google Earth map – location of the Isandlwana battlefield
3D flythrough of Isandlwana and Rorke’s Drift battlefields
Strategic context: the Anglo-Zulu War
Colonial policy and strategic objectives
By 1878, the British Government sought to impose a single administrative federation across southern Africa. The Zulu Kingdom, under King Cetshwayo kaMpande, remained the last major independent African power, fielding a disciplined national army of roughly 40,000 warriors. Its existence threatened the security of the adjacent British-controlled territories of Natal and the Transvaal.
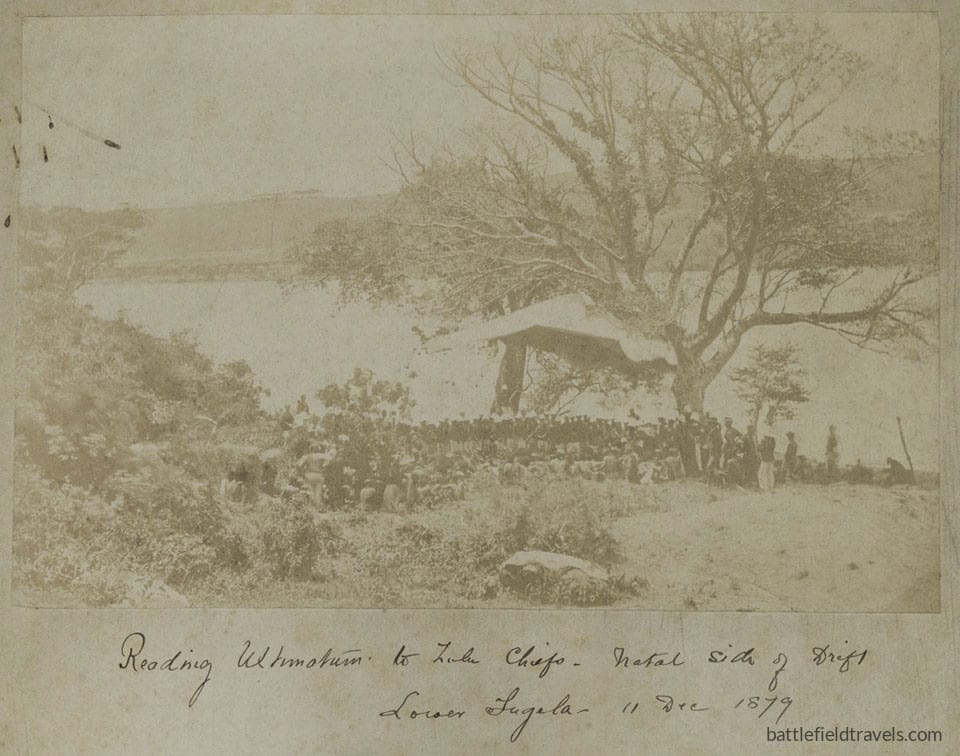
High Commissioner Sir Henry Bartle Frere and the Commander-in-Chief in South Africa, Lieutenant-General Lord Chelmsford, concluded that the Zulu military system had to be dismantled. In December 1878, Frere issued an ultimatum demanding that Cetshwayo disband his regiments and accept a British resident. The conditions were designed to be unacceptable, ensuring war on British terms.
Invasion plan and force dispositions
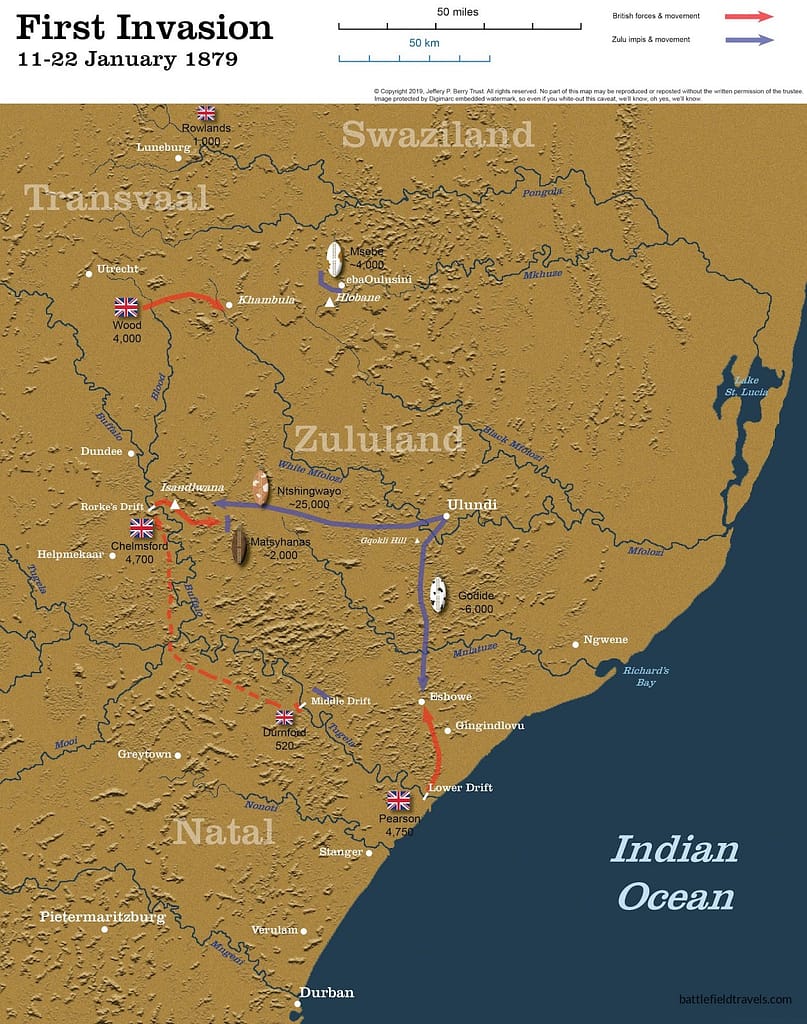
Chelmsford organised his force into five columns. Three columns would cross the Buffalo and Tugela Rivers on 11 January 1879, while the other two columns secured the frontier against both Zulu and Boer interference:
- Left Column (No. 4 Column – Colonel Evelyn Wood): crossed at Bemba’s Drift to advance from the northwest toward Hlobane.
- Centre Column (No. 3 Column – Lord Chelmsford): the main striking force, to penetrate Zululand by Rorke’s Drift and move on Ulundi, the royal kraal.
- Right Column (No. 1 Column – Colonel Charles Pearson): advanced north from the Lower Tugela toward Eshowe.
- Durnford’s No. 2 Column remained on the defensive near the Middle Drift of the Tugela River.
- Colonel Hugh Rowlands’ No. 5 Column would remain on the defensive aroudn Derby and Pretoria.
Each column combined regular British infantry, colonial mounted units, African auxiliaries, and small artillery detachments. The operational intent was to converge on Ulundi within three weeks, forcing the Zulu army to accept battle and destroying it on open ground.
Zulu mobilisation
King Cetshwayo’s response was measured and defensive. He ordered a national mobilisation at Nodwengu Military Kraal, summoning roughly 24,000–25,000 warriors to confront the invading central column. Command was vested in senior chiefs Ntshingwayo kaMahole Khoza and Mavumengwana kaNdlela Ntuli, both experienced regimental commanders.
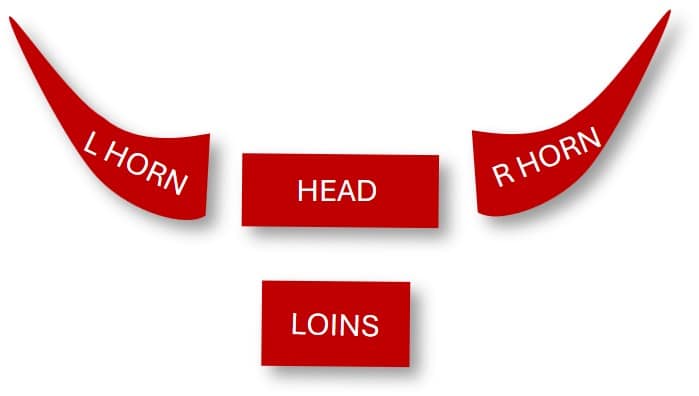
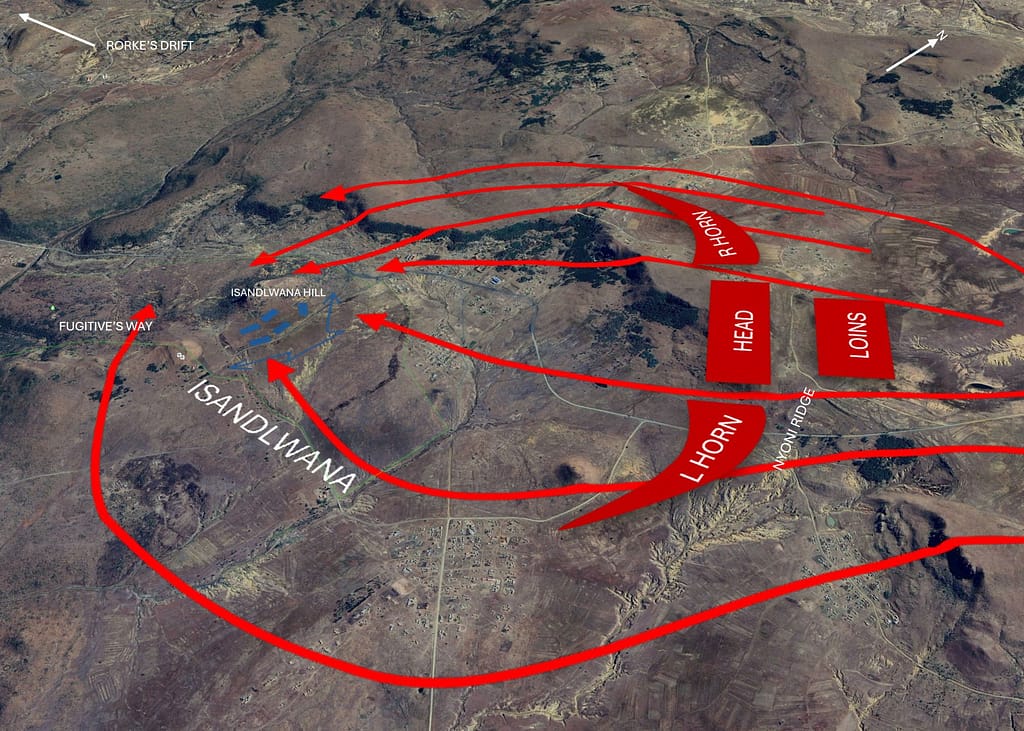
Zulu operational doctrine—evolved under Shaka Zulu earlier in the century—relied on speed, concealment, and enveloping manoeuvre. The army advanced in regiment-based formations (amabutho), operating under the impondo zankhomo or “buffalo horns” plan: a central “chest” to fix the enemy, two “horns” to encircle, and a reserve “loins” to exploit success.
Terrain factors at Isandlwana
The central theatre of operations lay between the Buffalo River (the Anglo-Zulu border) and Ulundi, a distance of approximately 80 kilometres. Key terrain included the crossing at Rorke’s Drift, the dominant feature of Isandlwana Hill, and the broken, undulating ground of the Nqutu Plateau. Visibility was limited by shallow valleys and irregular ridgelines—terrain that favoured the Zulu system of concealment and approach.
By 20 January 1879, Chelmsford’s centre column had advanced as far as Isandlwana. From this temporary camp, he intended to reconnoitre eastward and locate the main Zulu army. The decisions taken over the next forty-eight hours would set the conditions for Britain’s worst colonial-era defeat.
Both Chelmsford and Pulleine had failed to appreciate the micro-terrain (small scale terrain features that often do not appear on maps and can only be seen when you are standing on the ground) factors around Isandlwana Battle. The Zulu assembly area beyond Nqutu Ridge and the dead ground in the dongas and creekbeds around Isandlwana all allowed the Zulus to approach relatively unscathed before engaging in battle. The concept of exploiting small scale terrain features in battle is examined further in the Micro-Terrain and Battlefield Decision-Making research hub.
👉 This article is part of the BattlefieldTravels Deep Research Collection. In support of the KwaZulu-Natal battlefield community, and readers visiting from the KwaZulu-Natal Battlefields Route and Talana Museum, I have made the complete 5,700-word study freely available. If you value independent battlefield research like this, please consider supporting BattlefieldTravels through membership.
Opposing Forces at Isandlwana
 British Forces – Chelmsford’s Centre Column
 British Forces – Chelmsford’s Centre Column
The British central column comprised approximately 4,700 personnel, a mix of regular infantry, colonial volunteers, and African auxiliaries. Its core striking power rested with the 24th Regiment of Foot (later the South Wales Borderers).
Command:
- Lieutenant-General Lord Chelmsford, Commander, No. 3 Column
- Lieutenant-Colonel Henry Pulleine, 1/24th Foot (camp command when Chelmsford departed)
- Lieutenant-Colonel Anthony Durnford, Royal Engineers (command of the Natal Native Contingent column attached on 22 January)
Composition:
| Arm | Unit / Formation | Strength (approx.) | Remarks |
|---|---|---|---|
| Infantry | 1st Bn, 24th Foot – 5 companies | ≈ 500 | Veterans of the 9-year service term, armed with Martini-Henry .45 cal rifles |
| 2nd Bn, 24th Foot – 1 company (camp) | ≈ 100 | Reinforcement from column reserve | |
| Artillery | N Battery, 5th Brigade, Royal Artillery | 2 × 7-pdr RML guns | Ammunition wagon park in centre of camp |
| Mounted | Natal Mounted Police, Natal Carbineers, Newcastle Mounted Rifles, mounted volunteers | ≈ 200 | Reconnaissance, pickets, escort |
| Auxiliaries | 2 × companies 2/3 Natal Native Contingent (NNC) | ≈ 200 | Lightly trained, armed with muskets or spears |
| Support | Engineers, Rocket Battery (R.E.) | 1 detachment | Under Lt Raines (Rocket Troop later under Durnford) |
Total in camp on the morning of 22 January 1879: about 1,750–1,800 men (of which ≈ 1,300 were European).
Weapons and Fire Discipline
British infantry carried the Martini-Henry Mk I and Mark II single-shot breech-loader, sighted to 1,400 yards, firing a 480-grain bullet at 1,350 fps. Each soldier carried 70 rounds on the man; reserve ammunition was held in regimental boxes in wagons at the camp’s centre. Artillery ammunition consisted of case and shrapnel, effective to 800 yards against massed targets. Rates of fire were high, but resupply and distribution were poorly organised.

Doctrine and Command Philosophy
Chelmsford’s doctrine reflected mid-Victorian confidence in discipline and controlled volley fire. The column lacked organic cavalry and engineer support capable of constructing entrenchments. Command cohesion was strained by the ad hoc inclusion of colonial units under separate orders.
 Zulu Army – uNodwengu Command
 Zulu Army – uNodwengu Command
The Zulu mobilisation order brought approximately 20,000–24,000 warriors to the field, forming the uNodwengu (main) army. Command rested with Ntshingwayo kaMahole Khoza and Mavumengwana kaNdlela Ntuli, reporting directly to King Cetshwayo.
Organisation and Regimental Structure:
The army was arranged by amabutho (age-grade regiments). Those engaged at Isandlwana included:
| Regiment | Approx. Strength | Function in Battle Plan |
|---|---|---|
| uNokhenke, uDududu, uNdluyengwe, iMbube | ≈ 6 000 | Right Horn – to envelop British left flank |
| uMbonambi, uNokhenke (detachments), uKhandempemvu (the Chest) | ≈ 8 000 | Central assault on the camp |
| uNdi Corps, uNdloko, uMcityu | ≈ 7 000 | Left Horn – to swing behind and cut the retreat |
| uThulwana, iNdlondlo, iNgobamakhosi | ≈ 3 000 | Loins – reserve under Dabulamanzi kaMpande |
Weapons and Equipment
Primary armament remained the iklwa, a 40 cm bladed stabbing spear, and the isiHlangu cowhide shield. Several thousand possessed obsolete muzzle-loading muskets, as well as a few Snider-Enfields or Martini-Henrys, which were captured in earlier conflicts. Ammunition was limited, fire discipline poor, and most firearms were ineffective beyond 200 yards.
Command and Tactics
Zulu command practice combined strict regimental control with local initiative by section leaders. Coordination was achieved by voice, whistle, and hand signals. The standard tactical pattern, the “buffalo horns”, was well rehearsed: a rapid envelopment executed at running pace once contact was made. Warriors moved in dispersed order until the final charge, closing to shock range under covering fire from skirmishers armed with muskets.
Morale and Motivation
Morale was exceptionally high. The invasion of Zululand was viewed as a direct challenge to national sovereignty. The Zulu army, well fed and confident, intended to strike a decisive blow before British reinforcements could consolidate.
Pre-battle movements
Advance into Zululand
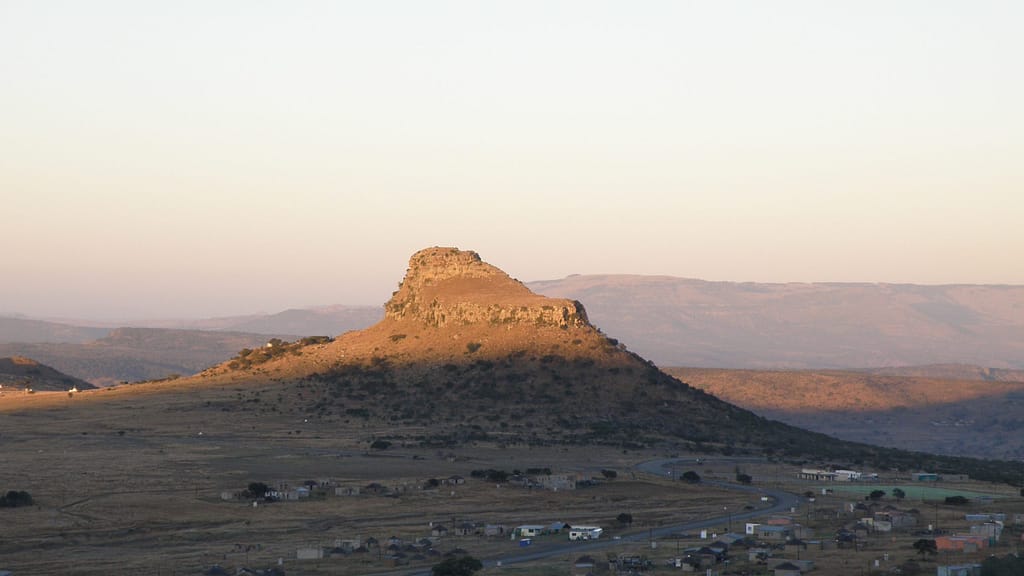
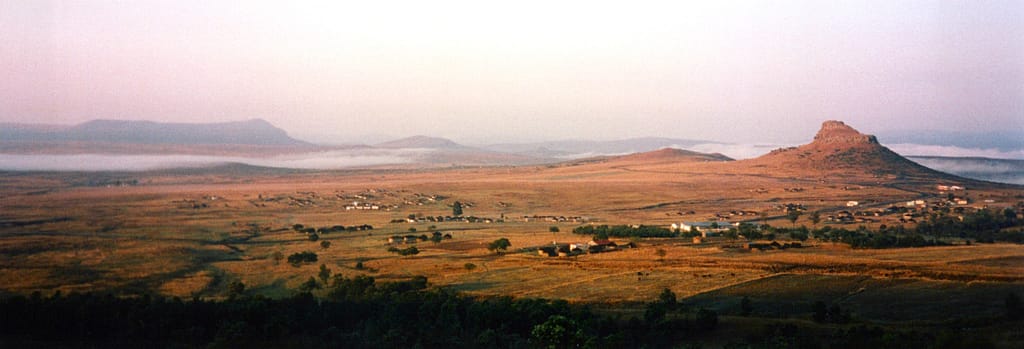
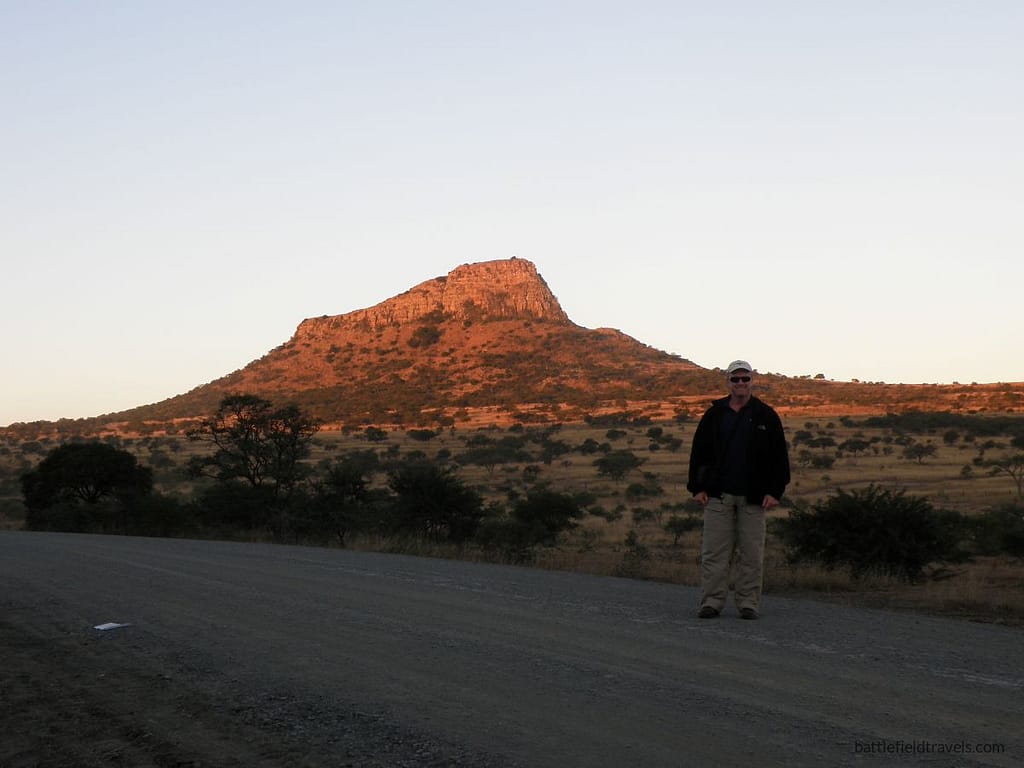
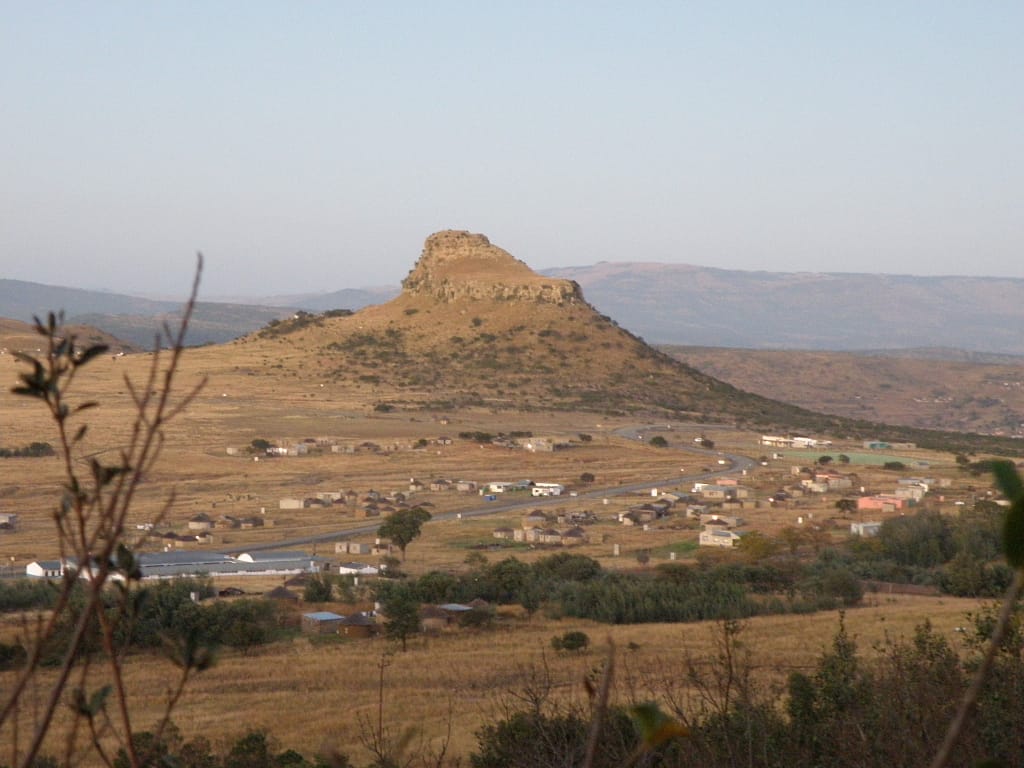
Following the river crossings on 11 January 1879, Lord Chelmsford’s Centre Column advanced east from Rorke’s Drift along the wagon track toward Ulundi. Progress was slow due to heavy supply wagons and poor roads. Each halt involved off-loading wagons, fording dongas, and constructing rough crossings for the artillery. By 18 January, the column reached the heights above Isandlwana Hill, a distinctive sphinx-shaped feature dominating the plain below. The site offered water and grazing but no natural defensive advantages.
Chelmsford viewed Isandlwana as a temporary bivouac, to be used while reconnoitring toward the Mangeni Falls and the Nqutu Plateau. No entrenchments were dug and no laager was formed, as wagons remained dispersed for grazing. The assumption was that the Zulu army would avoid a battle and instead retreat toward Ulundi.
Initial contact and reconnaissance
On 20 January, mounted patrols from the Natal Carbineers and Natal Mounted Police reported small bodies of Zulus moving on the plateau north-east of the camp. At 1600 hrs, Major John Dartnell led a mixed mounted detachment and elements of the Natal Native Contingent (NNC) to reconnoitre that sector. By dusk, his patrol had sighted a significant concentration of Zulu warriors in the broken ground near Mangeni Gorge. Dartnell elected to bivouac in the field rather than withdraw, sending a message to Chelmsford requesting reinforcement at first light.
Chelmsford interpreted Dartnell’s report as contact with the Zulu main army. During the night of 21–22 January, he resolved to move out at dawn with more than half the column, approximately 2,500 men, to support Dartnell. Before departing, he issued instructions to Lieutenant-Colonel Pulleine of the 1/24th Foot to hold the camp and protect the baggage train.
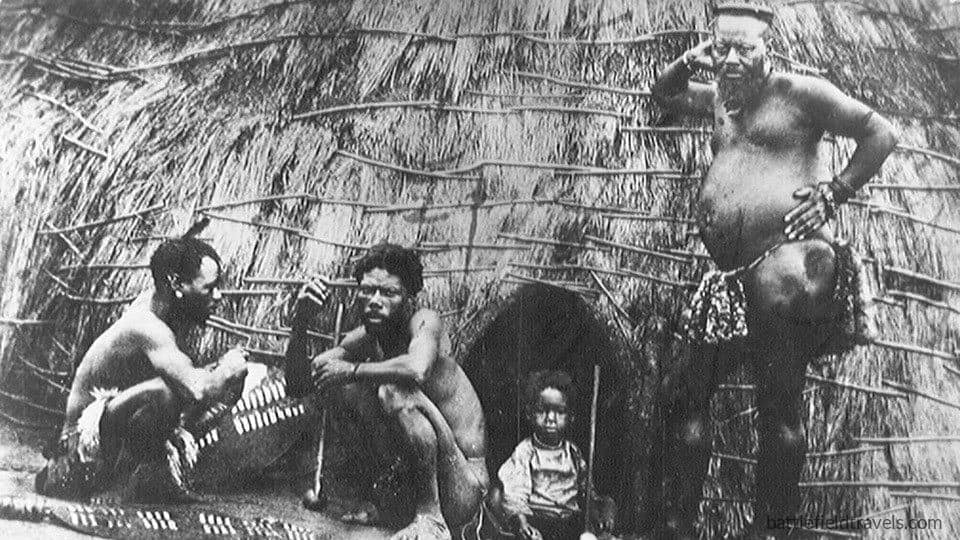
The camp at Isandlwana
Isandlwana camp posture
At 04:00 hrs on 22 January, Chelmsford’s column marched east, taking with it six companies of the 24th Foot, four guns, and most of the mounted troops. Left behind at Isandlwana were:
- Five companies, 1/24th Foot
- One company, 2/24th Foot
- Two 7-pounder guns of N/5 Battery
- Mounted colonial volunteers from local corps
- Approximately 200 NNC troops
Total strength: roughly 1,300–1,400 men.
Pulleine’s written orders were ambiguous and principally administrative, covering the guarding of stores and preparation to move forward. They did not specify defensive dispositions or authority to shift camp in the event of attack. Ammunition wagons remained parked in the camp centre under the quartermaster’s supervision; no forward distribution points were established.
Troop dispositions
The British camp stood on open ground beneath the eastern face of Isandlwana Hill. To the north and east lay the Nqutu heights, a series of undulating ridges and shallow valleys that offered excellent observation of any enemy force. The Manzimnyama Valley cut the ground on the right of the camp, while the Nyoni Ridge rose to the left. Sparse thorn scrub and long grass limited visibility to 800–1,000 yards.
Pulleine posted a chain of pickets on the ridgelines and maintained routine fatigue duties. The general mood in camp remained confident; few expected a major attack so far from the Zulu capital.

Arrival of Durnford’s column
At about 10:00 hrs, Lieutenant-Colonel Anthony Durnford, Royal Engineers arrived from Rorke’s Drift with about 500 men: mounted Basuto irregulars, a company of NNC, and a small rocket troop. As a senior officer to Pulleine, his arrival created uncertainty in command. Chelmsford had left no clear written directive defining authority between the two. Durnford, aggressive by nature and believing the enemy to be withdrawing eastward, decided to move out from camp with his mounted elements to reconnoitre.
By 10:30 hrs, his scouts advanced into the low hills beyond the Nqutu Ridge, unaware that within those valleys lay the concealed Zulu main army, resting and awaiting orders.
The decisions taken during this hour—Chelmsford’s dispersal, Pulleine’s passive defence, and Durnford’s forward movement—set the tactical conditions for the disaster that would follow.
Phase I – Early morning: observation and reconnaissance (07:00 – 10:30 hrs)
Zulu army sighted
The morning of 22 January 1879 began clear, with light mist over the valleys east of the camp. Routine orders were carried out: breakfast issue, equipment inspection, and fatigue parties loading wagons. Chelmsford’s half column was already marching east toward Mangeni Falls.
At 07:00 hrs, pickets on the Nyoni Ridge reported small groups of Zulus moving among the folds of ground. Lieutenant Barry of the NNC confirmed the sightings and requested guidance. Pulleine dispatched a company of the 1/24 Foot under Captain George Mostyn to reinforce the ridge pickets and authorised the artillery to deploy their guns facing northeast, covering the approaches from the plateau.

Durnford’s reconnaissance
At approximately 09:00 hrs, the outlying pickets observed larger bodies of Zulus, estimated to be several hundred, moving north to south along the skyline. These were elements of the Zulu left horn conducting a screen while the main army remained concealed in the Ngwebeni Valley, six kilometres beyond the ridge. Pulleine transmitted a written report to Chelmsford via mounted orderly, advising of “enemy in some strength upon the heights.”
When Durnford’s column reached camp at 10:00 hrs, he found the troops standing-to but no concentrated defensive plan in place. After a brief exchange with Pulleine, Durnford judged the enemy to be withdrawing before Chelmsford’s advance and decided to pursue. He requested two companies of the 24th Foot as support—Pulleine declined, citing orders to maintain camp integrity. Durnford therefore departed eastward with about 250 mounted Basuto and one rocket section, leaving his infantry to await orders.
Phase II – Contact and initial engagements (10:30 – 11:30 hrs)
Contact with the main Zulu army
At 10:30 hrs, Durnford’s mounted screen advanced along the track toward the Mangeni Valley. Around 11:00 hrs, scouts under Lieutenant Raw crested a rise overlooking a broad basin—the Ngwebeni Valley—and encountered the Zulu main army concealed in bivouac. The sudden appearance of mounted men caused the nearest regiments to spring up and form ranks. Shouts and signal horns carried down the valley as the mass of warriors began to surge forward.
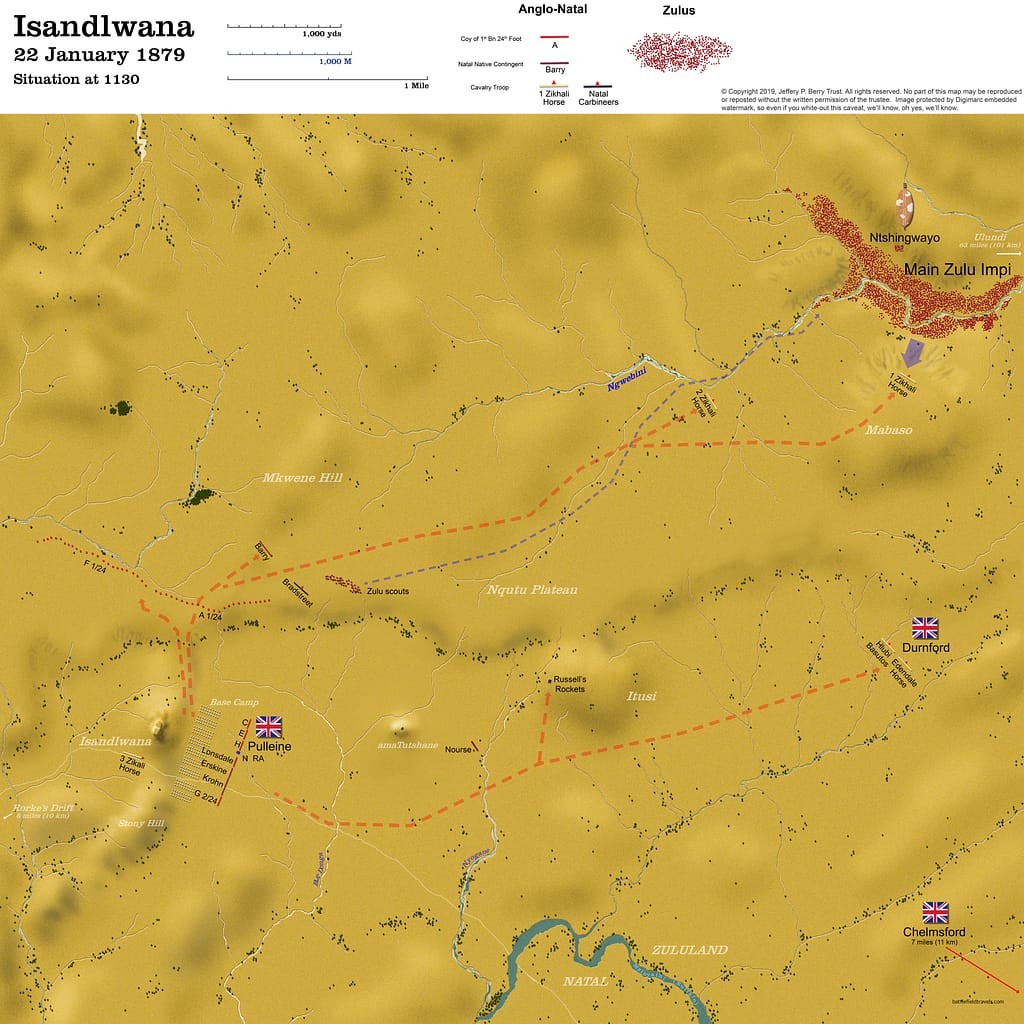
https://obscurebattles.blogspot.com/2019/02/isandlwana-1879.html
Durnford’s fighting withdrawal
Durnford’s men fell back rapidly, firing controlled carbine volleys to delay pursuit. The rocket troop, lagging on rough ground, was overrun within minutes; nearly all were killed. Durnford established successive delaying positions along the spurs west of the valley, transmitting urgent word to Pulleine that a full-scale attack was developing.
Back at Isandlwana, Pulleine ordered the camp alarm sounded. The 7-pounder guns under Lieutenant Curling deployed forward of the tents with their ammunition wagons in rear. The 1/24 Foot companies extended in a wide arc north and northeast of the hill, roughly 1,200 metres from the tents. Mounted volunteers under Lieutenant Henderson and NNC skirmishers covered the left flank. The companies were separated by open ground, reflecting the assumption that the enemy would attack frontally rather than attempt encirclement.
By 11:30 hrs, firing could be heard from Durnford’s direction to the east. The battle had begun.
Phase III – Main engagement: Zulu horns and chest (11:30 – 13:30 hrs)
British flanks under pressure
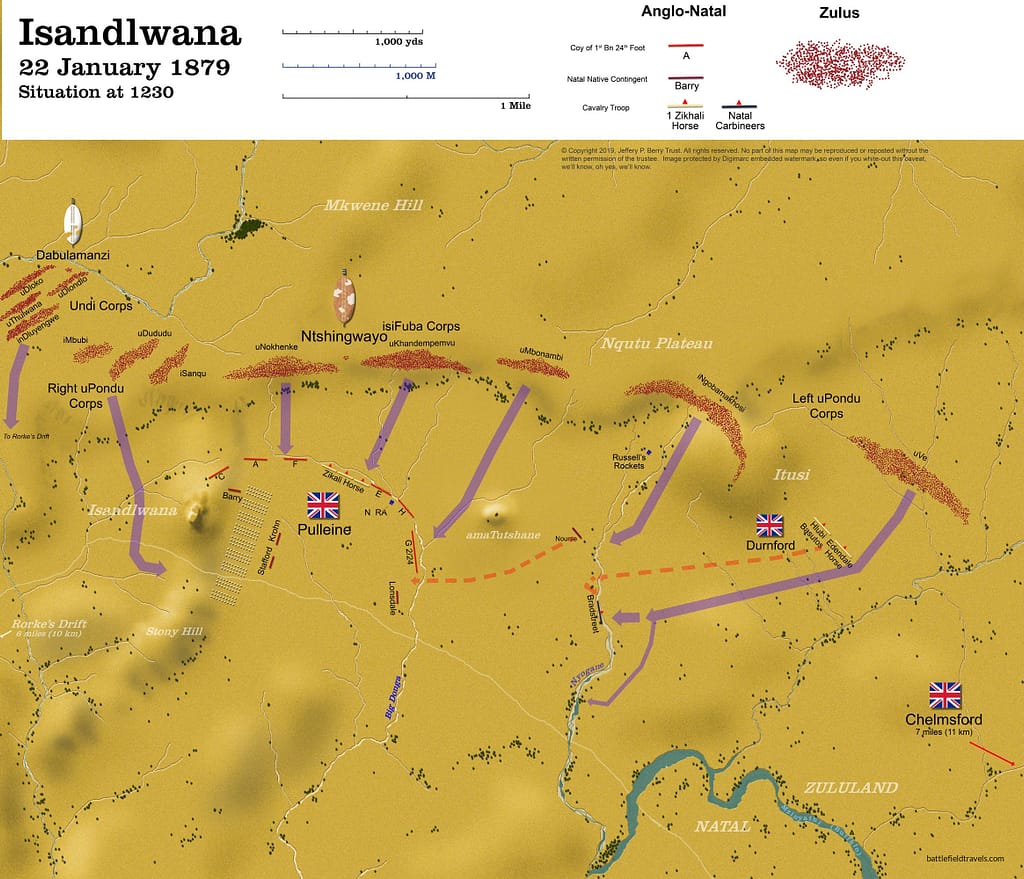
Zulu advance elements—uNokhenke, uDududu, and uMbonambi regiments—emerged over the ridge in extended order. The British artillery opened at 1,400 yards, alternating shrapnel and case shot, cutting lanes through the front Zulu ranks. Rifle volleys from the 24th Foot companies were steady and effective; eyewitnesses later described the Zulus “dropping in heaps.” The frontal assault faltered temporarily, and the Zulu commanders diverted pressure toward the flanks.
Durnford, operating on the right flank near the Manzimnyama stream, now faced the entire Zulu left horn, estimated at 6,000 men. He dismounted his Basuto troopers in extended line and delivered rapid carbine fire from behind dongas, inflicting heavy casualties but expending ammunition quickly. After about 20 minutes, his supply ran low, and he was forced to withdraw toward the camp. The Zulu left horn maintained contact with Durnford’s force, moving through dead ground unseen by the British centre.
On the northern flank, the Zulu right horn began looping around the Nyoni Ridge, unseen until it appeared beyond the British left. The NNC companies placed there broke under pressure and fled toward the rear, exposing Mostyn’s company. Pulleine ordered Captain Cavaye’s and Lieutenant Pope’s companies to pivot left to plug the gap, further thinning the centre.
Overextended lines
By 13:00 hrs, the British line extended over 1,500 yards, with companies too dispersed for mutual support. Ammunition distribution became critical; supply wagons remained near the tents, and runners struggled to locate regimental reserve boxes. Non-commissioned officers were seen breaking open boxes with bayonets to re-issue ammunition under fire.
Despite heavy losses, the Zulu “chest” continued to advance through the beaten zone, absorbing casualties without hesitating. As both horns enveloped the flanks, British units began to fall back in small groups toward the camp.
Phase IV – Encirclement and collapse (13:30 – 15:00 hrs)
Envelopment by the Zulu horns
By 13:30 hrs, Durnford’s right flank had been driven back onto the camp perimeter. The Zulu left horn broke into the rear areas, overrunning the ammunition park and cutting the track to Rorke’s Drift. At the same time, the right horn swept behind Isandlwana Hill, sealing the line of retreat. The Zulu “chest” surged into the centre, meeting the British rifle companies in close combat.
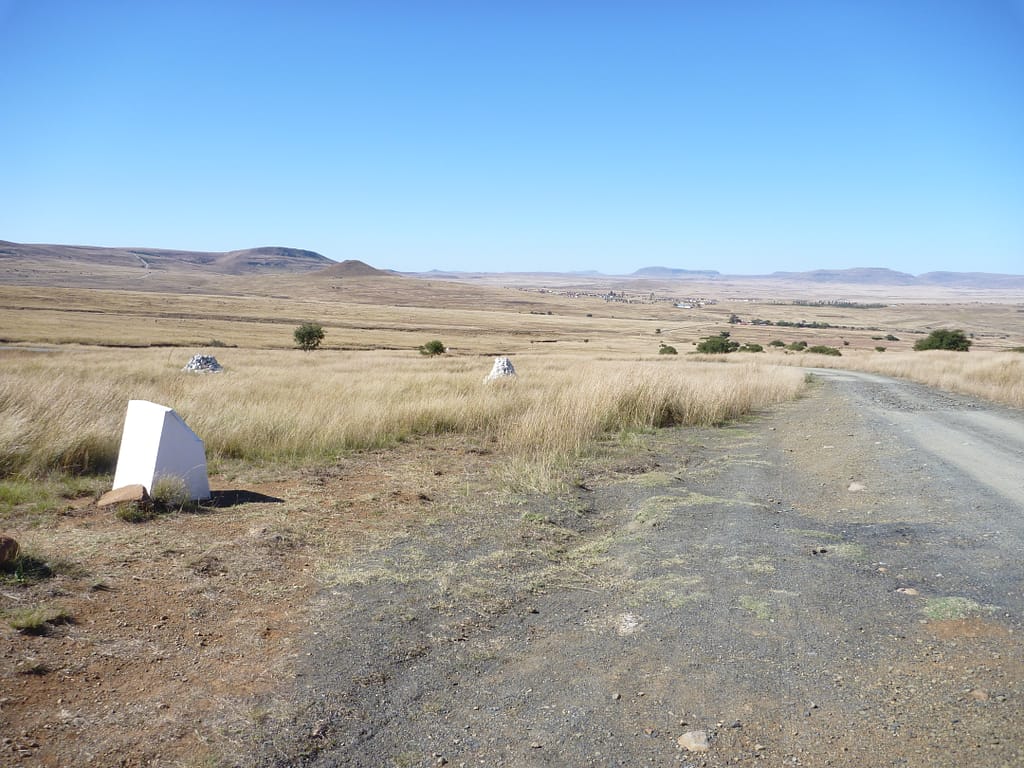
Fight in the main camp
Companies of the 24th Foot attempted to rally near the tents and ammunition wagons. The two guns fired their last rounds at under 400 yards before being overrun. Lieutenant Curling later recalled seeing his gunners speared beside their pieces. The NNC force disintegrated and surviving native auxiliaries fled south-west across the saddle.
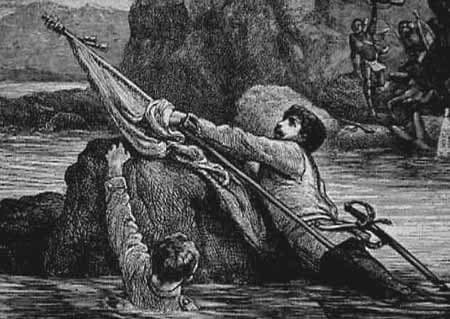
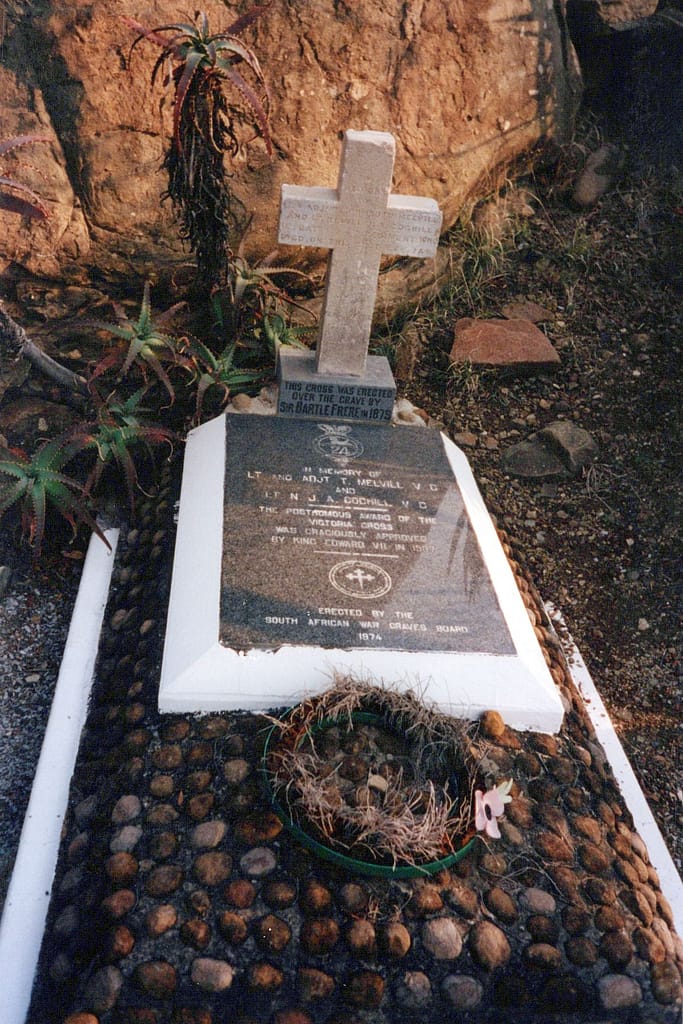
At approximately 14:00 hrs, isolated clusters of soldiers fought to the last cartridge, forming small squares amid the boulders and wagon debris. Lieutenant Melvill and Lieutenant Coghill, carrying the Queen’s Colour of the 1/24 Foot, attempted to escape across the Buffalo River. Both were killed on the Natal bank; the Colour was recovered days later.
The sun turned black
A partial solar eclipse darkened the sky around 14:29 hrs, coinciding with the battle’s final phase. Within thirty minutes, the field was lost. Survivors, mainly mounted men from Durnford’s column, broke out through the gap at Fugitives’ Drift, pursued to the river. The slaughter continued until approximately 15:00 hrs.
Out of nearly 1,750 men in camp that morning, fewer than 60 Europeans and a small number of mounted natives escaped. Zulu losses were heavy, estimated 1,000–1,500 killed, but they held the field.

Outcomes and analysis
Immediate aftermath
When Lord Chelmsford returned to Isandlwana shortly after 17:00 hrs, his reconnaissance force found the camp silent, fires still burning, and the plain strewn with dead. Every wagon had been looted, tents cut down, and ammunition scattered. Bodies lay in dense clusters where companies had made final stands—the forward slopes, the wagon park, and the saddle toward the Buffalo River. The two guns of N/5 Battery were found dismounted, surrounded by their dead crews.
Chelmsford bivouacked overnight on the field under torchlight, expecting a renewed Zulu attack that did not come. His men buried the dead in shallow pits and resumed the withdrawal to Rorke’s Drift the following morning. There, they discovered the garrison had successfully defended the mission station against a Zulu attack during the night of 22–23 January.
Casualties and materiel losses
British and colonial losses at Isandlwana were estimated at 1,329 killed, including 52 officers and almost all of the 1/24th and 2/24th Foot detachments. African auxiliaries suffered an additional 600–800 casualties, many killed during the pursuit. Zulu casualties were between 1,000 and 1,500, though precise figures are uncertain.
The Zulus captured approximately:
- 1,000 rifles and carbines (mostly Martini-Henry)
- Over 400,000 rounds of ammunition
- Two field guns (later rendered unusable)
- Large quantities of rations, tents, wagons, and draught animals
The captured firearms and ammunition significantly enhanced Zulu combat power for the subsequent months of the campaign.
Strategic consequences
The defeat transformed a limited punitive expedition into a major imperial campaign. Public and parliamentary reaction in Britain was immediate; Queen Victoria recorded shock that “our troops should have been cut to pieces by savages.” Reinforcements exceeding 10,000 men were deployed from Britain and India.
Chelmsford retained temporary command but was soon superseded by Lieutenant-General Sir Garnet Wolseley. Operational reorganisation introduced fortified supply posts, wagon laagers, and strengthened reconnaissance procedures. Within six months, the heavily reinforced British Army had recovered, and launched a second major invasion of Zululand in early June 1879. The Zulu army faced a series of defeats culminating in the Battle of Ulundi (4 July 1879), which destroyed the Zulu military system and ended the kingdom’s independence.
Operational lessons
Isandlwana demonstrated that disciplined indigenous forces, employing mobility and terrain advantage, could defeat a technologically superior opponent under conditions of divided command and poor situational awareness. The lesson would be repeated at the 1896 Battle of Adwa in Ethiopia, where a much less sophisticated Ethiopian army destroyed an Italian force of more than 14,000.
The Isandlwana battlefield today
Terrain and preservation
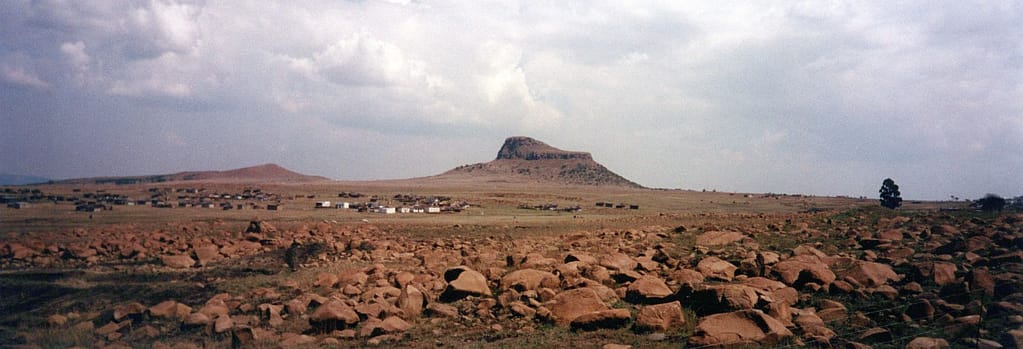
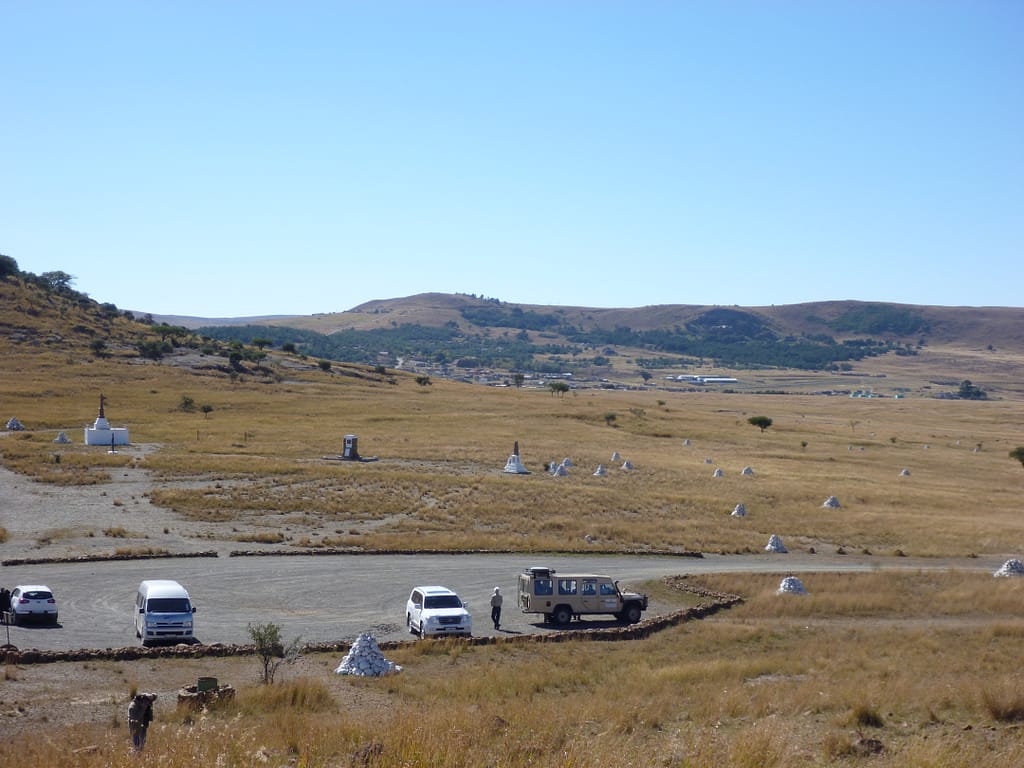
The Isandlwana battlefield remains one of the best-preserved colonial battle sites in southern Africa. The terrain is largely unchanged since 1879: open grassland rising toward the distinctive basalt outcrop of Isandlwana Hill, whose profile dominates the plain. The old wagon track from Rorke’s Drift still crosses the saddle west of the hill, descending toward Figitive’s Drift on the Buffalo River. Seasonal rains alter the colour of the veld but not its contours—allowing the visitor to easily visualise company-level movements.
The site has been formally protected since the mid-20th century under the KwaZulu-Natal Battlefields Route heritage programme. Fencing and demarcated paths limit vehicle movement to preserve cairn positions. The field’s open aspect provides an almost unbroken line of sight from the camp area to the Nqutu heights, mirroring the original defenders’ visual experience.
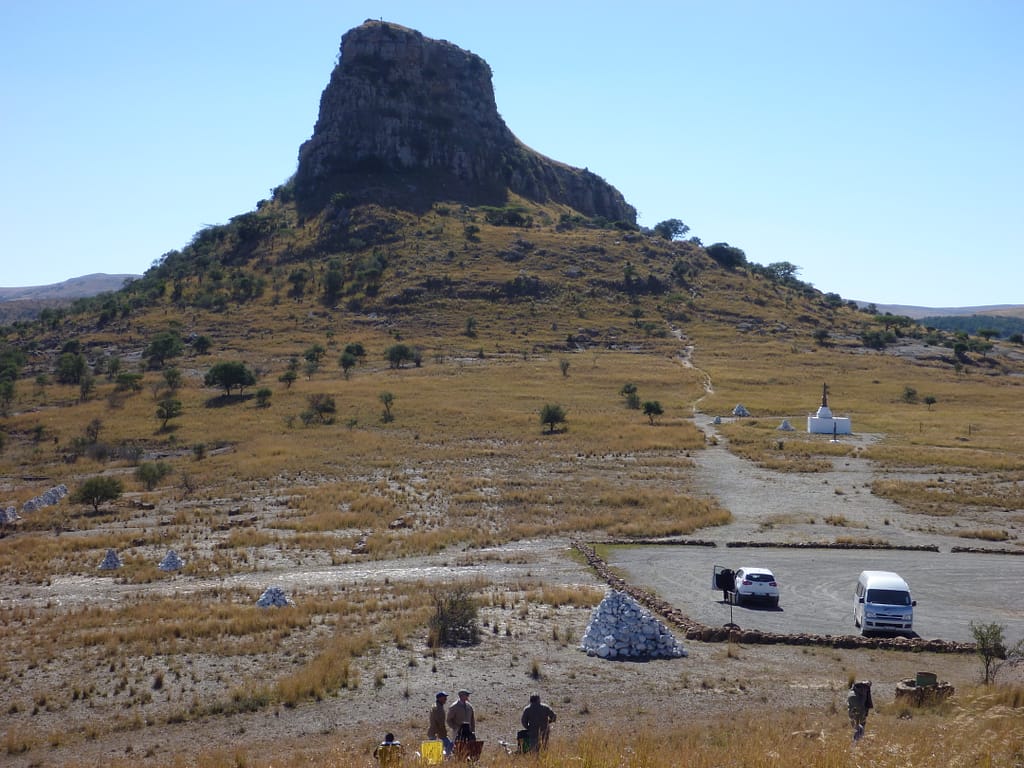
Memorials and markers
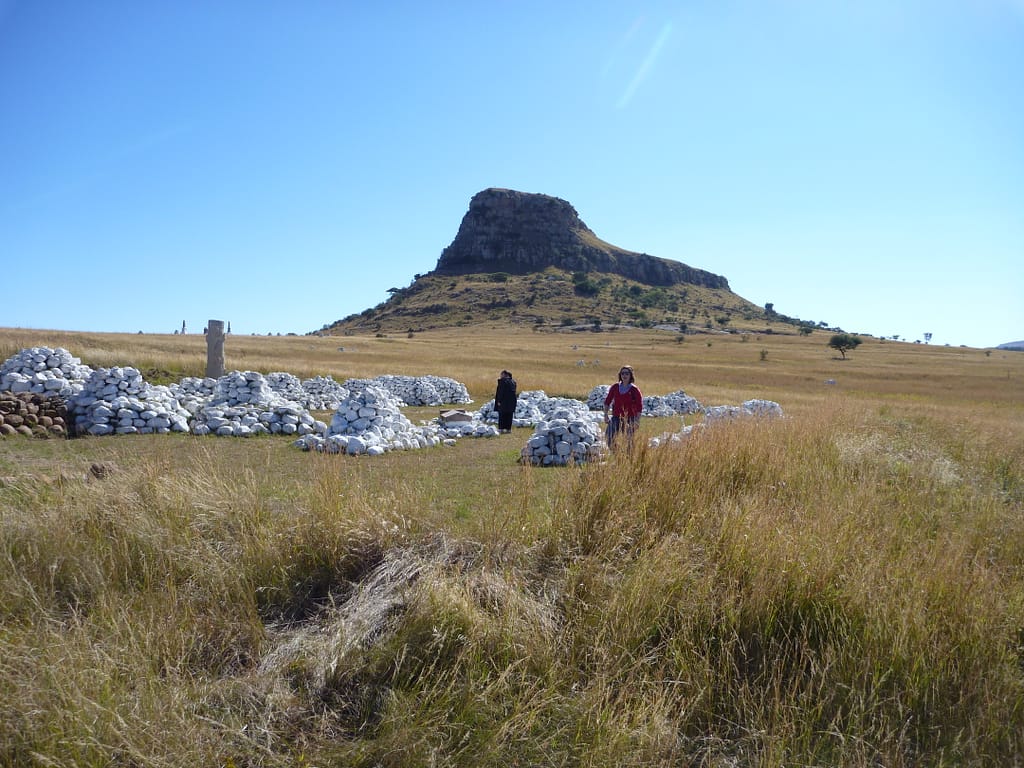
White-painted stone cairns mark the approximate locations where groups of British soldiers fell. Each cairn contains a communal burial trench beneath it; none were moved when permanent memorials were built. The largest cluster lies on the forward slope below the tent line and along the track toward Fugitives’ Drift. Bronze plaques identify specific regiments and detachments.
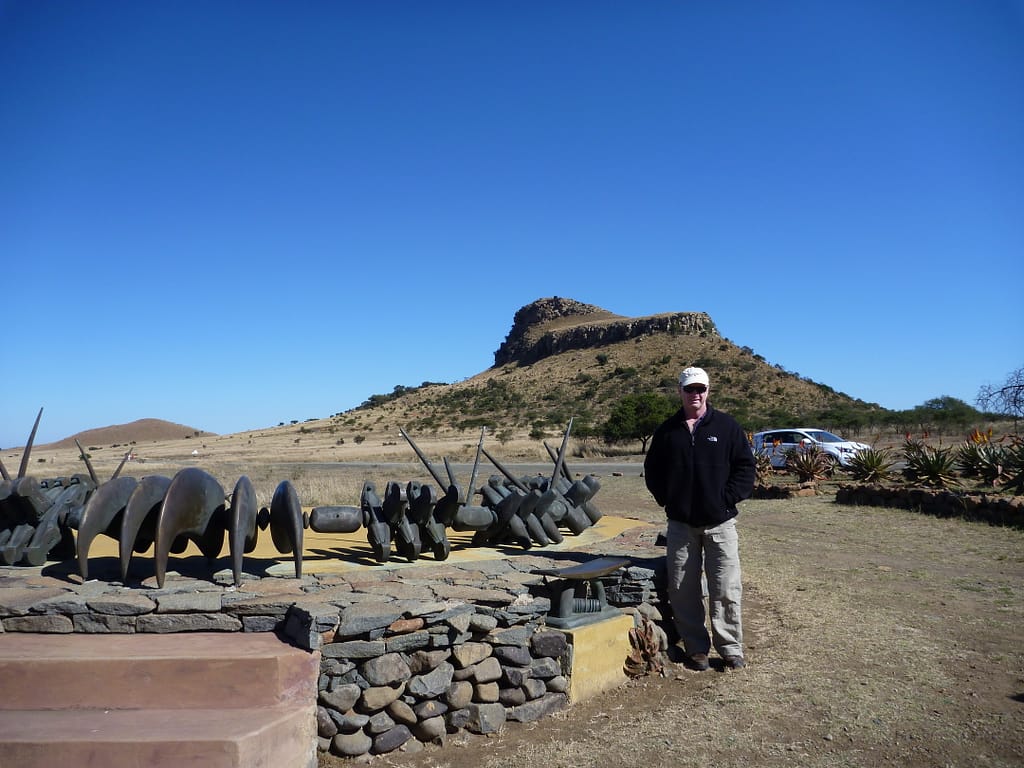
A Zulu Victory Monument near the modern village commemorates the warriors who fought and died in defence of their homeland. The memorial’s spear-and-shield motif complements rather than contrasts the British obelisk standing near the former camp. Together, they form a balanced interpretation of the battle’s cost on both sides.
Visitor orientation and facilities
There is a small Visitor Centre and Museum near the car park at the western entrance. Exhibits include recovered artefacts—Martini-Henry cartridge cases, uniform buttons, fragments of wagon hardware—and interpretive panels outlining the tactical phases of the action. Local guides, many of whom are descended from participants, provide comprehensive battlefield tours; their commentary integrates oral tradition with regimental records.
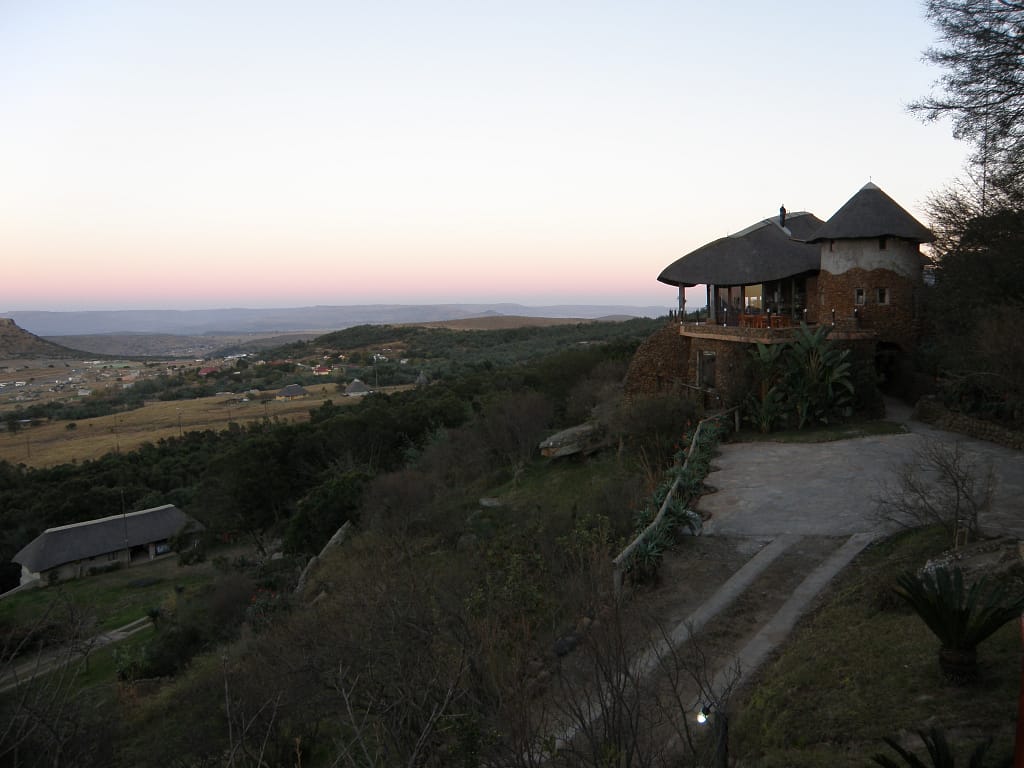
The surrounding region offers linked visits to Rorke’s Drift, Fugitives’ Drift, and Mangeni Falls, completing the operational circuit of 22 January 1879. The Isandlwana Lodge, situated on the ridge south-west of the hill, offers accommodation and provides commanding views across the entire field. I stayed there on both my visits to the battlefield.
In Memoriam – Petros Sibisi and Rob Gerrard
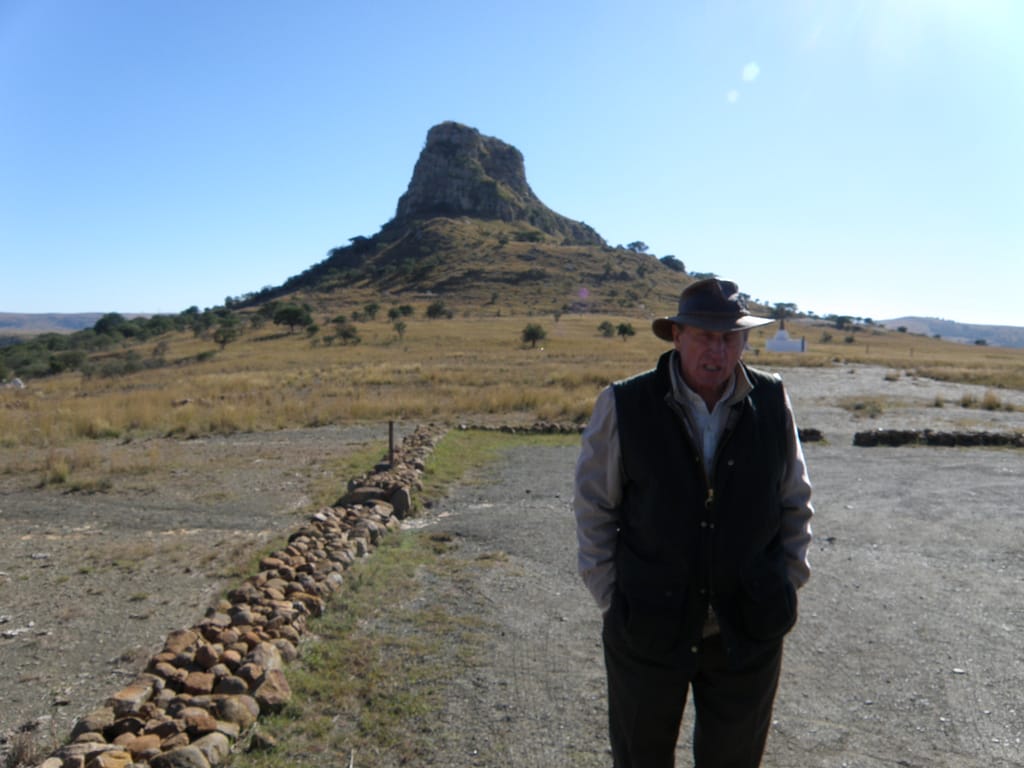
On my first visit to Isandlwana in 2000, I met with Rob Gerrard, the resident guide at Isandlwana Lodge. Rob asked me if I would be happy to explore the battlefield with his understudy, a young Zulu named Petros Sibisi. I spent the entire day with Petros exploring the battlefields at Isandlwana and Rorke’s Drift , and other key locations such as Fugitive’s Drift and Mangeni Falls. Petros offered deep insights into Zulu culture and helped me with the pronunciation of the Zulu regimental names. I still have a video recording of Petros listing all the Zulu regiments. I remained in contact with Petros for some years afterwards. I was deeply saddened to learn that he had passed away in 2010 at the age of 35.

For many years, Rob Gerrard served as resident historian and guide at Isandlwana. His exhaustive mapping of cairn lines and first-hand interviews with local elders produced the modern topographical understanding of the battle. On my second visit to Isandlwana in 2011, I walked the battlefield with Rob and learned a great deal from his detailed accounts of the battle. Rob was the victim of a violent farm attack in 2016 and died soon afterwards from complications. His work endures through the guides he trained and the visitors who continue to walk the ground he studied in such depth.
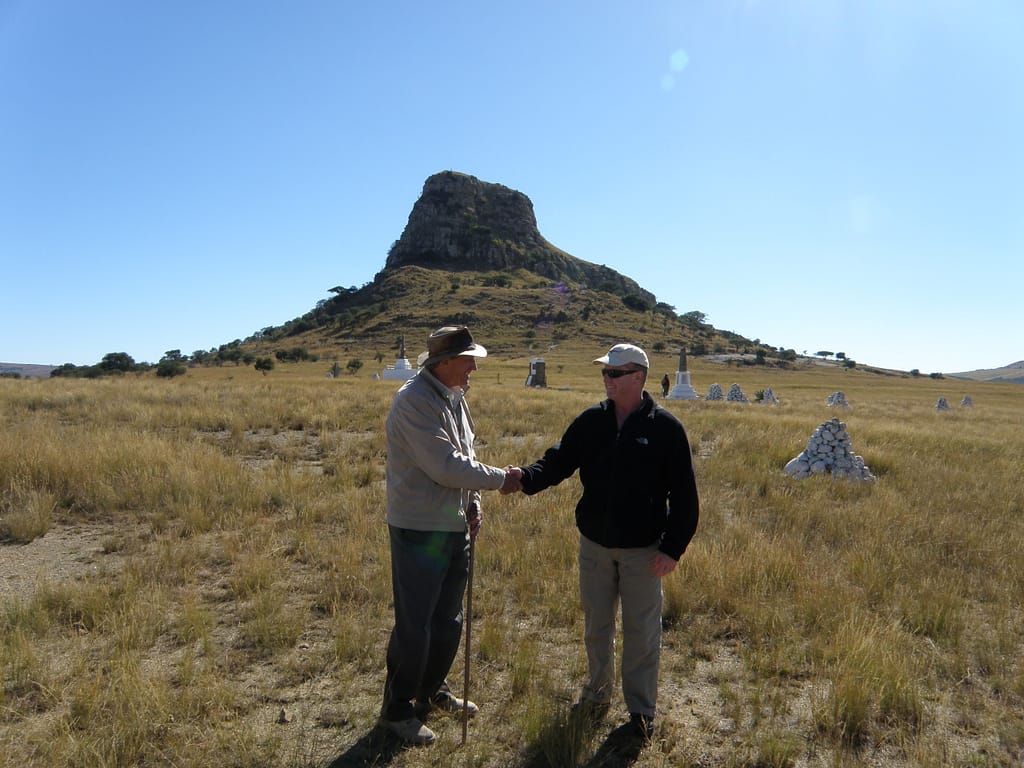
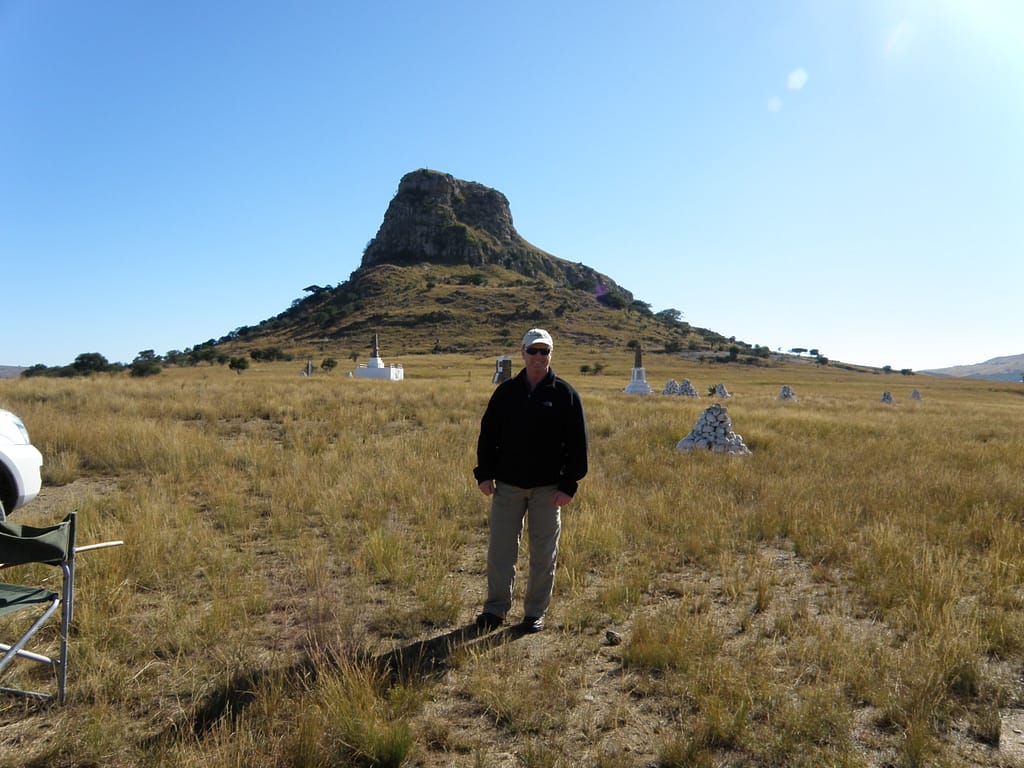
Additional images of Isandlwana battlefield
Found this useful? Buy me a coffee — it helps fund future battlefield research


Authored by Mick Prictor, a retired military officer with 40 years’ service, and a military historian specialising in terrain-focused analysis of tactics, doctrine, and command decision-making in land warfare. His work draws on extensive battlefield fieldwork—more than 280 sites worldwide—and one of the world’s largest private collections of historic military arms, uniforms, and equipment. About me
Sources
Primary and Contemporary Sources
- Parliamentary Papers (C.2260, C.2262, 1879) – Official despatches from Lord Chelmsford and subordinate officers on operations in Zululand, January–July 1879.
- The London Gazette, March–July 1879 – Casualty lists and post-action despatches.
- Court of Inquiry Proceedings, Rorke’s Drift (1879) – Testimony regarding ammunition supply, camp layout, and command relationships.
- The Illustrated London News (February–April 1879) – Contemporary engravings and correspondence from the field.
Regimental and Archival Material
- Regimental Records of the 24th Regiment (South Wales Borderers Museum, Brecon) – Muster rolls, returns, and officers’ reports.
- Natal Archives Repository (Pietermaritzburg) – Colonial volunteer nominal rolls and survivor statements.
- Royal Artillery Institution Papers, Vol. III (1880) – Technical notes on N/5 Battery and lessons from Isandlwana.
Secondary Sources
- Ian Knight, Zulu Rising: The Epic Story of iSandlwana and Rorke’s Drift (Pan McMillan 2010).
- Adrian Greaves, Rorke’s Drift (Cassell, 2025).
- David Rattray, A Soldier-Artist in Zululand: William Whitelocke Lloyd (2004).
- Donald Morris, WASHING OF THE SPEARS – The Rise and Fall of the Zulu Nation Under Shaka and Its Fall in the Zulu War of 1879. Simon & Schuster (1965).
- Beckett, Ian F. W. Rorke’s Drift and Isandlwana 1879 (Oxford: Osprey, 2001) – Concise operational overview with detailed mapping.
- Laband, John. The Rise and Fall of the Zulu Nation (London: Arms & Armour, 1997) – Strategic study of Zulu statecraft and military organisation.
- Lock, Peter & Quantrill, Peter. Zulu Victory: The Epic of Isandlwana and the Cover-Up (London: Greenhill, 2002) – Re-examination of command failures and post-battle narrative shaping.
Online and Digital Resources
- South Wales Borderers Museum (Brecon) – Digital archive of 24th Regiment artefacts and medal rolls.
- KwaZulu-Natal Battlefields Route – Visitor information, GPS mapping, and preservation initiatives.
- National Army Museum (UK) Online Catalogue – Official photographs and campaign correspondence.
- Obscure Battles Isandlwana article – Jeffery Berry’s incredibly detailed maps. Used here with permission
Recommended Viewing
- BBC Timewatch: Zulu – The True Story (2003) – Documentary comparing archaeological evidence with regimental records.
- The National Army Museum Lecture Series (2019) – “Isandlwana and the Lessons of Colonial Warfare” by Ian Knight.
📚 Further Reading – Anglo-Zulu War
This battle study nests within the broader analytical framework explored in the Research Hub, where operational methods, operating environments, armies, commanders, and weapons are examined across conflicts and eras. The links below connect related studies across the wider body of battlefield analysis on the BattlefieldTravels site.
⚔️ Explore all battle studies from the Anglo-Zulu War
🏛️Explore the museum of Anglo-Zulu War historic weapons and equipment
The book list for this conflict includes the finest campaign studies, memoirs, and operational analyses of the Anglo-Zulu War, selected to complement this battlefield study.
📚Anglo-Zulu War 1879 – Recommended Reading
🗞️ For updates on new battlefield studies and research insights, you can subscribe to the Newsletter.
Related Battle Studies, Museum Pieces & Reading Resources
 🏛️ Anglo-Zulu War (1879) Weapons and Equipment
 🏛️ Second Anglo-Afghan War (1879) Weapons and Equipment
 ⚔️ Battle of Kabul, Afghanistan,
11-24 December 1879
 ⚔️🔒Battle of Spion Kop, Natal,
23-24 January 1900
 ⚔️ Battle of Rorkes Drift, South Africa,
22-23 January 1879
 🏛️ Anglo-Boer War (1899–1902) Weapons and Equipment
🧭 Battlefield Travel Guide: Isandlwana (22 January 1879)
Getting There
- KwaZulu-Natal Province, South Africa; the site lies south-east of Dundee and west of Nqutu, with access from the R68 and a signposted gravel approach road to the battlefield.
- Rorke’s Drift and Fugitives’ Drift are within the same rural road network; allow extra time for gravel surfaces and low speeds.
- Standard vehicles are fine in dry conditions; a high-clearance vehicle is useful after rain.
Site Orientation
- The battlefield centres on Isandlwana Hill; the British camp stood on the plain beneath the western slopes facing the Nyoni heights.
- Open grassland, ridges and dongas shape movement and fields of fire; walking the firing line, withdrawal routes, and ground toward the Manzimnyama clarifies the battle sequence.
- Numerous white cairns mark British burial sites; a Zulu memorial near the village commemorates fallen warriors.
Museums & Visitor Centres
- Kwazulu-Natal Battlefield Route covers more than 80 battle sites, including Isandlwana and Rorke’s Drift.
- Small Visitor Centre and museum near the main car park with campaign displays and site interpretation.
- Local guides provide detailed tours; check on-site for availability and timings.
On-Site Experience
- Best explored on foot to read the terrain: camp area, forward companies’ positions, right horn/left horn approaches, and the withdrawal axis toward Fugitives’ Drift.
- Carry a good contour map or GPS with marked features; the visibility of cairns and terrain breaks helps reconstruct phases.
- Respect all marked graves and memorials; remain on established paths where indicated.
Nearby Points of Interest
- Rorke’s Drift: Defensive stand later the same day, museum and cemetery.
- Fugitives’ Drift: British survivors’ escape route to the Buffalo River.
- Mangeni Falls: Area of Lord Chelmsford’s detached column on 22 Jan 1879.
Practical Tips
- Time on ground: at least one full day at Isandlwana; several days to add Fugitives’ Drift, Mangeni Falls, and Rorke’s Drift.
- Weather shifts quickly; carry water, sun protection, wet-weather layers, and wear sturdy footwear.
- Mobile reception is limited in places; download maps in advance.
- For weapons, uniforms, and equipment of the Anglo-Zulu War, see the Virtual Museum.
FAQ: Battle of Isandlwana, 22 January 1879
The Battle of Isandlwana was fought on 22 January 1879 during
Isandlwana lies in KwaZulu-Natal Province, South Africa, roughly 30 kilometres south-east of Dundee and 45 kilometres from Nqutu. The battlefield stands on open grassland beneath the distinctive basalt outcrop of Isandlwana Hill.
The British centre column was led by Lieutenant-General Lord Chelmsford, with Lieutenant-Colonel Henry Pulleine commanding the camp and Lieutenant-Colonel Anthony Durnford leading the attached Natal Native Contingent. The Zulu army was directed by senior chiefs Ntshingwayo kaMahole Khoza and Mavumengwana kaNdlela Ntuli under the authority of King Cetshwayo kaMpande.
Approximately 1,750 British and colonial troops defended the camp against a Zulu army estimated at 20,000–24,000 warriors drawn from multiple regiments (amabutho).
The Zulu army achieved a decisive victory. The entire British camp was overrun; only around 60 Europeans escaped. British and colonial losses exceeded 1,300 killed. Zulu casualties were roughly 1,000–1,500. The defeat forced Britain to reinforce its invasion and reorganise its campaign.
Key factors included divided command between Chelmsford, Pulleine and Durnford, dispersion of forces, lack of prepared defences, and poor ammunition distribution. The Zulu commanders exploited concealment, speed, and coordinated envelopment to achieve complete tactical surprise.
Yes. The Isandlwana Battlefield is preserved as part of the KwaZulu-Natal Battlefields Route. White cairns mark British burial sites, a Zulu memorial honours the fallen warriors, and a small museum and visitor centre provide interpretation. Guided tours are available year-round.
Subscribe to Battlefield Travels and receive a free E-Book Battlefield Guide
Unlock expert battlefield analysis, campaign reconstructions, and historical insights drawn from firsthand exploration and primary sources.
🗺️ You’ll receive:
🎖️ Exclusive historical insights you won’t find elsewhere
📘 A free eBook: 10 Tips for Exploring Historic Battlefields
📰 New battlefield studies straight to your inbox as they are published

⚔️ Go deeper — Members get exclusive access to the Deep Research Collection, Field Notes, and monthly Research Dispatches. Try membership free for 7 days, cancel anytime. From $9/month.
Excellent description , summary and photographs of the battlefield . Much appreciated .
Thanks David. I just finished upgrading the article with more depth and granularity.
It is a pretty special place!