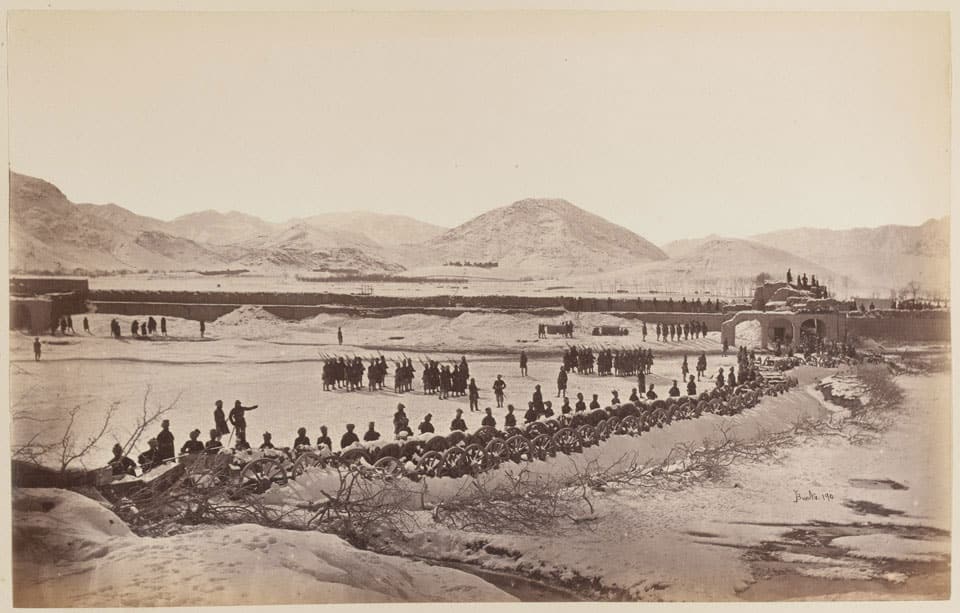
Roberts at Sher Pur: holding Kabul against the odds!
In December 1879, during the Second Anglo-Afghan War, General Frederick Roberts and 8,000 British and Indian troops held the Sher Pur Cantonment in Kabul against 50,000 Afghan warriors under Mohammed Jan. For two weeks, Roberts resisted siege and assault, culminating in the dramatic failure of a massed Afghan attack.

Key facts
Google Earth map – location of the Battle of Kabul – Only for the very game!
Strategic Context: The Second Anglo-Afghan War and the Great Game
The Battle for Kabul in December 1879 was a central episode of the Second Anglo-Afghan War (1878–1880). The conflict was rooted in the rivalry between Britain and Russia in Central Asia, known as the Great Game. Both empires sought to expand their influence across the region, and Afghanistan became the key buffer state on India’s vulnerable northwest frontier.
The Russian mission of 1878
In July 1878, a Russian diplomatic mission arrived uninvited at the court of Amir Sher Ali Khan in Kabul. When Britain attempted to send its own mission, Afghan troops refused them entry at the Khyber Pass. This perceived insult, coupled with the fear of Russian influence in Kabul, provided London with the pretext for war.

British invasion and Treaty of Gandamak
In November 1878, three British columns advanced across the Afghan frontier. Despite early resistance, the invasion quickly overwhelmed Afghan forces. Sher Ali fled north seeking Russian support, but died in February 1879. His son, Yaqub Khan, succeeded him and, facing political weakness, signed the Treaty of Gandamak (May 1879). This agreement:
- Ceded control of Afghan foreign policy to Britain.
- Allowed a permanent British Resident and mission in Kabul.
- Promised annual subsidies to the Amir in exchange for compliance.
For Britain, it seemed a decisive success — a stable frontier state under indirect control.
The Kabul uprising and Cavagnari’s death
The fragile arrangement collapsed on 3 September 1879, when Afghan troops mutinied in Kabul. They stormed the British Residency, killing Sir Pierre Cavagnari, the Resident, along with his escort of Guides infantry. The massacre ignited widespread unrest and shattered British confidence in the Amir’s ability to control his forces.
Arrival of General Roberts’ Kabul Field Force
The response was swift. A new Kabul Field Force, about 8,000 strong, was assembled under Major-General Frederick Roberts. Marching from British India, Roberts defeated Afghan forces at the Battle of Charasiab (6 October 1879) and occupied Kabul. He based his force in the old Sher Pur Cantonment, a fortified enclosure dating from the First Anglo-Afghan War.
Though Kabul itself was secured, Roberts faced growing hostility from the surrounding countryside. Tribal leaders and warlords, united by outrage at the British presence, began gathering a vast host under Mohammed Jan Khan Wardak. By December 1879, the British garrison in Kabul faced encirclement and imminent siege.
Opposing Forces: Roberts’ Kabul Field Force vs Mohammed Jan’s Tribal Host
 The Kabul Field Force (British and Indian Army)
 The Kabul Field Force (British and Indian Army)
General Frederick Roberts commanded about 8,000 troops, a mix of British regulars and Indian Army regiments. Though outnumbered more than six to one, this was a seasoned, professional force with modern weapons, artillery, and disciplined command.
- Infantry:
–British regiments — 72nd Highlanders, 92nd Highlanders (Gordon Highlanders).
–Indian regiments — Gurkhas, Sikhs, and Bengal Infantry battalions. - Cavalry:
-9th Queen’s Royal Lancers.
-14th Bengal Lancers. - Artillery: Mountain batteries with light, mobile guns that could be rapidly deployed on the walls of Sher Pur.
- Strengths: discipline, organisation, modern rifles, and a unified chain of command.
- Weaknesses: isolated deep inside hostile territory, short on supplies, and heavily outnumbered.

 Mohammed Jan Khan Wardak’s Afghan Army
 Mohammed Jan Khan Wardak’s Afghan Army
The Afghan host was commanded by Mohammed Jan Khan Wardak, a tribal leader who drew support from across central Afghanistan. His initial core of 10,000 was rapidly reinforced by tribal fighters, swelling to perhaps 50,000 warriors by mid-December.
Composition:
- Afghan regulars still loyal to the cause, but poorly trained compared to the British.
- Large tribal contingents from Wardak, Ghazni, Logar, and other districts.
- Religious volunteers (Ghazis) motivated by jihad against the British presence.
- Weapons: A mix of jezails (long-barrelled muskets), swords, spears, and captured or obsolete firearms. Very little artillery.
- Strengths: overwhelming numbers, high morale, and local terrain familiarity.
- Weaknesses: poor cohesion, lack of centralised command, no artillery superiority, and limited logistical support.

British advance and occupation of Kabul
Roberts marches on Kabul
After the killing of Sir Pierre Cavagnari and his escort in September 1879, the British government ordered an immediate punitive expedition. Major-General Frederick Roberts, already distinguished from the earlier campaign at Peiwar Kotal, was given command of the Kabul Field Force, numbering around 8,000 British and Indian troops.
Roberts advanced north from the Kurram Valley with a force built for mobility and endurance. His columns included seasoned regiments such as the 72nd Highlanders, Gurkha battalions, the 9th Queen’s Royal Lancers, and Indian infantry drawn from Bengal and Punjab. Supply was limited to what could be carried, reflecting the speed of the mission.

The Battle of Charasiab, 6 October 1879
Afghan forces attempted to block Roberts’ march at Charasiab, a village about 12 km south of Kabul. Around 12,000 Afghans, including regular troops and tribal fighters, occupied high ground commanding the approach routes. Roberts executed a flanking movement, sending Highlanders and Gurkhas up steep hillsides while cavalry threatened the enemy’s flanks. After sharp fighting, the Afghans were driven off with heavy casualties. The road to Kabul was open.
British occupation of Sher Pur Cantonment, Kabul
Roberts entered Kabul on 12 October 1879, establishing order in the city and demonstrating British authority. For his base, he chose the Sher Pur Cantonment, a vast rectangular enclosure originally constructed by the British during the First Anglo-Afghan War (1839–42) but abandoned after the retreat from Kabul. Though partially ruinous, Sher Pur still provided defensible walls, open interior space for encampment, and access to supply routes.
Inside Sher Pur, Roberts set about fortifying his position. The cantonment’s walls enclosed an area nearly 2 km long, but they required strengthening, particularly along the northern and eastern faces. Artillery was mounted on bastions, while infantry pickets were established on the surrounding hills.
⚔️ Go deeper — Members get exclusive access to the Deep Research Collection, Field Notes, and monthly Research Dispatches. Try membership free for 7 days, cancel anytime. From $9/month.
Growing Afghan opposition
Roberts’ occupation inflamed Afghan resistance. Tribes from the Wardak, Logar, and Ghazni regions, along with Kabul city militias, rallied to the call of Mohammed Jan Khan Wardak. By late November, Roberts’ intelligence reported that as many as 50,000 Afghan warriors were assembling around Kabul.
Despite being heavily outnumbered, Roberts retained the initiative, sending cavalry patrols to disrupt tribal gatherings and ordering aggressive sorties to seize nearby forts. Yet it was clear that Sher Pur would soon be tested by a full-scale siege.

The Siege of Sher Pur Cantonment, 11–21 December 1879
Afghan forces close on Kabul
By early December 1879, Mohammed Jan Khan Wardak had assembled a large host of tribal levies, Ghazis, and disaffected Afghan regulars, initially numbering around 10,000 but rapidly swelling to perhaps 50,000. These fighters were poorly trained and armed compared to Roberts’ regulars, but their sheer numbers, local knowledge, and religious zeal posed a serious threat.
The Afghans advanced on Kabul from the west and south, establishing themselves on dominating ground around the city — the Asmai Heights, Behmaroo Heights, and the outlying villages that ringed Sher Pur Cantonment. On 15 December, Roberts’ cavalry screen (including the 9th Queen’s Royal Lancers and 14th Bengal Lancers) attempted to delay them but was driven back after sharp skirmishes. By that evening, the British garrison was effectively surrounded.

Roberts’ defensive preparations
Sher Pur was large — too large for Roberts’ 8,000 men to garrison every wall. Roberts concentrated on strengthening key bastions and assigning regiments to sectors.
- The 72nd Highlanders, Gurkhas, and Bengal Infantry manned the southern and eastern faces.
- Cavalry were kept in reserve inside the enclosure for rapid response.
- Field artillery was positioned to sweep the open approaches.
Inside the walls, supply discipline was strict. Roberts had about three weeks’ rations, sufficient provided relief forces could arrive in time.

Sorties and counter-strokes
Roberts refused to adopt a passive stance. Between 17–20 December, he ordered several sorties against Afghan positions:
- On 17 December, British and Indian cavalry sallied out, provoking Afghan concentrations but buying time for Roberts to probe enemy strength.
- Subsequent sorties seized fortified villages around Kabul, including positions that threatened the cantonment’s perimeter. These raids disrupted Afghan siege lines and maintained British morale.
The most significant outcome was psychological. By demonstrating aggressiveness, Roberts convinced the Afghans that the garrison would not simply sit behind walls waiting to be overwhelmed.

Awaiting relief
On 21 December, Roberts dispatched a message to Brigadier-General Charles Gough, ordering him to march from the east to reinforce Kabul. Gough’s approach threatened Afghan supply lines and placed further pressure on Mohammed Jan to act. With winter weather closing in and the British relief column advancing, the Afghan commander resolved to launch an all-out assault to crush Sher Pur before reinforcements arrived.
The Afghan assault, 23 December 1879
The signal to attack
In the early hours of 23 December 1879, Afghan commanders lit a great bonfire on the Asmai Heights west of Kabul — the prearranged signal for a general assault on Sher Pur Cantonment. From the surrounding hills and villages, an estimated 50,000 Afghan warriors surged forward, converging on the British position from the east and south.

The assault on the perimeter
The attack developed along a wide front:
- Eastern sector: Dense masses of fighters advanced against the eastern walls, attempting to overwhelm the thinly manned defences with sheer numbers.
- Southern sector: Repeated rushes were made against bastions and gates, supported by jezail fire from nearby compounds.
- Northern breach: At one point, attackers forced a small breach in the northeastern angle of the wall, briefly penetrating the outer defences.
The defenders, however, responded with disciplined musketry and artillery fire. British and Indian battalions rotated through the threatened sectors, ensuring that fresh companies always faced the heaviest pressure. Roberts maintained a small central reserve ready to seal any breakthrough. At the northeast breach, Highlanders and Gurkhas counterattacked with bayonets, driving the Afghans back out of the enclosure.

Culmination of the attack
By midday, the Afghan assault had lost momentum. Despite their numbers, the attackers were poorly coordinated, and the steep ditches and bastions of Sher Pur channelled them into killing zones. Every rush against the walls was met with sustained volleys and cannon fire at close range. The defenders held firm, and morale inside the cantonment remained high.
The Afghans suffered heavy casualties — perhaps 3,000 dead and wounded. As exhaustion and confusion spread, their attacks slackened, then ceased altogether. By afternoon, large groups were already withdrawing toward the surrounding hills.

Roberts regains the initiative
Seizing the moment, Roberts ordered his cavalry and skirmishers to sortie from the gates and harass the retreating Afghans. Pursuit was limited — the enemy still vastly outnumbered the defenders — but the message was clear: the assault had failed, and Sher Pur was secure.
By 24 December, Mohammed Jan’s host had melted away into the countryside, its cohesion broken. The siege of Kabul was over. Roberts’ small force had held out against overwhelming odds, preserving British control of the Afghan capital through the winter.
Outcomes and Consequences
Casualties
- British and Indian losses: remarkably light — only a few dozen killed and wounded during the siege and final assault.
- Afghan casualties: estimated at 3,000 dead and wounded, mostly incurred during the mass assault of 23 December. The disparity reflected the defenders’ fire discipline, strong fortifications, and Roberts’ ability to concentrate force at critical points.
Immediate aftermath
The rout of Mohammed Jan’s host ended the immediate threat to Kabul. Roberts re-established British control in the capital, conducted punitive patrols into rebellious districts, and stabilised the garrison through the winter of 1879–80. Afghan morale suffered from the failure of such a massive coalition to overwhelm a much smaller force.
The battle also cemented Frederick Roberts’ reputation as a commander of exceptional determination. His aggressive use of sorties, tight fire control, and calm leadership under pressure made Sher Pur a textbook example of imperial defence against overwhelming numbers.
Afghan politics
Mohammed Jan’s failure weakened the tribal coalition but did not end resistance. Afghanistan remained volatile, with shifting alliances and sporadic uprisings continuing into 1880. The inability of Yaqub Khan’s regime to assert control further eroded confidence in the Treaty of Gandamak.
Continuation of the war
Although the siege had been lifted, the Second Anglo-Afghan War continued. In July 1880, British forces suffered a major defeat at Maiwand, where Ayub Khan’s forces destroyed a brigade near Kandahar. The war concluded with Roberts’ celebrated march from Kabul to Kandahar (August–September 1880) and his victory there on 1 September, restoring British prestige. However, Britain lacked the capacity to permanently impose its will in Afghanistan. The war ended in 1881 with British withdrawal, leaving Afghanistan internally unstable but strategically useful as a buffer state.
Legacy
The Battle for Kabul is remembered as one of Roberts’ defining moments. It showed the effectiveness of a professional army under fire, but it also foreshadowed the difficulties of controlling Afghanistan — difficulties that would confront every foreign power attempting to hold Kabul thereafter.

The battlefield today: visiting Sher Pur and Kabul
The site of the Battle for Kabul (1879) has long since been absorbed into the expanding city. The old Sher Pur Cantonment, once a self-contained fortified enclosure, is now part of central Kabul’s Sher Pur district. Yet, for those familiar with the history, traces of the battlefield remain visible.
Surviving terrain features
- Asmai Heights to the west and Behmaroo Heights to the north still dominate the city skyline. In 1879, Afghan signal fires and assault waves surged from these ridges. Standing on them today, the tactical logic of the ground is obvious: whoever held the heights controlled Kabul’s approaches.
- The rectangular outline of Sher Pur Cantonment survives in the modern street plan. The lines of the original walls can still be traced where roads and compounds follow their course.
- Former gates into the cantonment correspond to modern road junctions, preserving the geography of Roberts’ defence in the pattern of the city itself.
What remains of Sher Pur?
- The cantonment walls are long gone, but aerial imagery makes the footprint clear.
- Inside the district, urban development has erased much of the military character, but the open ground and orientation of streets still hint at its past function.
Cold War layers
On Behmaroo Heights, the Soviets constructed an officers’ club and swimming pool during the Soviet–Afghan War (1979–89). These structures, now abandoned, became infamous in local stories of Taliban use for executions during the 1990s. They serve as a stark reminder that Kabul has remained a battlefield through successive conflicts.
The British Cemetery
In the northwest corner of Sher Pur lies the British Cemetery, an unexpectedly tranquil space. Many of the headstones commemorate soldiers from regiments that fought during the defence of Sher Pur in December 1879. Later wars added more graves, including those of aid workers, journalists, and soldiers from Britain’s modern involvement in Afghanistan. For visitors, it provides one of the few accessible memorials directly linked to Roberts’ campaign.
360 photo of the British Military Cemetery in the northwest corner of the old Sher Pur Cantonment. Not the safest place in the world as you can see!.
Security considerations
Kabul remains one of the most dangerous battlefield destinations. When I visited in 2017, I did so with guns, lots of guns, under escort, travelling with armed guards and armoured vehicles. Independent exploration of Sher Pur is not safe and should not be attempted. Even professional historians or journalists rely on local security arrangements.
Time Required
If conditions permitted safe access, exploring Sher Pur, the British cemetery, and the high ground around Kabul would require 1–2 days. In reality, any visit is constrained by security risks and movement restrictions.
Found this useful? Buy me a coffee — it helps fund future battlefield research


Authored by Mick Prictor, a retired military officer with 40 years’ service, and a military historian specialising in terrain-focused analysis of tactics, doctrine, and command decision-making in land warfare. His work draws on extensive battlefield fieldwork—more than 280 sites worldwide—and one of the world’s largest private collections of historic military arms, uniforms, and equipment. About me
Sources & Further Reading
Battle of Kabul, 1879, at Britishbattles.com
National Army Museum: Second Afghan War 1879


📚 Further Reading – Anglo-Afghan Wars
This battle study nests within the broader analytical framework explored in the Research Hub, where operational methods, operating environments, armies, commanders, and weapons are examined across conflicts and eras. The links below connect related studies across the wider body of battlefield analysis on the BattlefieldTravels site.
⚔️ Explore all battle studies from the Anglo-Afghan Wars
🏛️ Explore the museum of Anglo-Afghan War historic weapons and equipment
The book list for this conflict includes the finest campaign studies, memoirs, and operational analyses available on the 1st (1839-42), 2nd (1878-80), and 3rd (1919) Anglo-Afghan Wars, selected specifically to complement this battlefield study.
📚Anglo-Afghan Wars (1839-1919) – Recommended Reading
🗞️ For updates on new battlefield studies and research insights, you can subscribe to the Newsletter.
Related Battle Studies, Museum Pieces & Reading Resources
 🏛️ Anglo-Zulu War (1879) Weapons and Equipment
 🏛️ Second Anglo-Afghan War (1879) Weapons and Equipment
 ⚔️ Battle of Isandlwana, South Africa,
22 January 1879
 ⚔️ Winston Churchill and the Armoured Train Incident: Chieveley, Natal, 15 November 1899
 ⚔️ Battle of Rorkes Drift, South Africa,
22-23 January 1879
 📚 Anglo-Afghan Wars War (1839–1919),
Recommended Reading
🧭 Battlefield Travel Guide: Battle for Kabul (11–24 December 1879)
Getting There
- Location: Sher Pur district, central Kabul, Afghanistan.
- Access: Entry to Afghanistan remains extremely restricted; Kabul is not a safe destination for independent travel.
- Security: Exploration requires armed escort, armoured vehicles, and local contacts — this is not a casual battlefield visit.
Site Orientation
- Key Terrain: Sher Pur Cantonment (now urban district), Asmai Heights (west), Behmaroo Heights (north).
- Surviving Features: Street layout still follows the outline of the 19th-century cantonment walls and gates.
- Overlooks: Heights give clear view of approaches to Kabul, just as in 1879.
Museums & Visitor Centres
- On-site: None. No formal interpretation or preservation within Kabul.
- Nearby: The British Cemetery at Sher Pur preserves graves from Roberts’ campaign and later conflicts.
On-Site Experience
- Interpretation: None on the ground; understanding relies on maps, GIS overlays, and historical accounts.
- Atmosphere: Modern Kabul sprawls across the battlefield, but the heights and cantonment outline still convey the defensive logic of 1879.
- Points of Note: Soviet-era officers’ club and pool on Behmaroo Heights; still-visible gates and street lines of Sher Pur.
Nearby Points of Interest
- Related Sites: Battlefields of Charasiab (south of Kabul) and Maiwand/Kandahar (further south, 1880).
- Local: Kabul’s old city, Bala Hissar citadel (site of fighting in multiple Anglo-Afghan Wars).
Practical Tips
- When to Visit: Not recommended due to current security environment.
- Facilities: None specific to the battlefield; Kabul has modern hotels and embassies but travel is strictly controlled.
- Notes: Only attempt with professional security support; battlefield features best studied via maps, aerial imagery, and academic sources.
Additional images: selected items from the 2nd Afghan War
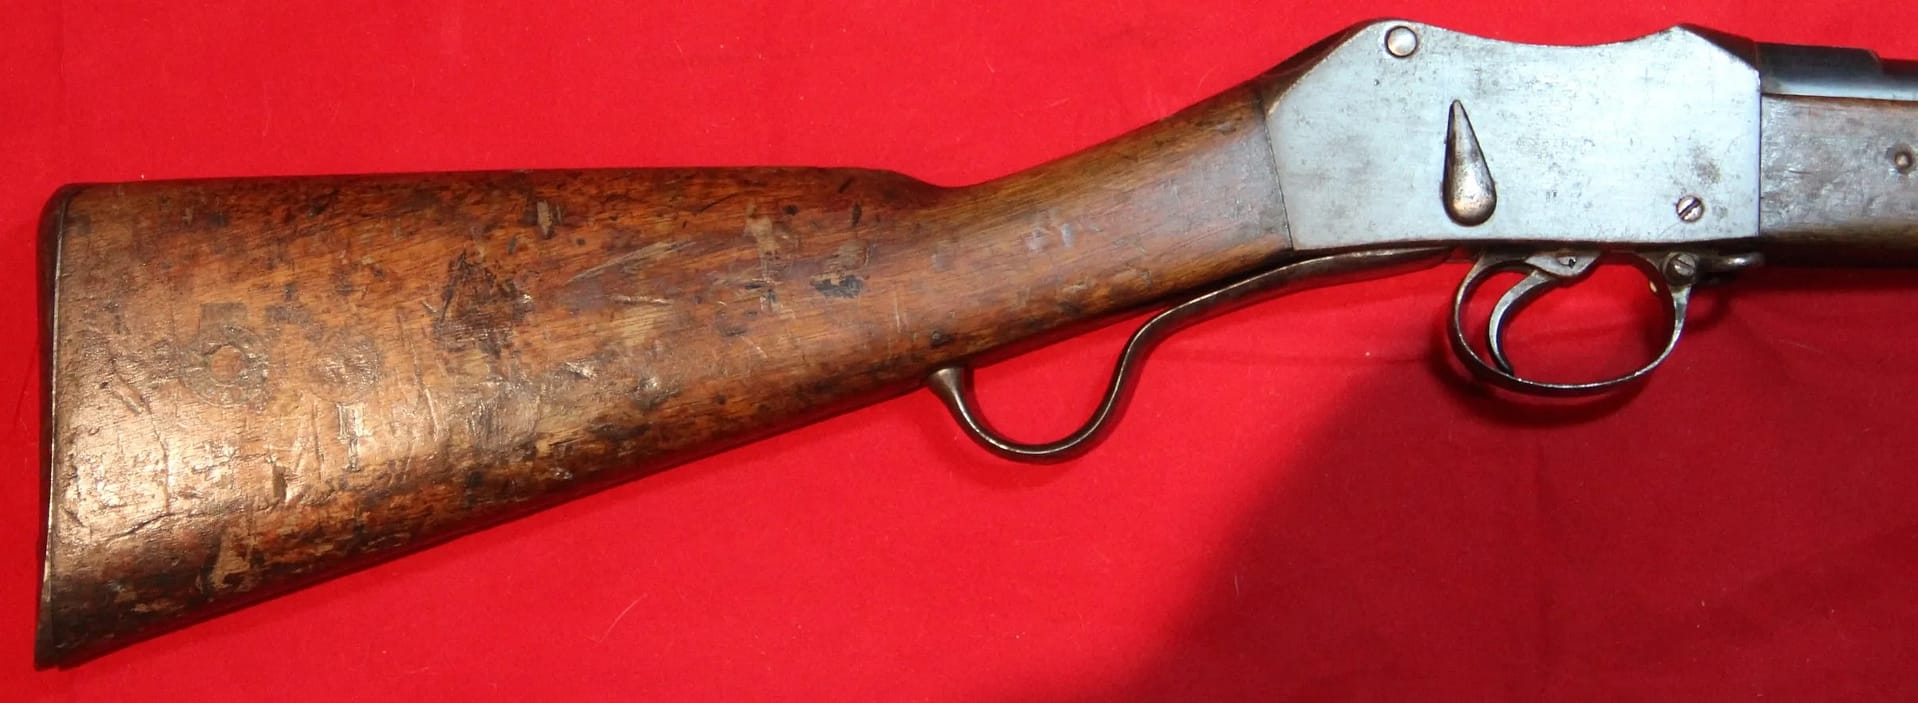
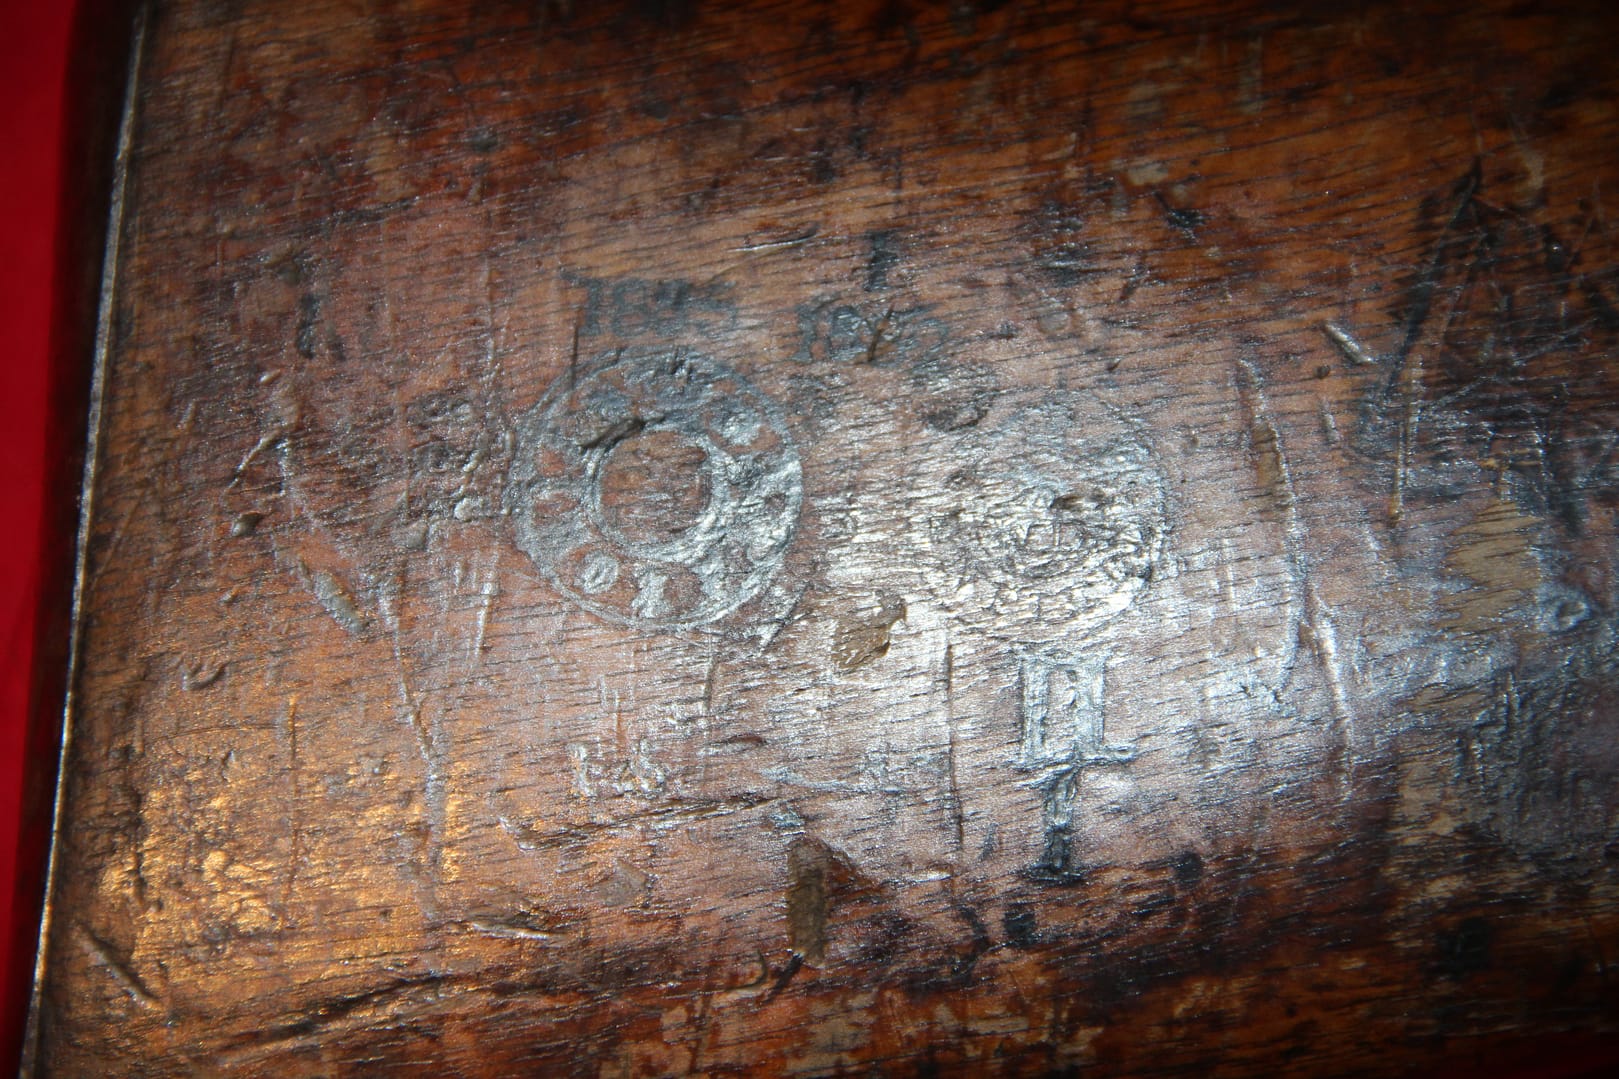
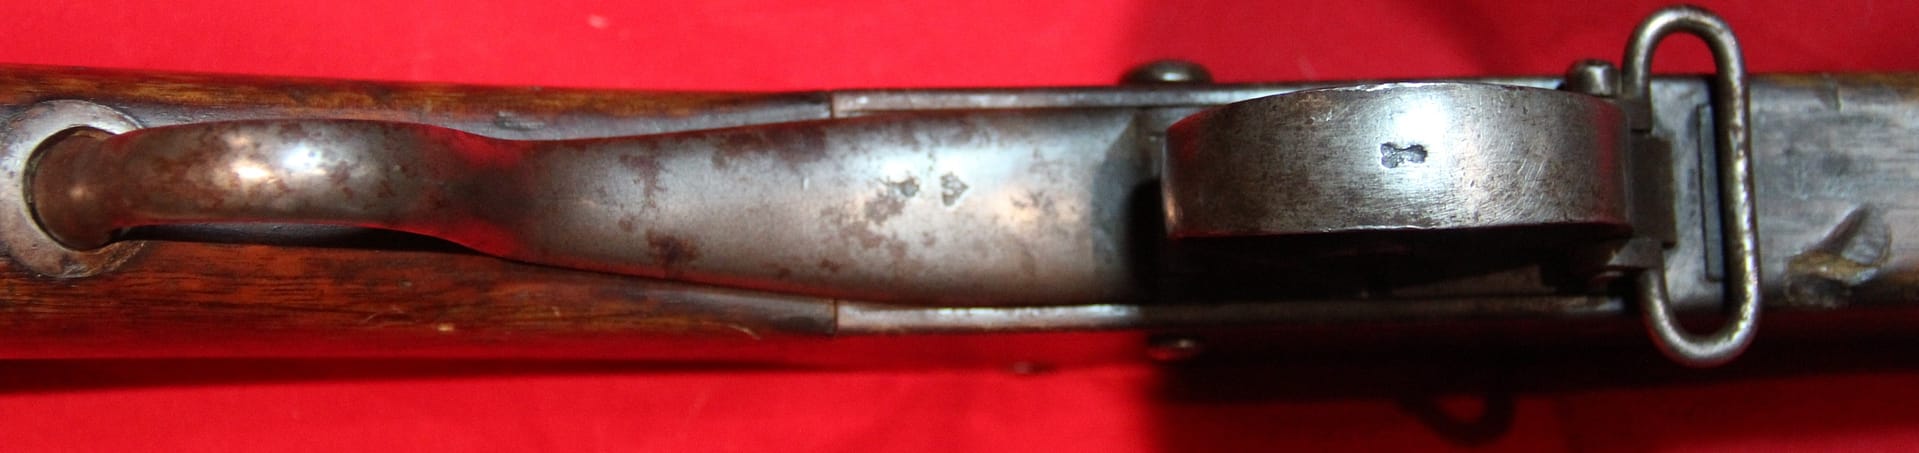
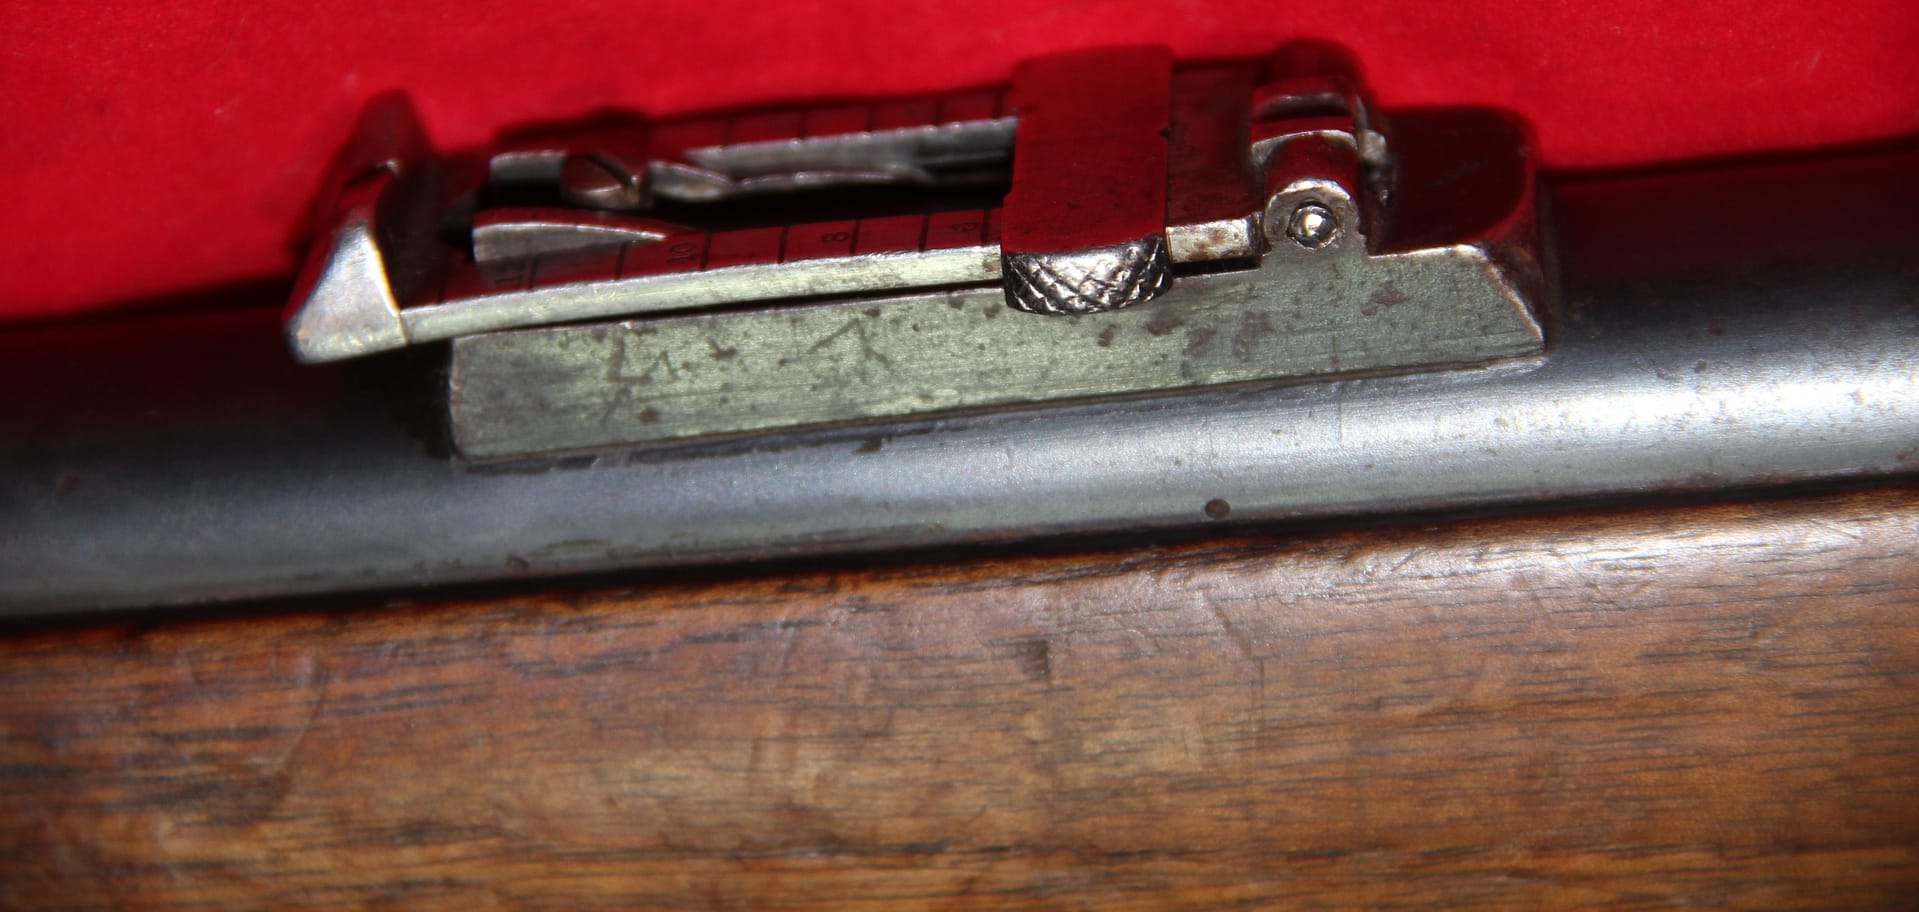
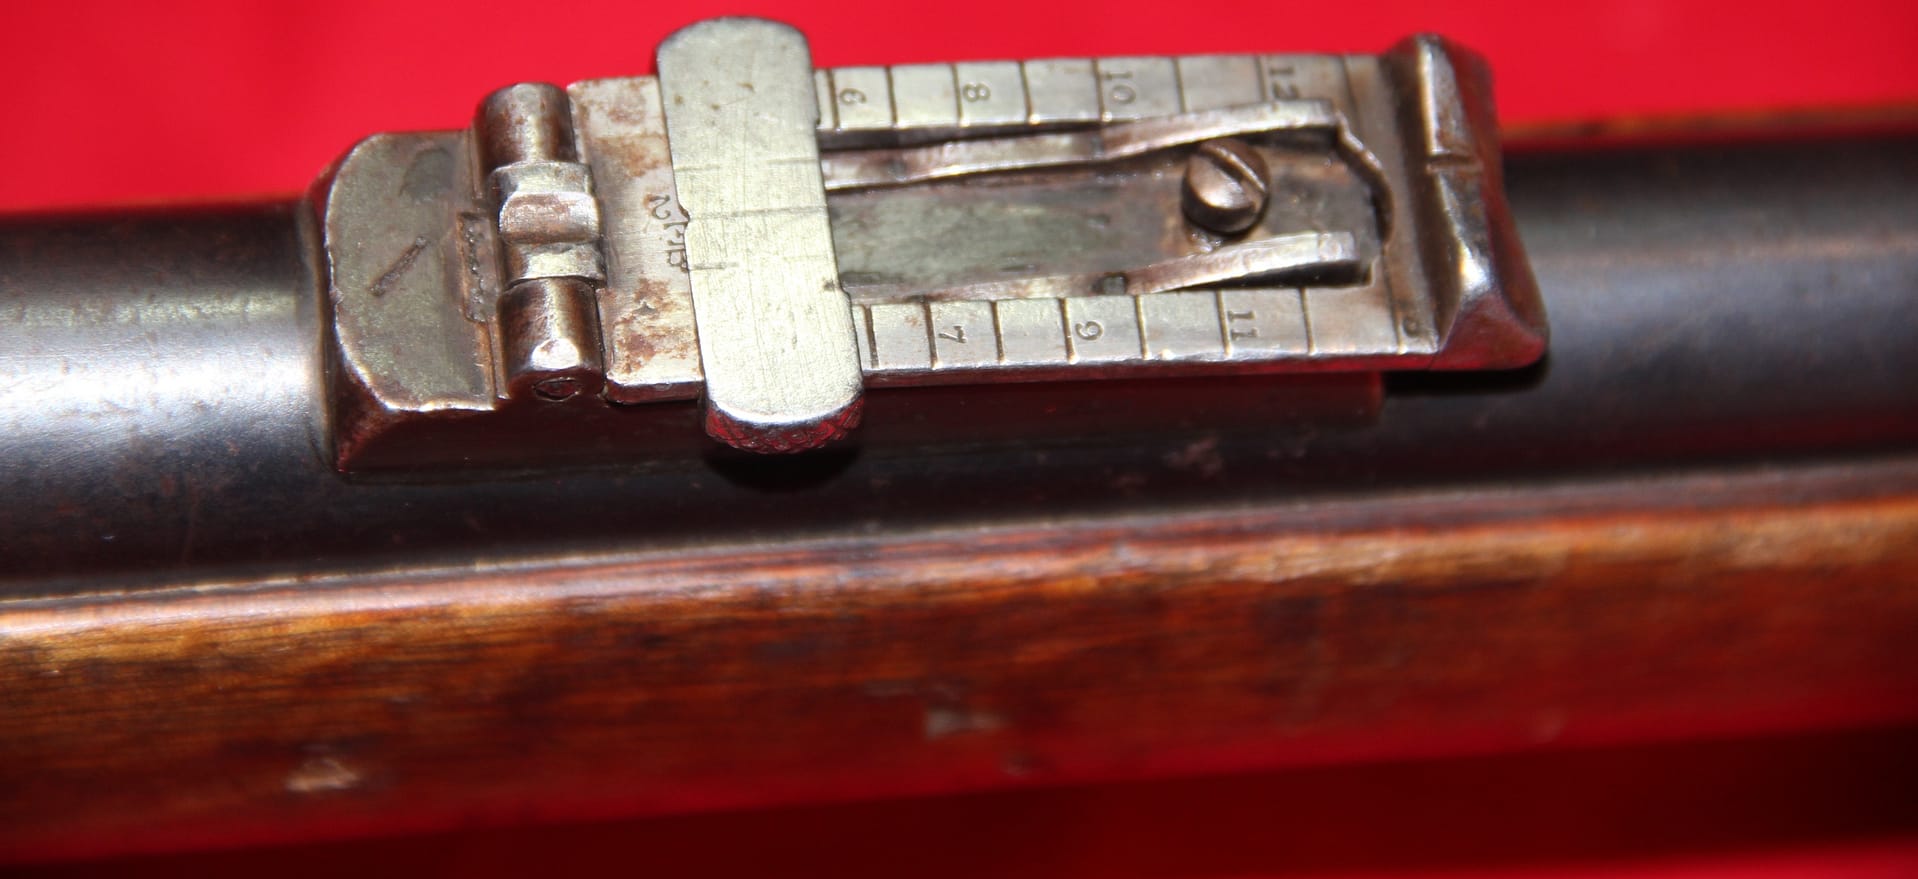
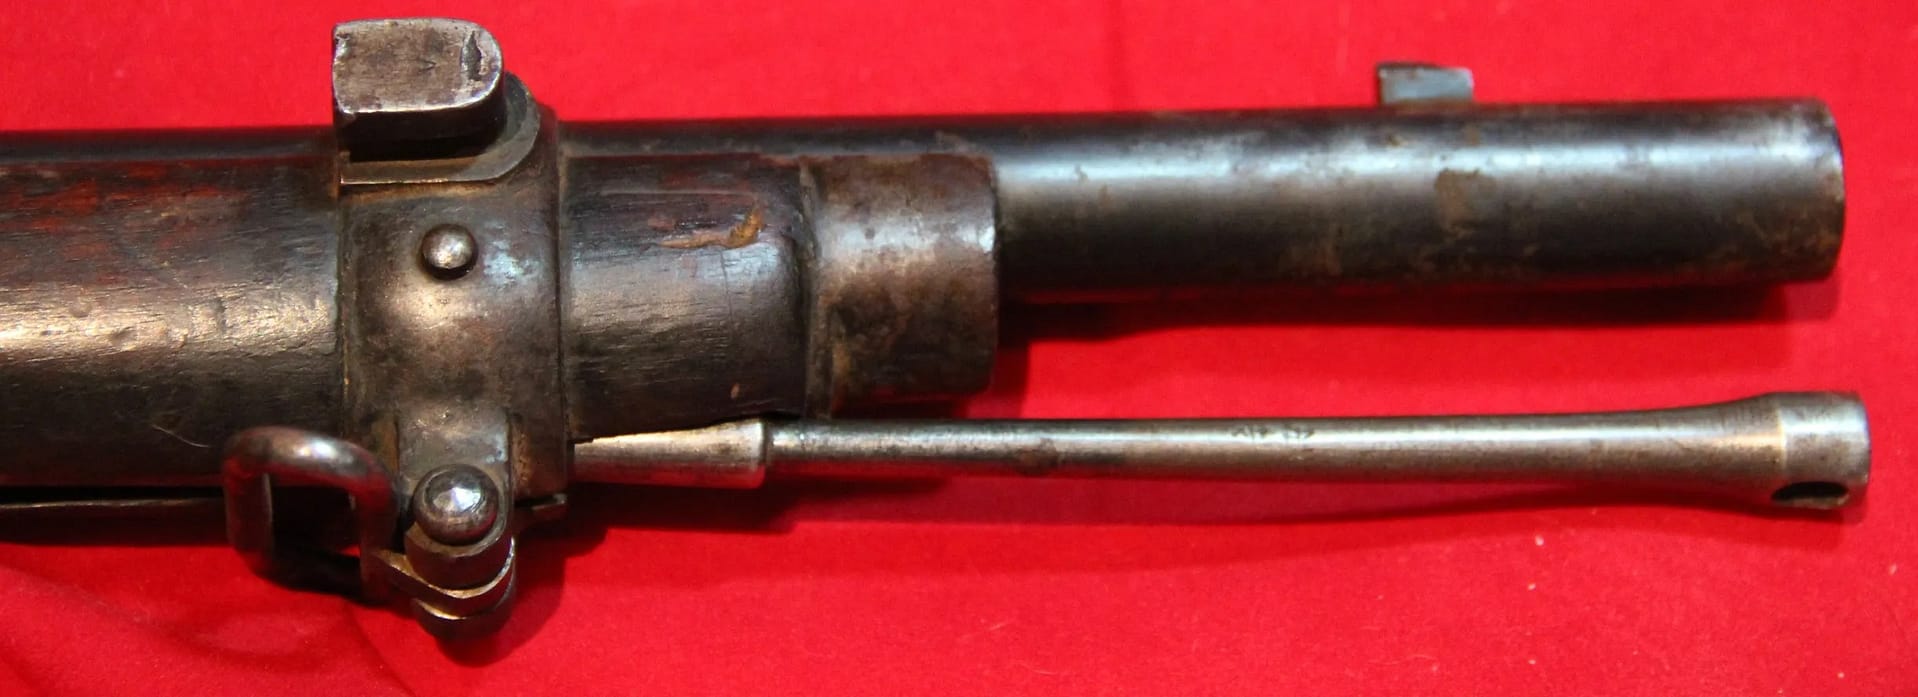
English Model 1871 Mark I Martini-Henry .577/.450 infantry rifle, dated 1875. From my personal collection
The Martini-Henry was the standard British infantry rifle during the Anglo-Zulu War of 1879. A single-shot, falling-block, breech-loading design chambered for the powerful .577/450 cartridge, it offered long-range accuracy and rapid aimed fire in trained hands. Its heavy recoil and black-powder fouling demanded discipline and good maintenance, particularly during sustained action. At battles such as Isandlwana and Rorke’s Drift, the rifle’s strengths and limitations were revealed in close-quarter fighting against fast-moving Zulu formations armed with assegais and shields..


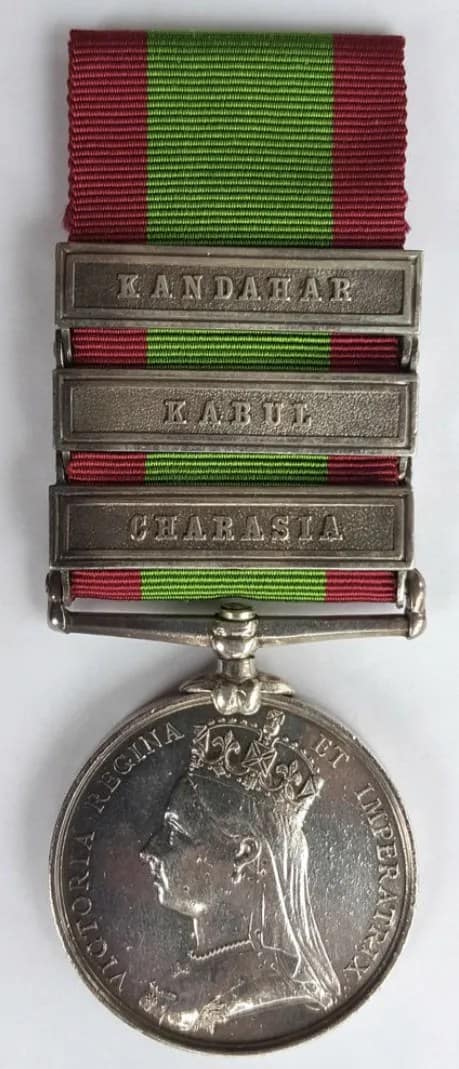
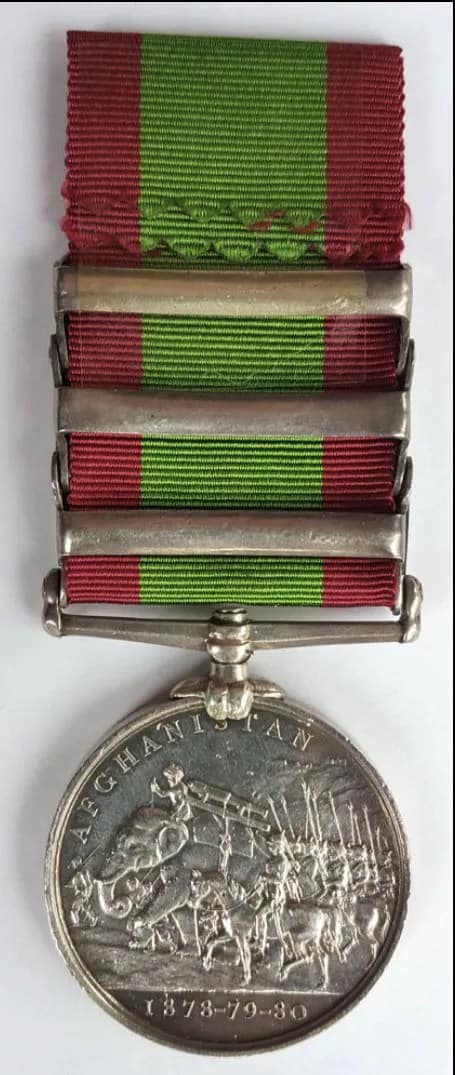
Afghan War medal to 1741 PTE H Maguire, 72nd Highlanders. With Kandahar, Kabul and Charasia clasps
The Afghan War Medal was authorised in 1881 for British and Indian Army personnel who served in the Second Anglo-Afghan War (1878–1880). Struck in silver, it features the diademed effigy of Queen Victoria on the obverse and a fortified mountain scene on the reverse, symbolising operations across the Hindu Kush. The medal was issued with one of several clasps, including Ali Masjid, Peiwar Kotal, Charasia, Kabul, and Kandahar, denoting specific campaigns and actions. A no-clasp medal was awarded to troops on garrison or line-of-communication duties.
Worn on a distinctive green ribbon with broad crimson edges, the medal became one of the most recognisable decorations of late-Victorian frontier warfare, reflecting service in harsh terrain, extreme climates, and sustained expeditionary operations along the North-West Frontier.


Subscribe to Battlefield Travels and receive a free E-Book Battlefield Guide
Unlock expert battlefield analysis, campaign reconstructions, and historical insights drawn from firsthand exploration and primary sources.
🗺️ You’ll receive:
🎖️ Exclusive historical insights you won’t find elsewhere
📘 A free eBook: 10 Tips for Exploring Historic Battlefields
📰 New battlefield studies straight to your inbox as they are published

⚔️ Go deeper — Members get exclusive access to the Deep Research Collection, Field Notes, and monthly Research Dispatches. Try membership free for 7 days, cancel anytime. From $9/month.