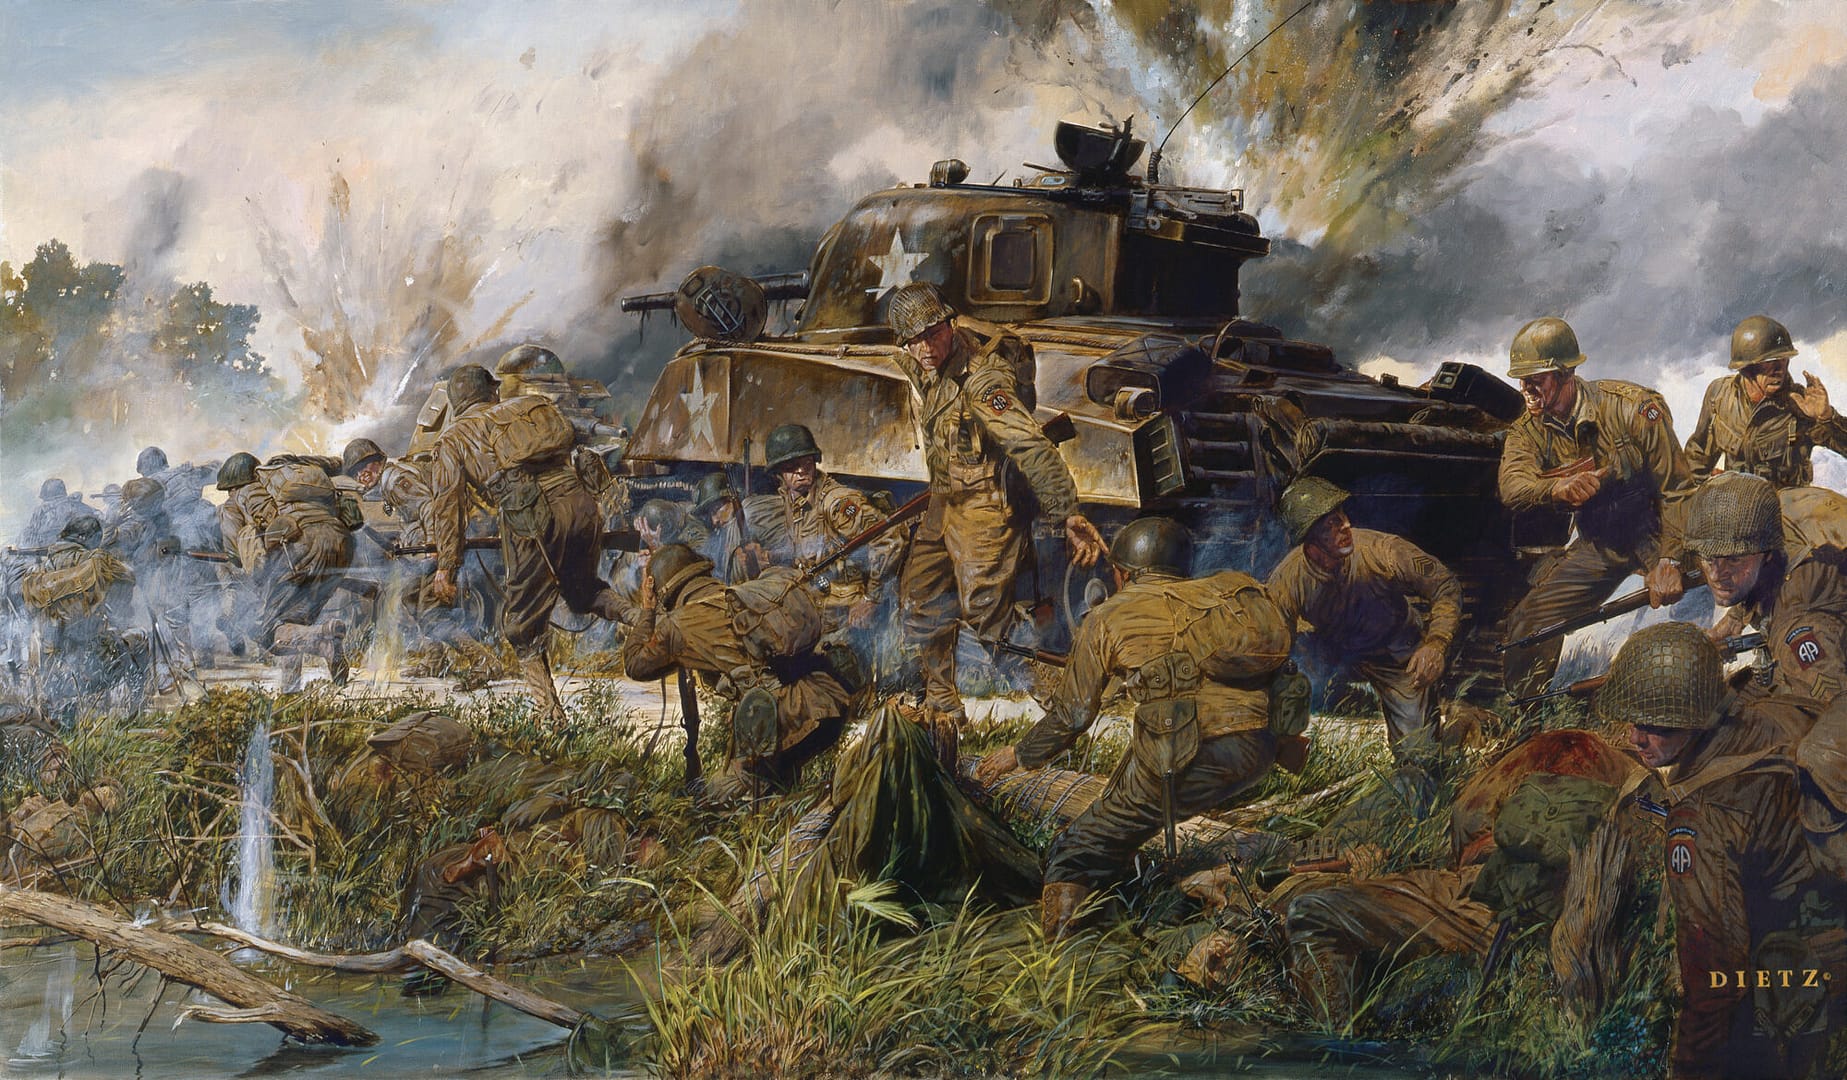
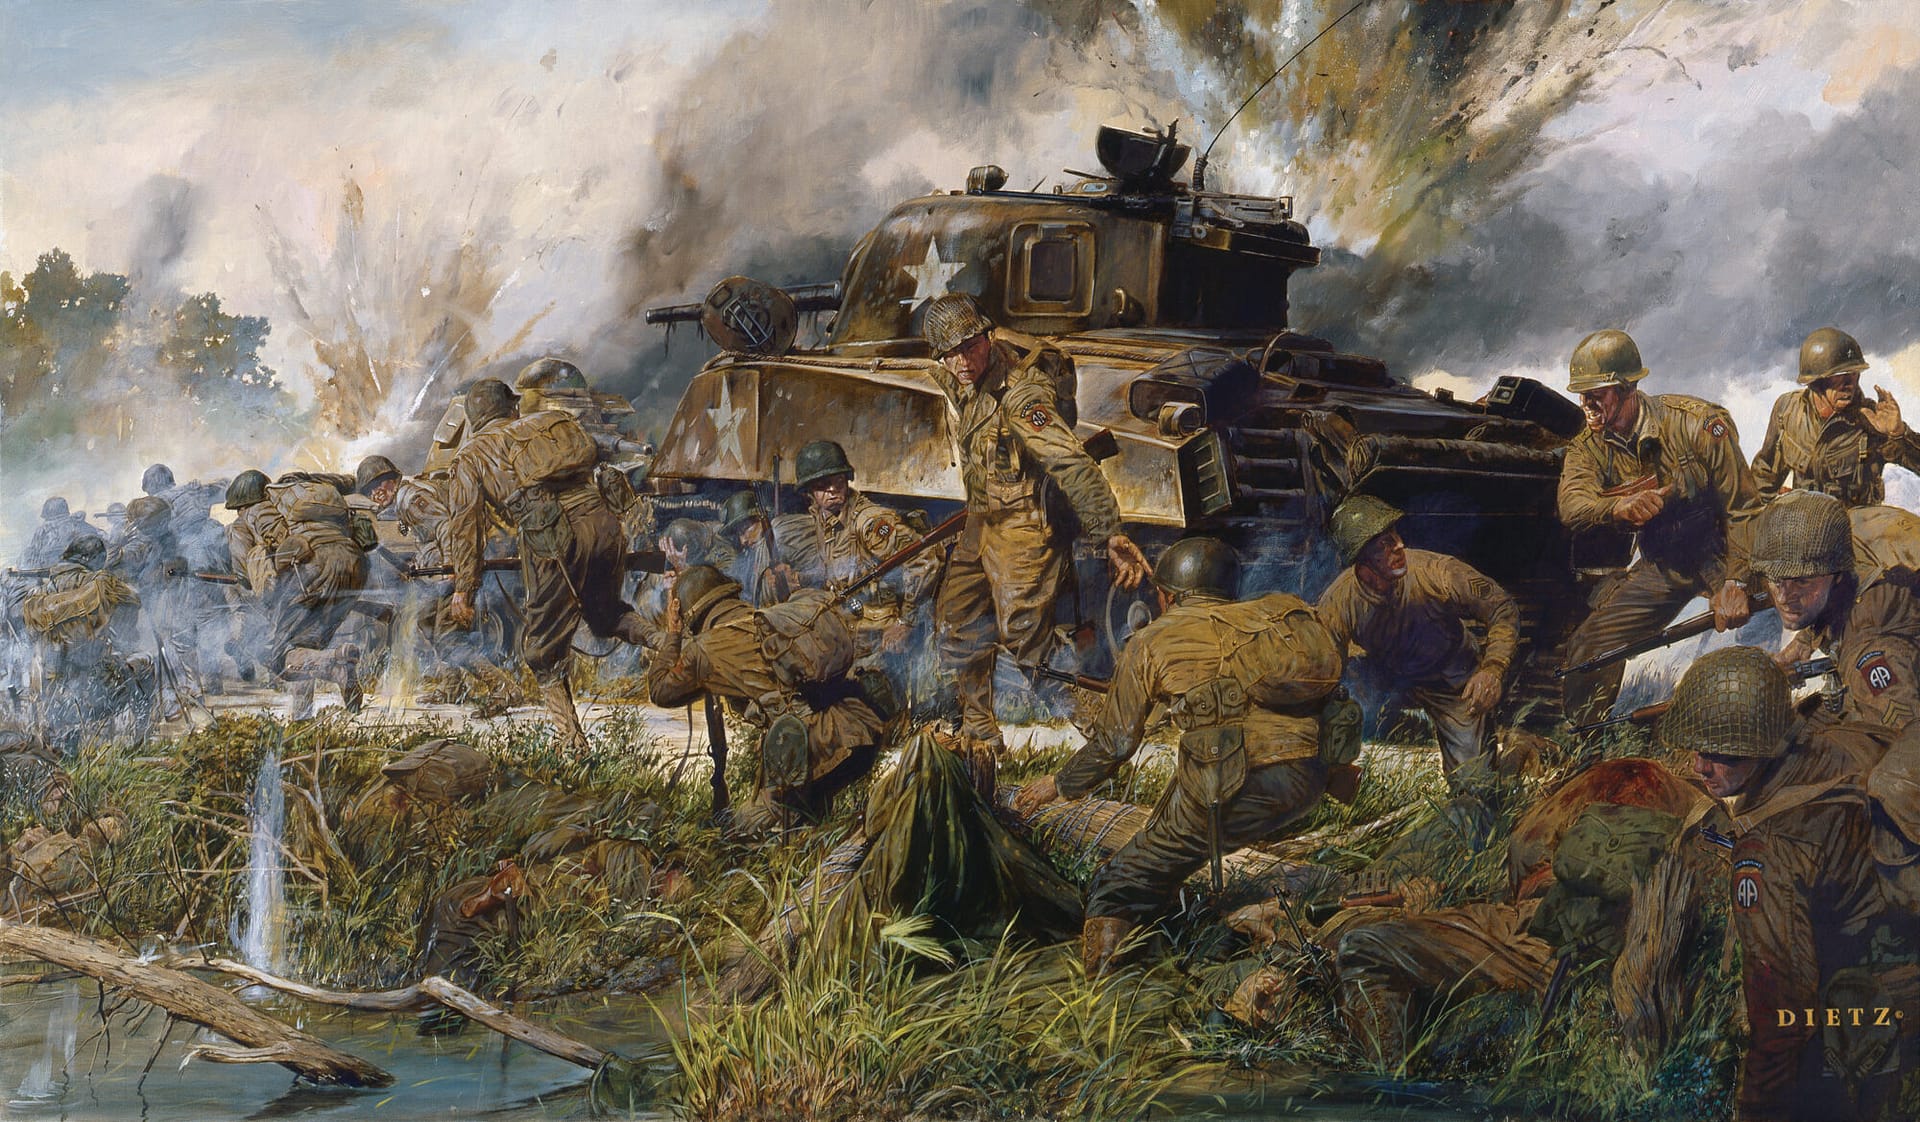
Fighting for the Causeway – 82nd Airborne Division at La Fière Bridge
The final act of Steven Spielberg’s 1998 movie ‘Saving Private Ryan’ is set in the fictional French town of Ramelles, as a mixed group of paratroopers defend a bridge over the Merderet River against German armoured counter-attacks. That scene is based on real events that happened right here at La Fière Bridge. I was a paratrooper in the 82nd Airborne Division 1996-99, so this place was somewhat of a pilgrimage for me.
Key facts
Google Earth map – Location of the La Fiere bridge battlefield
🎧 Prefer to listen? This article is available as a 45-minute podcast episode
Tip: If Podbean overlay appears after pausing, click the × in the top-right corner to return to the player controls.
🧭🥾 Walking the Battlefield
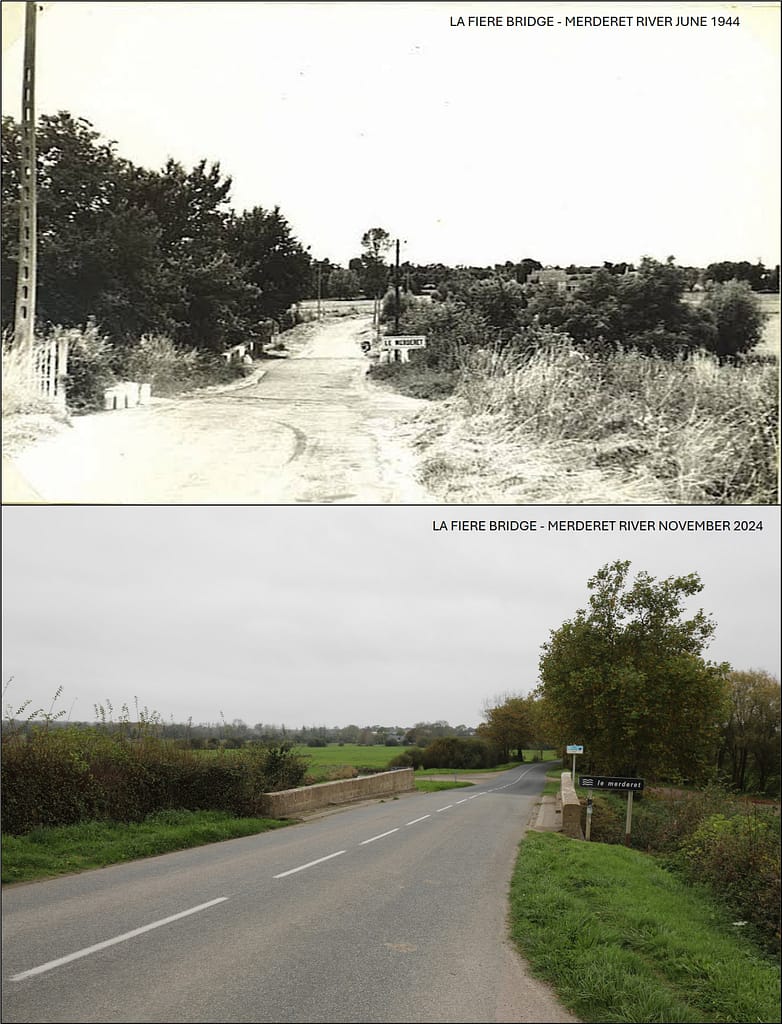
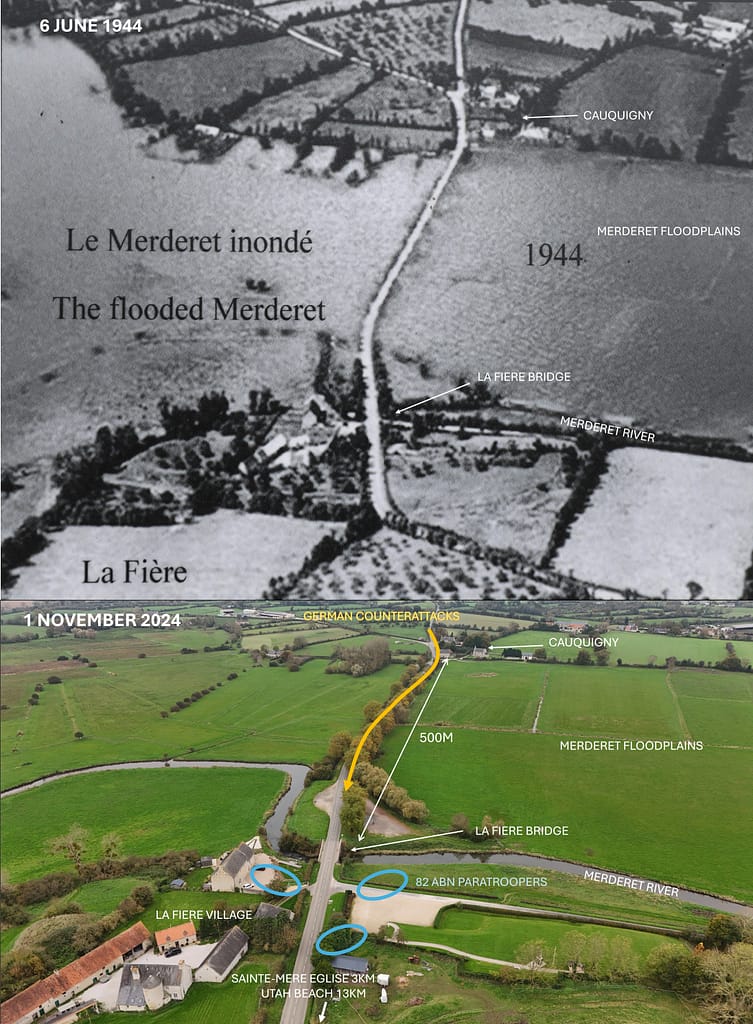
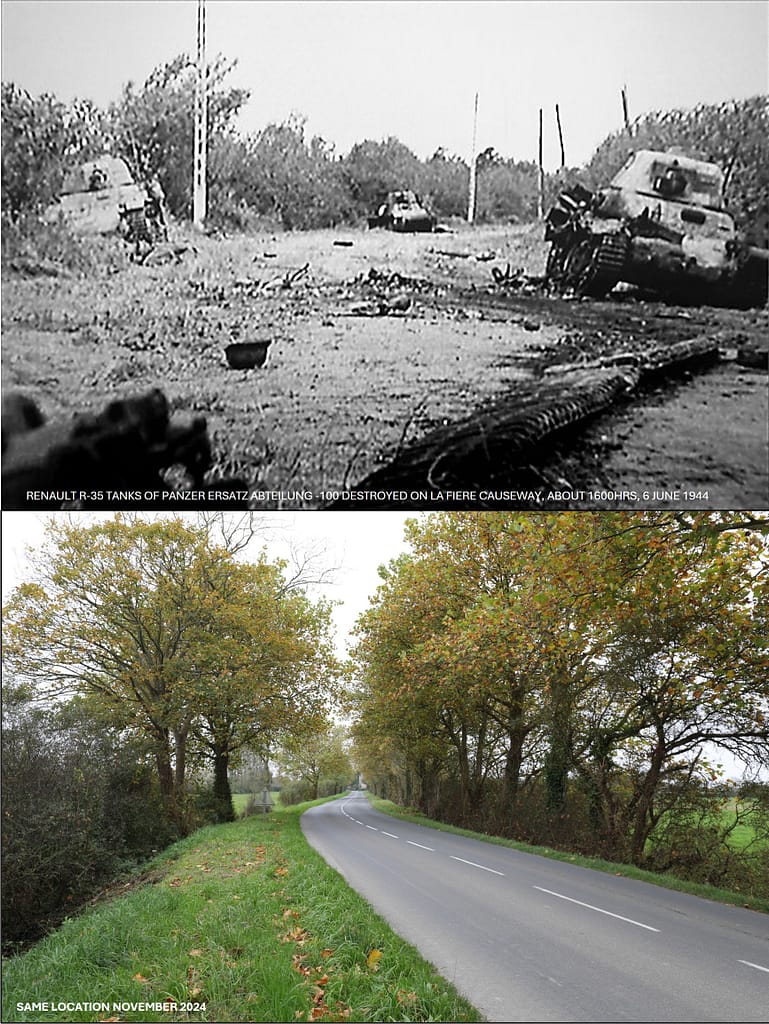
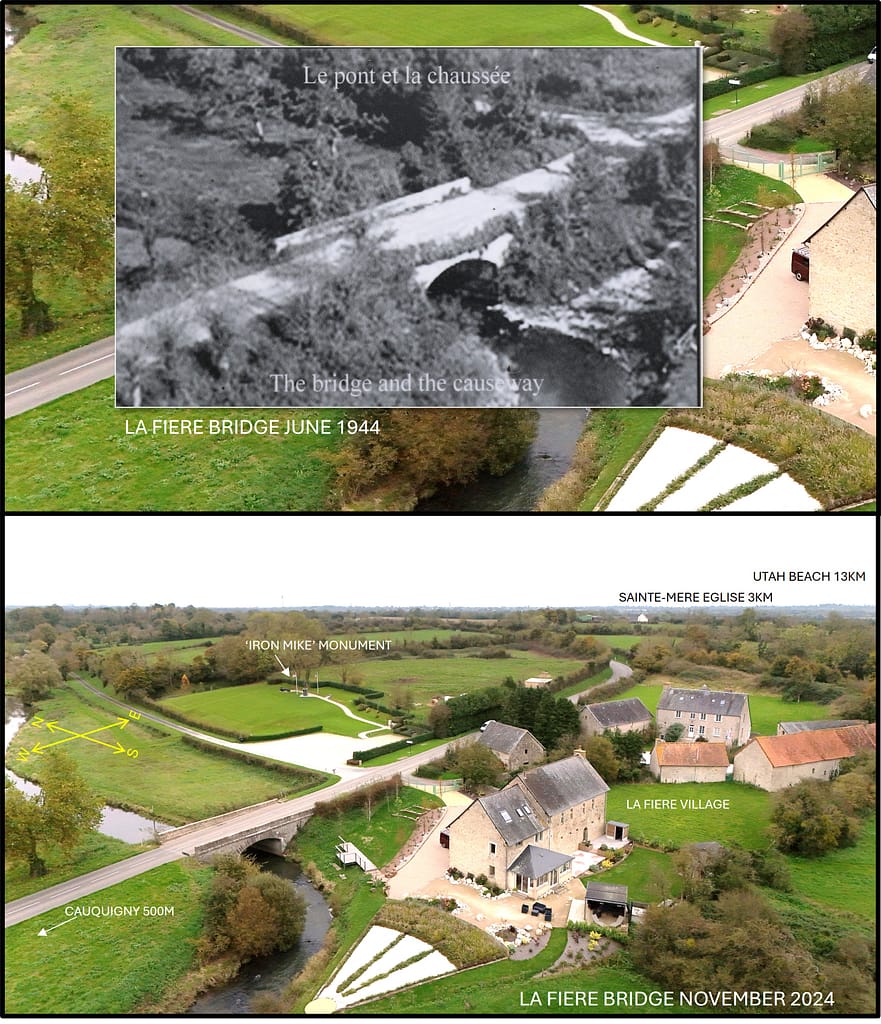
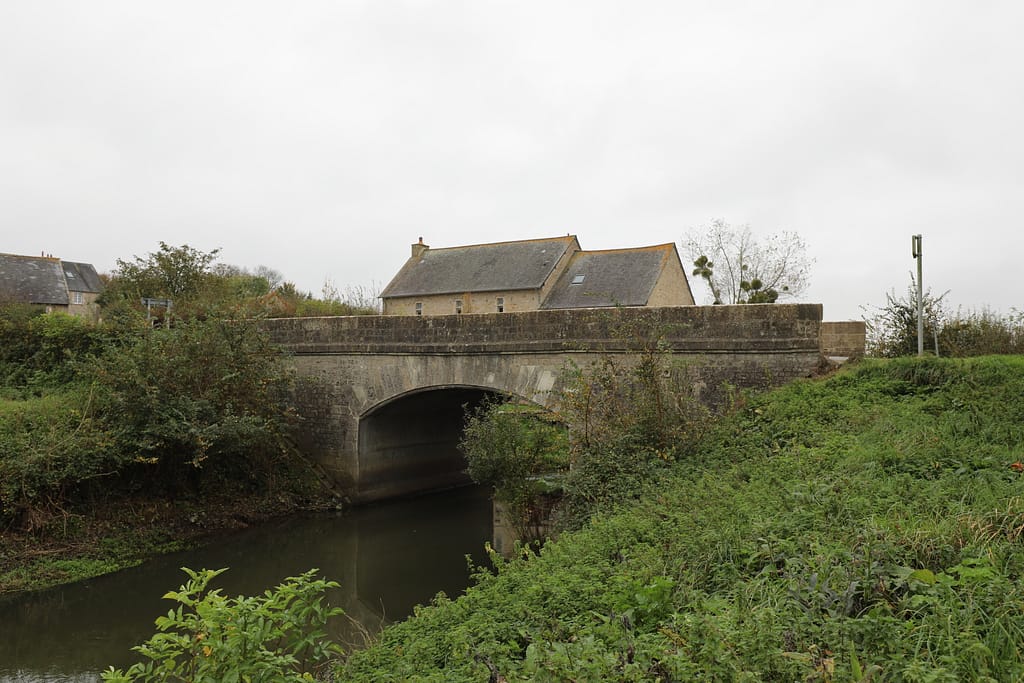
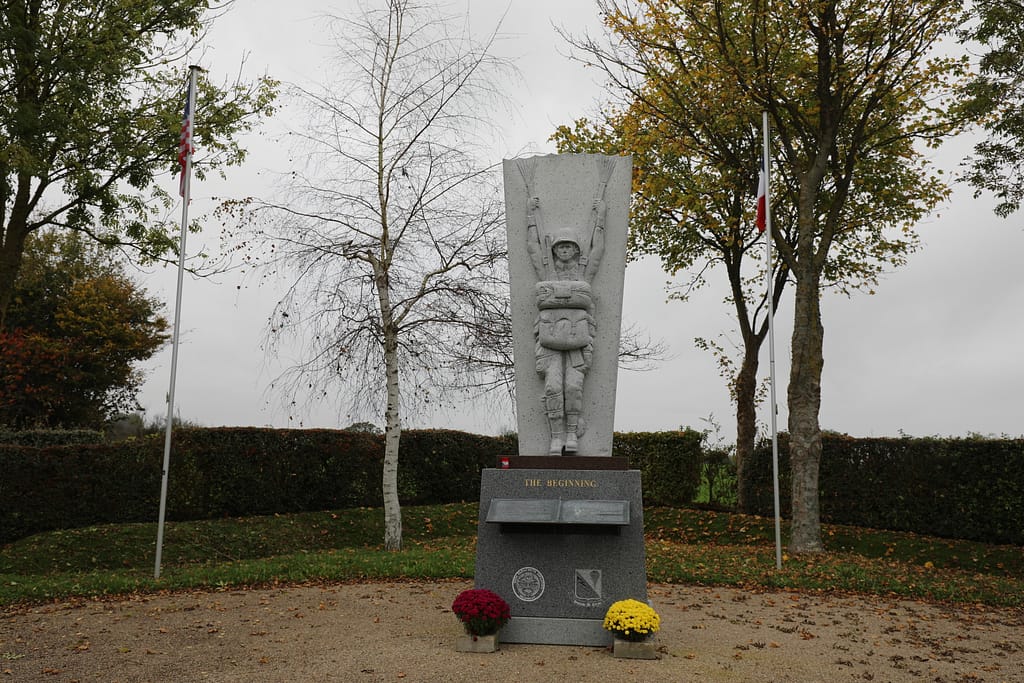
I visited the battlefield of La Fière Bridge in November 2024, equipped with unit histories, American and German accounts, numerous photographs, maps, period diagrams, and GIS overlays. The battlefield today is very recognisable. The bridge at La Fiere is still there. The causeway to Cauqigny is still a raised road above the farmlands – you just have to imagine the flooded fields on either side to understand how vital the causeway was to the D-Day landings. The period photographs of the destroyed German tanks can be easily placed by the distinct curves in the otherwise straight causeway. There are several monuments and markers at La Fiere, including ‘Iron Mike’. More monuments at Cauquigny to commemorate the 325th GIR role, and more at Le Helpiquets to commemorate the 507th PIR. The bridge at Chef-du-Pont is also well commemorated with monuments to the 508th PIR and individual acts of bravery.
Normandy series of battlefield studies
This article is part of a series exploring the D-Day airborne and amphibious battlefields on 6 June 1944 and the immediate aftermath. Click on the hotlinks to open the battlefield study.
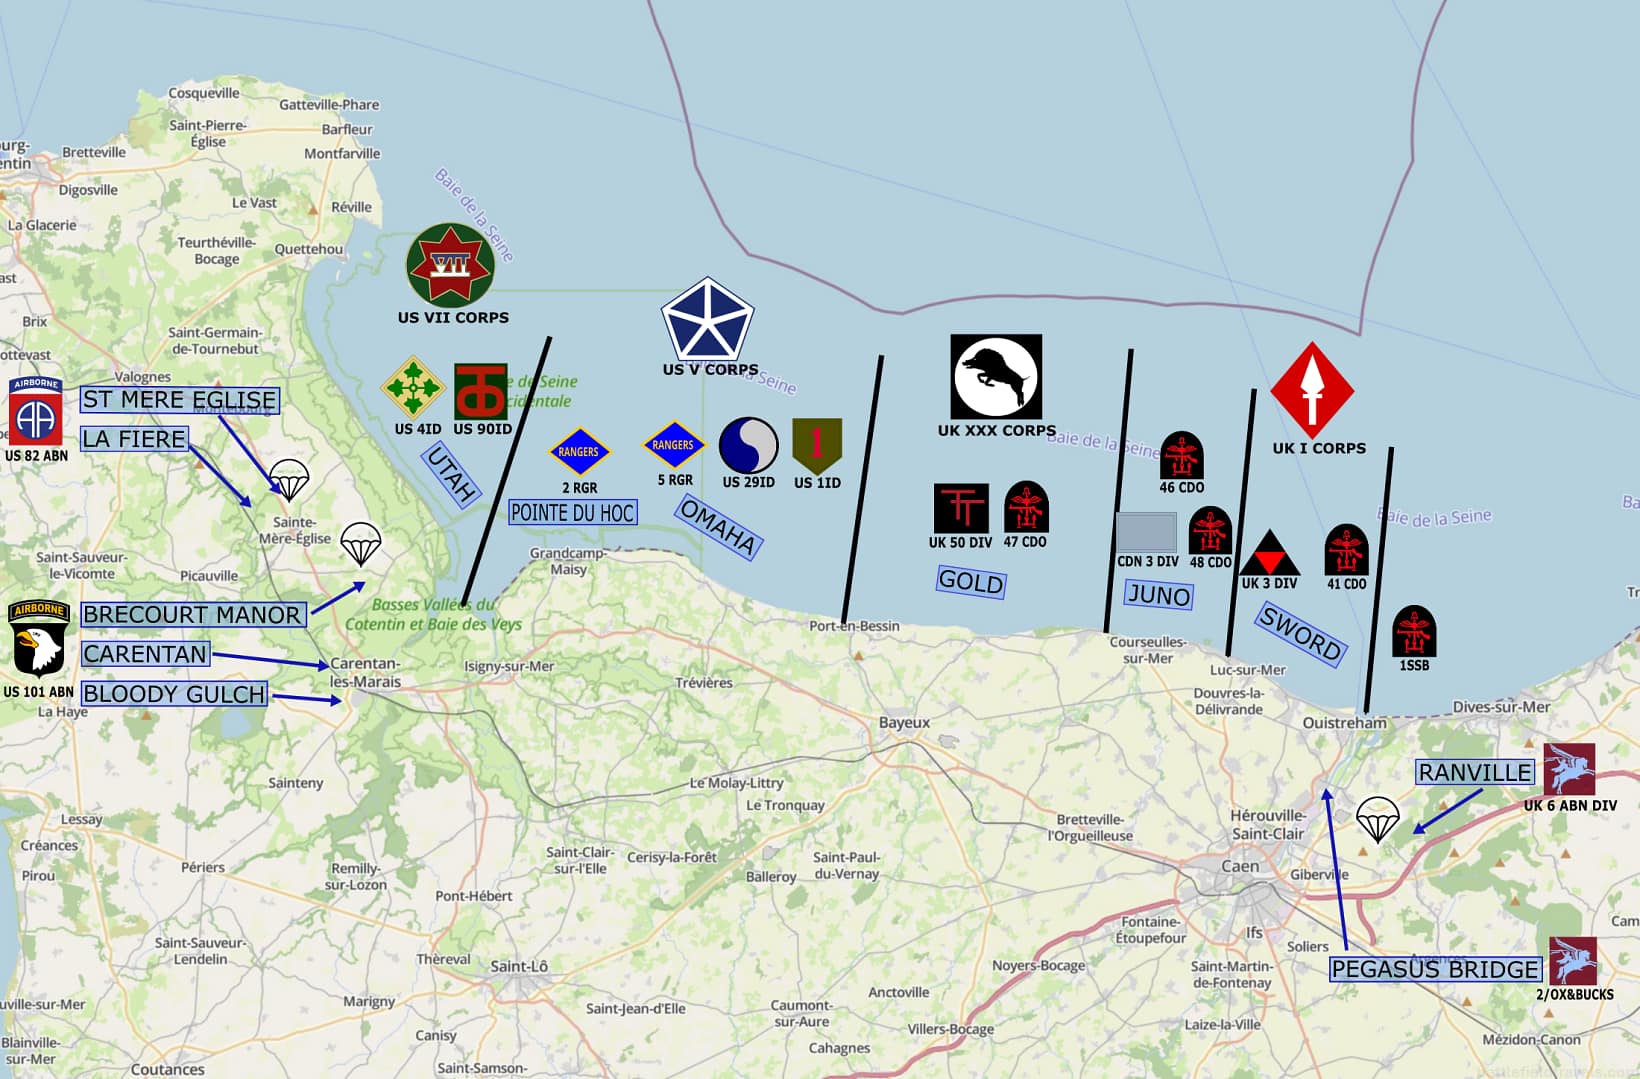
Strategic Context: Airborne operations on D-Day
82nd Airborne Division’s mission on D-Day
I have previously covered the US Airborne operations on D-Day in a separate article. The 82nd Airborne Division’s mission included capturing the town of Sainte-Mere Eglise and its strategic road junctions, plus key bridges (La Fiere and Chef Du Pont bridges) over the Merderet River to prevent German attacks against the Utah Beach landings, 12km to the east. The bridges also needed to be available when US forces were ready to break out from Utah Beach. The Germans had flooded the farmlands around the Merderet River, so the La Fiere bridge and about 500 metres of elevated road causeway were the only way to get across the flooded area. I have included a June 1944 photo to show the flooding.
Early on 6 June 1944, a mixed force of 82nd Airborne Division paratroopers captured the La Fiere Bridge against relatively light opposition. The Germans defending the bridge surrendered and elements of the 507th PIR were able to cross the 500m long causeway to capture Cauquigny and move on to Amfreville. Elements of the 508th PIR moved south and captured the village of Chef-du-Pont but were unable to take the bridge.
Significance of the bridge and causeway
La Fière Bridge and its adjacent causeway formed a natural chokepoint. To the east, the road led to Sainte-Mère-Église; to the west, it stretched across fields turned into a shallow lake by flooding, funnelling all movement through a narrow strip barely 100 metres wide. Both German reinforcements and American supply lines would have to pass through this defile. For the 82nd Airborne, holding La Fière meant holding the line between Utah Beach and the German mechanised counterattacks they knew were coming.
As historian S.L.A. Marshall later wrote, “It took the blood of hundreds to buy the bridge,” and without it, the Allied beachhead may well have faced destruction or delay. The battle that followed was short in duration but ferocious in execution — one of the most costly small-unit engagements in the American experience of World War II.
Opposing Forces: American paratroopers versus German armour
 Allied Forces – 82nd Airborne Division
 Allied Forces – 82nd Airborne Division
The seizure and defence of La Fière Bridge fell to elements of the 505th Parachute Infantry Regiment (PIR), part of the 82nd Airborne Division. Scattered during their early morning drop on 6 June, paratroopers converged on key objectives around Sainte-Mère-Église, with some groups concentrating at La Fière bridge and causeway. The core defenders included:
- 505th Parachute Infantry Regiment (PIR). Commanded by Colonel William E. Ekman
- 1st Battalion, 505th PIR. First units to secure the La Fière manor and eastern side after scattered landings.
- 2nd Battalion, 505th PIR. Arrived later and contributed to the reinforcement and counterattacks.
- 3rd Battalion, 505th PIR. Some scattered elements participated, but focused mainly on St Mere Eglise.
- 325th Glider Infantry Regiment (GIR). Commanded by Colonel Harry L. Lewis. Elements of the 325th GIR, especially 2nd Battalion, were brought in by glider on 7 June and played a crucial role in launching the final successful assault over the causeway on 9 June, clearing German positions and allowing expansion of the bridgehead.
- 507th Parachute Infantry Regiment (PIR). Commanded by Colonel George V. Millett Jr.
- Paratroopers from the 507th PIR, though widely scattered, gathered in small groups and fought in the vicinity of the western side of the Merderet, around Chef-du-Pont and Timmes’ Orchard, engaging German forces and forming part of the defence and eventual counteroffensive.
- Lieutenant Colonel Charles J. Timmes, commander of 2nd Battalion, 507th PIR, led the group that held the western end of the causeway under heavy fire for several days in what became known as ‘Timmes’ Orchard.’
- 508th Parachute Infantry Regiment (PIR). Commanded by Colonel Roy E. Lindquist. Like the 507th, the 508th PIR was also scattered, but some elements participated in defensive actions near La Fière and contributed to blocking German movements.
- 319th Glider Field Artillery Battalion (GFAB). Provided artillery support, including 75mm pack howitzers deployed in support of the infantry around La Fière and Chef-du-Pont.
- 307th Airborne Engineer Battalion. Responsible for demolition and bridging tasks, helped prepare and hold defences on both ends of the causeway.
- Company A, 746th Tank Battalion. Reinforced the paratroopers at La Fiere Bridge, and supported the causeway assault on 9 June 1944
 German Forces – 91st Air Landing Division & 100th Panzer Ersatz Detachment
 German Forces – 91st Air Landing Division & 100th Panzer Ersatz Detachment
The initial German resistance at La Fière was conducted by elements of the 1057th and 1058th Grenadier Regiments, part of the 91st Luftlande (Air Landing) Division. These were second-line troops — well-trained and led, but lacking combat experience. More significantly, they were eventually reinforced by units of the 100th Panzer Ersatz (Replacement) Brigade.
German reinforcements from the 100th Panzer Ersatz Brigade brought a mix of outdated yet still dangerous armoured vehicles into the fight, including at least one Panzer III, Renault R35 light tanks, and half-tracks carrying mechanised infantry. Though outclassed by modern standards, these vehicles posed a real threat to the lightly armed American paratroopers defending the La Fière causeway. Their lack of manoeuvre space and exposure on the narrow roadway, however, made them vulnerable to American bazookas, satchel charges, and well-sited machine guns.
The German objective was clear: recapture La Fière Bridge and drive east to split the American lodgement at Utah Beach from the airborne forces inland. Counterattacks were piecemeal at first but grew in intensity as reinforcements arrived from the west. The key advantage for the Germans in those crucial few days was their overmatch in tanks and artillery compared to the lightly armed American paratroopers.
Terrain: The Merderet Floodplain
The tactical significance of La Fière lay not in its size, but in its geography. A stone bridge and narrow elevated causeway spanned the Merderet River and its surrounding floodplain. The Germans had deliberately inundated the low-lying areas by damming and opening irrigation canals, creating a shallow, swampy lake over hundreds of square kilometres, with only a few causeway crossings. This meant:
- Movement from both east and west was channelled onto the causeway, with no room to manoeuvre
- Any advance or retreat had to be linear and fully exposed to fire
- The western approaches, especially around Cauquigny, offered slightly higher ground for German staging and artillery
Seizure and initial defence (6 June 1944)
At dawn on D-Day, small groups of paratroopers from the 505th PIR gathered around La Fière manor house, having landed east of the Merderet. Although disoriented and understrength, they understood the importance of the bridge: it was one of only a few elevated crossings west of Sainte-Mère-Église. Elements of 507th PIR, badly scattered in the drop, operated on the western side of the causeway.
The first German probes came from the west. Lightly armed, the Americans used rifles, BARs, and bazookas to repulse infantry advancing along the narrow causeway from Cauquigny. Company F, joined by elements of Company A and divisional engineers, established a hasty defence east of the bridge, using the manor buildings, hedgerows, and causeway shoulders for cover.
1LT John “Red Dog” Dolan ordered A Company to establish defensive fighting positions about 75 metres wide on the eastern side of La Fière bridge. To the rear, MAJ Kellam positioned a 57mm anti-tank gun approximately 150 metres back to provide covering fire. Two bazooka teams guarded the eastern bridgehead: PFC Lenold Peterson and PVT Marcus Heim, Jr. on the south side, and PFC John Bolderson and PVT Gordon Pryne on the north side.
At around 1345 hours, elements of the 507th PIR captured Cauquigny and then moved off northwest to link up with Lieutenant Colonel Timmes. At about 1600 hours, the seven-man detachment of 507th PIR holding Cauquigny was overrun, and American troops began falling back to the eastern side of the causeway. Artillery and mortar fire followed, after which three German tanks (captured French Renault tanks) with supporting infantry began advancing across the causeway.
As the lead tank approached within 40 metres of the bridge, the commander, spotting the mines, made the fatal mistake of opening his hatch and was immediately shot by dug-in paratroopers. Both A Company bazooka teams sprang into action. Exposing themselves from their foxholes, they fired rapidly, disabling and setting fire to the first two tanks. The third tank was destroyed by the 57mm gun under MAJ Kellam’s command.
The flooded fields proved an unexpected ally. Any attempt to bypass the bridge by foot or vehicle was rendered suicidal. German troops were funnelled into a single axis of attack, where they were met by enfilade fire along the causeway. Casualties mounted quickly on both sides.
Despite the chaos of the drop, this improvised stand by a few dozen paratroopers held the bridge throughout 6 June, preventing German access to the key road junctions around Sainte-Mère-Église and Utah Beach.
⚔️ Go deeper — Members get exclusive access to the Deep Research Collection, Field Notes, and monthly Research Dispatches. Try membership free for 7 days, cancel anytime. From $9/month.
German Reinforcements and the Battle for Cauquigny (7 June 1944)
By 7 June, the Germans had recognised the strategic importance of the La Fière crossing and moved swiftly to reinforce their positions on the western side of the causeway. Elements of the 91st Luftlande Division, including Grenadier Regiment 1057, and units from the 100th Panzer Ersatz und Ausbildungs Brigade converged on the area. They occupied the slightly elevated ground around Cauquigny village, which included a stone church, farms, and orchards that overlooked the causeway — creating an ideal base of fire.
American reconnaissance patrols reported increased movement across the Merderet. German tanks — mostly captured French Renault R35s and Hotchkiss H-39s, pressed into German service — began to probe the causeway again, this time with infantry support and intermittent artillery barrages. Self-propelled guns and mortars positioned west of the river began hammering American positions near the manor house and causeway entrance.
On the evening of 7 June, a small American force attempted to dislodge the enemy from Cauquigny, led by paratroopers from the 507th PIR. Crossing the causeway under cover of darkness, the force achieved initial surprise and briefly captured the village. However, lacking sufficient support and overwhelmed by German counterattacks, they were forced to withdraw. Some survivors escaped back across the causeway; others, including elements of 2/507 under LTC Charles Timmes, took refuge in an orchard north of Cauquigny, which became known as “Timmes’ Orchard.” There they held out under siege for days, repelling repeated German attacks while awaiting relief.
German assaults on La Fiere Bridge (8 June 1944)
Throughout 8 June, German forces launched repeated frontal assaults across the narrow causeway, attempting to dislodge the Americans from their bridgehead. The canalised nature of the terrain, with flooded marshes on both sides of the road, turned the causeway into a deadly killing zone. US machine gun crews, mortarmen, and bazooka teams were sited in depth behind hedgerows and in the manor house ruins, inflicting heavy losses.
One German self-propelled gun, possibly a French-made Lorraine 37L conversion, reached the eastern end of the causeway but was destroyed at close range when paratroopers ran forward under fire to place satchel charges on the hull — a desperate but successful act.
The Americans were under constant pressure. Mortar and artillery fire bracketed the manor and the hedgerows behind it, wounding or killing several key personnel. Supplies of ammunition and medical aid ran low. Reinforcements from scattered units of the 82nd gradually filtered in, helping to plug gaps.
Despite the ferocity of the assaults, the Germans were unable to force a crossing. A combination of the terrain and stubborn resistance by American airborne troops frustrated their efforts. However, it was clear to both sides that unless the western bank could be cleared, the La Fière bridge would remain a critical vulnerability in the American defensive perimeter.
Counterattack by 325th Glider Infantry Regiment (9 June 1944)
Recognising the danger of a German breakthrough, the Americans rushed elements of the 325th Glider Infantry Regiment into the area. These troops, though still assembling after their hazardous landings, were brought forward under cover of darkness and took up positions east of the causeway.
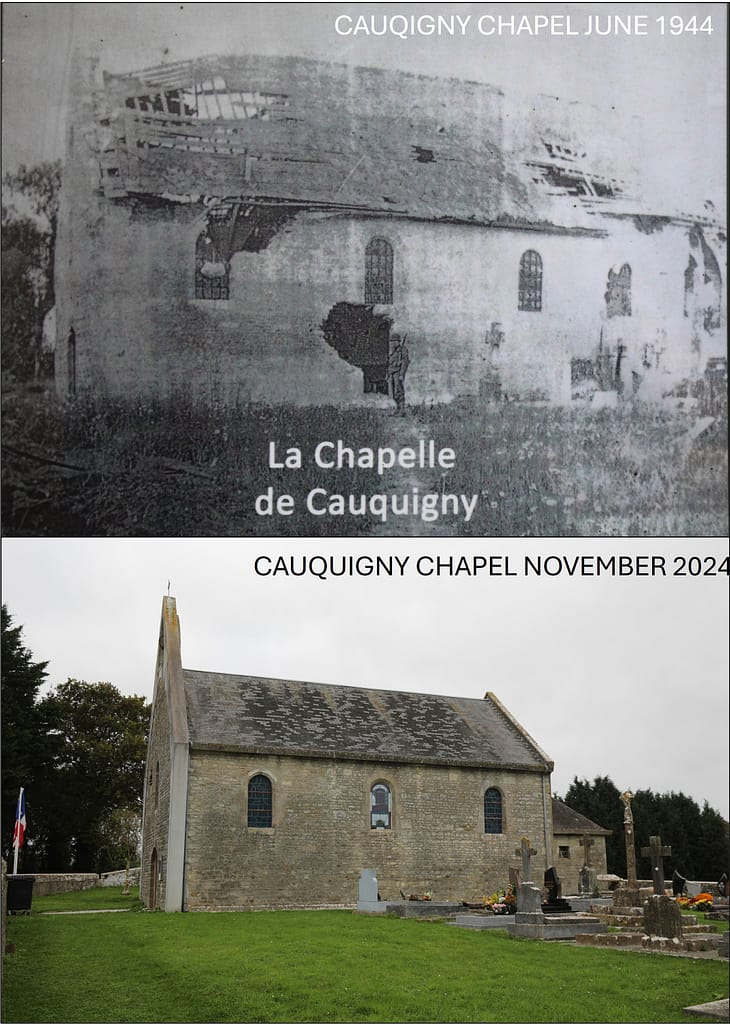
On 9 June, supported by heavy mortars and limited artillery, the 325th GIR launched a coordinated counterattack across the causeway, supported by the newly arrived M4 Sherman tanks of 746th Tank Battalion. This was one of the bloodiest assaults in the Normandy campaign. The glider troops assaulted across the narrow strip of land, fully exposed to fire. Casualties were severe. But, through sheer determination, they cleared Cauquigny churchyard and outbuildings, and re-established control of the western causeway terminus
The bridge and causeway were now back in American hands — at great cost. The final German defenders were pushed back into the hedgerows west of Cauquigny. The immediate threat to Sainte-Mère-Église and the Utah beachhead was neutralised.
Strategic Outcomes of the Battle for La Fiere
Although larger engagements often overshadow the Battle for La Fière Bridge, its tactical importance was disproportionate to its size. Had the Germans broken through at La Fière, they could have disrupted the American lodgement at Utah Beach, and isolated Sainte-Mère-Église, cutting off the 82nd Airborne from reinforcement.
Instead, the stubborn defence by scattered paratroopers, followed by the ferocious counterattack by the 325th GIR, sealed the Merderet line and consolidated the western flank of the American airborne zone. The causeway’s recapture on 9 June ensured a secure western boundary for the 82nd Airborne Division. As the allies began their breakout from Utah Beach, the bridge and causeway provided a corridor for movement and resupply westward.
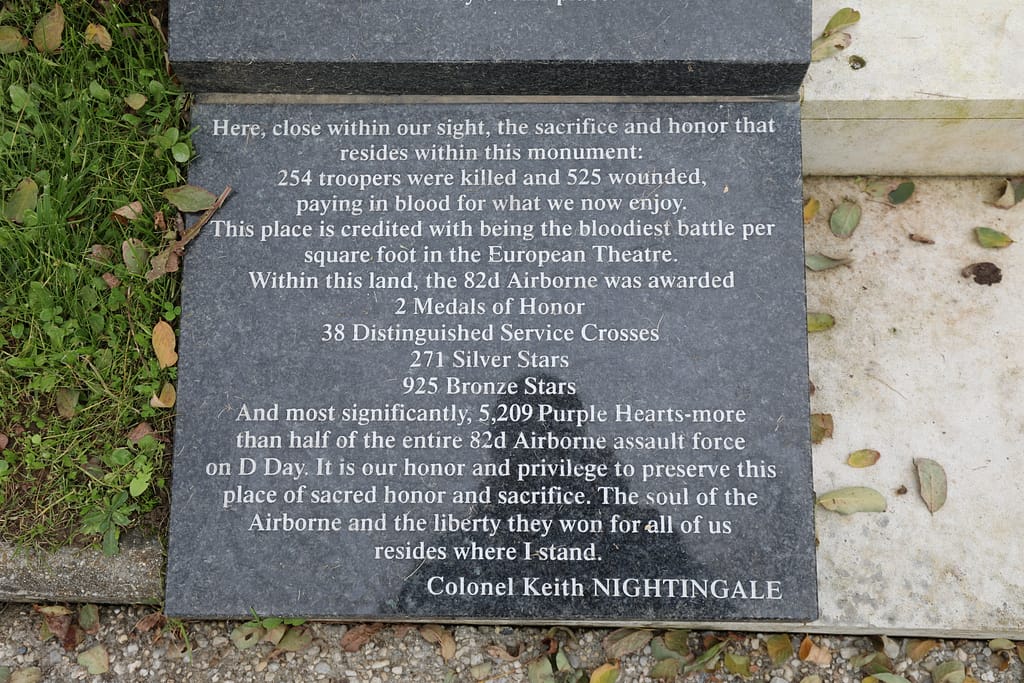
The battle also became one of the most costly single actions for the 82nd Airborne in Normandy. Estimates suggest over 250 American were killed in the fighting for La Fiere, with some companies losing more than half their strength in a single assault.
The micro-terrain (small scale terrain features that often do not appear on maps and can only be seen when you are standing on the ground) at La Fiere dictated the course of the battle. With the Merderet Valley flooded, the causeway became vital ground for movement in either direction. However, attempts by either side to seize the causeway meant assaults along a narrow, predictable avenue that had very little cover. Consequently, the casualties were heavy on both sides. The concept of exploiting small scale terrain features in battle is examined further in the Micro-Terrain and Battlefield Decision-Making research hub.
The La Fiere Bridge battlefield today
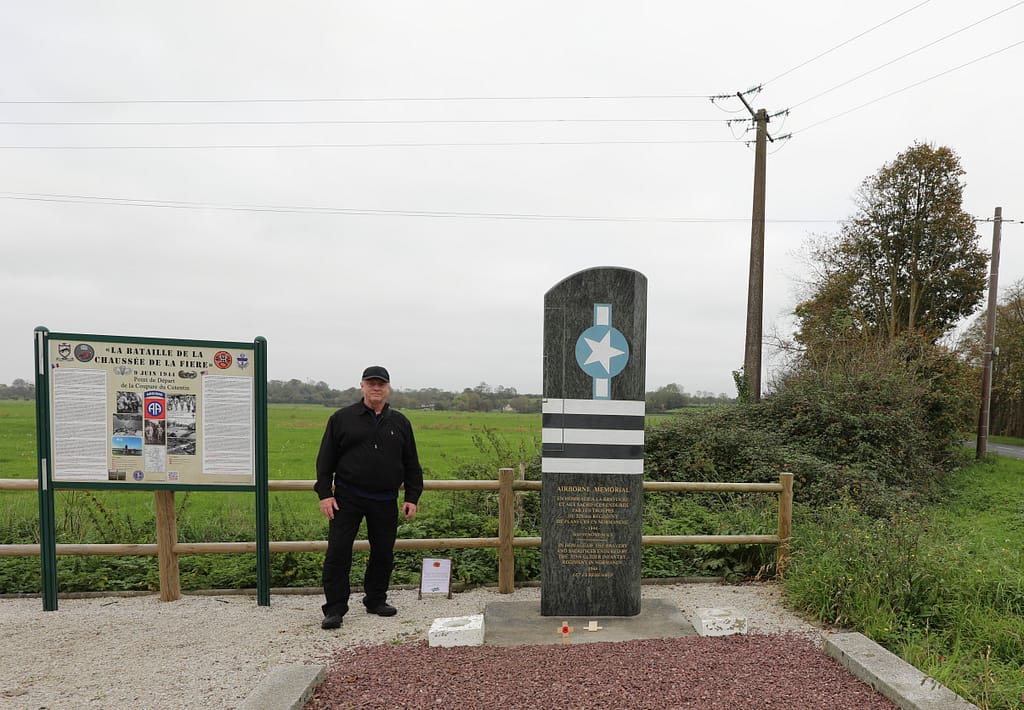
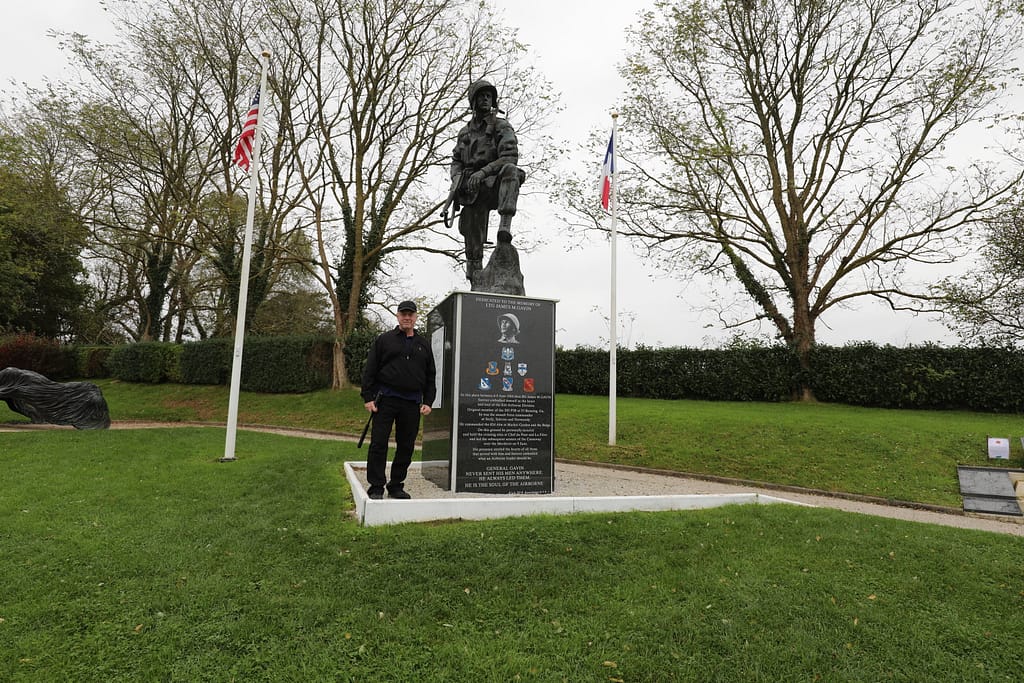
The battlefield today is very recognisable. The bridge at La Fiere is still there. The manor house east of the bridge, where early US defences formed, still stands. It offers a direct view down the causeway and was likely a key command and observation post. The causeway to Cauqigny is still a raised road above the farmlands – you just have to imagine the flooded fields on either side to understand how important the causeway was. The period photographs of the destroyed German tanks can be easily placed by the distinct curves in the otherwise straight causeway. There are several monuments and markers at La Fiere, including the Iron Mike statue in the memorial park.
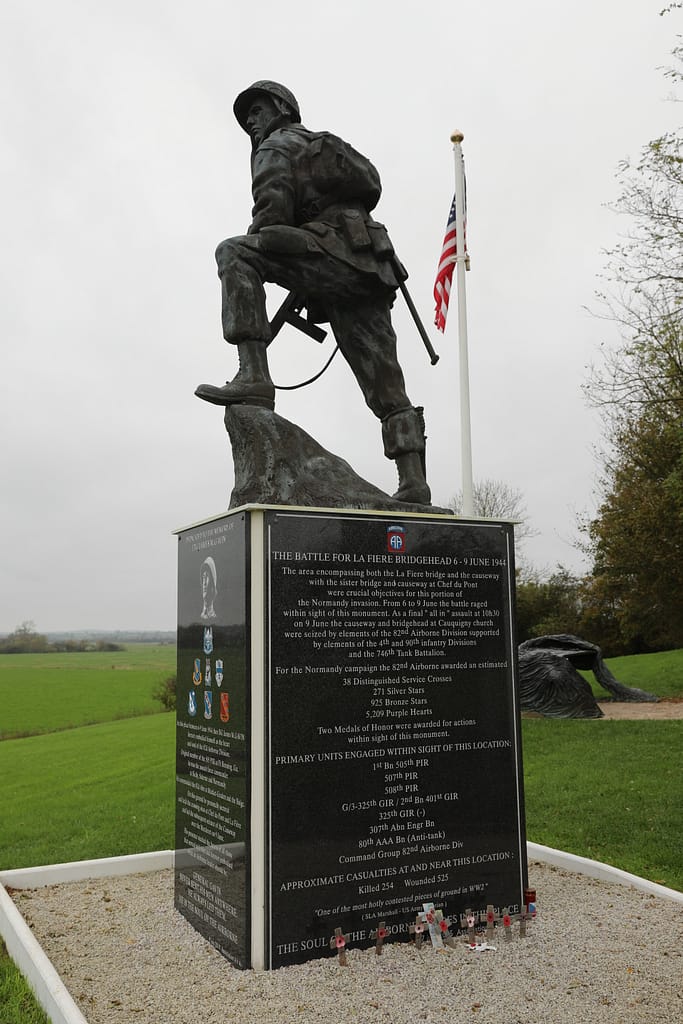
The church at Cauquigny, once German-held, is slightly modifed from its wartime damage. Its interior was scarred by gunfire but has been restored. There are monuments at Cauquigny to commemorate the 325 GIR role, and more at Le Helpiquets to commemorate the 507th PIR. The bridge at Chef-du-Pont is also well commemorated with monuments to the 508th PIR and individual acts of bravery.
The Airborne Museum at Sainte-Mere-Eglise is fabulous and tells the story of all of the battles around 82nd Airborne and 101st Airborne Division Drop Zones. The museum is not to be missed, and St Mere Eglise itself is largely as it was in June 1944.
La Fiere Bridge
Chef-du-Pont
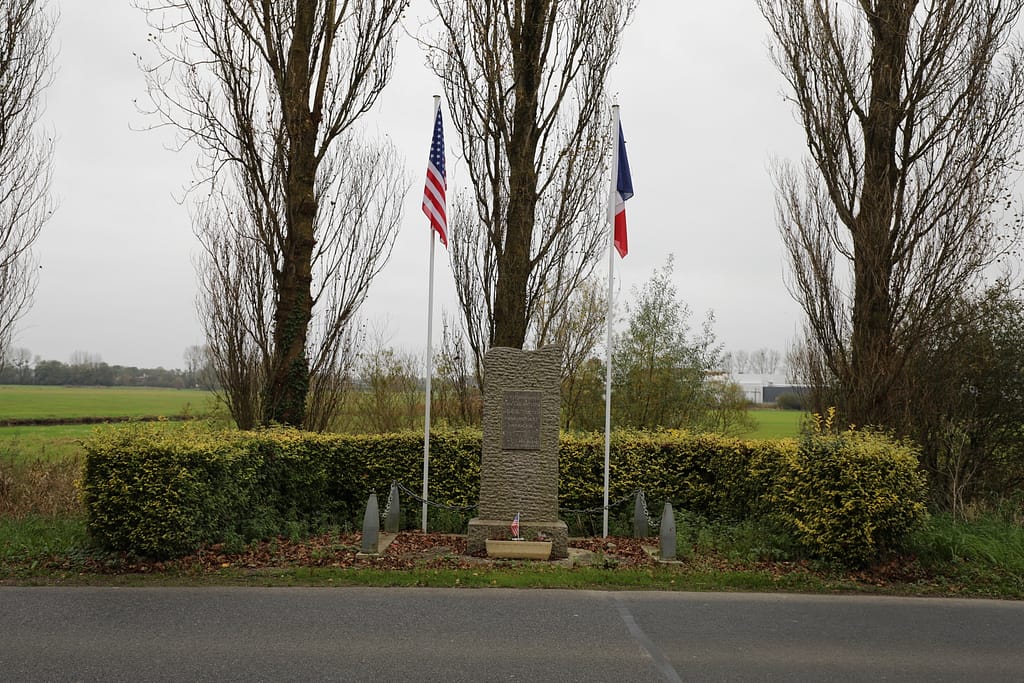
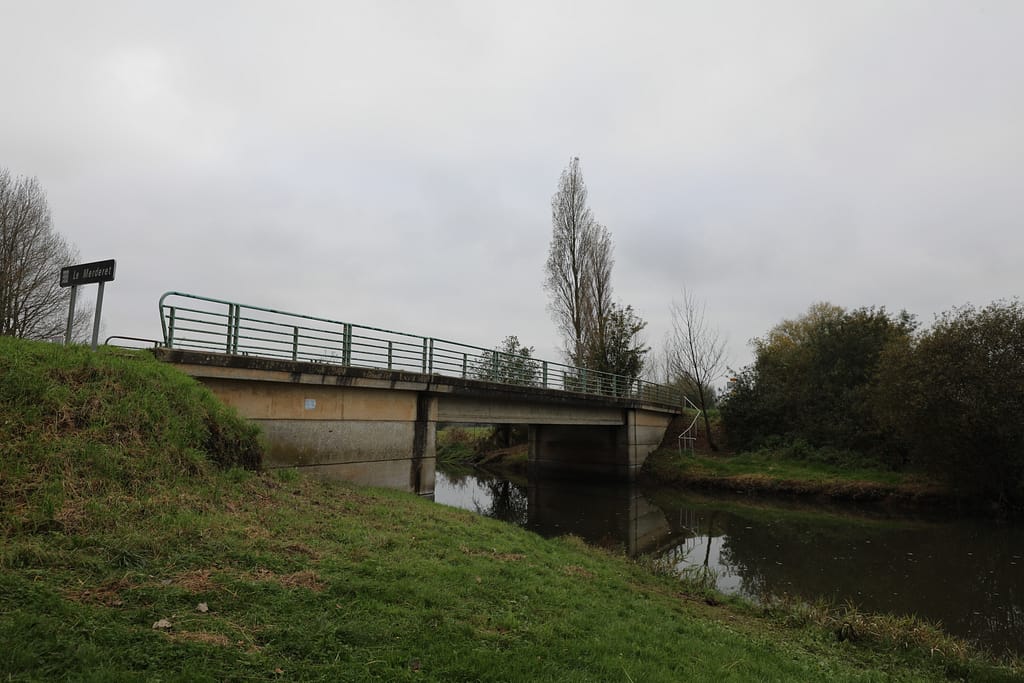
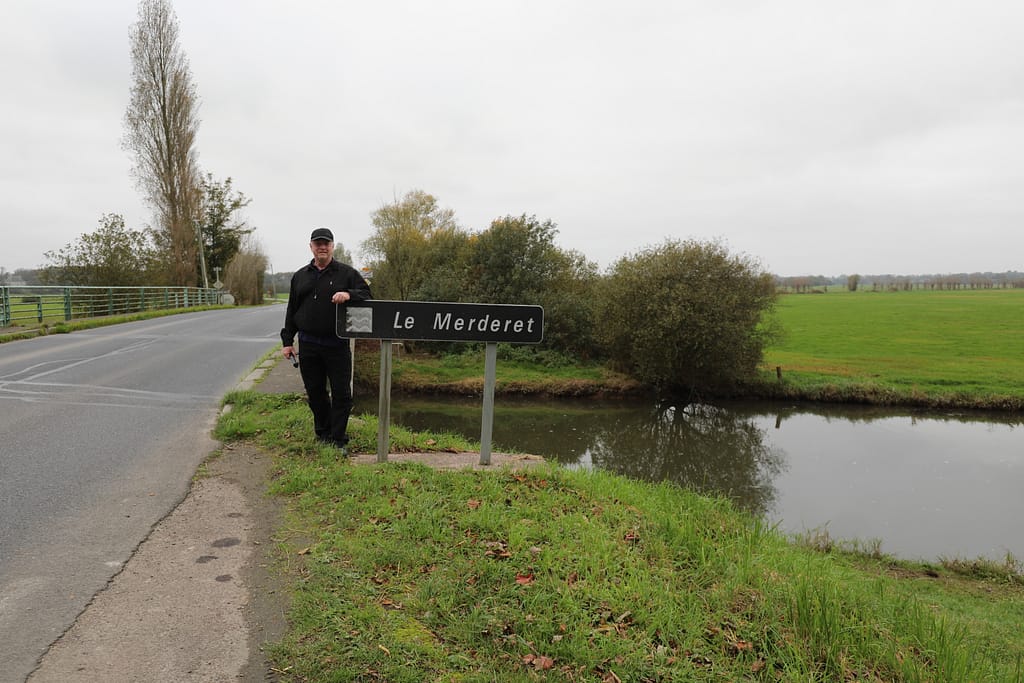
La Helpiquets
Found this useful? Buy me a coffee — it helps fund future battlefield research


Authored by Mick Prictor, a retired military officer with 40 years’ service, and a military historian specialising in terrain-focused analysis of tactics, doctrine, and command decision-making in land warfare. His work draws on extensive battlefield fieldwork—more than 280 sites worldwide—and one of the world’s largest private collections of historic military arms, uniforms, and equipment. About me
❓ Test Your D-Day Knowledge
Twenty questions covering the airborne operations, invasion beaches, commanders, forces and fighting of 6 June 1944.
20 questions · 60% to pass · expect a challenge
Sources – Battle for La Fiere Causeway
- Ambrose, S. E. (1999). D-day, June 6, 1944: the climactic battle of World War II. Thorndike.
- Ambrose, S. E. (1992). Band of Brothers: E Company, 506th Regiment, 101st Airborne from Normandy to Hitler’s Eagle’s Nest. Touchstone, Simon & Schuster.
- Beevor, Antony. (2009). D-Day: The Battle for Normandy. Penguin Books
- Ryan, Cornelius (1959). The Longest Day: June 6, 1944. Simon and Schuster, New York.
- Hastings, Max (1984). Overlord : D-Day and the battle for Normandy. Simon and Schuster, New York.
- Robert M. Murphy (2011). No Better Place to Die: Ste-Mere Eglise, June 1944―The Battle for la Fiere Bridge. Casemate
- Niklas Zetterling (2000). Normandy 1944: German Military Organisation, Combat Power and Organisational Effectiveness, Winnipeg: J.J. Fedorowicz.
📚 Further Reading – La Fiere Causeway
This battle study nests within the broader analytical framework explored in the Research Hub, where operational methods, operating environments, armies, commanders, and weapons are examined across conflicts and eras. The links below connect related studies across the wider body of battlefield analysis on the BattlefieldTravels site.
⚔️ Explore all battle studies from World War Two 1939-1945
🏛️Explore the museum of World War Two historic artefacts
The book list for this conflict includes the finest campaign studies, memoirs, and operational analyses available on the D-Day landings, selected specifically to complement this battlefield study.
📚World War Two – Recommended Reading
🗞️ For updates on new battlefield studies and research insights, you can subscribe to the Newsletter.
Related Battle Studies, Museum Pieces & Reading Resources
 ⚔️ D-Day: Brecourt Manor assault, Easy Company, 506th PIR,
6 June 1944
 ⚔️ D-Day: Sword Beach landings,
6 June 1944
 ⚔️ D-Day: Utah Beach landings,
6 June 1944
 ⚔️ D-Day: Omaha Beach landings,
6 June 1944
 📝 🔒Field Note: XXX Corps Orders, Leopoldsburg, Belgium, 15 Sep 1944
 ⚔️ D-Day: 101st Airborne Division and the Battle of Bloody Gulch,
13 June 1944
🧭 Battlefield Travel Guide: La Fière
Getting There
- Nearest Town: Sainte-Mère-Église (approx. 3 km east).
- Transport: Easily reached by car via the D15; short drive or cycle from Sainte-Mère-Église.
- Parking: Small car park available by the memorial and bridge, often busy on anniversaries.
Site Orientation
- Key Landmarks: The stone bridge over the Merderet, the Iron Mike paratrooper statue, and the preserved causeway stretching across the flooded lowlands.
- Walking Routes: Short walks along the causeway provide excellent perspectives on both the flooded fields and the defensive positions. The ground is flat but narrow; caution with traffic.
- Best Vantage Points: The bridge itself and the field edges around Cauquigny give the clearest sense of the bottleneck and how vital the crossing was.
Museums & Visitor Centres
- Airborne Museum (Sainte-Mère-Église): The primary interpretive centre for the 82nd and 101st Airborne in Normandy, with aircraft, dioramas, and personal stories.
- La Fière Memorials: On-site plaques and the Iron Mike monument commemorate the fierce fighting of 6–9 June 1944.
- Nearby: Dead Man’s Corner Museum (Saint-Côme-du-Mont) also covers the airborne struggle for control of the causeways.
On-Site Experience
- Interpretive Signage: Limited but multilingual; most detail is in Sainte-Mère-Église.
- Atmosphere: Quiet rural site; standing on the causeway with the flooded meadows on either side makes it easy to visualise the deadly choke point.
- Guides & Tours: Local battlefield guides and D-Day tour companies often include La Fière on half-day or full-day airborne itineraries.
Nearby Points of Interest
- Amfreville & Timmes’ Orchard: Defensive stands by scattered paratroopers, just west of La Fière.
- Chef-du-Pont Causeway: Another vital crossing fought over by the 82nd.
- Sainte-Mère-Église: The paratrooper in the church tower, museums, and cafés make a natural hub for exploring airborne battlefields.
Practical Tips
- When to Visit: Early morning or late evening for solitude; around 6 June the area is busy with commemorations and re-enactments.
- Facilities: Limited at the site; Sainte-Mère-Église offers cafés, restrooms, and accommodation.
- Special Considerations: The causeway is narrow with occasional vehicle traffic; watch footing if exploring field edges. Drone photography works well here, capturing the waterlogged terrain and bottleneck.
FAQ: Battle of La Fiere (6-9 June 1944)
A critical fight from 6–9 June 1944 for control of a causeway and bridge over the Merderet River, west of Sainte-Mère-Église, during the Normandy landings.
U.S. paratroopers of the 82nd Airborne Division (primarily 505th and 507th PIR) defended against
Control of the causeway secured the western flank of Utah Beach and allowed reinforcements and armour to move inland.
After four days of heavy fighting and several German attacks, the Americans held the bridge and causeway, suffering high casualties but ensuring the success of the Utah Beach link-up
Yes. The causeway, bridge, and memorials remain intact, with several monuments (including Iron Mike) commemorating the battle. Interpretive panels are placed along the causeway.
Subscribe to Battlefield Travels and receive a free E-Book Battlefield Guide
Unlock expert battlefield analysis, campaign reconstructions, and historical insights drawn from firsthand exploration and primary sources.
🗺️ You’ll receive:
🎖️ Exclusive historical insights you won’t find elsewhere
📘 A free eBook: 10 Tips for Exploring Historic Battlefields
📰 New battlefield studies straight to your inbox as they are published

⚔️ Go deeper — Members get exclusive access to the Deep Research Collection, Field Notes, and monthly Research Dispatches. Try membership free for 7 days, cancel anytime. From $9/month.