The day Scotland lost its King!
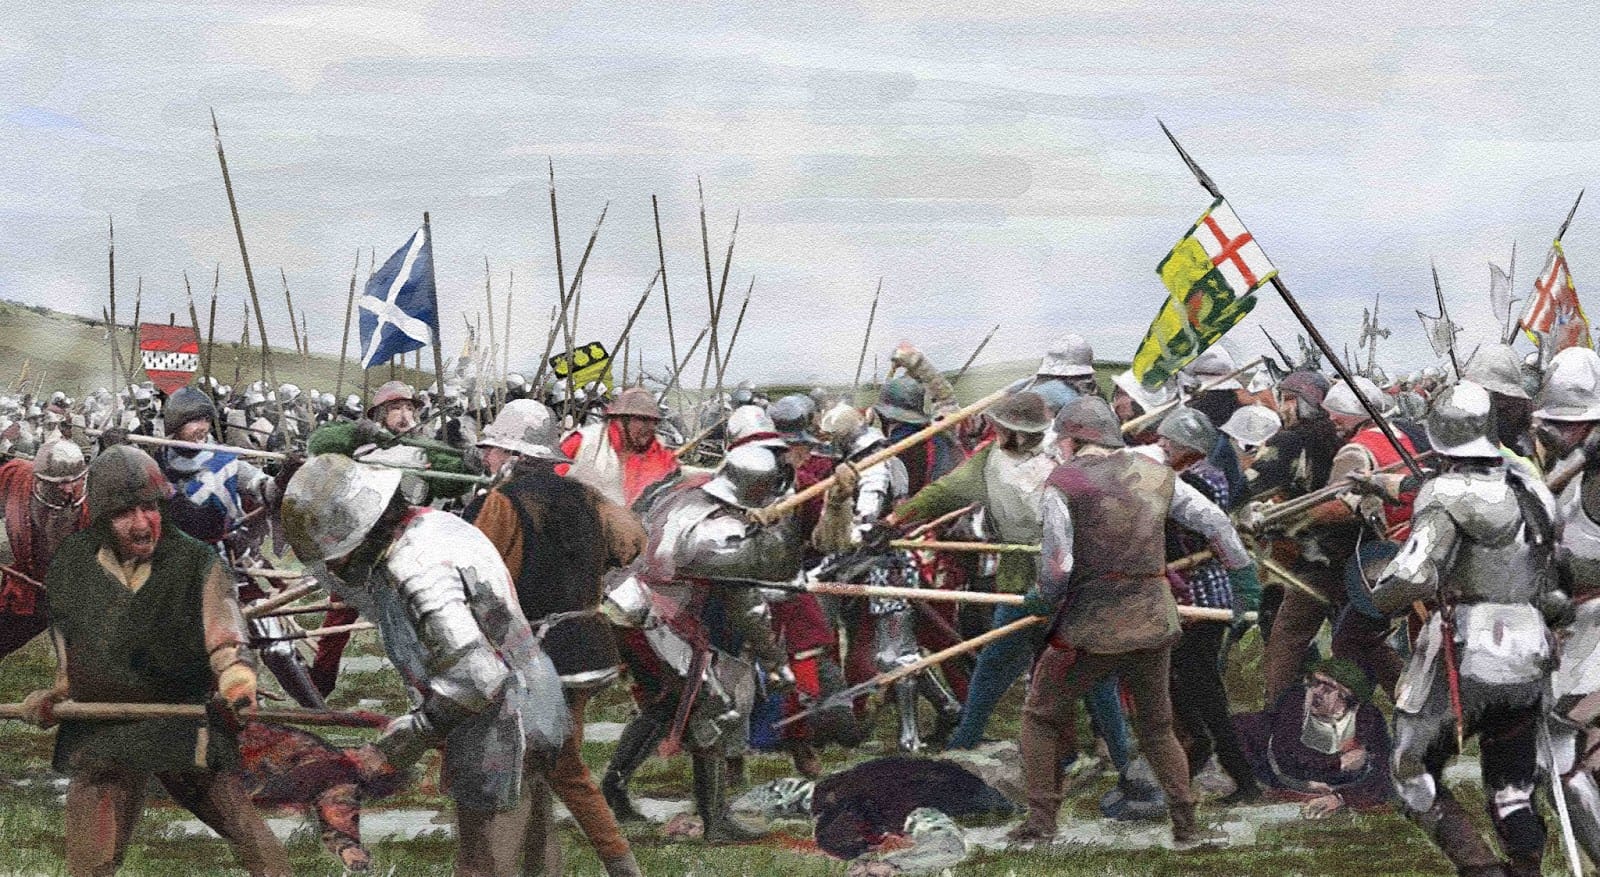
On 9 September 1513, the armies of Scotland and England clashed at Flodden Field near Branxton, Northumberland. The result was catastrophic for Scotland: King James IV was killed, alongside thousands of nobles and soldiers, in the bloodiest Anglo-Scottish battle ever fought.
Key facts
Google Earth map – location of the Battle of Flodden Field
Strategic context: James IV invasion of England in 1513
The Battle of Flodden Field was fought on 9 September 1513 in Northumberland, near the village of Branxton. It was part of the broader conflict known as the War of the League of Cambrai, a European-wide struggle involving France, the Holy Roman Empire, Spain, and England. While Henry VIII of England campaigned in France, his northern neighbour — King James IV of Scotland — opened a second front in support of France under the terms of the Auld Alliance (an alliance between the kingdoms of Scotland and France against England made in 1295).
The wider war
In 1511, Pope Julius II forged the Holy League to oppose French expansion in Italy. England, Spain, and the Papacy aligned against France. By 1513, Henry VIII personally led an expeditionary army to northern France, leaving the defence of England in the hands of Thomas Howard, Earl of Surrey, and other nobles.
France, desperate to distract England, invoked its alliance with Scotland. Bound by treaty to aid France if attacked, James IV declared war on England in August 1513. This decision committed Scotland to an offensive campaign at a time when Henry and most of England’s best troops were on the continent.
Scotland’s military strength
James IV had worked for years to modernise Scotland’s military, importing artillery and training his infantry in the Swiss pike style then dominant in European warfare. His army of around 34,000 men was one of the largest Scotland ever fielded, supported by French advisers and gunners. With Henry absent, James saw a rare opportunity to strike south, gain prestige, and assist his French ally by forcing England to recall forces from the continent.
The invasion of England
In late August 1513, James crossed the border with his full host, advancing into Northumberland. He quickly captured several English castles, including Norham, Wark, Etal, and Ford, securing key crossings over the River Tweed. His army was entrenched on the commanding high ground of Flodden Edge, a strong defensive position overlooking the surrounding countryside.
From this vantage, James could threaten the English interior and force Surrey to march against him. Confident in his artillery and in the new pike tactics of his infantry, James awaited battle. His decision to confront the English in an open field, rather than conduct a raid and withdraw, reflected both his desire for glory and the chivalric traditions of the age.
The stage was thus set: an ambitious Scottish king seeking a decisive victory to secure his dynasty’s prestige, versus an experienced English commander charged with protecting the northern frontier while his king fought abroad.
Opposing forces: James IV’s Scots vs Surrey’s English Army
 The Scottish Army
 The Scottish Army
King James IV mustered an estimated 34,000 men, one of the largest Scottish armies ever fielded. His host was a mixture of feudal levies, Highland clans, and Lowland contingents, supported by a strong artillery train and French advisers.
- Infantry: James sought to modernise his infantry by adopting the Swiss pike square system, then regarded as the most formidable infantry formation in Europe. He equipped thousands of Lowland soldiers with long pikes (up to 18 feet) imported from France, aiming to create dense blocks ‘Schiltrons’ that could repel cavalry and drive through enemy lines.
- Highland troops: Highlanders and border levies carried traditional weapons — claymores, axes, and shorter spears — but were less central to James’s plan.
- Artillery: Scotland’s artillery park was significant, including heavy cannon provided by France. However, many were cumbersome siege guns, difficult to manoeuvre on soft ground.
- Nobility and command: The Scottish nobility formed the officer class and many fought in the front ranks beside their men. James himself, in the chivalric tradition, placed himself in personal danger by commanding from the field rather than the rear.
The Scottish army was formidable on paper, but the adoption of the pike came with risks. Unlike the Swiss or Landsknechts, Scotland had little practical experience fighting with these weapons, and the terrain of Flodden would prove ill-suited to their effective use.
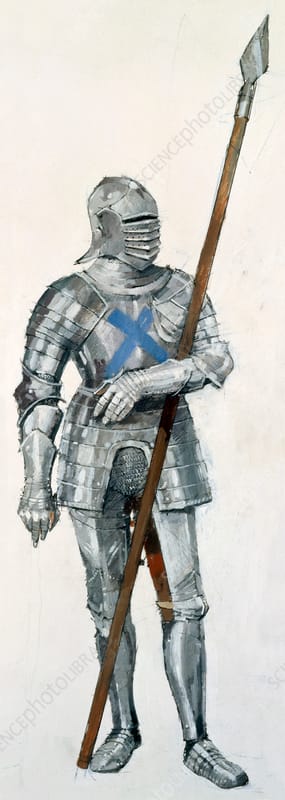
 The English Army
 The English Army
The English host, under Thomas Howard, Earl of Surrey, numbered around 26,000 men. Though smaller, it had several advantages: cohesion, experience in border warfare, and a balanced composition of troop types.
- Infantry: English infantry relied on traditional billmen armed with the billhook — a polearm combining axe blade, spike, and hook — well-suited for close-quarter fighting. Their formations were more flexible than the rigid Scottish pike squares.
- Archers: Longbowmen, though fewer than in earlier centuries, still provided a valuable skirmishing and supporting role.
- Artillery: Surrey had fewer guns than James, but they were lighter, more mobile field pieces, easier to deploy in battle.
- Leadership: Surrey was a veteran of northern command, his family having long experience in the Anglo-Scottish wars. His lieutenants, including his son Thomas Howard (future Duke of Norfolk), were seasoned commanders accustomed to fighting Scots in difficult terrain.
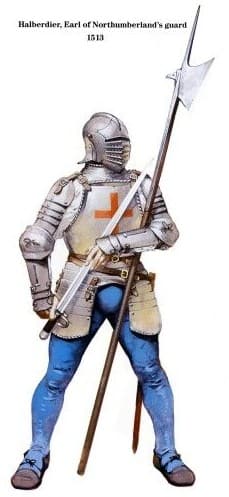
9 September 1513 – the battle begins
The march to contact
By early September, James IV held a strong position on Flodden Edge, a ridge overlooking the valley of the River Till. His army, supported by heavy artillery, dominated the approaches from the south. When Thomas Howard, Earl of Surrey, advanced from Newcastle with his 26,000-strong English host, he recognised the danger of attacking uphill into entrenched pike squares.
Instead, Surrey manoeuvred northwards, threatening to cut James’s line of retreat to Scotland. This forced the Scottish king to abandon the heights of Flodden and march east toward Branxton Hill, where he redeployed his army on 9 September. In doing so, James gave up the tactical advantage of terrain, a decision that astonished later commentators.
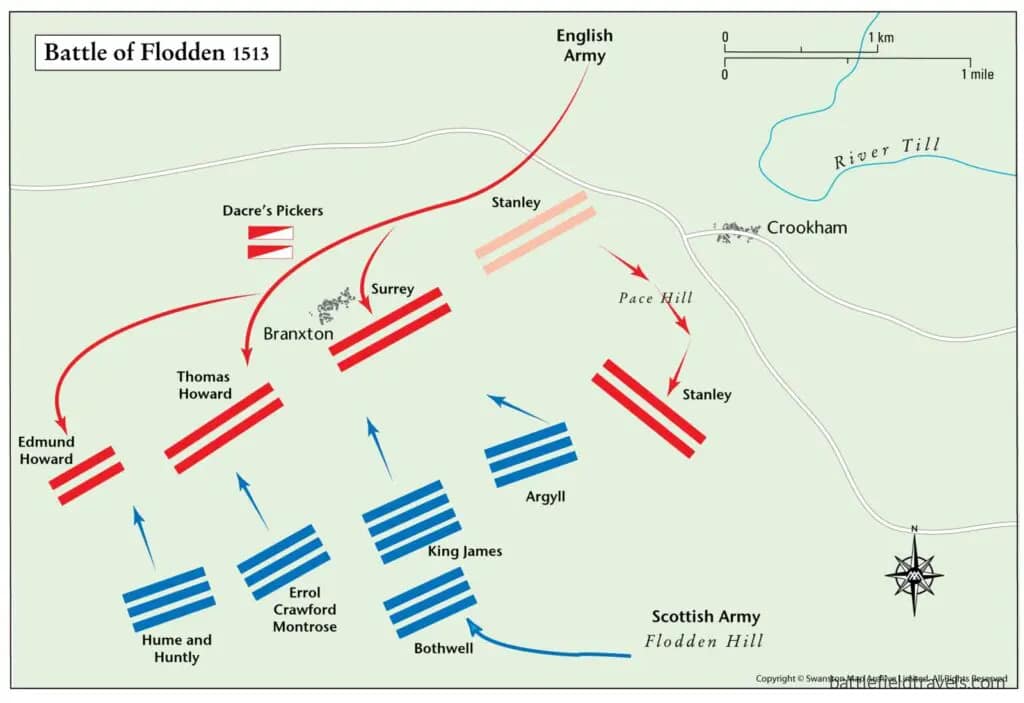
Opening artillery exchange
The battle opened with an exchange of artillery fire. The Scots possessed more and heavier guns, many supplied by France, but they were unwieldy siege pieces, poorly sited and slow to reload. The English artillery, though fewer in number, were lighter field pieces, more easily manoeuvred. Their fire proved more accurate and sustained, disrupting the Scottish front ranks. James’s cannon achieved little, and his infantry grew impatient under bombardment.
9 September 1513 – the Scottish advance
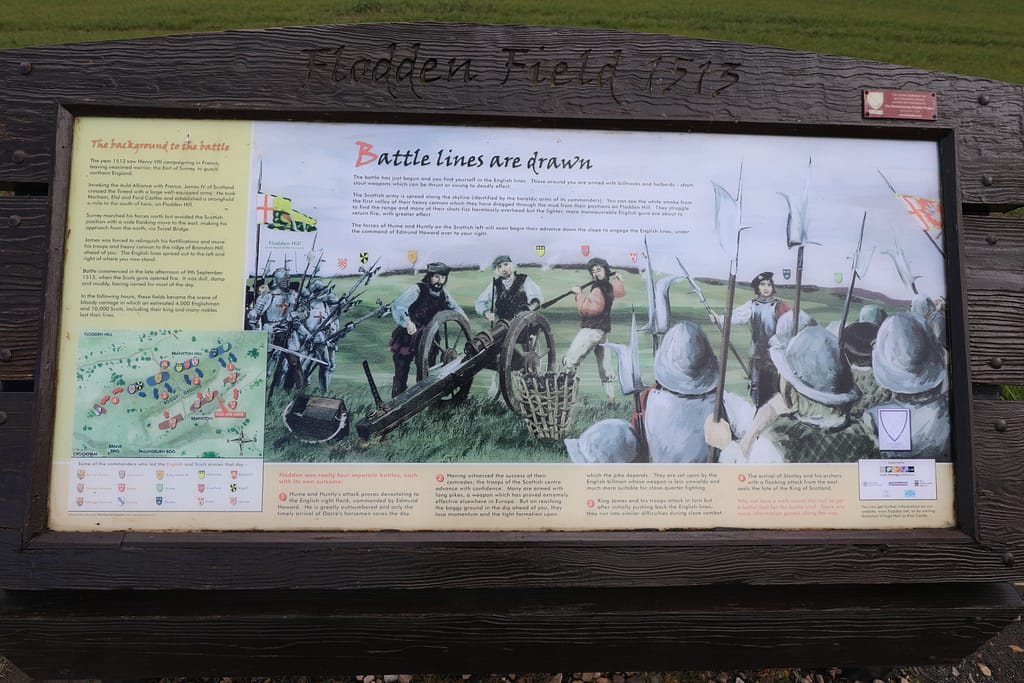
Seeking to bring the fight to close quarters, James ordered his schiltrons (pike formations) to advance downhill toward the English lines. This movement immediately exposed the weaknesses of his tactical system. The slope leading from Branxton Hill was cut by patches of marshy, uneven ground. The long pikes, effective on flat fields, became unwieldy in the bogs. Units lost cohesion, ranks compressed, and forward momentum faltered.
The English billmen, advancing uphill in counter-formation, exploited these difficulties. Armed with shorter polearms, they were better suited to fighting in the broken terrain.
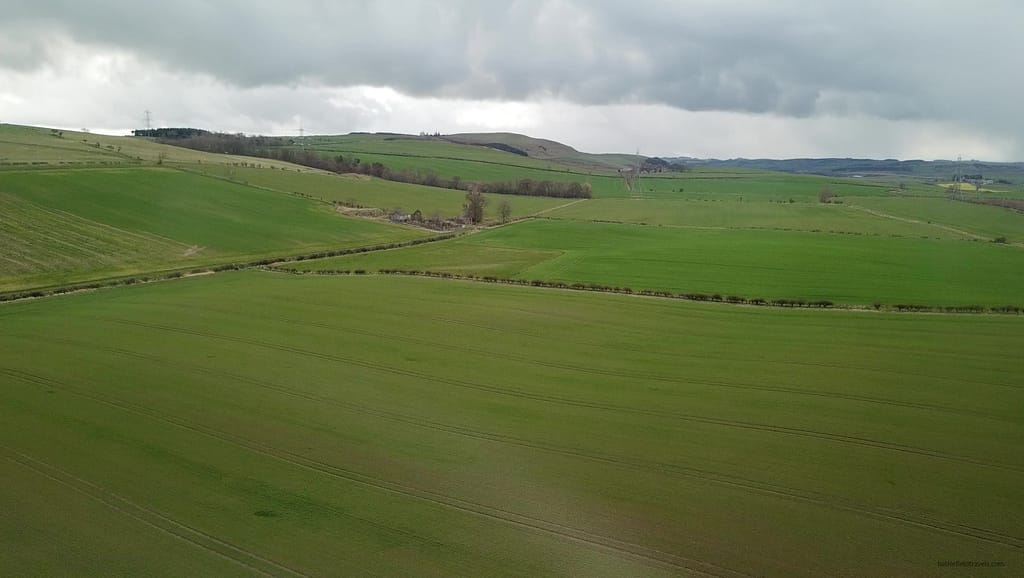
Clash of pike and bill
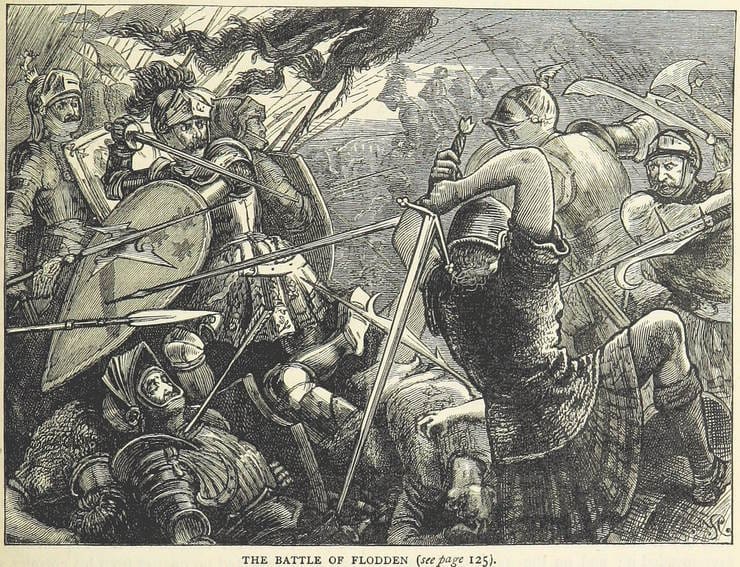
The first clash came on the English right, where the Scottish left descended into marshland and became mired. English infantry fell upon them with bills and swords, hacking into the disordered pike blocks. Losses were immediate and severe.
On the English left, the Scottish right advanced with greater momentum and pressed hard against Surrey’s line. Here the fighting was intense and prolonged, with the Scots making some headway before being checked by sustained English resistance. The central battle, where James himself commanded, surged forward with determination but was met by heavy artillery fire and disciplined English billmen.
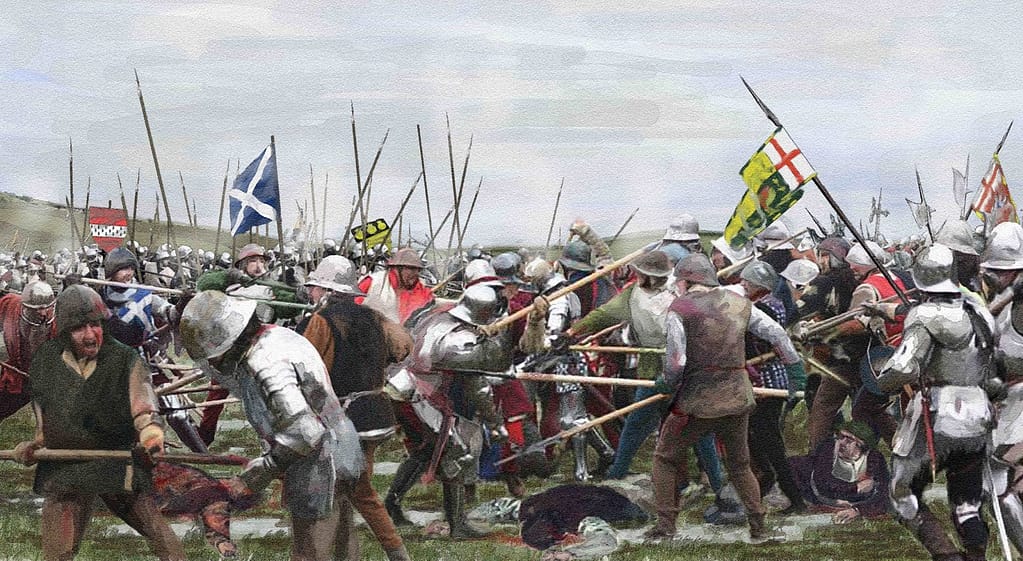
Contemporary chronicles describe a brutal, close-quarters struggle. The pikes, once blunted or broken, left the Scots vulnerable. The English bills, with their hooks and axe blades, dragged men from formation, cut down officers, and gave the English the edge in hand-to-hand combat.

9 September 1513 – death of James IV
Amid the chaos, King James IV fought on foot in the thick of the melee, accompanied by many of his nobles. Demonstrating great personal courage, he pressed into the English line. But as the fighting raged, James was struck down and killed, his body later identified among the fallen. He was the last reigning monarch of the British Isles to die in battle.
The deaths of so many commanders threw the Scottish army into confusion. As news spread of the king’s fall, morale collapsed.
9 September 1513 – Scottish collapse and rout
With the left shattered in the marshes and the centre breaking under pressure, the Scottish host began to disintegrate. English forces pressed their advantage, driving the Scots from Branxton Hill. What began as an orderly retreat turned into a rout. Thousands were cut down in the pursuit northwards.
By nightfall, the battlefield was strewn with Scottish dead, including many of the kingdom’s leading nobles, bishops, and officers. Flodden was not only a military disaster but a political catastrophe.
⚔️ Go deeper — Members get exclusive access to the Deep Research Collection, Field Notes, and monthly Research Dispatches. Try membership free for 7 days, cancel anytime. From $9/month.
Outcomes: casualties, consequences, and the death of a King
Casualties and losses
The Battle of Flodden was one of the bloodiest battles ever fought on British soil.
- Scottish losses: about 10,000 killed, an enormous proportion of the force engaged. The toll included much of the Scottish nobility and officer corps.
- English losses: around 1,500 dead, heavy but sustainable given the scale of the engagement.
The disparity reflected the breakdown of the Scottish advance in difficult ground and the ferocity of the English pursuit.
Death of James IV
The most significant casualty was King James IV himself. Fighting in the front rank with his nobles, James was cut down during the melee. His body was later found and identified, though accounts differ as to the manner of his death. With him fell the last reigning monarch of the British Isles to die in battle — a symbolic end to an era of chivalric kingship.
Losses among the Scottish Nobility
The scale of aristocratic loss was staggering:
- Twelve earls, including the Earls of Lennox, Argyll, and Bothwell.
- Two bishops (St Andrews and the Isles).
- Dozens of barons, knights, and clan leaders.
This near decapitation of the political and military leadership of Scotland left the kingdom leaderless at a critical moment.
Political aftermath in Scotland
The death of James IV left the throne to his infant son, James V, barely a year old. A regency was established under the Queen Dowager, Margaret Tudor — sister of Henry VIII of England. This created a paradoxical situation in which the Scottish throne passed to the son of a woman directly tied to the English royal family. The political vacuum, factional rivalries, and heavy casualties crippled Scotland’s ability to wage further offensive war for a generation.
Consequences for England
For England, the victory was decisive but came at a time when Henry VIII was campaigning in France. While Henry gained little from his French expedition, Surrey’s victory at Flodden gave England a propaganda triumph. It reassured the northern counties, removed the immediate Scottish threat, and provided the Tudors with a symbol of dynastic strength.
Long-term significance
Flodden reshaped Anglo-Scottish relations:
- Scotland entered a period of political instability and military weakness.
- English confidence in its northern defence grew, allowing Henry to continue his continental ambitions.
- The battle became ingrained in cultural memory — celebrated in English chronicles as a triumph, mourned in Scottish ballads as a national tragedy.
Flodden was not merely a battlefield defeat: it was a national catastrophe for Scotland, altering the balance of power on the island and marking the end of an older medieval style of kingship in which monarchs led armies from the front.
The battlefield today: visiting Flodden Field
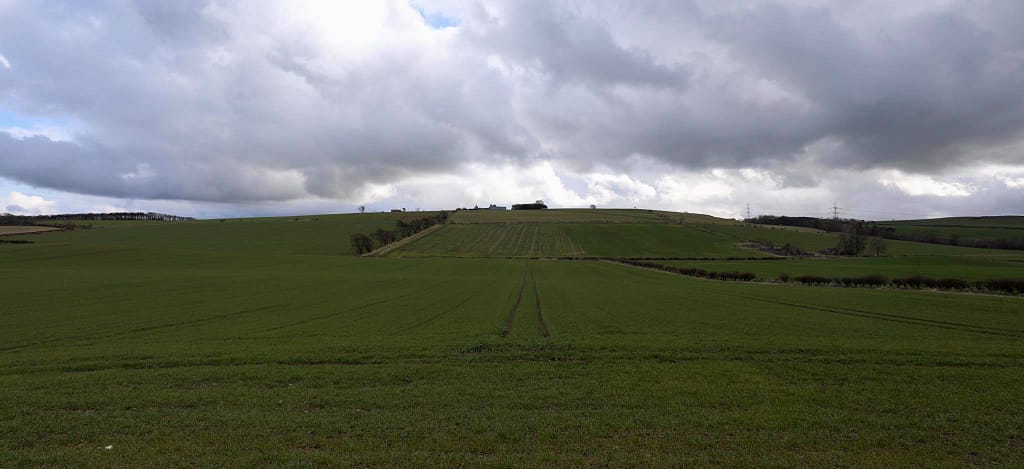
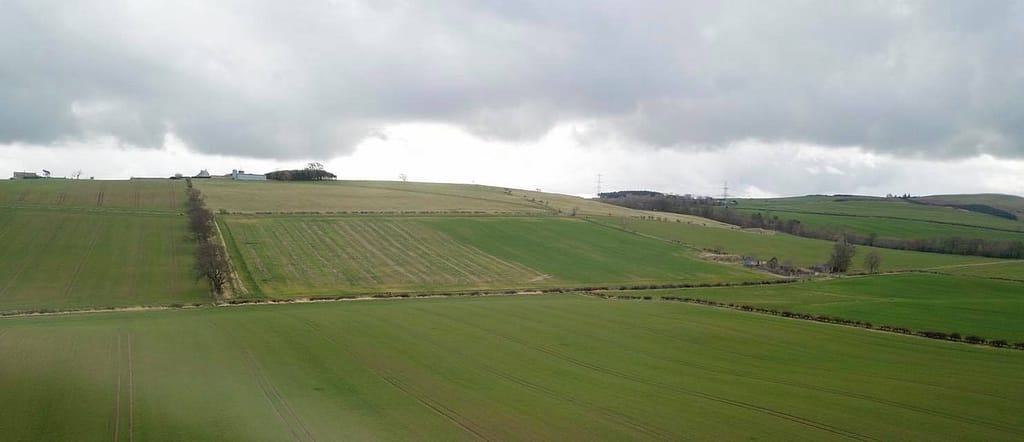
The battlefield of Flodden lies near the village of Branxton in Northumberland, about 100 km southeast of Edinburgh and 6 km from the English–Scottish border. Unlike many later battlefields, Flodden remains a quiet, compact rural site, its open fields and low ridges largely unchanged since 1513.
Terrain and orientation
The ground is key to understanding Flodden:
- The Scottish army originally occupied the higher slopes of Flodden Edge, before manoeuvring east onto Branxton Hill.
- Between the Scottish and English lines lay a stretch of boggy, uneven ground. In 1513, this marsh disrupted the long Scottish pike formations and contributed directly to their collapse.
- Today, the ridges and depressions remain visible; walking the ground gives a strong sense of how terrain dictated the outcome.
Memorials and interpretation
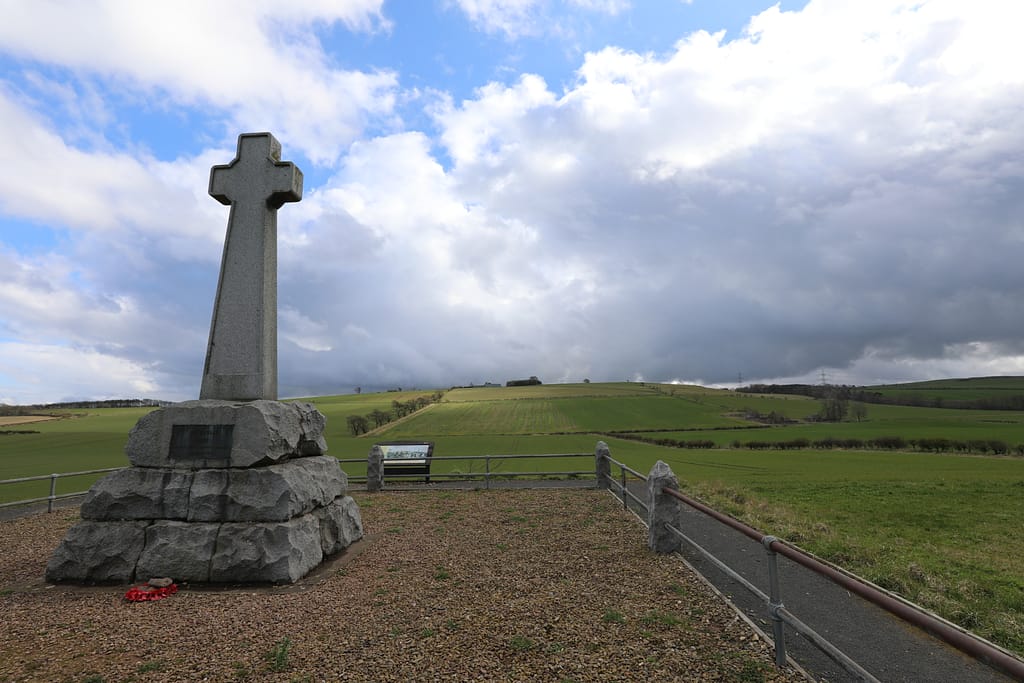
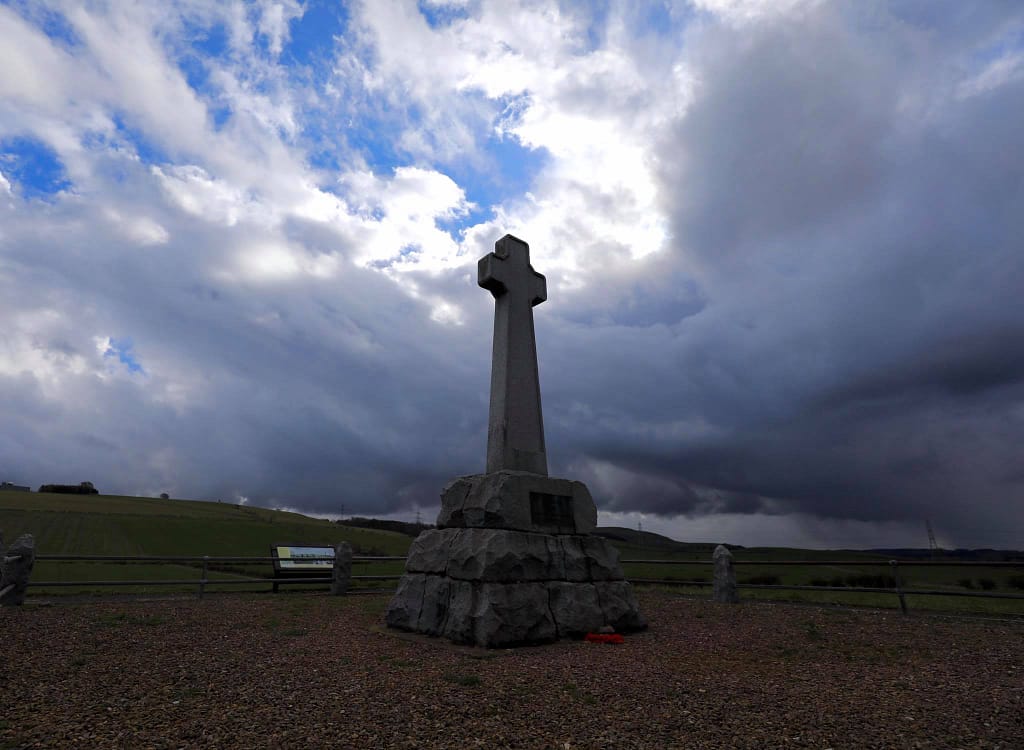
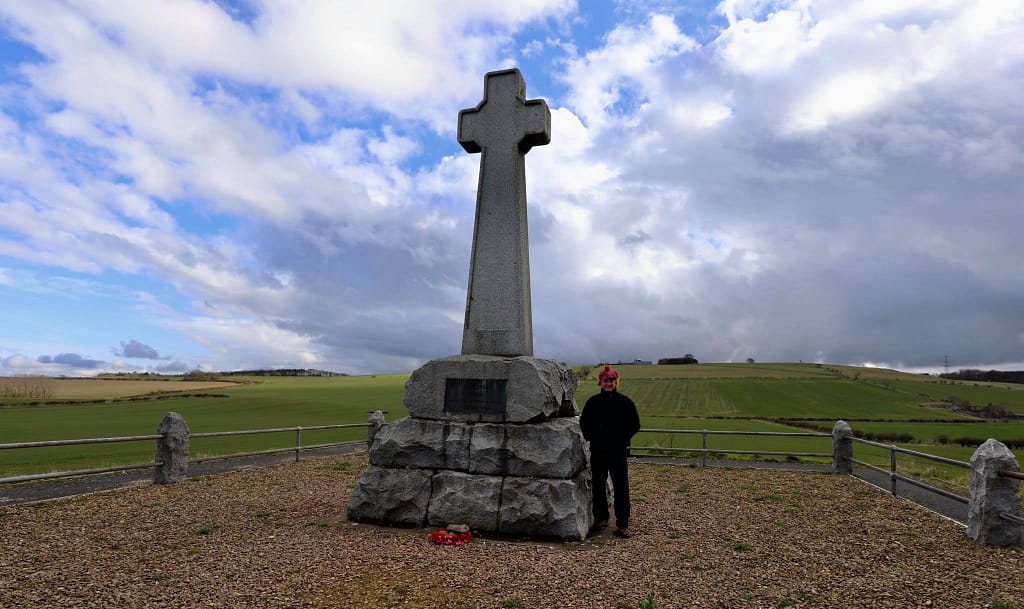
A granite cross monument, erected in 1910, marks the approximate centre of the battlefield. Smaller plaques and memorials are positioned around the site, including markers to the fallen and interpretive boards explaining troop positions and phases of the battle.
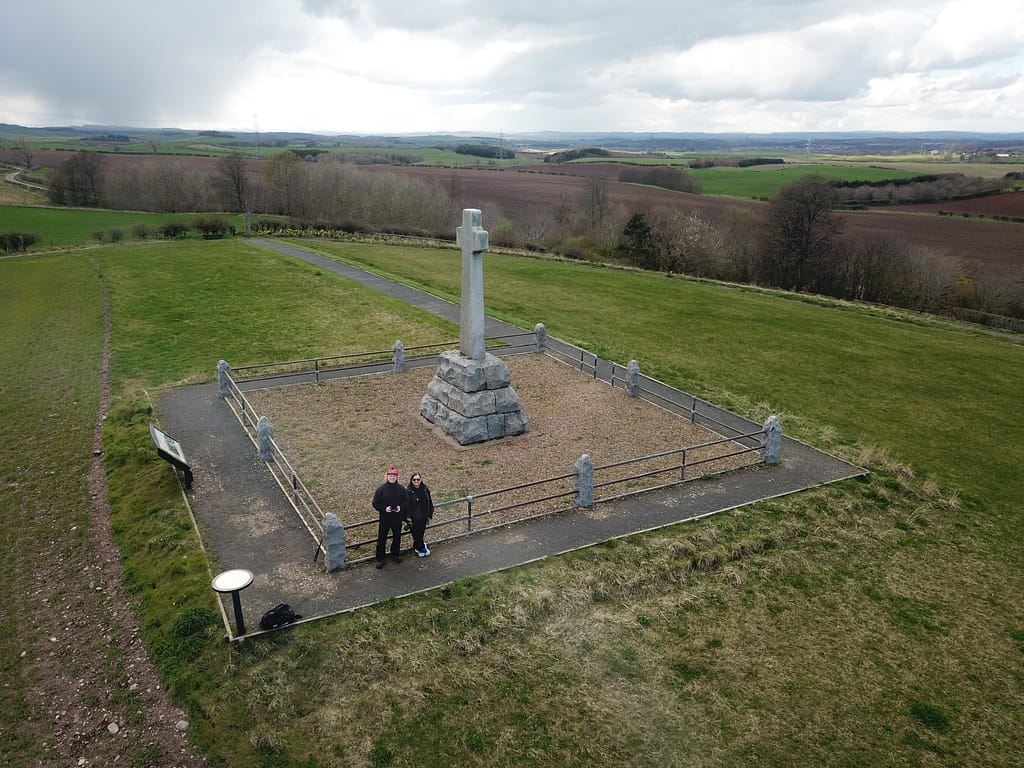
The Flodden 1513 Ecomuseum, managed by the Flodden Heritage Trust, is not a single building but a network of trails, plaques, and interpretation points across the wider border region. These connect Flodden to related sites such as Norham Castle and Etal, both of which fell to James IV’s army during the campaign.
Visitor experience
The battlefield can be explored comfortably in 2–3 hours. The site is open farmland, still free of modern development. The walk from Branxton village allows visitors to cross the ground between the English and Scottish positions, tracing the ridges and marsh where the battle was decided.
The atmosphere is strikingly quiet — a rolling landscape of fields and hedgerows, with only monuments and panels to hint at the scale of the slaughter. Unlike heavily commercialised sites, Flodden retains a solemn simplicity.
Access and Facilities
- Visitor Centre: None on site, but local heritage centres and the Flodden Heritage Trust website provide context.
- Facilities: Limited; Branxton and nearby villages have small pubs and accommodation.
- Best vantage point: The top of Branxton Hill offers the clearest overview of both Scottish and English positions.
Found this useful? Buy me a coffee — it helps fund future battlefield research


Authored by Mick Prictor, a retired military officer with 40 years’ service, and a military historian specialising in terrain-focused analysis of tactics, doctrine, and command decision-making in land warfare. His work draws on extensive battlefield fieldwork—more than 280 sites worldwide—and one of the world’s largest private collections of historic military arms, uniforms, and equipment. About me
Sources & Further Reading
- John Sadler (Author), Stephen Walsh (Illustrator), 2006. Flodden 1513: Scotland’s greatest defeat (Campaign, 168) (Osprey Publishing).
- George Goodwin, 2013. Fatal Rivalry: Flodden, 1513: Henry VIII and James IV and the Decisive Battle for Renaissance Britain. (W. W. Norton & Company)
📚 Further Reading – War of the League of Cambrai
This battle study nests within the broader analytical framework explored in the Research Hub, where operational methods, operating environments, armies, commanders, and weapons are examined across conflicts and eras. The links below connect related studies across the wider body of battlefield analysis on the BattlefieldTravels site.
⚔️ Explore all battle studies from the War of the League of Cambrai
🏛️Explore the museum of Ancient and Medieval historic artefacts
The book list for this conflict includes the finest campaign studies, memoirs, and operational analyses available on the War of the League of Cambrai, selected specifically to complement this battlefield study.
📚War of the League of Cambrai – Recommended Reading
🗞️ For updates on new battlefield studies and research insights, you can subscribe to the Newsletter.
Related Battle Studies, Museum Pieces & Reading Resources


🧭 Battlefield Travel Guide: Flodden (9 September 1513)
Getting There
- Nearest Towns: Branxton village is adjacent; Coldstream and Berwick-upon-Tweed provide wider services.
- Access: About 100 km southeast of Edinburgh; 6 km south of the Scottish border. Accessible by car via the A697.
- Parking: Small free car park near Branxton with direct access to the battlefield trail.
Site Orientation
- Key Landmarks: Branxton Hill (Scottish position), Flodden Edge (initial Scottish camp), boggy ground between the ridges where the clash occurred.
- Best Vantage Points: Top of Branxton Hill for an overview of both armies’ positions; marshy low ground illustrates where the Scottish advance broke apart.
- Walking Routes: Well-marked trail linking monuments and interpretation panels; full circuit takes 1.5–2 hours.
Museums & Visitor Centres
- On-site: No formal visitor centre; battlefield interpretation panels and monuments provide context.
- Nearby: Flodden 1513 Ecomuseum (network of sites across the border region, including Norham and Etal Castles).
On-Site Experience
- Interpretive Signage: Heritage Trust boards at major points explain troop movements, commanders, and phases of the battle.
- Atmosphere: Quiet farmland with open views; the unchanged ridges and marshland provide strong terrain context.
- Monuments: Large granite memorial cross (1910) at battlefield centre; plaques marking English and Scottish positions.
Nearby Points of Interest
- Related Sites: Norham Castle and Etal Castle, both captured by James IV in the campaign.
- Local: Coldstream Museum (military history), Berwick’s Elizabethan walls, and border walking trails.
Practical Tips
- When to Visit: Spring and summer provide clearer walking conditions; autumn commemorations mark the battle’s anniversary.
- Facilities: None on site — bring water and suitable clothing; Branxton and Cornhill-on-Tweed offer pubs and accommodation.
- Notes: Battlefield is open farmland — respect paths and farming activity. Allow 2–3 hours for full exploration.
Subscribe to Battlefield Travels and receive a free E-Book Battlefield Guide
Unlock expert battlefield analysis, campaign reconstructions, and historical insights drawn from firsthand exploration and primary sources.
🗺️ You’ll receive:
🎖️ Exclusive historical insights you won’t find elsewhere
📘 A free eBook: 10 Tips for Exploring Historic Battlefields
📰 New battlefield studies straight to your inbox as they are published

⚔️ Go deeper — Members get exclusive access to the Deep Research Collection, Field Notes, and monthly Research Dispatches. Try membership free for 7 days, cancel anytime. From $9/month.