Jacobite highland charge in the dawn mist!
The Battle of Prestonpans, fought on September 21, 1745, was a critical engagement during the Jacobite Rising of 1745. The rebellion, led by Charles Edward Stuart, ‘Bonnie Prince Charlie’, aimed to restore the Stuart dynasty to the British throne.
Key facts
🗺️ Battle of Prestonpans, 21 September 1745
⚔️ Jacobite Rising 1745-46
🪖 2,500 Highlanders under Bonnie Prince Charlie vs 2,100 British troops under General Sir John Cope
🎯 Viet Minh combined-arms assault against a small, isolated French outpost
Visit the virtual museum of weapons, uniforms and equipment of the Jacobite Rising of ’45
Google Earth map – Location of the Prestonpans battlefield
🧭🥾 Walking the Battlefield
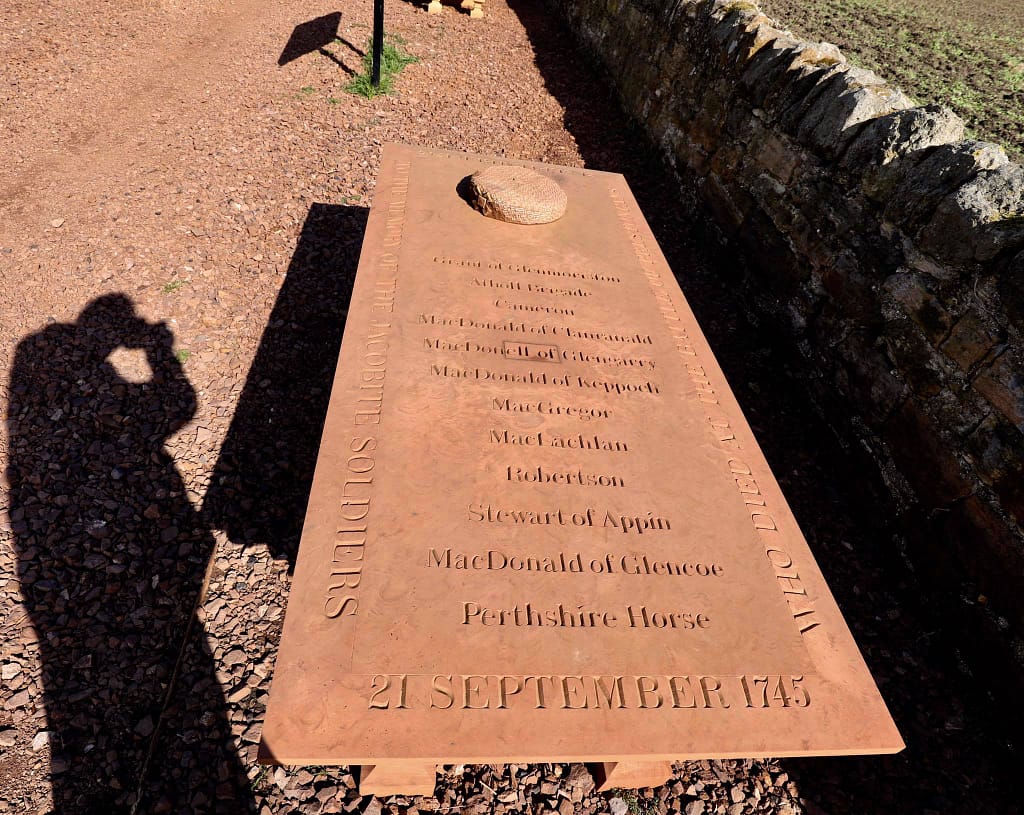
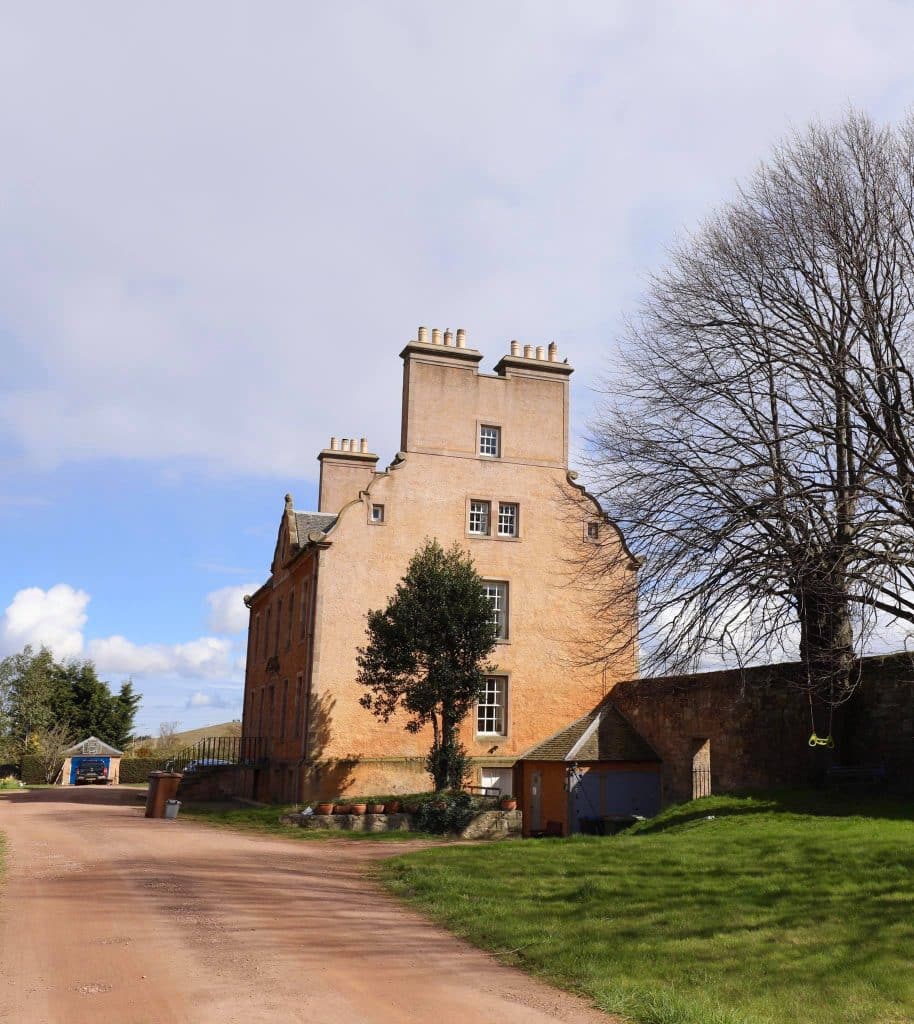
I visited the Prestonpans battlefield in April 2019, equipped with several accounts of the battle, diagrams, maps and GIS overlays. The battlefield is remarkably unchanged since 1745. While the town of Prestonpans has grown, many of the original buildings are still there, and the surrounding farmland is mostly undisturbed. The battlefield is well marked with interpretive plaques and diagrams.
Background to the Jacobite Rising of 1745
(The name Jacobite refers to the followers of the deposed Catholic Stuart King James II (1685-88), and his heirs. Jacobite is derived from the Latin rendering of James as ‘Jacobus’)
The Battle of Prestonpans, fought on September 21, 1745, was a critical engagement during the Jacobite Rising of 1745. The rebellion, led by Charles Edward Stuart, ‘Bonnie Prince Charlie’, aimed to restore the Stuart dynasty to the British throne. Charles, the grandson of the deposed King James II, landed at Glenfinnan in July 1745 and quickly gathered support among the Highland clans. His army marched on Edinburgh to challenge the authority of the Hanoverian King George II.
The British government, under the Duke of Newcastle, underestimated the Jacobite threat. However, as the rebellion gained momentum, the government dispatched forces to suppress it. Sir John Cope, commander of government troops in Scotland, was tasked with stopping the Jacobite advance. Cope moved his army north to confront the rebels, but Charles outmaneuvered him and captured Edinburgh on September 17, leaving only Edinburgh Castle in government hands. Cope then redirected his forces to the east coast, landing at Dunbar and marching towards Prestonpans to confront the Jacobites.
The Opposing Forces: Bonnie Prince Charlie’s Jacobites versus John Cope’s Government army
The Jacobite Army
The Jacobite army, led by Charles Edward Stuart, comprised about 2,500 men, mostly Highland clansmen. These soldiers were known for their ferocity in battle and their use of the devastating Highland charge. The Highland charge sought to neutralise British advantages in disciplined musketry by rapidly closing with the enemy to engage in hand-to-hand combat. The Jacobites were lightly armed, with many carrying broadswords, targe shields, and a mix of muskets and pistols. Their leadership included experienced commanders such as Lord George Murray and Cameron of Lochiel, both of whom played critical roles in the battle’s planning and execution.
The Government Army
Sir John Cope’s government army numbered around 2,300 men, composed of regular British infantry regiments, dragoons, and artillery. These troops were well-disciplined and well-equipped with muskets and bayonets. They were trained in the conventional line tactics of the era. Cope’s forces included the 13th and 14th Dragoons, several battalions of infantry, and artillery pieces. Despite their superior firepower, the government troops lacked experience in fighting against Highland tactics, and their morale was questionable due to their rapid redeployment and lack of confidence in their leadership.
Phases of the Battle of Prestonpans
Initial deployments
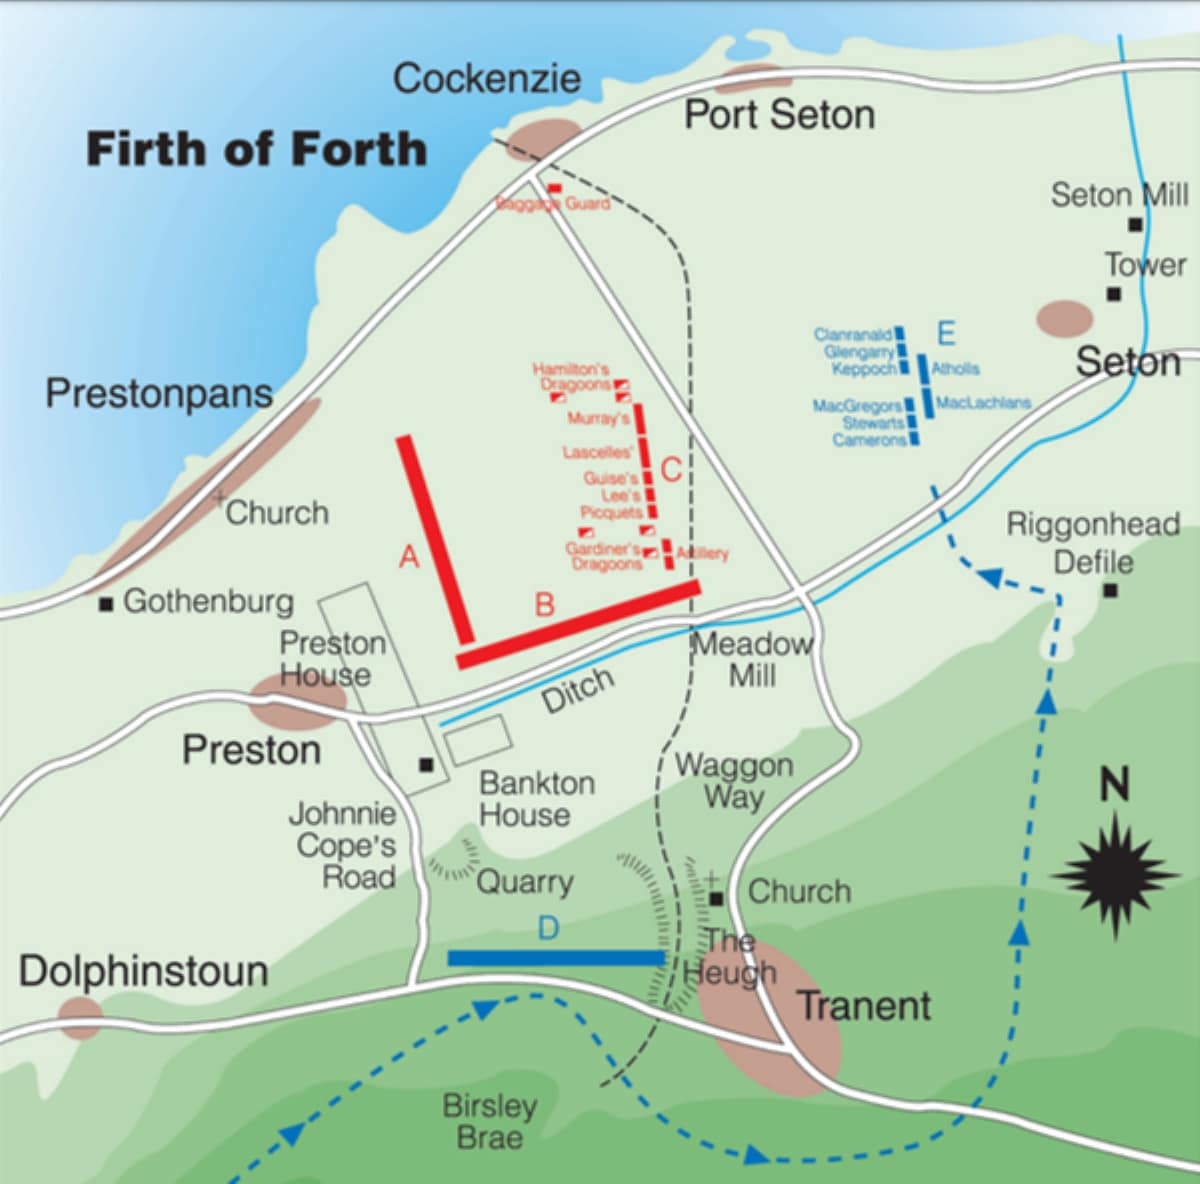
On the evening of September 20, Cope positioned his army near the village of Prestonpans, east of Edinburgh, choosing ground that he believed was defensible. The Firth of Forth protected his right flank, and his left was secured by a marshy area that he assumed would hinder any Jacobite attack. He deployed his troops in a conventional line formation, oriented towards the south, with his dragoons on the flanks and artillery positioned to cover the open ground.
The Jacobites, observing Cope’s position from higher ground at Birsley Brae, realised that a frontal assault across the marsh would be difficult. However, local intelligence provided by a sympathetic farmer revealed a hidden path through the marsh that would allow them to outflank the government troops. That night, Charles and his commanders decided to use this route to launch a surprise attack at dawn.
⚔️ Go deeper — Members get exclusive access to the Deep Research Collection, Field Notes, and monthly Research Dispatches. Try membership free for 7 days, cancel anytime. From $9/month.
Jacobite flank march
Before dawn on September 21, the Jacobite army moved through the marsh under cover of darkness. The movement was carried out in near silence, allowing them to approach undetected. The Jacobites formed into three divisions, with Clan MacDonald on the right, the Camerons and Stewarts in the centre, and the MacGregors and other clans on the left. Each division was carefully positioned to maximise the impact of their attack on Cope’s unsuspecting troops.
Jacobite charge
As dawn broke, the Jacobites launched their assault with the infamous Highland charge. They moved quickly, covering the distance to the government lines before Cope’s troops could organise an effective response. The charge was accompanied by a fierce war cry, designed to instil terror in the enemy ranks.
The government forces were caught entirely off guard. Cope had positioned his artillery at the front, but the speed of the Jacobite attack rendered it ineffective. The government infantry attempted to fire a volley into the advancing Highlanders, but the thick morning mist and the Jacobites’ rapid movement negated the effect of the volley.
Collapse of the Government Army
The left flank of Cope’s army, held by the dragoons, was the first to break under the Highland charge. The dragoons, startled by the ferocity of the Highlanders, panicked and fled without putting up much resistance. Their retreat left the government infantry exposed, and the Jacobites quickly exploited this vulnerability.
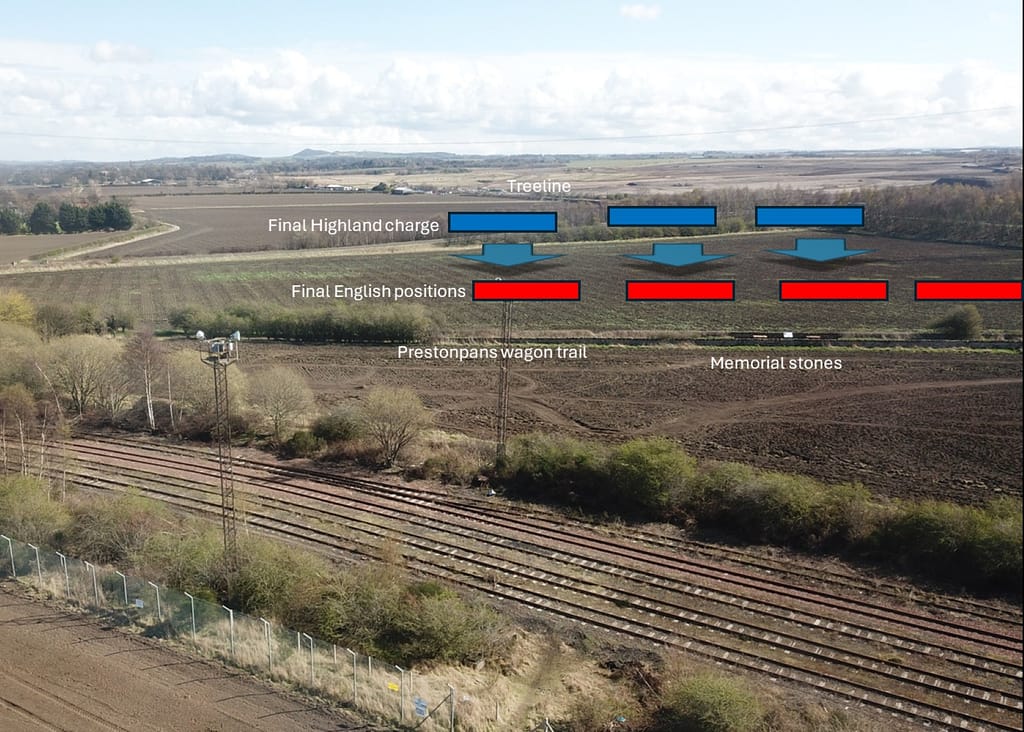
At a range of about 30 yards, the highlanders halted, fired their muskets once and dropped them on the ground. and then charged the final few yards with targe and broadsword. The government troops, trained in Bland’s manual of bayonet drill, thrust at the attacking highlanders, only to have their bayonet points deflected by the targe, while the broadsword struck down from above. Pope’s centre attempted to hold its ground, refusing flanks in an attempt to resist the charge. But the Jacobites overwhelmed them with a combination of musket fire and hand-to-hand combat. The Highlanders wielded broadswords and targes to devastating effect, cutting down government soldiers who could not get away.
Within minutes, the right flank of the government line began to falter. Despite some efforts to organise a defence, the sheer force and determination of the Jacobites proved too much. Many government soldiers abandoned their weapons and attempted to flee, only to be pursued and captured.
Aftermath on the Prestonpans battlefield
The battle was effectively over in less than fifteen minutes. Government casualties were severe, with many soldiers either killed or taken prisoner. Sir John Cope managed to escape the battlefield with a small contingent of cavalry, but his army was destroyed. More than 1,500 government troops were captured, and those who escaped were widely ridiculed for their swift defeat.
By contrast, Jacobite casualties were minimal, with fewer than 100 dead or wounded. The victory solidified Charles Edward Stuart’s position in Scotland and greatly enhanced the morale of his forces.
The Jacobites had made effective use of the micro-terrain around Prestonpans to mask their movements and their assembly area. They had then taken advantage of the mist and fog to cover the first stages of the advance. The concept of exploiting small scale terrain features and environmental conditions in battle is examined further in the Micro-Terrain and Battlefield Decision-Making research hub.
Outcomes: Jacobite victory, government humiliation
The Battle of Prestonpans was a resounding victory for the Jacobites and significantly boosted the rebellion. The government’s failure to contain the rebellion early on emboldened Jacobite supporters. The victory allowed the Jacobites to consolidate their control over Scotland, further bolstering their forces with new recruits and supplies captured from the defeated government army.
For the British government, the defeat at Prestonpans was a humiliating setback. Cope’s failure to anticipate the Jacobite maneuver and his army’s quick collapse exposed weaknesses in government forces. The battle also demonstrated the effectiveness of Highland tactics when executed with surprise and determination. In the aftermath, the British government increased efforts to crush the rebellion, eventually leading to the decisive Battle of Culloden in April 1746.
How to deal with the highland charge?
The Highland charge that destroyed Cope’s army at Prestonpans in September 1745, and repeated the feat against Hawley’s army at Falkirk Muir in January 1746, exposed a fundamental weakness in standard British bayonet drill against targe and sword. The tactical solution, developed during Cumberland’s six-week training programme at Aberdeen, was used to devastating effect at Culloden four months later. For a full primary source analysis of that innovation, see: The Culloden Bayonet Drill: How Cumberland’s Army Solved the Highland Charge.
The Prestonpans battlefield today
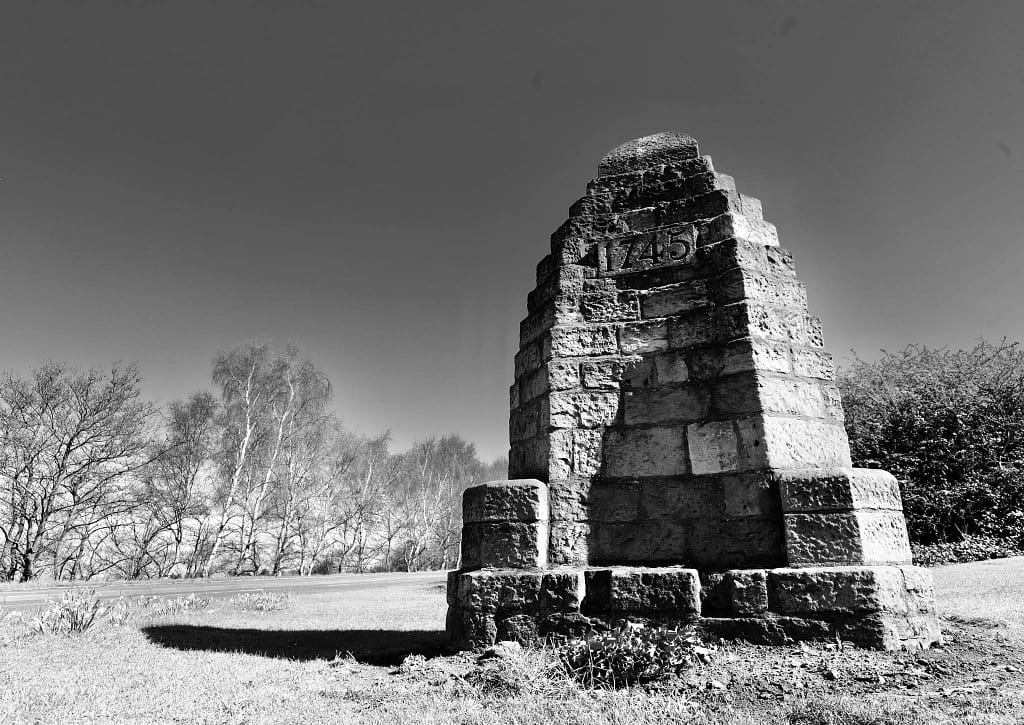
The site of the Battle of Prestonpans is now preserved as a historical landmark. Several monuments and plaques commemorate the battle, and there is a lookout to the south of the battlefield, about where the highlanders made their flank march. Guided tours and reenactments provide historical context, allowing visitors to gain insight into the events of 1745.
Although much of the battlefield has been developed over time, key locations, such as the site of the Jacobite charge and government positions, remain accessible. The Prestonpans Battlefield Trust has worked to preserve the site and promote awareness of this crucial engagement in Scottish and British history. There is a current campaign to establish a visit centre. The website is below:
https://www.battleofprestonpans1745.org/visitor-centre-campaign/
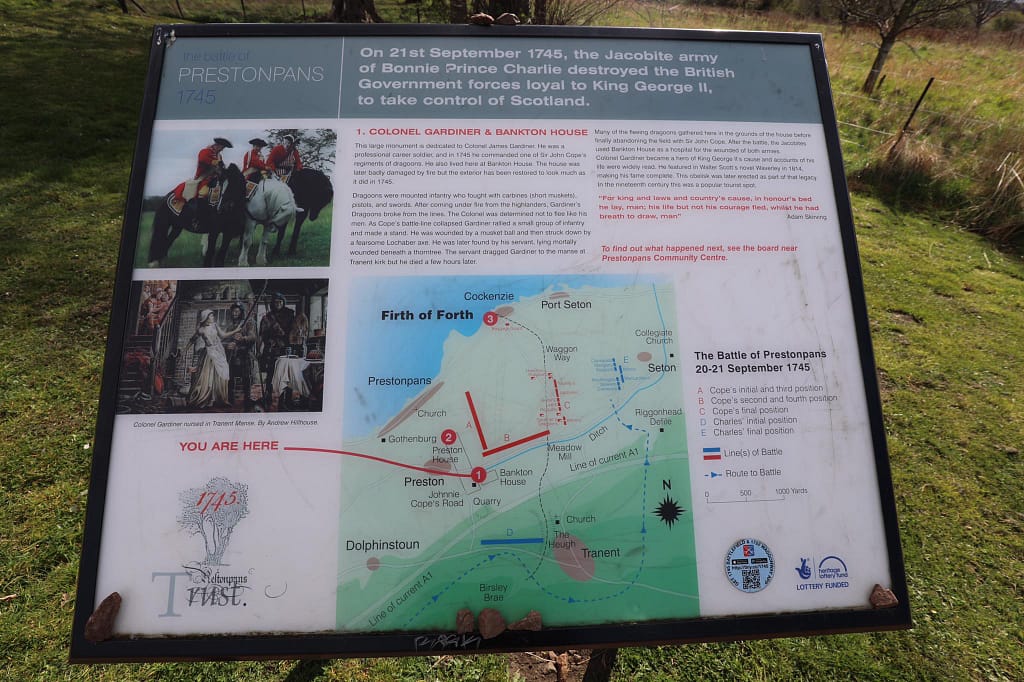
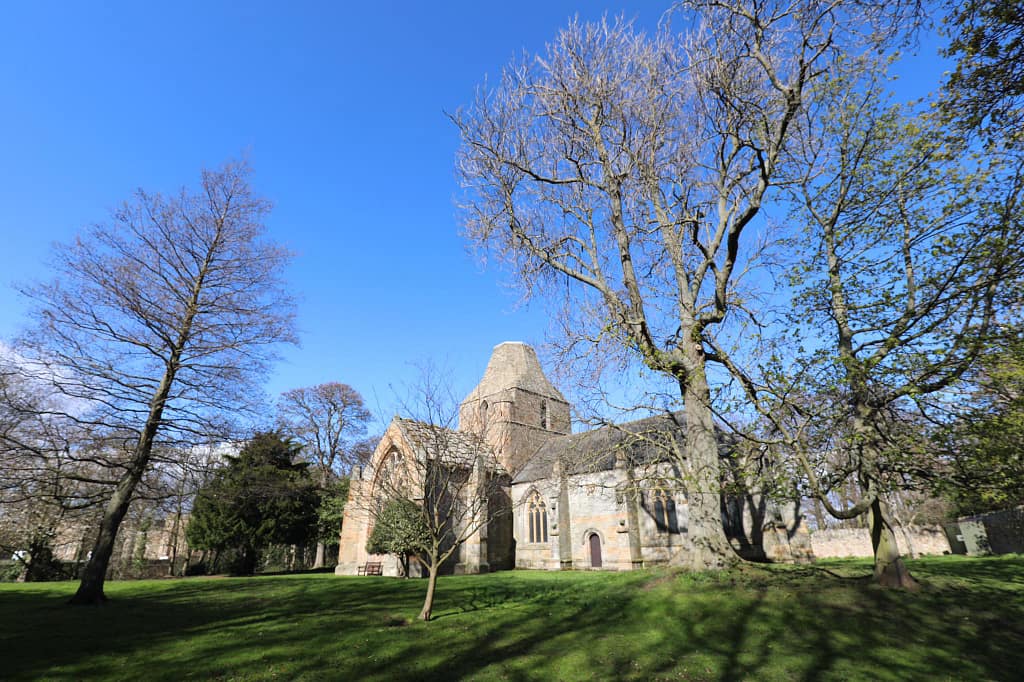

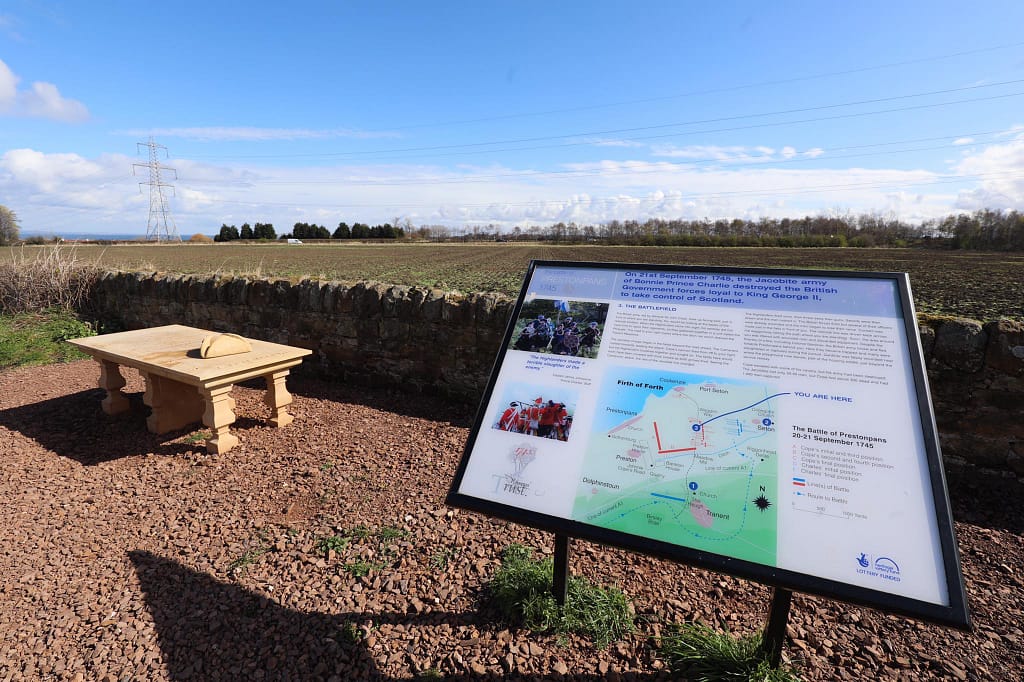

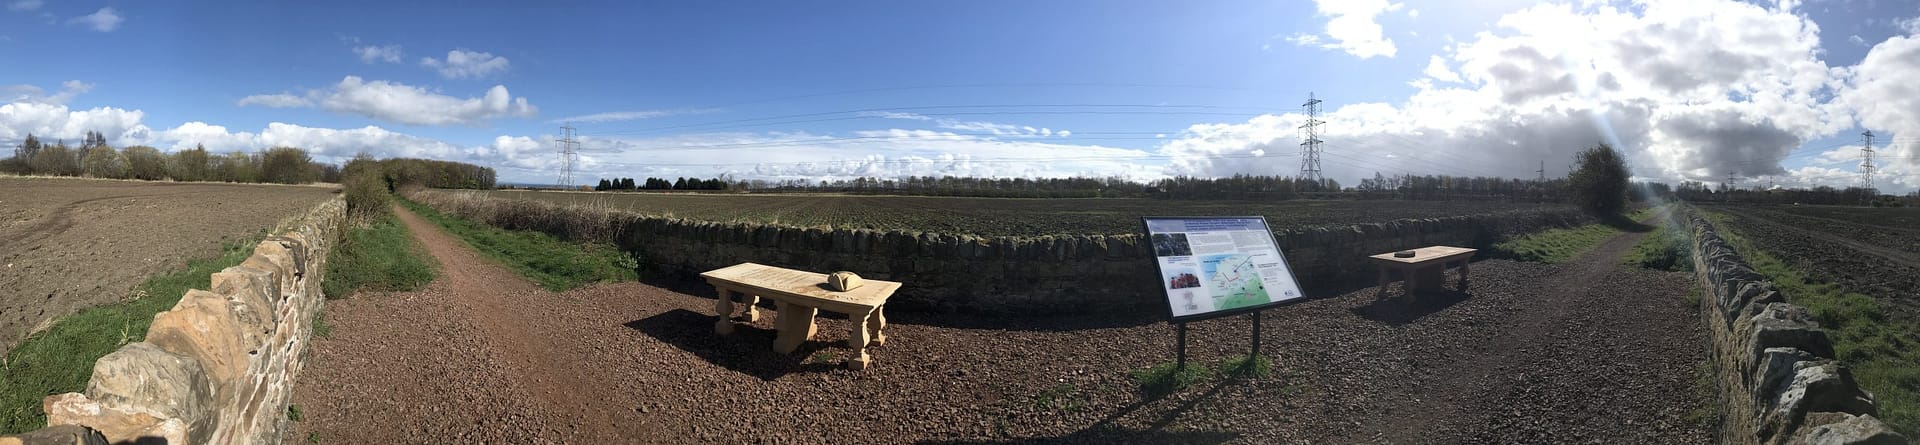
View from the wagon trail. From this point, on the morning of the battle, you would have been looking at the backs of the British troops about 100m away, and the highlanders attacked from the area of that tree line on the horizon. The British line was driven back across this trail towards the village of Prestonpans.
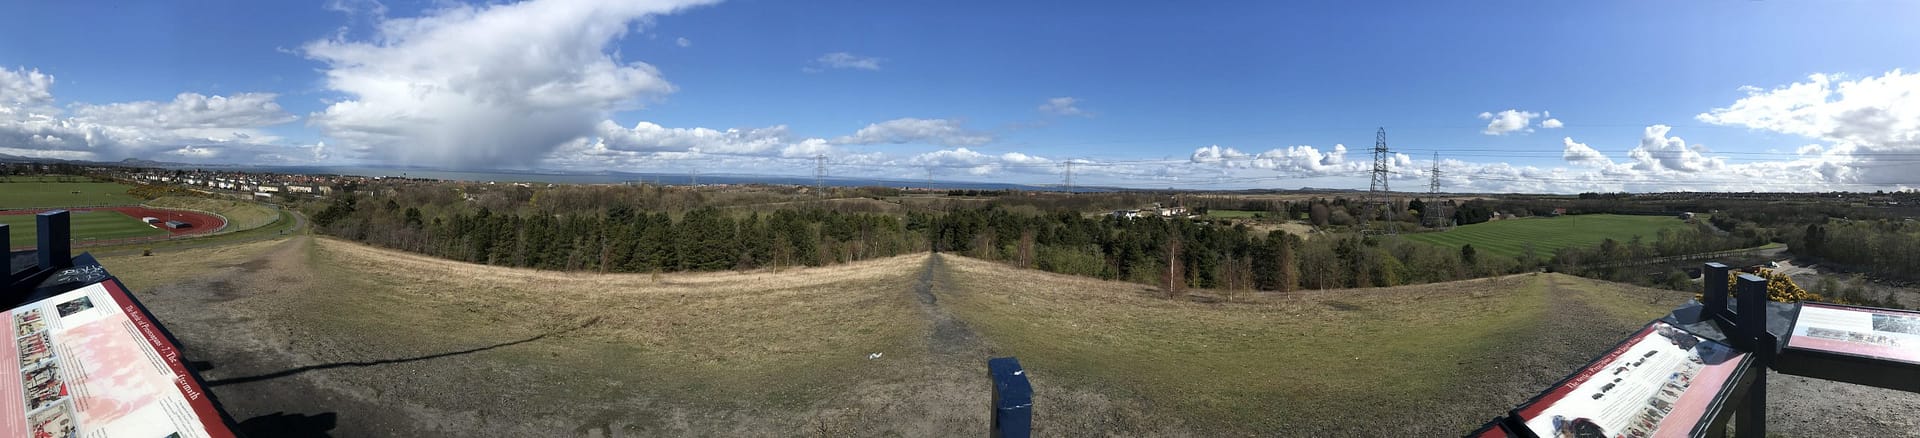
View of the battlefield from Pyramid Hill, south of Prestonpans
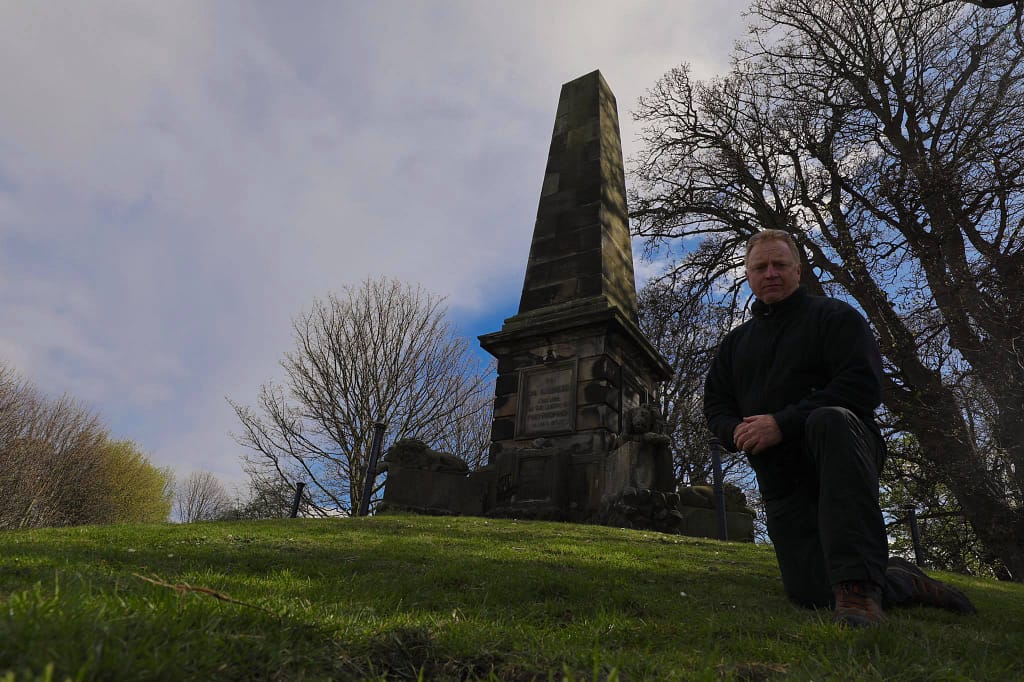
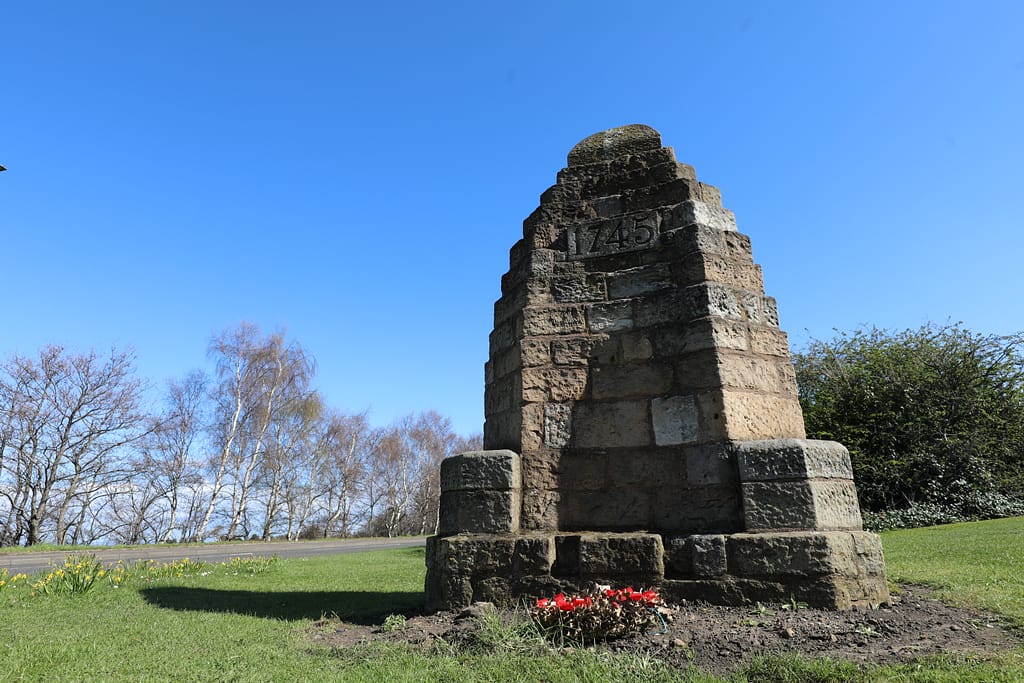
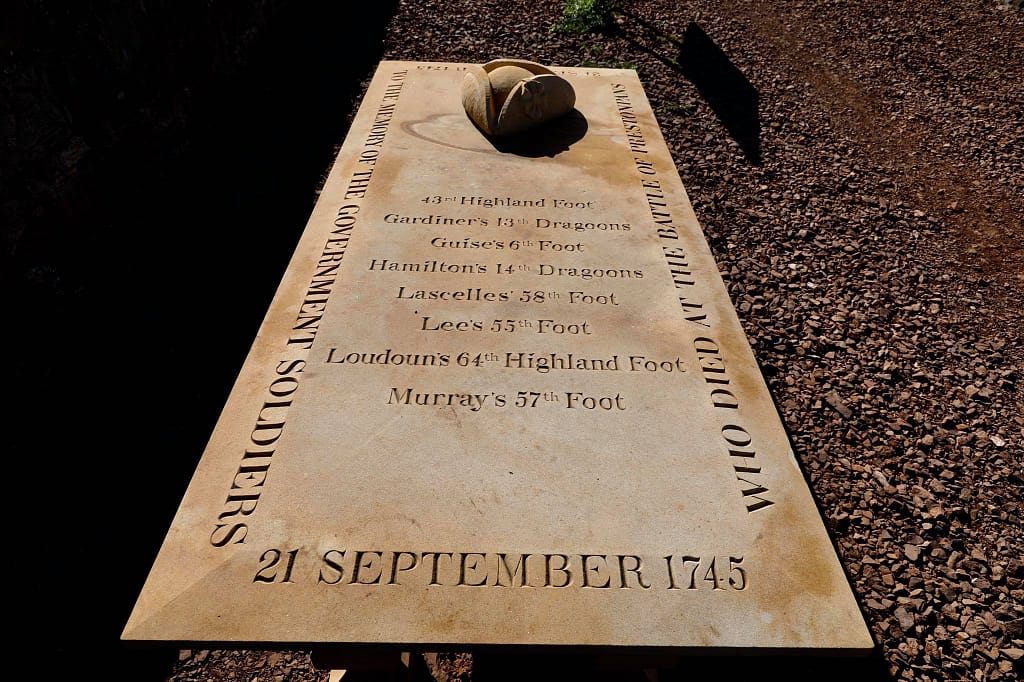
Battle of Prestonpans. Memorial cairn to the ’45
Found this useful? Buy me a coffee — it helps fund future battlefield research


Authored by Mick Prictor, a retired military officer with 40 years’ service, and a military historian specialising in terrain-focused analysis of tactics, doctrine, and command decision-making in land warfare. His work draws on extensive battlefield fieldwork—more than 280 sites worldwide—and one of the world’s largest private collections of historic military arms, uniforms, and equipment. About me
Sources
Secondary Sources
- Christopher Duffy, The ’45: Bonnie Prince Charlie and the Untold Story of the Jacobite Rising (2003).
- Martin Margulies, The Battle of Prestonpans 1745 (Tempus 2007)
- Stuart Reid, Culloden Moor 1746: The Death of the Jacobite Cause (Osprey Campaign Series, 2002).
- Michael Barthorp, The Jacobite Rebellions 1689–1746 (Osprey Men-at-Arms, 1982).
- National Trust for Scotland, Culloden Battlefield Guide (official visitor materials).
📚 Further Reading – Jacobite Rising (1745-46)
This battle study nests within the broader analytical framework explored in the Research Hub, where operational methods, operating environments, armies, commanders, and weapons are examined across conflicts and eras. The links below connect related studies across the wider body of battlefield analysis on the BattlefieldTravels site.
⚔️ Explore all battle studies from the Jacobite Rising of 1745-46
🏛️Explore the museum of War of the Austrian Succession historic weapons and equipment
The book list for this conflict includes the leading campaign studies, memoirs, and operational analyses available on the Jacobite Rising of 1745-46, selected specifically to complement this battlefield study.
📚Jacobite Rising 1745-46 – Recommended Reading
🗞️ For updates on new battlefield studies and research insights, you can subscribe to the Newsletter.
Related Battle Studies, Museum Pieces & Reading Resources


🧭 Battlefield Travel Guide: Battle of Prestonpans (1745)
Getting There
- Nearest Town: Prestonpans, East Lothian, Scotland (approx. 15 km east of Edinburgh).
- Transport: Train from Edinburgh Waverley (about 15 minutes) or by car via the A1.
- Parking: Limited near the memorial cairn; additional parking in Prestonpans town centre.
Site Orientation
- Key Landmarks: Memorial cairn, Tranent churchyard, fields stretching toward the Firth of Forth.
- Walking Routes: Short marked trails link the cairn, viewing points, and interpretive signage.
- Best Vantage Points: The cairn area and raised ground near Tranent give clear views of Jacobite and Government positions.
Museums & Visitor Centres
- Prestonpans Battlefield Heritage Trust: Maintains signage, interpretation boards, and public education projects.
- Prestongrange Museum: Nearby industrial heritage site with exhibits on the region’s wider history.
- National Museum of Scotland (Edinburgh): Jacobite-era artefacts, weaponry, and material culture from the ’45.
On-Site Experience
- Interpretive Signage: Modern boards explain the dawn attack and the collapse of the government line.
- Atmosphere: Open farmland bordered by housing and light industry — still conveys the shock of the sudden charge.
- Tours: Guided walks occasionally run during Jacobite commemorations; self-guided visits are straightforward.
Nearby Points of Interest
- Tranent Churchyard: Assembly area for Highland troops before the attack.
- Gladsmuir: Site of later Jacobite skirmishes.
- Edinburgh: Key Jacobite objective after Prestonpans; explore the Royal Mile and Edinburgh Castle for context.
Practical Tips
- When to Visit: Early morning echoes the Jacobite timing; summer offers the clearest sightlines.
- Facilities: Shops, cafés, and amenities in Prestonpans; minimal facilities at the cairn itself.
- Special Considerations: Much of the battlefield is farmland — stick to public paths and signed areas.
Subscribe to Battlefield Travels and receive a free E-Book Battlefield Guide
Unlock expert battlefield analysis, campaign reconstructions, and historical insights drawn from firsthand exploration and primary sources.
🗺️ You’ll receive:
🎖️ Exclusive historical insights you won’t find elsewhere
📘 A free eBook: 10 Tips for Exploring Historic Battlefields
📰 New battlefield studies straight to your inbox as they are published

