Seizing the Caen Canal and Orne River bridges in the opening minutes of D-Day!
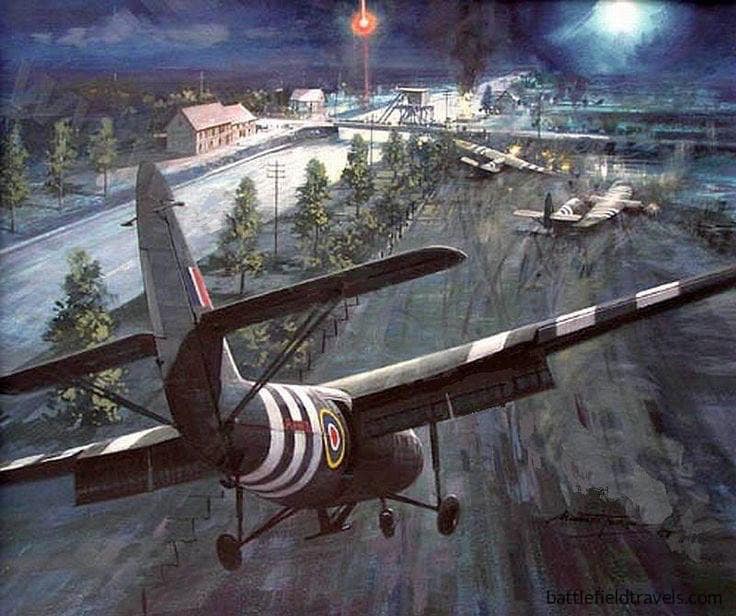
In the opening minutes of D-Day, British airborne troops conducted a glider-borne coup de main assault to seize the bridges over the Caen Canal (Pegasus Bridge) and the River Orne (Horsa Bridge). Their mission was audacious but high risk: capture the bridges intact and hold them against German counterattacks until relieved, thereby securing the eastern flank of the Normandy landings.
Key facts
Google Earth map – location of Pegasus Bridge
🎧 Prefer to listen? This article is also available as a 45-minute podcast
Tip: If Podbean overlay appears after pausing, click the × in the top-right corner to return to the player controls.
🧭🥾 Walking the Battlefield
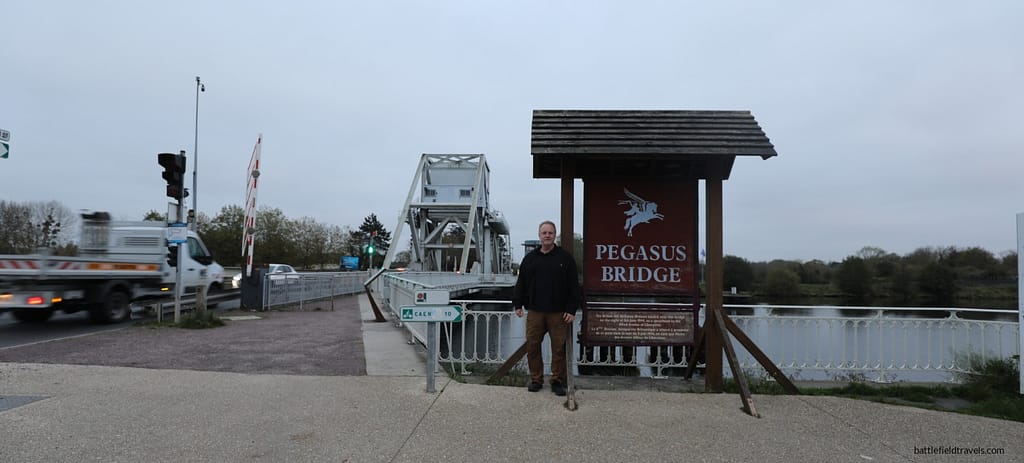
I visited the Normandy Beaches, including Pegasus and Horsa Bridges, in October/November 2024. I was equipped with unit histories, copies of original operations orders, maps and sketches, dozens of photographs taken on D-Day or soon afterwards, and my own digital GIS overlays to pull it all together.
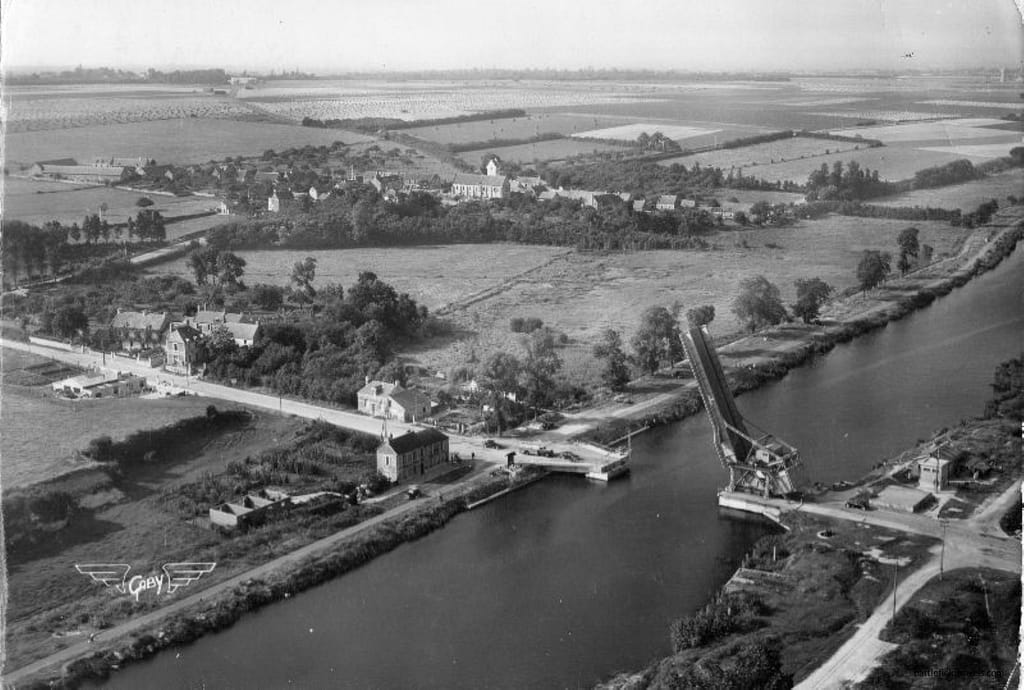
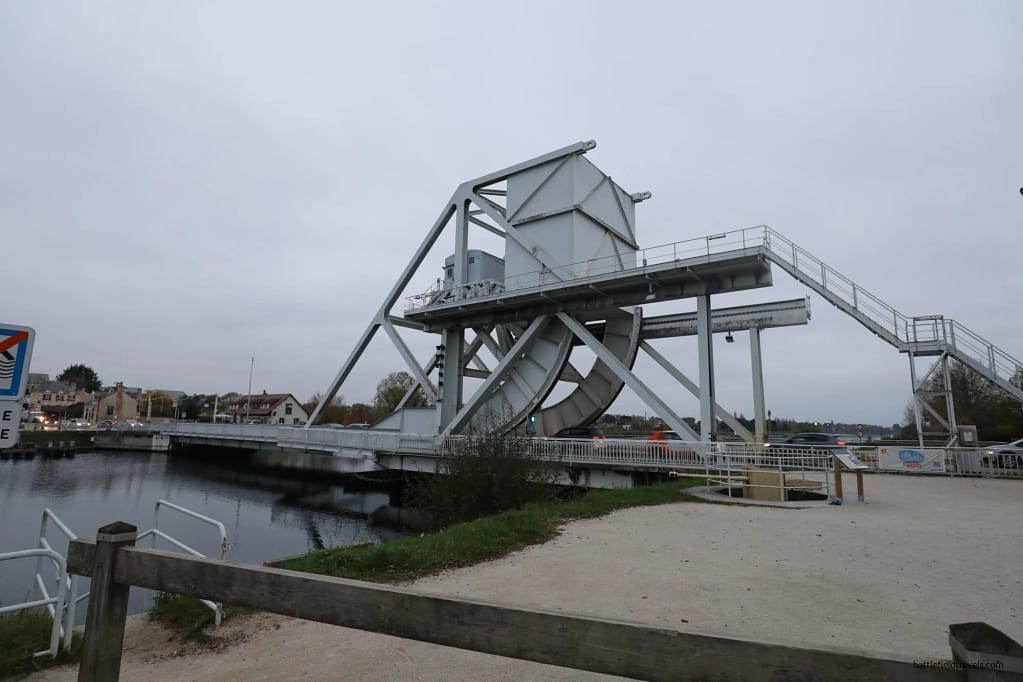
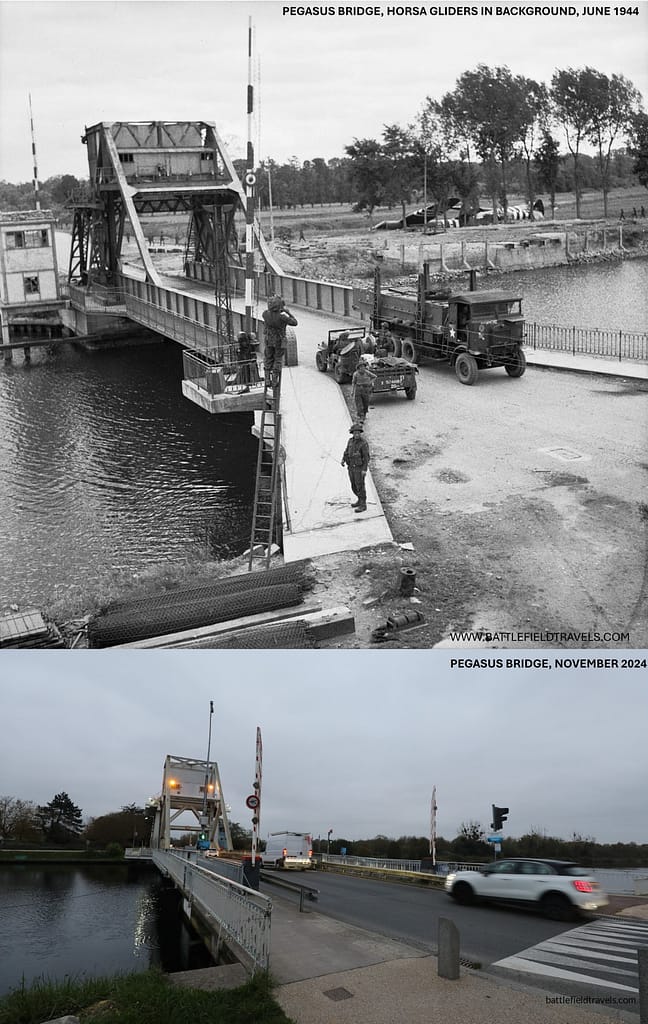
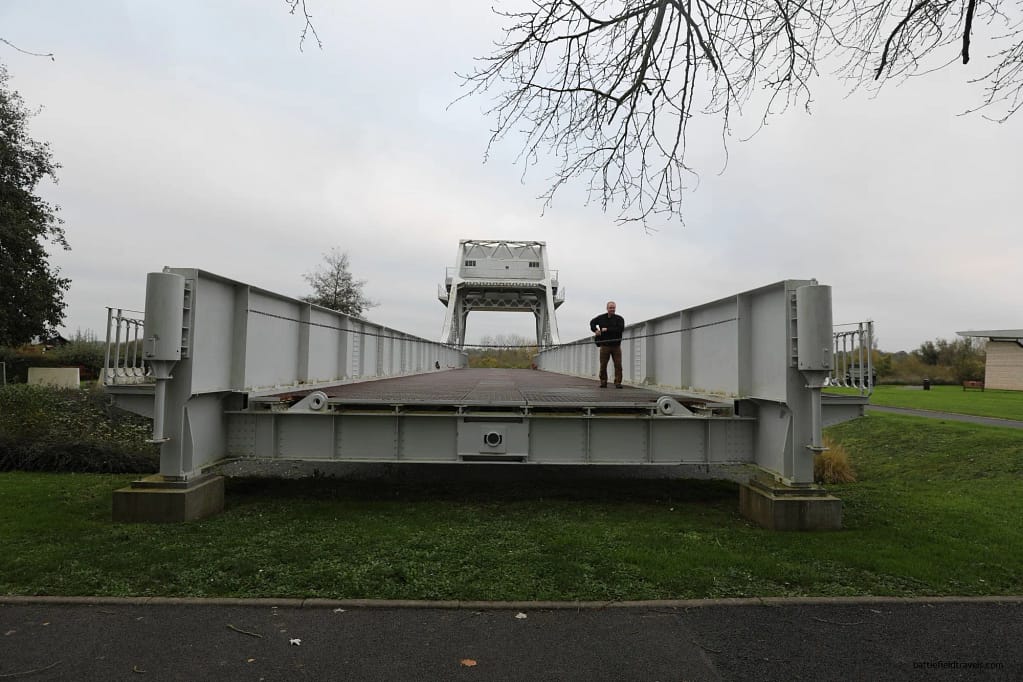
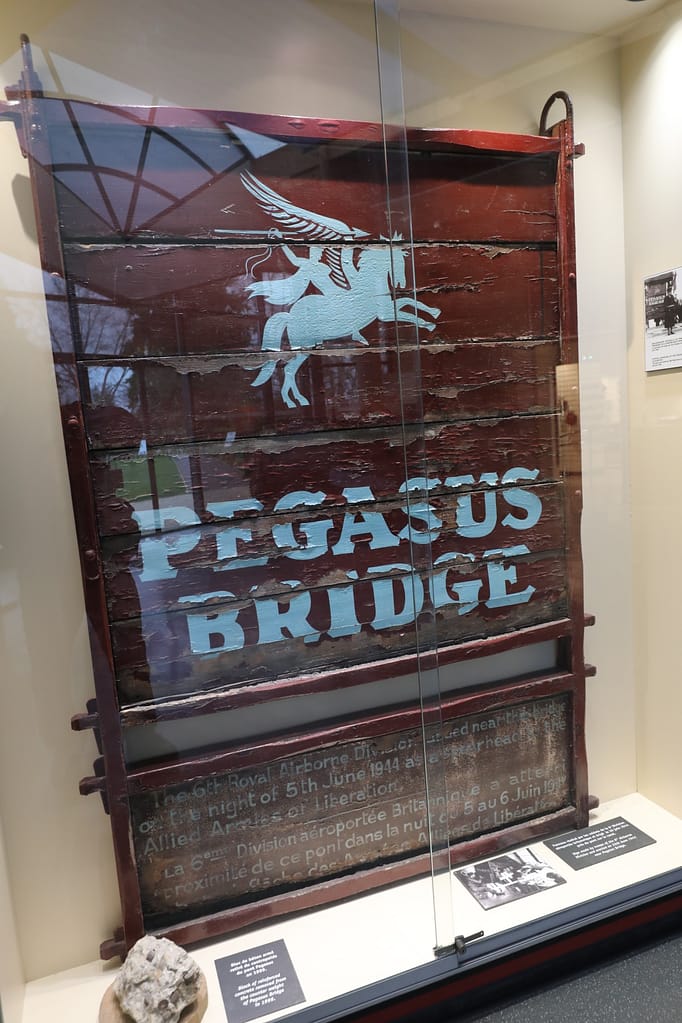
The area around Pegasus Bridge and Horsa Bridge, like many other D-Day sites, is remarkably unchanged since 1944. Both bridges have been replaced. Pegasus Bridge was replaced in 1994 with a very similar bascule-type bridge, but the original 1944 bridge is still accessible in the Pegasus Bridge Memorial Museum. Horsa Bridge was replaced in 1971. The terrain around the bridges is largely untouched, and many of the buildings in the towns of Bénouville and Ranville remain as they were in 1944. It is all very recognisable.
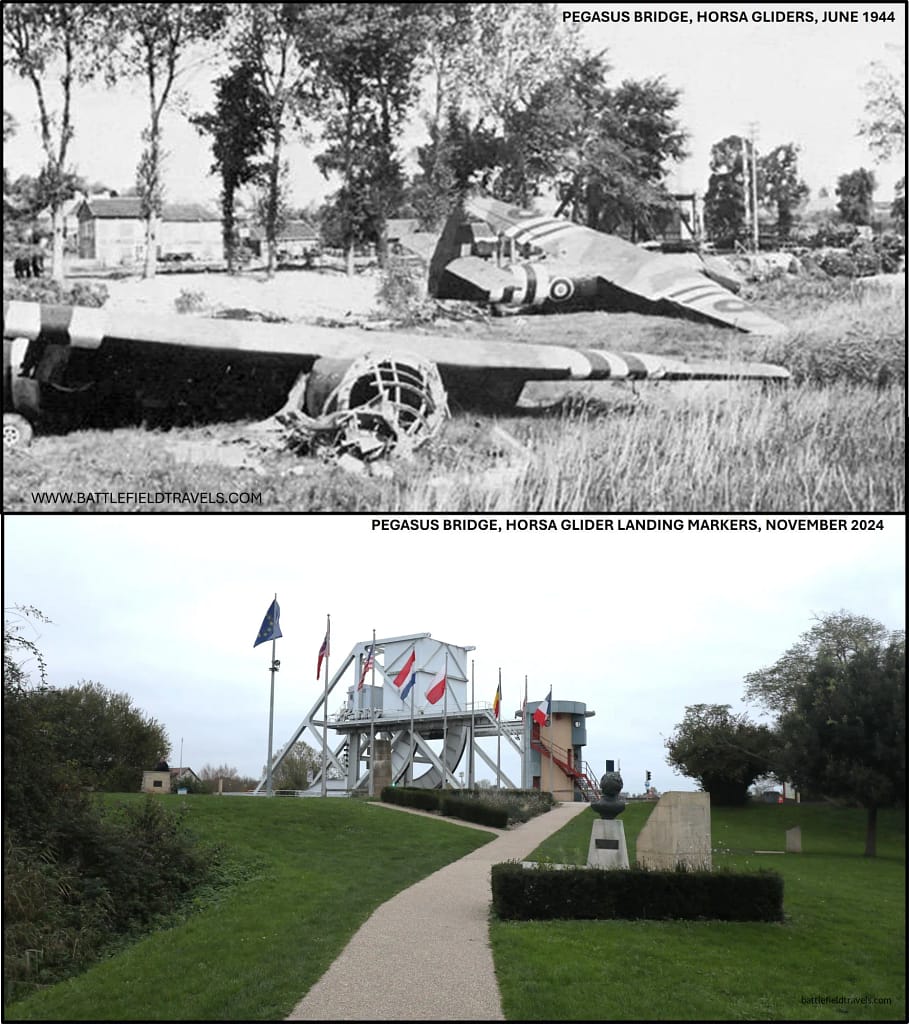
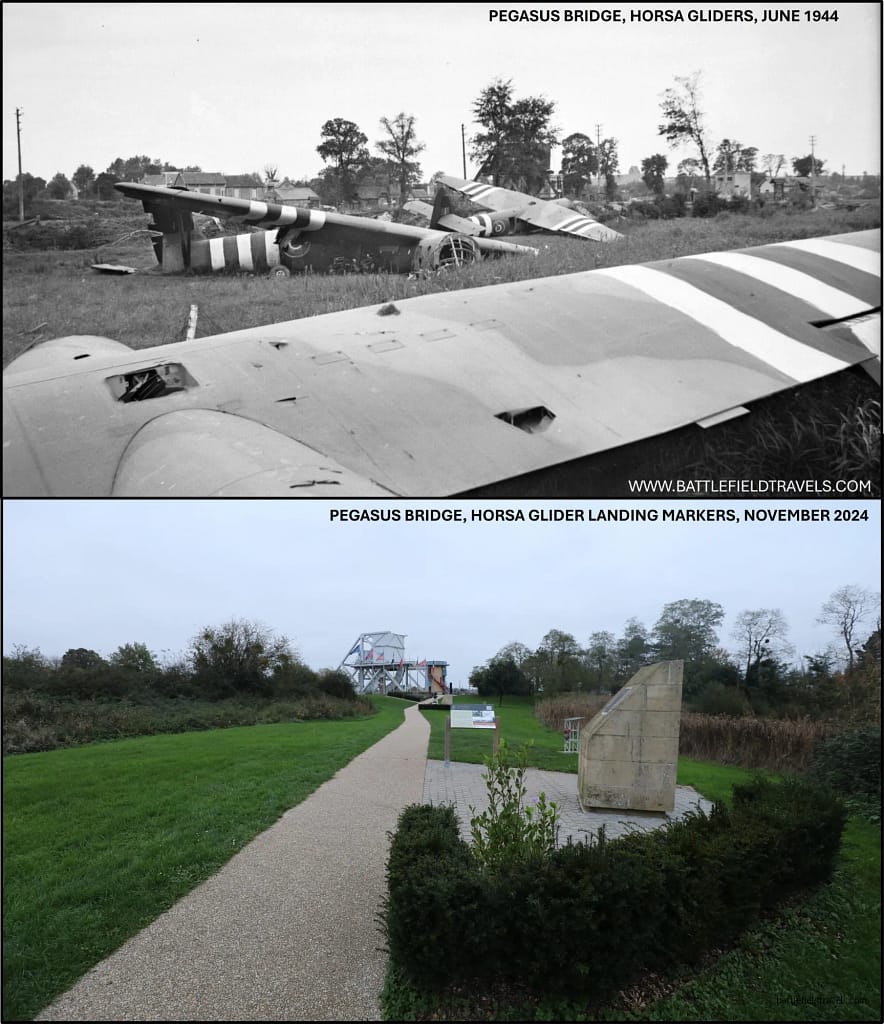
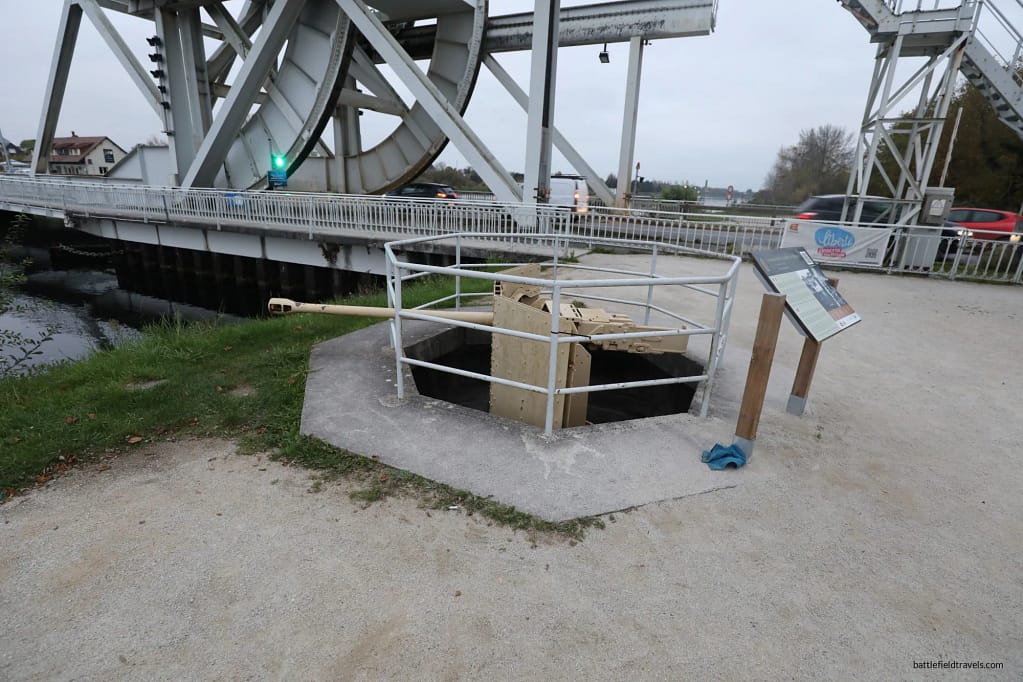
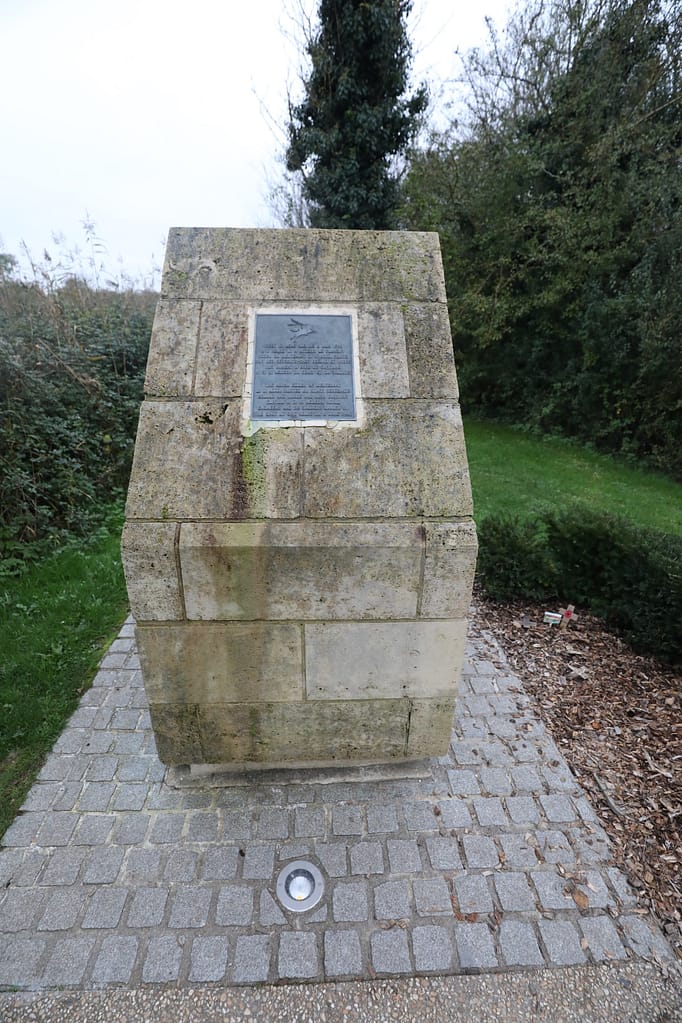
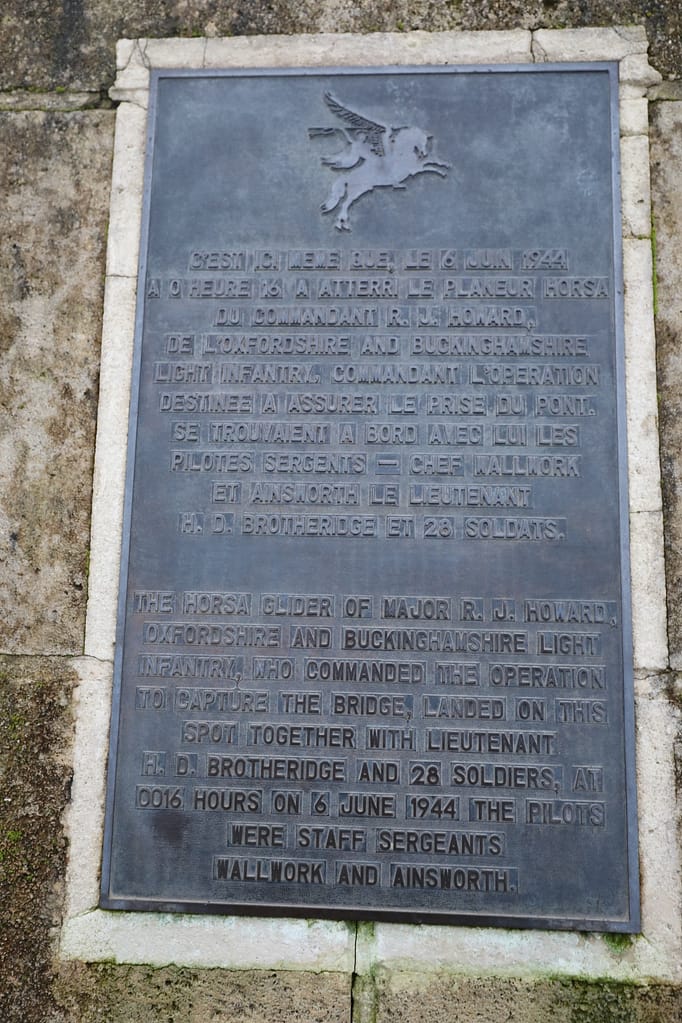
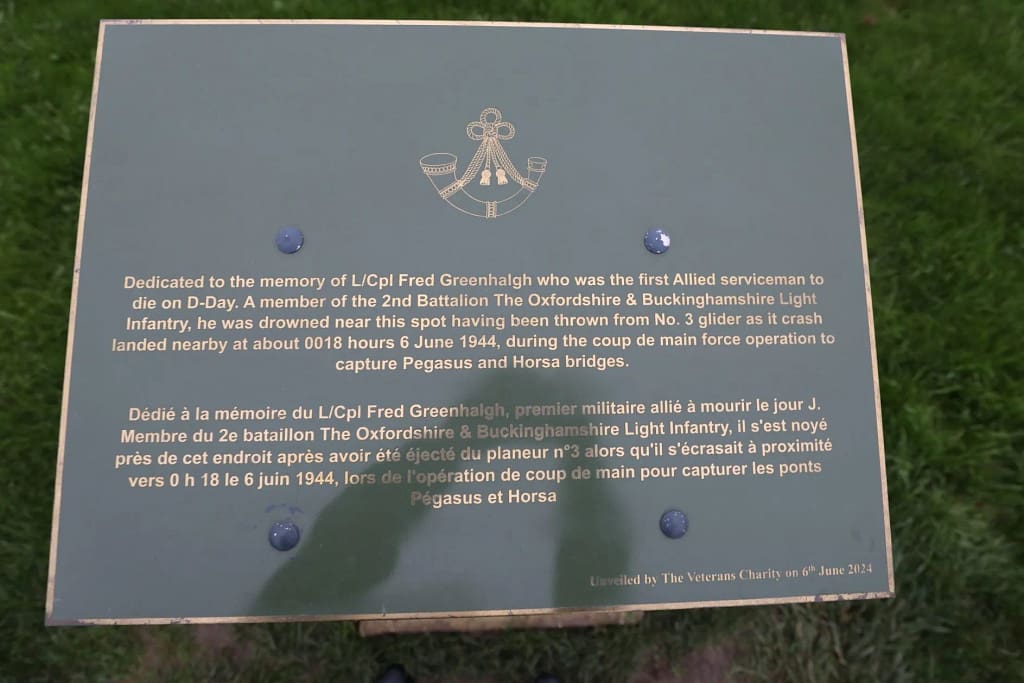
Concrete monuments mark the landing sites of the first three gliders at Pegasus Bridge, the first of which is only about 30 metres from the bridge itself. The German pillbox that Major Howard later used as his command post is now built into the foundations of the bridge manager’s office. The anti-tank gun that Wally Parr operated to great effect is still in place, right next to the eastern end of the bridge. On the west bank of the canal, the legendary Café Gondrée building was the wartime home of the Gondrée family and remains in the family’s hands.
Normandy series of battlefield studies
This article is part of a series exploring the D-Day airborne and amphibious battlefields on 6 June 1944 and the immediate aftermath. Click on the hotlinks to open the battlefield study.
Strategic Context – Operation OVERLORD
Allied grand strategy
By 1944, the Western Allies had resolved to open a second front in Europe. The Soviet Union had been carrying the main burden of the land war since 1941 while suffering immense casualties. Stalin pressed Roosevelt and Churchill for direct action in France to relieve pressure on the Eastern Front. The Anglo-American response was Operation OVERLORD, the cross-Channel assault designed to break into north-west Europe and defeat Nazi Germany.1Max Hastings, Overlord: D-Day and the Battle for Normandy (London: Michael Joseph, 1984), pp. 29–33.
D-Day operational framework
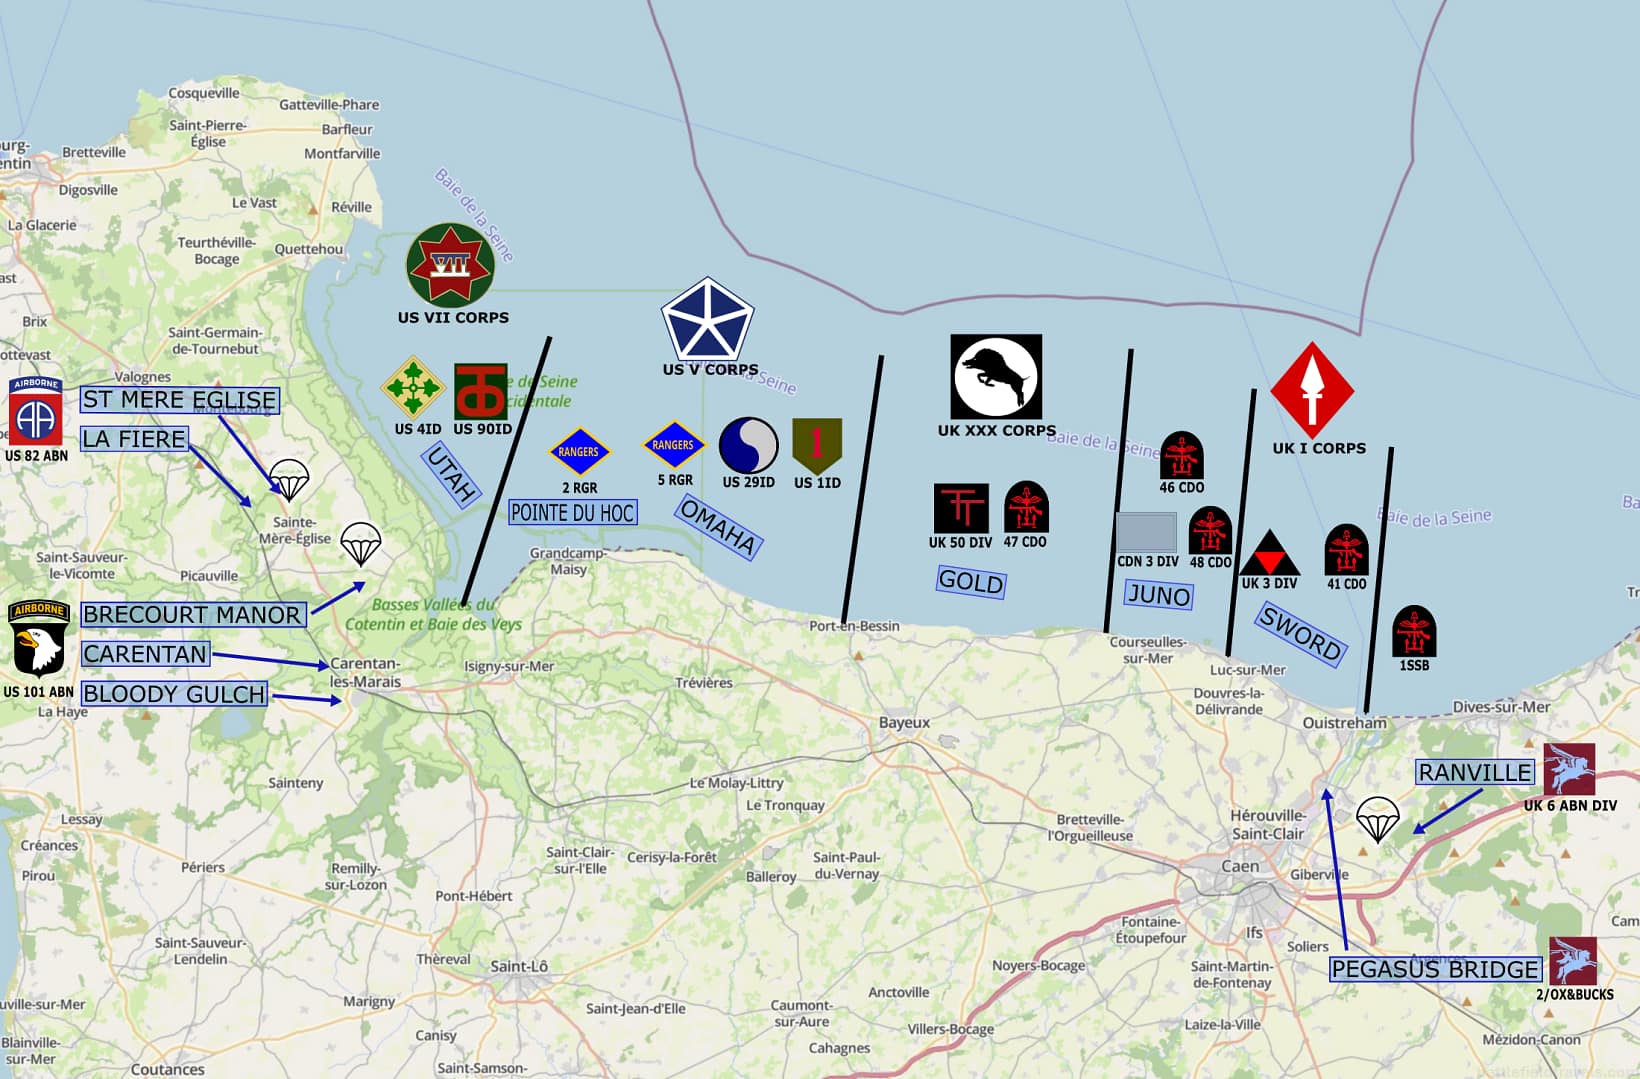
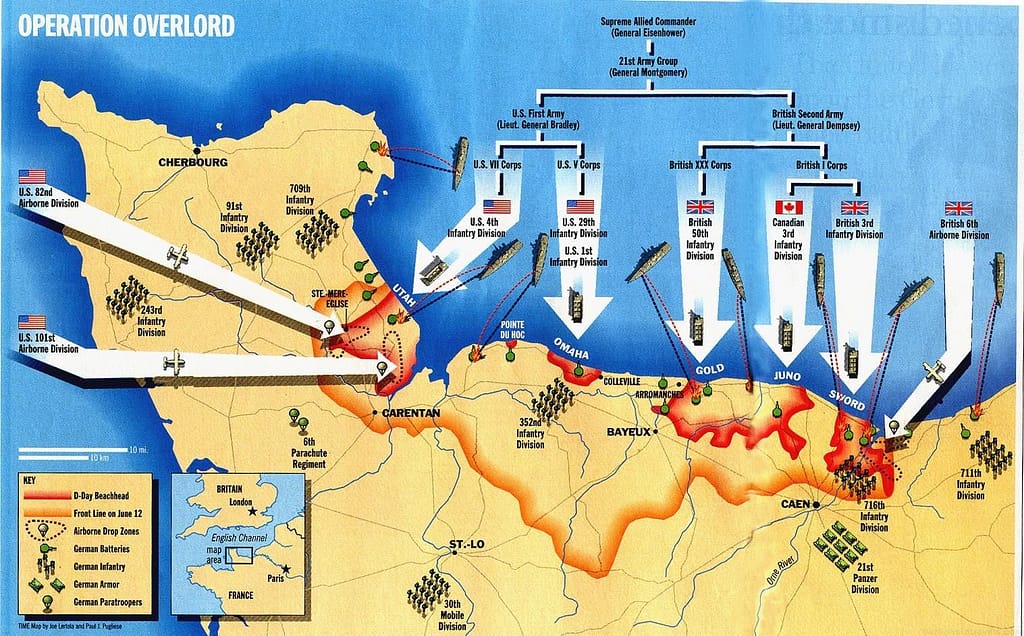
The invasion was planned for early summer 1944, when tides and moonlight favoured large-scale amphibious operations. Supreme Headquarters Allied Expeditionary Force (SHAEF), commanded by General Dwight D. Eisenhower, allocated distinct sectors across a 50-mile frontage of coastline in Normandy. The U.S. First Army under General Omar N. Bradley, would land on the western beaches (Utah and Omaha), while the British Second Army under General Miles Dempsey would assault the central and eastern sectors (Gold, Juno, Sword). Each beachhead had a defined operational purpose in building a continuous lodgement.2Carlo D’Este, Decision in Normandy (London: Collins, 1983), pp. 73–74.
In advance of the seaborne invasion, the American 82nd and 101st Airborne Divisions would land behind Utah Beach to seize the critical beach exits and secure the western flank of the invasion.
The biggest threat to the invasion was the mass of German armoured reserves around Le Havre and the mouth of the Seine. If these powerful forces could reach the landing beaches, the invasion was at risk of failure. Consequently, the eastern flank of the invasion would be secured by the British 6th Airborne Division landing on the east side of the Orne River. The 6th Airborne Division would secure the Merville coastal artillery battery, the bridges over the Dives River, the town of Ranville, and the critical bridges over the Caen Canal and Orne River.
Strategic Context: Importance of the bridges
Contribution to D-Day landings
The coup de main seizure of the Caen Canal Bridge at Bénouville (later renamed Pegasus Bridge) and the nearby Orne River Bridge at Ranville (later renamed as Horsa Bridge), in the early hours of 6 June 1944, formed a critical opening phase of the Allied D-Day landings.
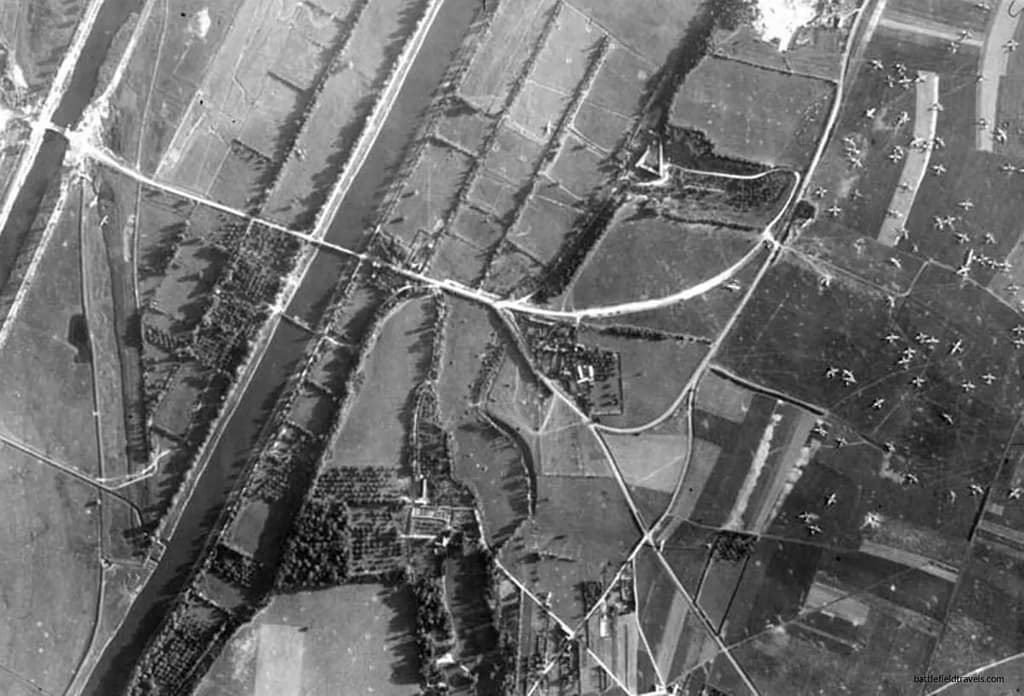
These bridges were of exceptional strategic importance. The Caen Canal and the River Orne ran roughly north–south through the low coastal plain on the east flank of the invasion beaches. Between the coast and the city of Caen, there were very few permanent crossings. The bridges at Bénouville and Ranville, therefore, formed the only reliable east–west routes across the waterways in the immediate area north of Caen. Any force seeking to move between the coast and the interior would have to pass over these crossings.
Opportunity and risk
For the Allied planners, the bridges represented both an opportunity and a risk. If the crossings remained in German hands, armoured units stationed around Caen could use the bridges to strike into the exposed eastern flank of the seaborne landings, particularly Sword Beach, only eight kilometres away.
Conversely, if the Allies captured the bridges intact, the waterways themselves would become a natural defensive barrier, protecting the eastern flank of the Allied beachhead. Control of the crossings would allow the Allies to establish a bridgehead east of the Orne from which further operations could be launched toward the Dives valley and the approaches to Caen.
Opposing Forces at Pegasus Bridge and Horsa Bridge
 Allied Forces
 Allied Forces
Coup de main force
The coup de main assault force was drawn from D Company, 2nd (Airborne) Battalion Oxfordshire and Buckinghamshire Light Infantry, part of the 6th Airlanding Brigade of the 6th Airborne Division.
The coup de main force comprised approximately 180 men, organised into six platoon groups distributed across six Horsa gliders. Each glider carried a mixture of infantry, engineers, and glider pilots who would join the fighting once the aircraft had landed.
Key components of the coup-de-main assault force included:
• D Company, 2nd Ox & Bucks Light Infantry – the primary assault force.
• Royal Engineers detachments – tasked with cutting demolition wires and removing explosive charges from the bridges.
• Glider Pilot Regiment crews – two pilots per glider, who fought alongside the infantry after landing.
• Signals and support personnel.

The gliders were divided between the two objectives. Three gliders were assigned to the Caen Canal bridge at Bénouville, while the remaining three were directed toward the Orne River bridge at Ranville.
The key leaders involved in the assault were:3Royle, Major J.P. (1944) REPORT ON OPERATION ‘OVERLORD’ BY MAJOR J.P. ROYLE, 1 Wing, GLIDER PILOT REGIMENT, No.1 Wing, the Glider Pilot Regiment. Available at: https://www.pegasusarchive.org/normandy/war_1wing.htm#Appendix%20%22F%22 (Accessed: 03 April 2026).
- Major John Howard, Officer Commanding D Company, 2nd (Airborne) Battalion, Oxford and Buckinghamshire Light Infantry
- Glider Number 1. Lieutenant Den Brotheridge, who would lead the first assault across the canal bridge.
- Glider Number 2. Lieutenant David Wood, commanding a platoon tasked with clearing the northeastern side of the bridge.
- Glider Number 3. Lieutenant Richard ‘Sandy’ Smith, responsible for supporting actions on the west side of the bridge.
- Glider Number 4. Captain Brian Pilday, Company Second-in-Command, and Lieutenant Tony Hooper, designated to lead the assault on Ranville Bridge.
- Glider Number 5. Lieutenant Dennis Fox, Ranville Bridge Assault
- Glider Number 6. Lieutenant Tod Sweeney, Ranville Bridge Assault.
The glider pilots themselves played a crucial role in the operation’s success. The lead glider targeting Pegasus Bridge was flown by Staff Sergeant Jim Wallwork and Staff Sergeant John Ainsworth, experienced pilots of the Glider Pilot Regiment. Their task required exceptional skill. They had to release from their tow aircraft over Normandy, navigate in darkness, and land their glider within a narrow field beside the bridge.
Reinforcing
- 7th Battalion, The Parachute Regiment, under Lieutenant Colonel RIchard Pine-Coffin was tasked with reinforcing and assuming control of the bridges. The battalion commenced its parachute drop east of Ranville at 00:50 hours on D-Day. Although the battalion was badly scattered across the drop zones, Pine-Coffin quickly rallied about one-third of the battalion and ran to the bridges, arriving at about 01:30 hours. Major Nigel Taylor‘s company rapidly assumed responsibility for defending the Benouville sector on the west bank of the canal. Additional elements of the battalion continued to arrive throughout the morning.
- 1st Special Service Brigade under Brigadier Simon Fraser ‘Lord Lovat’ arrived at the bridges at around 13:30 hours, thereby connecting Sword Beach with the bridges, and bringing armoured reinforcements to the bridge defences. Lord Lovat then continued east to support the broader 6th Airborne Division mission.
 German Forces engaged at Pegasus Bridge
 German Forces engaged at Pegasus Bridge
Bridge defenders
The bridges over the Caen Canal at Bénouville and the Orne River at Ranville were held by elements of the German 716th Infantry Division, commanded by Generalleutnant Wilhelm Richter. This was a static coastal formation responsible for defending the Caen sector.
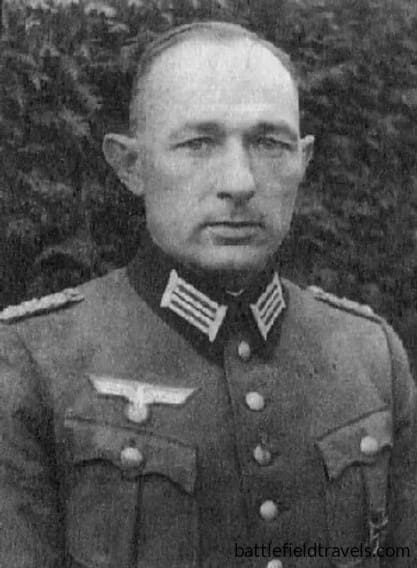
The immediate bridge garrisons were drawn from Grenadier-Regiment 736, and commanded by Major Hans Schmidt from his small headquarters at Ranville. Each bridge was defended by a detachment of 15-20 men, supported by at least one anti-tank gun, light machine guns and demolition parties tasked with destroying the bridges if required.
The troops were of mixed quality, including older soldiers and foreign conscripts from Eastern Europe. They were not postured or prepared to repel a sudden, close-range assault delivered by highly-trained airborne troops.
Caen sector reserves
Behind this thin forward screen lay the principal mobile reserve in the sector: the 21st Panzer Division, commanded by Generalmajor Edgar Feuchtinger. Stationed south and east of Caen, the division was the only German armoured formation positioned close enough to the landing area to intervene rapidly on 6 June.
The division’s core combat elements included:
- Panzer-Regiment 22 (Colonel Hermann von Oppeln-Bronikowski), equipped with a mix of Panzer IV tanks and converted French armoured vehicles.
- Panzergrenadier-Regiment 125 (Colonel Hans von Luck), mechanised infantry.
- Panzergrenadier-Regiment 192 (Colonel Josef Rauch), mechanised infantry.
- Artillerie-Regiment 155, equipped with towed and self-propelled guns.
- Assault gun, anti-tank, engineer, and reconnaissance units, including elements of Panzerjäger-Abteilung 200 and divisional reconnaissance battalions.
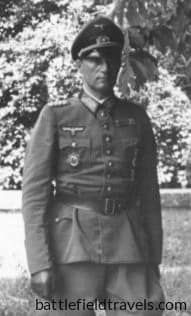
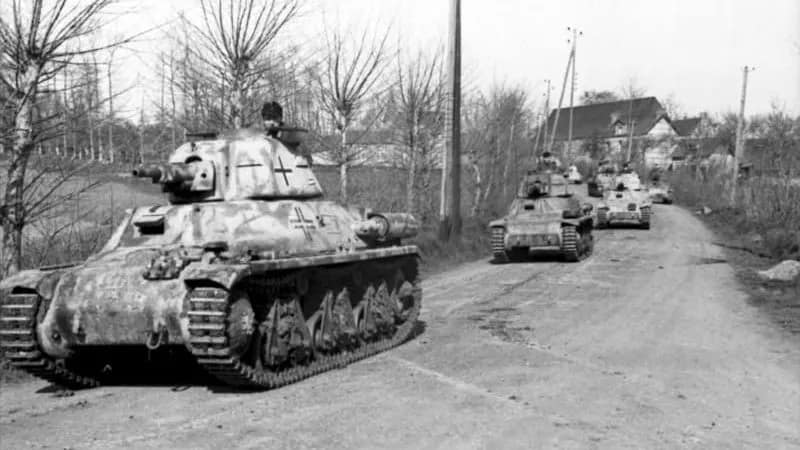
The 21st Panzer Division made extensive use of converted French vehicles, many of which were modified under Major Alfred Becker into self-propelled guns and armoured carriers. While innovative, this equipment was mechanically unreliable and inferior to standard German armoured vehicles.
Following the Pegasus Bridge coup-de-main assault, elements of the division were gradually committed toward the Orne bridgehead. However, the division’s response was constrained by higher command authority. As part of the German armoured reserve, its employment required authorisation from Hitler’s headquarters, which was not forthcoming. By the time coordinated counter-attacks developed, the British airborne forces had secured the bridges and reinforced their positions.4Niklas Zetterling, Normandy 1944: German Military Organisation, Combat Power and Organisational Effectiveness (Winnipeg: J.J. Fedorowicz, 2000), pp.99–104.
British 6th Airborne Division: ‘Operation TONGA’

Securing the eastern flank
The task of securing the eastern flank of the Normandy invasion was assigned to the 6th Airborne Division, commanded by Major-General Richard Gale. The division had been formed specifically for airborne operations and was tasked with a series of objectives east of the invasion beaches. Its mission, codenamed ‘Operation TONGA’, was threefold:56th Airborne Div, Chief of Staff. (17 May 1944) 6 AIRBORNE DIV OPERATION INSTRUCTION No.1, The 6th Airborne Division in Normandy. Available at: https://www.pegasusarchive.org/normandy/frames.htm (Accessed: 03 April 2026).
- Capture the Caen Canal and River Orne bridges intact.
- Destroy bridges over the River Dives further east to delay German reinforcements moving from the direction of the Seine.
- Establish and hold a defensive perimeter east of the Orne until relieved by seaborne forces advancing inland from Sword Beach.
In addition to the coup de main force, the bulk of 6th Airborne Division was tasked with securing the surrounding area and reinforcing the bridgehead once the bridges had been captured. The division included:
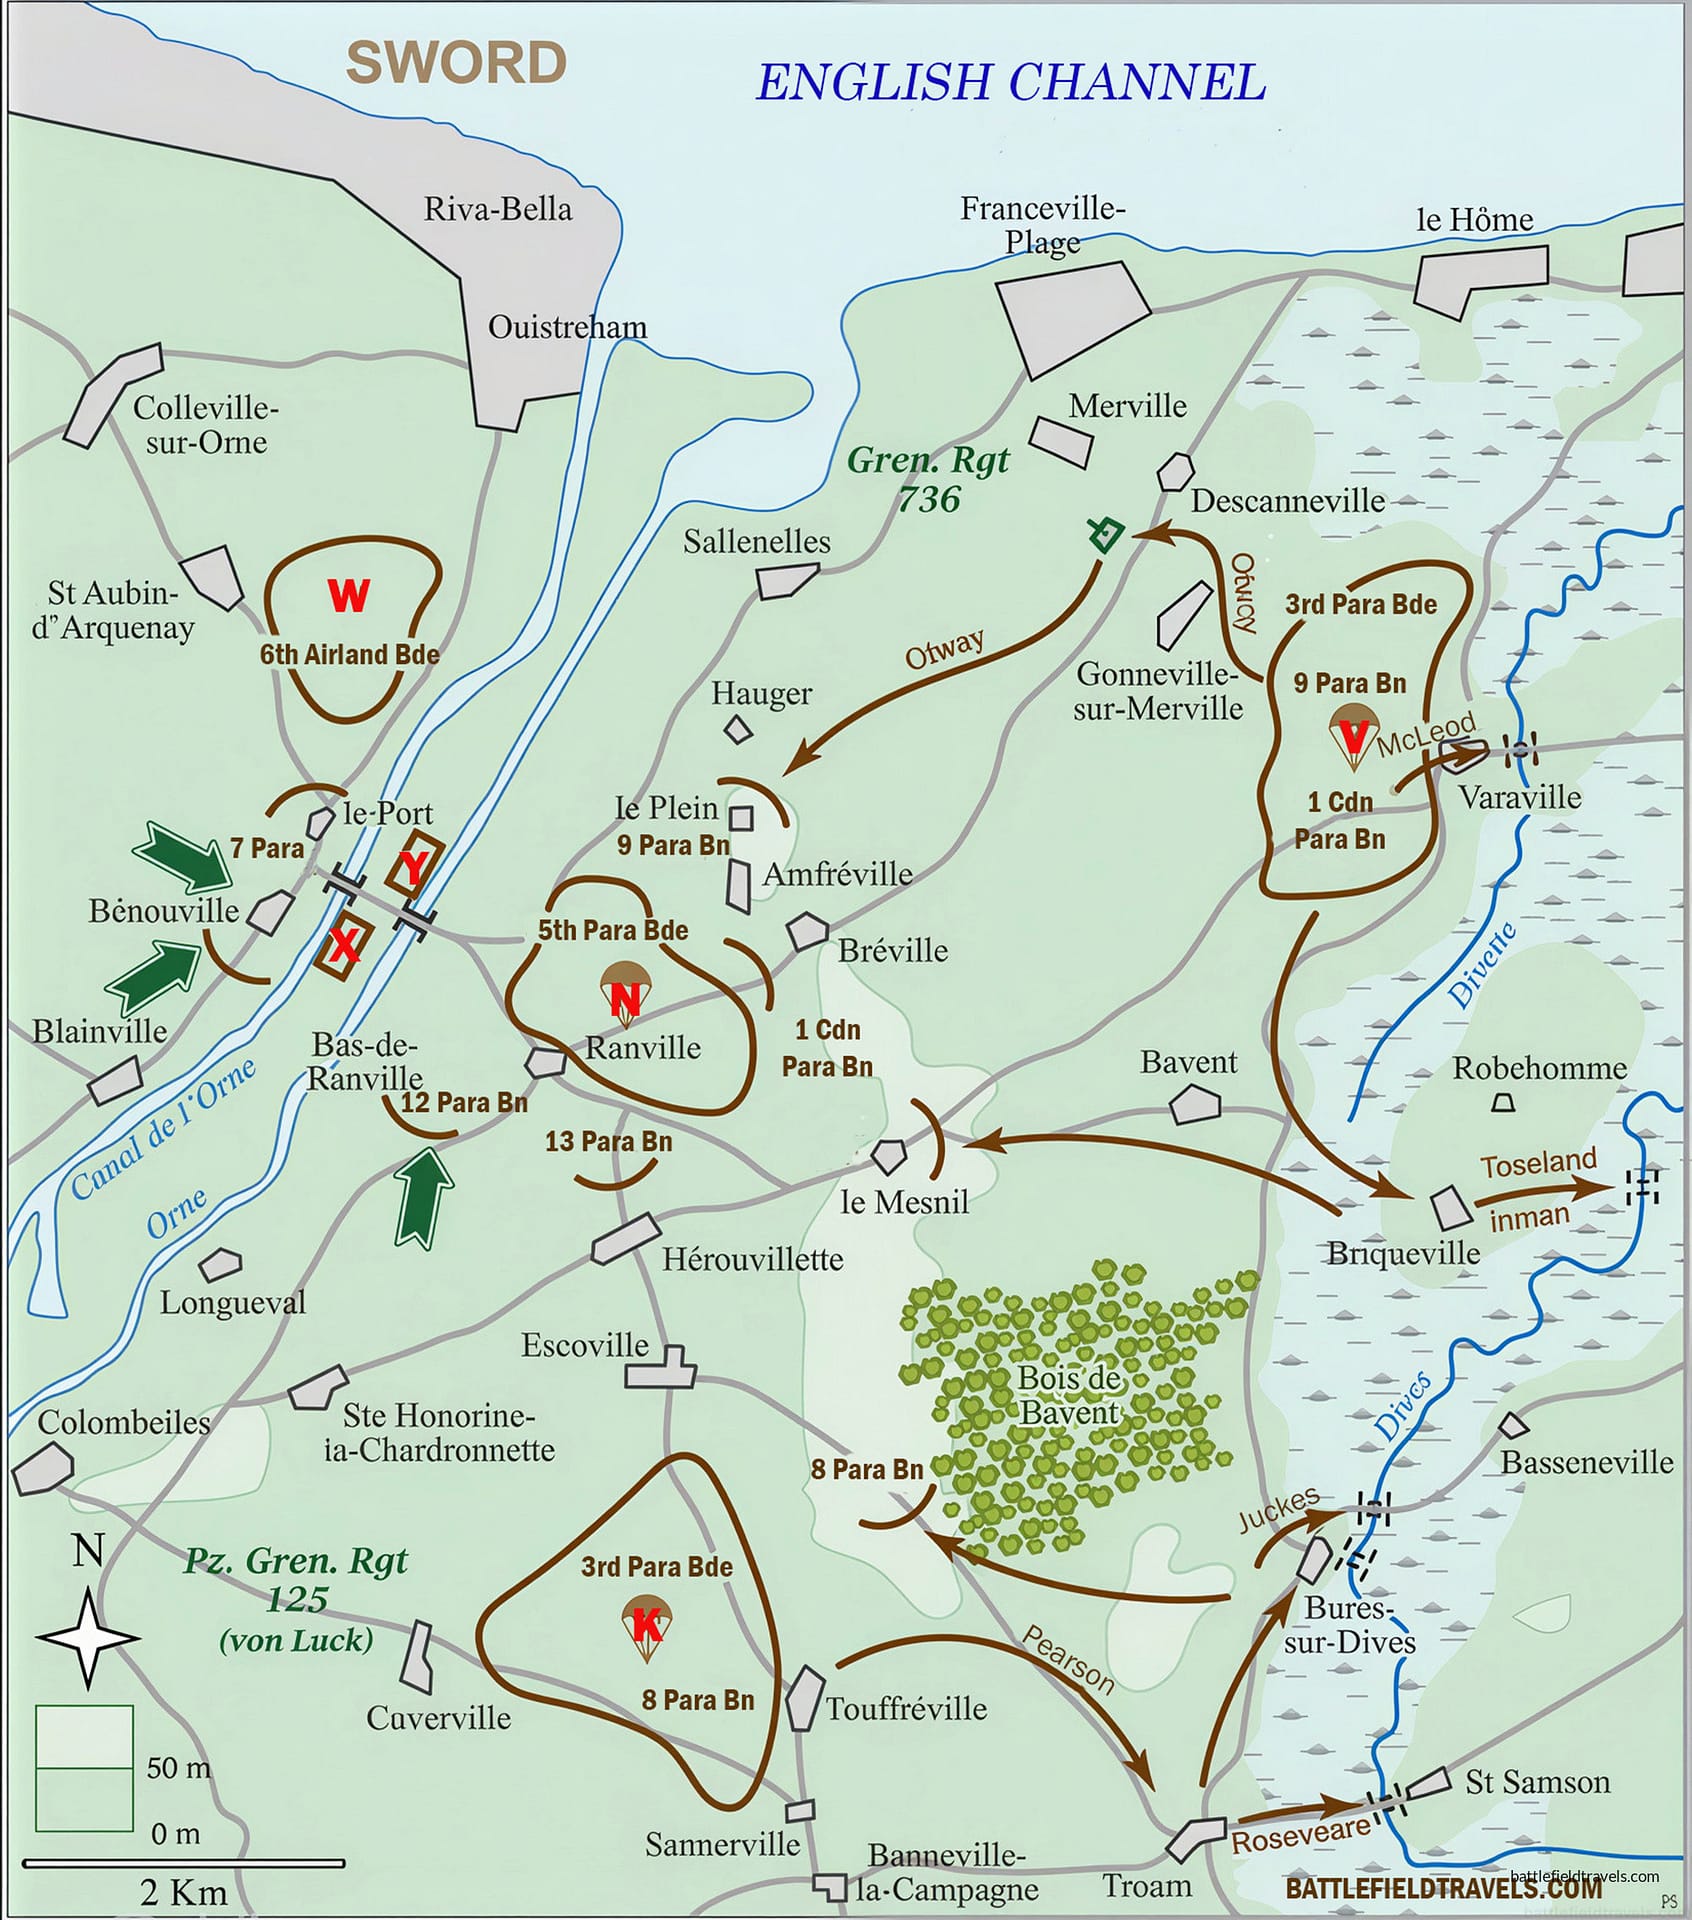
- 5th Parachute Brigade (7th, 12th and 13th Parachute Battalions), tasked with securing Ranville and reinforcing the bridgehead east of the Orne.
- 3rd Parachute Brigade (8th and 9th Parachute Battalions, 1st Canadian Parachute Battalion), assigned to destroy bridges over the River Dives and neutralise the German artillery battery at Merville.
- 6th Airlanding Brigade The brigade’s task was to reinforce the divisional perimeter — Sainte-Honorine, Escoville, and the high ground known as Ring Contour 72 near Le Bas de Ranville
- Supporting units, including airborne artillery, engineers, and anti-tank elements.
In total, approximately 8,500 troops of the 6th Airborne Division would land east of the Orne River on D-Day. However, the immediate success of the operation depended on the small glider-borne assault force capturing the bridges in the opening minutes of the invasion.6L. F. Ellis, Victory in the West, Vol. I (1962), pp. 149–156.
Micro-Terrain on the objective area
Although the Normandy coastal plain appears relatively flat, the waterways and their associated embankments created a series of narrow choke points that shaped the tactical possibilities of both attackers and defenders. Micro-Terrain is the small-scale terrain features of the battlefield that often have a disproportionate effect in shaping options and decision-making. The concept is explored further in the Micro-Terrain Hub.
The Caen Canal ran from Ouistreham on the coast southwards in a straight, engineered channel parallel to the River Orne, separated from it by only a few hundred metres of farmland and small villages. Both waterways were bordered by raised embankments, with narrow roads running alongside them. The bridges at Bénouville and Ranville, therefore, formed critical crossing points where the road network intersected the waterways.
Constraints to the glider assault
For the attackers, this geography presented both an opportunity and a constraint. The fields east of the canal offered one of the few locations where gliders could land within direct assault distance of the bridge. However, the landing area was narrow and bordered by hedges, ditches, and wire obstacles. A landing even slightly off course could leave a glider wrecked in the canal, scattered across hedgerows, or too far from the objective to achieve surprise.
Defensive advantages
For the defenders, the bridges were natural choke points. Any attacking force had to cross a narrow span exposed to fire from both ends of the bridge and from nearby defensive positions. The German garrison had installed machine-gun posts, light artillery, and prepared demolition charges designed to destroy the bridge if an attack appeared imminent.
At the same time, the surrounding terrain limited the ability of German armoured forces to manoeuvre once the bridges had been captured. The embankments along the canal and river restricted movement to the road network, forcing vehicles to approach the bridges along predictable routes. This terrain advantage allowed the lightly armed airborne troops to establish effective defensive positions covering the approaches to the crossings.
Operation DEADSTICK: preparation for the coup de main
How to seize an enemy-held bridge
To achieve the necessary speed and surprise, Major General Gale decided that it could not be done by an airborne force that would need to parachute onto drop zones and then march to the objectives. The force would need to land directly beside the bridges using gliders and have sufficient combat power to assault and seize them immediately.
This form of assault, known as a coup de main, was a bold and risky method of seizing a heavily defended objective. If the gliders landed accurately and surprise was achieved, the bridges could be secured within minutes. If the landings failed, however, the attackers could be scattered or destroyed before reaching the objective. Major General Gale stated that his inspiration for the operation was the German glider-borne coup de main assault on the Belgian fortress of Eben Emael in May 1940.
Ground assault force preparation
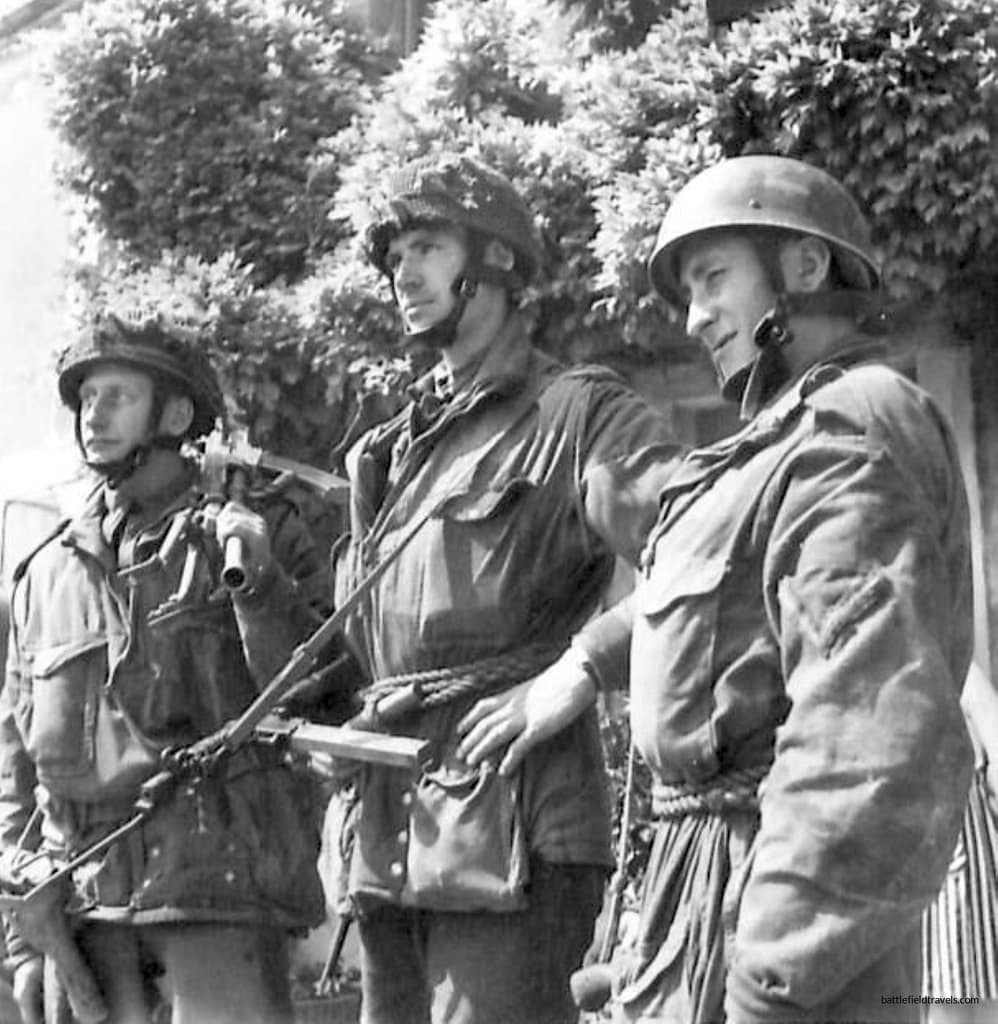
Once General Gale had made the decision to seize the Benouville and Ranville Bridges by coup de main, he needed an appropriate force for the mission. He asked Brigadier Hugh Kindersley, commander of the 6th Airlanding Brigade, to nominate his best company commander. Kindersley replied that Major John Howard was the man for the job. Howard’s D Company was not large enough to seize both bridges, so he was offered two additional platoons to reinforce from four to six platoons. He chose Lieutenant Sandy Smith’s and Lieutenant Dennis Fox’s platoons from B Company. He was also reinforced by 30 sappers under Captain Jock Nelson.7Stephen Ambrose, Pegasus Bridge (New York: Simon & Schuster, 1984), p. 42.
During the mission rehearsal training, Howard and his team learned many lessons about coordinating close combat around a tight objective, such as a bridge, especially the need for mutual recognition at night and control measures to avoid fratricide.
Glider force preparation
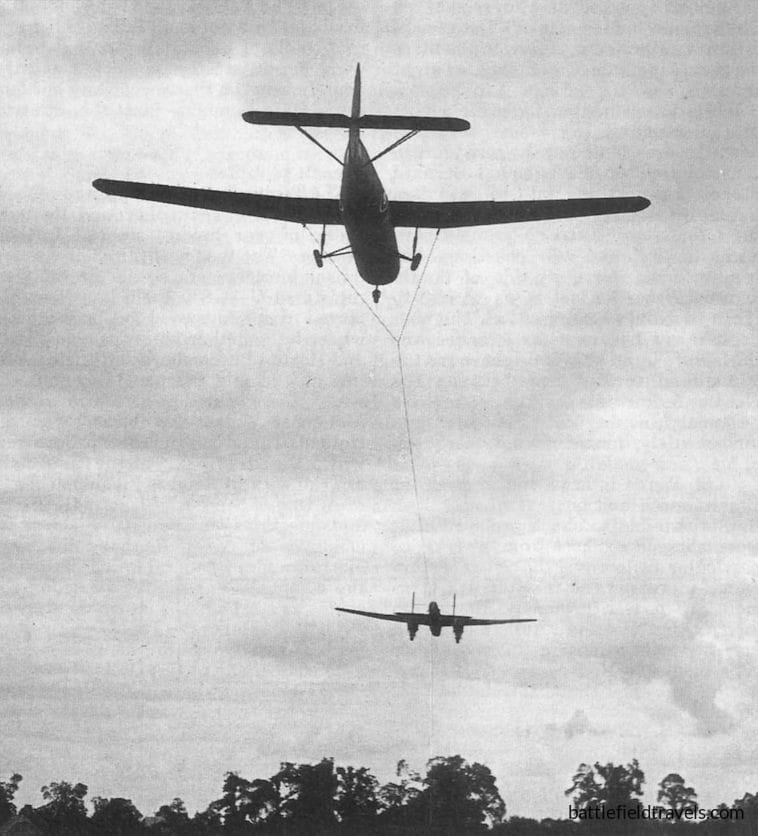
While Howard prepared the ground force, the Glider Pilot Regiment undertook Operation DEADSTICK to prepare its pilots to land by night on very small, unlit landing zones. Training for the glider assault was intensive. SIxteen glider pilots, sufficient for the six gliders plus two spare crews, commenced training for the mission at RAF Tarrant Rushton in Dorset in April 1944.
The pilots needed to land as close as possible to the bridges, but without overshooting the objective. During the approach and landing, the pilots would use dead-reckoning navigation (using compass heading, stopwatch timing, and constant rate turns) to guide their aircraft to the objective in the darkness. They initially practised the landings by day, using concrete blocks and sandbags to simulate the weight of embarked troops. Then they progressed to using dark goggles to simulate a night landing. Finally, they progressed to practising multi-aircraft landings to tight landing zones by night, using only dead-reckoning navigation techniques.
Parachute arrestor systems were fitted to all the gliders, but were not tested during the rehearsals as they would damage the aircraft. The crews ultimately rehearsed the mission forty-three times prior to D-Day.8Royle (1944), Report on Operation ‘Overlord’. (Glider Pilot Regiment).
The glider assault and capture of the bridges (00:07–00:30 hours)
Pegasus Bridge glider assault from the 1962 movie ‘The Longest Day’
Crossing the English Channel
The operation commenced several hours before the gliders reached Normandy. During the evening of 5 June 1944, the coup de main force assembled at RAF Tarrant Rushton, one of the principal airfields used for the D-Day airborne operations. The six Horsa gliders carrying Major John Howard’s men were towed by Halifax bombers of No. 298 and No. 644 Squadrons of the Royal Air Force, part of the newly formed Airborne Forces group tasked with delivering British airborne troops to Normandy.
Shortly before midnight, the aircraft began their take-off sequence. Each Horsa glider, constructed largely of wood and fabric, carried about 28 soldiers, their equipment, and weapons, in addition to the two pilots. The gliders were attached to their towing aircraft by long cables and climbed steadily across the English Channel toward the Normandy coast.
Inside the gliders, the troops sat on narrow benches along the fuselage walls, surrounded by equipment and weapons secured for the landing. The men had rehearsed the operation repeatedly in England and knew that their task would succeed or fail in the critical first minutes after landing. Once released from their tow aircraft, they would have only a few minutes to guide their aircraft to the landing zones beside the bridges before crash-landing in the fields beside each bridge.

Caen Canal Bridge, Bénouville
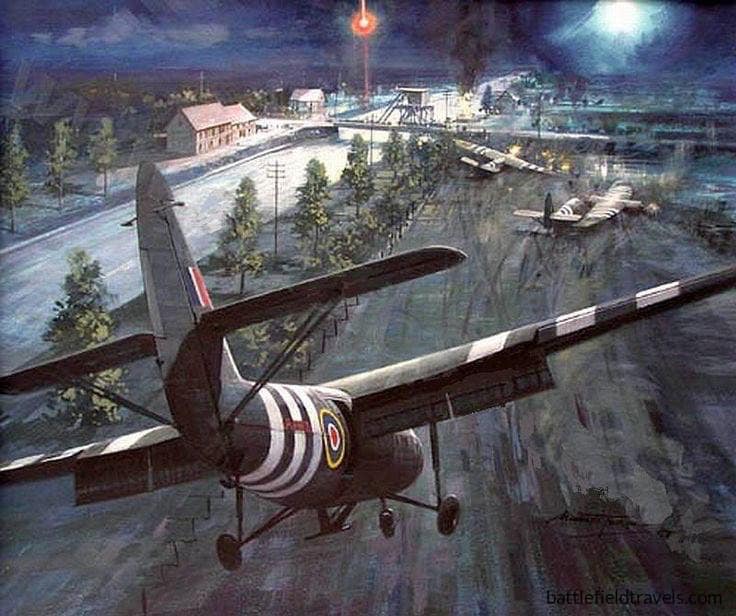
At approximately 00:07 hours, as the formation approached the Normandy coast, the tow cables were released. From that moment, the gliders descended silently toward their objectives. The unpowered gliders produced very little sound, allowing them to approach the landing zones with a degree of stealth impossible for conventional aircraft.
Glider Number 1. Bénouville Bridge
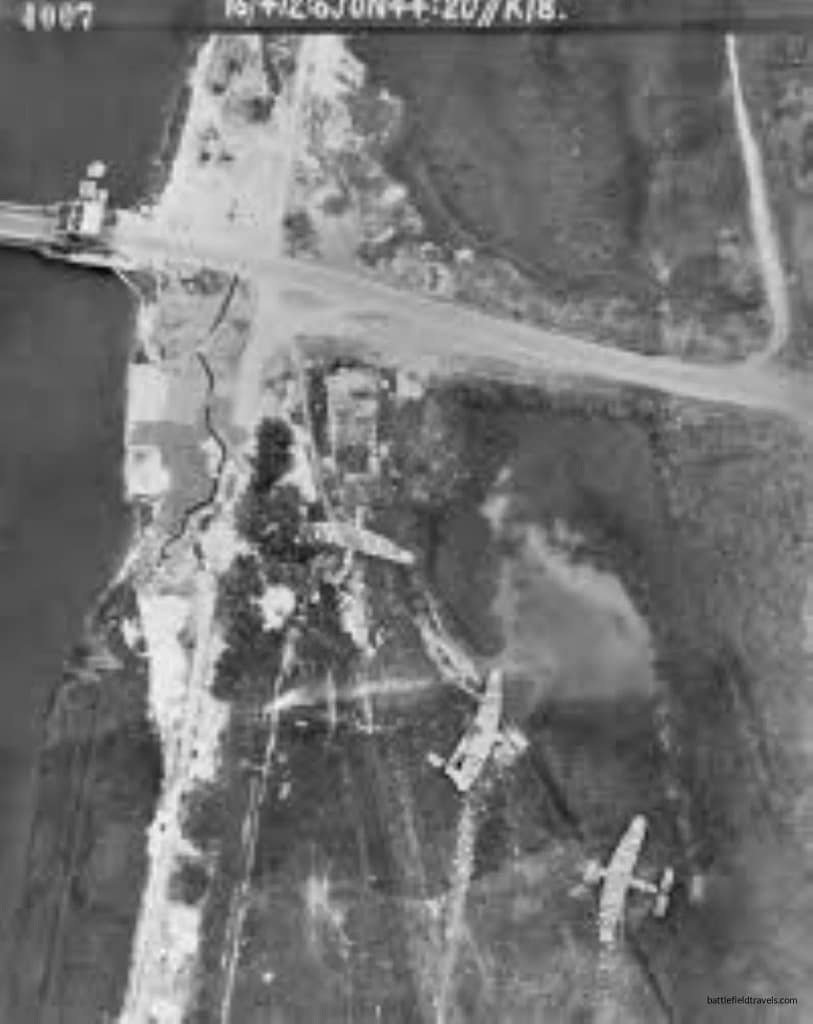
The lead glider, piloted by Staff Sergeant Jim Wallwork with co-pilot Staff Sergeant John Ainsworth, carried Major Howard and a portion of the assault force assigned to the Caen Canal bridge. Wallwork and Ainsworth had spent weeks studying aerial photographs and maps of the landing zone, memorising the alignment of the canal and nearby roads.9Royle (1944), Report on Operation ‘Overlord’. (Glider Pilot Regiment).
At 00:16 hours, the lead glider crossed the canal at low altitude and made the turn into the planned northerly landing direction. As the glider’s wheels touched down, Ainsworth activated the arrestor parachute system. The aircraft decelerated violently and bounced in the air, tearing off all three wheels. The aircraft then touched down again on its skids, throwing up a cloud of sparks as the skids struck rocks. Major Howard thought the sparks were tracer fire.10Ambrose, Pegasus Bridge (1984), p. 72.
The glider’s nose crashed through barbed-wire obstacles, which brought the aircraft to a sudden halt about 30 metres from the bridge. Wallwork and Ainsworth were thrown forward through the windshield as their seats tore loose from the cockpit floor. Both were knocked unconscious.
Likewise, Major Howard and many other troops were knocked temporarily unconscious by the violent halt. Within seconds, most had recovered. Despite the violent landing, most of the men aboard were able to scramble from the wreckage.
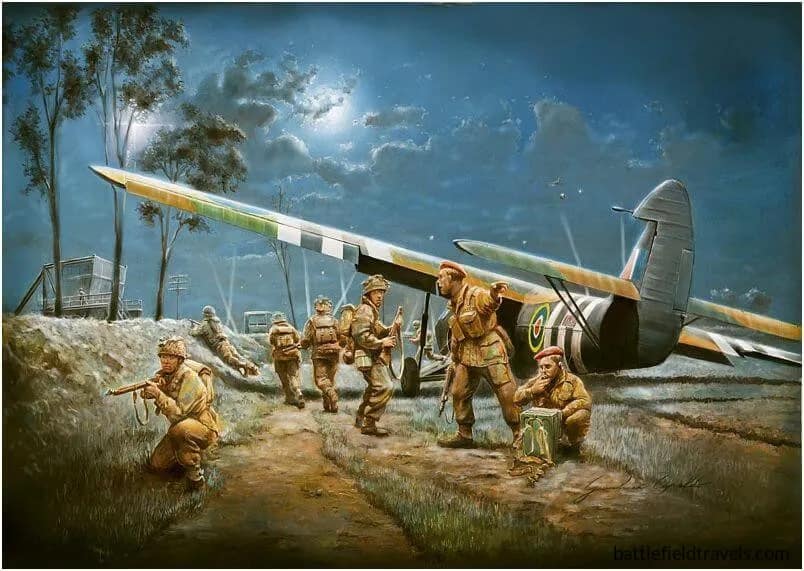
Lieutenant Brotheridge gathered his platoon and got them moving towards the bridge. Incredibly, while several German sentries on the bridge heard the first glider’s crash landing, they assumed it was debris falling from the Allied bomber fleets passing overhead. None noticed the Horsa glider that had torn through their barbed wire entanglements, just outside the bridge’s lighting.

Glider Number 2. Bénouville Bridge
The second glider landed one minute after the lead. The pilot, Staff Sergeant Boland, could see Wallwork’s glider on the ground ahead. He activated his arrestor chute and spoilers, forcing his Horsa to the ground. As he skidded to a halt, he wrenched his glider to the right to avoid hitting the other Horsa. The aircraft broke in two and came to a halt close to the pond. Lieutenant David Wood gathered his platoon and moved forward to Major Howard, who was positioned just outside the German perimeter wire. Howard directed Wood to ‘Number 3 task’—clear the German trenches on the northeastern side of the bridge. Wood and his platoon moved forward.
Glider Number 3. Bénouville Bridge
At about the same time, the third glider touched down. Like the lead glider, it deployed the arrestor parachute, bounced, tore off its wheels, and skidded to a violent halt. Doctor John Vaughan, who was seated behind the pilots, was thrown through the windshield and landed in front of the glider; he lay there unconscious for about 30 minutes. The platoon commander, Lieutenant Sandy Smith, was also thrown through the windshield and landed next to Doctor Vaughan, stunned and without his Sten gun. Smith gathered the fit men and raced forward to the bridge. Lance Corporal Fred Greenhalgh was thrown into the pond and, unfortunately, drowned. Several other men were injured or unconscious and remained with the aircraft.11Ambrose, Pegasus Bridge (1984), p. 75.
In the space of two minutes, the three gliders had delivered 90 troops to within metres of the bridge, completely surprising the German sentries. The assault began almost immediately.
Capture of the Bénouville bridge
One of the first officers to reach the bridge was Lieutenant Den Brotheridge, leading a section tasked with clearing the western end of the crossing. Brotheridge and his men advanced rapidly toward a German machine-gun position covering the bridge. As they approached the span, Brotheridge threw a grenade at the machine gun position and was struck in the neck by a bullet and mortally wounded. Despite this loss, his men continued the assault, clearing the defensive positions and securing the western end of the bridge.12Ellis, Victory in the West, Vol. I (1962), p. 150.
The other platoons moved simultaneously to secure the eastern end of the bridge and the nearby buildings that could serve as firing positions. German soldiers emerging from nearby bunkers and houses were quickly overwhelmed by grenades and small-arms fire. Lieutenant Sandy Smith had his wrist almost torn off by a German stick grenade, but continued to fight. Lieutenant David Wood’s platoon continued to clear and secure the northeastern approaches to the bridge. As Wood moved back to Major Howard’s command post at the pillbox, he was struck in the legs by a burst of submachinegun fire. One of Howard’s platoon commanders at the Bénouville Bridge was now dead oand the other two were wounded. Training, experience and rehearsals now kicked in, and the Platoon Sergeants and Corporals took over the three platoons.
Royal Engineer efforts
While Howard’s infantry platoons cleared the bridge approaches, the attached Royal Engineers moved onto the structure itself. The Germans had prepared demolition charges on the bridge, connected to firing cables intended to destroy the crossing in the event of an attack. The engineers located and cut these wires before the charges could be detonated, ensuring the bridge remained intact.
The last few German survivors ran back to the German headquarters at Bénouville to report the surprise attack. Within a few minutes of the glider landings, the Caen Canal bridge was firmly in British hands.
Orne River Bridge, Ranville
While Howard and his men secured the Caen Canal Bridge at Bénouville, the next phase of the operation was underway at the Orne River Bridge at Ranville, about 400 metres east of the Canal Bridge.
Glider Number 6. Ranville Bridge
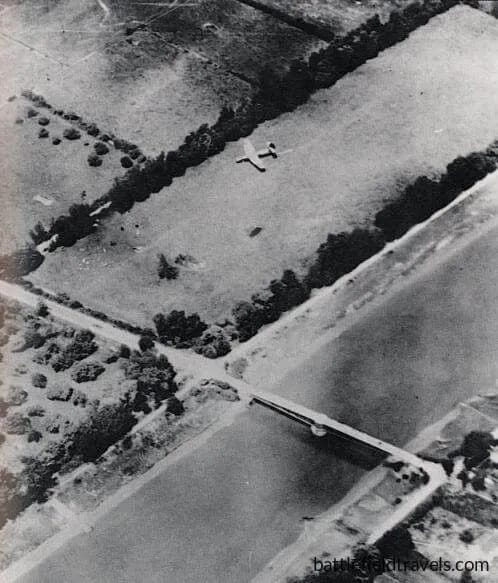
At 0020 hours, Glider Number 6 landed about 200 metres north of the Orne River bridge at Ranville. For the river bridge assault, the landing direction was north to south, and the landing zone was further away from the objective due to tree cover near the bridge and herds of livestock. Glider Number 6 landing was smooth and Lieutenant Dennis Fox and Sergeant Thornton gathered their platoon and headed towards the bridge. A machine gun opened fire on them, but Sergeant Thornton set up a mortar and destroyed the machine gun position with the first shot.13Ambrose, Pegasus Bridge (1984), p. 81..
Fox’s platoon rushed the bridge, and all the German sentries fled the position. The British paratroopers rapidly seized both ends of the bridge.
Glider Number 5. Ranville Bridge
At 00:21 hours, Glider Number 5, carrying Lieutenant Sweeney’s platoon, hit a pocket of air and descended rapidly, landing some 700 metres north of the Ranville bridge. The landing was smooth, and Sweeney’s platoon jogged to the bridge unopposed. They linked up with Fox’s platoon to secure the bridge.14Royle (1944), Report on Operation ‘Overlord’. (Glider Pilot Regiment).
What happened to Glider Number 4?
Glider Number 4, along with about one-sixth of Major Howard’s force, was missing. The towing aircraft had become disoriented and misidentified the Dives River and Canal as the objective area. Glider No. 4, with 22 Platoon embarked, landed nearly 12 kilometres away, at the Dives River near Périers-en-Auge.
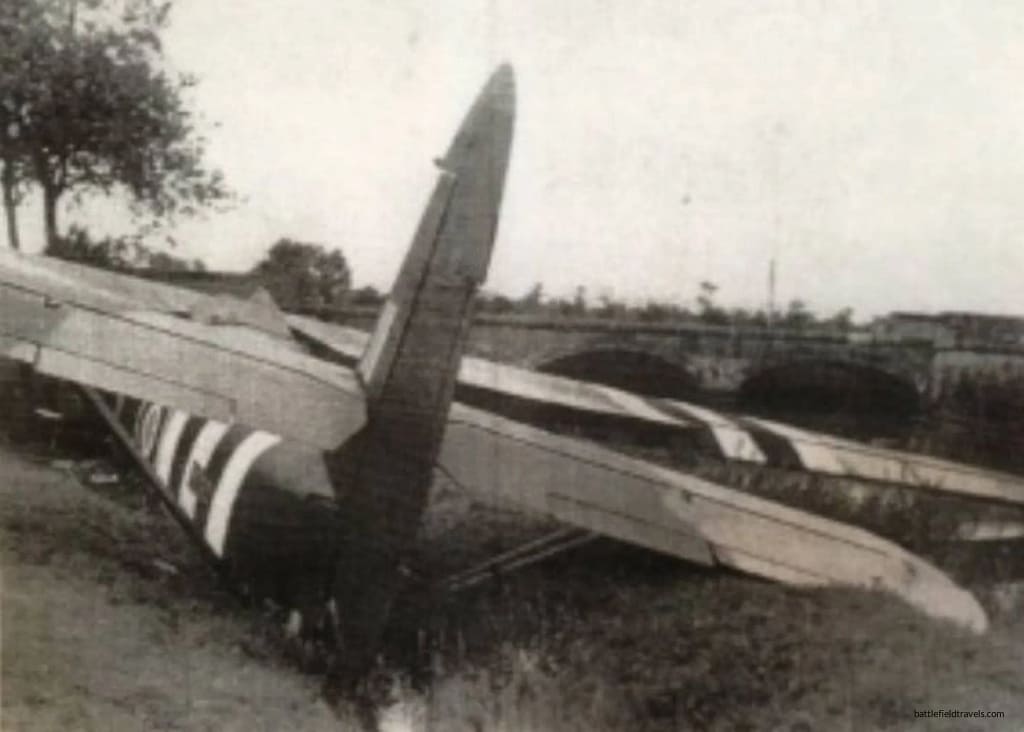
The glider, piloted by Staff Sergeants Shorter and Lawrence, landed hard in a ditch close to the bridge facing south on the eastern side of the bank. As the glider skidded to a halt, the underside broke apart, and the seats came adrift, leaving the embarked troops alive but disorganised when the aircraft came to a halt. Capt Priday and LT Hooper led the platoon in capturing the Dives River bridge, but quickly realised it was the wrong location. Over the next 24 hours, they made their way to Ranville, where they linked up with the rest of D Company.15“The Coup de Main Attack on Pegasus & Horsa Bridges.” Lightbobs, www.lightbobs.com/1944-pegasus-bridge-coup-de-main.html. Accessed 1 Apr. 2026.
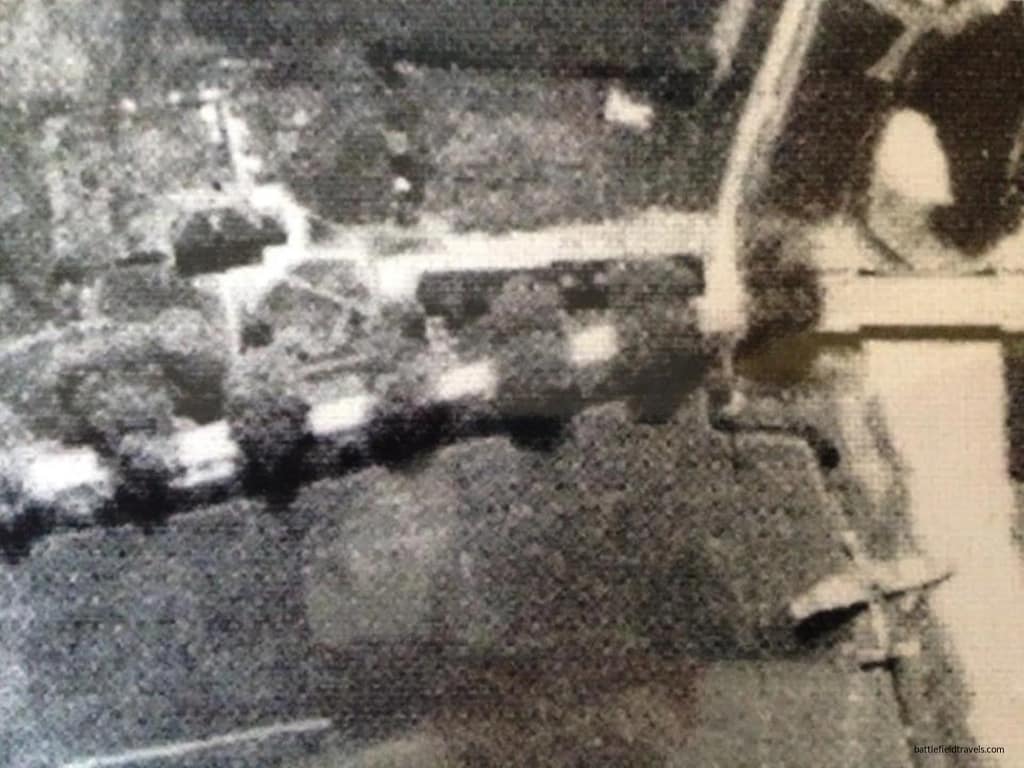
A successful coup de main!
By about 00:30 hours, less than fifteen minutes after the first glider touched down, both the Bénouville and Ranville bridges had been captured intact and secured by Major Howard’s force.
The success of the assault owed much to the extraordinary precision of the glider landings. Night glider operations were notoriously difficult, yet the aircraft had landed within metres of their intended objectives. This level of precision allowed the assault force to achieve complete tactical surprise, overwhelming the small German garrisons before they could organise a coordinated defence.
Having successfully seized the bridges, Major Howard was able to pass the codeword for mission success: ‘HAM and JAM’. ‘HAM’ meant the bridges had been captured. ‘JAM’ meant the bridges were intact. Major Howard’s orders were now to ‘Hold until relieved’. The more difficult phase of the operation — holding the bridges against German counterattack — was only just beginning.
Consolidation on the objective (00:30–01:30 hours)
Securing the approaches to the bridges
Although the initial assault had succeeded with remarkable speed, Major John Howard’s force now faced the more difficult task of holding the bridges until reinforcements could arrive. The coup de main detachment had achieved surprise and captured the crossings intact, but it was still a lightly armed force isolated deep inside German-held territory.
Howard was less concerned about the Ranville Bridge as the British 5th Parachute Brigade was due to commence landing east of the Orne River at 00:50 hours. The paratroopers would protect the eastern flank and the Ranville bridge. He was more concerned with the western flank and the approaches to the Bénouville Bridge.
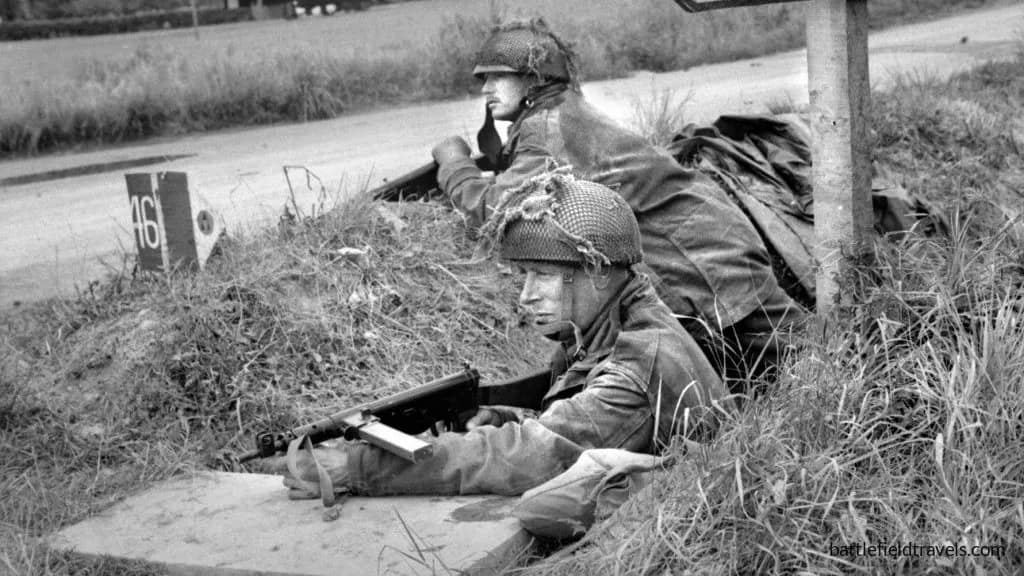
The priority was to organise a defensive perimeter around the bridges. Howard called Lieutenant Fox and his platoon across to the Bénouville Bridge and deployed his platoons to cover the key approaches to the canal and river crossings. Defensive positions were established along the roads leading toward Bénouville, Le Port, and the southern approaches from Caen. Bren guns and rifle teams were placed to cover the bridge approaches, while PIAT anti-tank teams were positioned to engage any armoured vehicles that might attempt to reach the crossings.16Ambrose, Pegasus Bridge (1984), pp. 89-91..
Consolidation on the objective
At the same time, Royal Engineers had determined that although the bridge was wired for demolition, the explosive charges had not been placed in their cannisters, so the bridge could no longer be demolished. The engineers also began strengthening defensive positions using whatever cover was available — hedgerows, roadside ditches, and nearby buildings.
Doctor Vaughan regained consciousness, joined Major Howard at his command post, and began treating the wounded. Vaughan was still dazed from his concussion and wandered several times towards the western end of the bridge. He was called back to safety each time.
5th Parachute Brigade drop
At 00:50 hours, Major Howard heard the steady hum of dozens of Stirling bombers as they dropped the British 5th Parachute Brigade to the north and east of Ranville. He could see flares arcing into the night sky as the Pathfinders marked the drop zones. He could also see German searchlight beams illuminating the parachute canopies and the tracer and anti-aircraft fire directed at the paratroopers and their aircraft.
Major Howard began blowing his signal whistle using Morse code. Three dots and a dash—V for Victory; the signal that the bridge was in British hands. Paratroopers could hear the whistle from kilometres away in the still night air. The signal let them know that the coup de main had been successful, and they needed to rally and get to the bridges as soon as possible.
Many paratroopers later recalled that the whistle helped them determine their location and the direction to the bridge.
Reinforcements race to the bridges
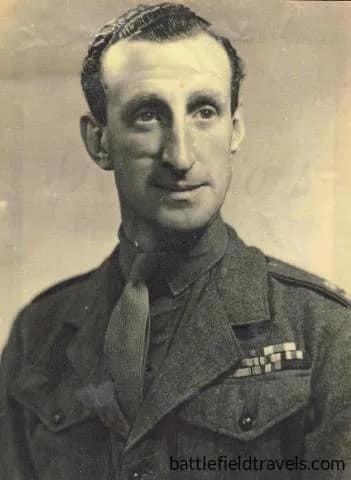
Lieutenant Colonel Richard Pine-Coffin, Commanding Officer 7th Battalion, The Parachute Regiment, had the task of reinforcing Major Howard at the bridges and securing the western approaches. With much of his battalion still scattered around Ranville, he set off at the run, with about 100 men.17Ellis, Victory in the West, Vol. I (1962), pp. 152–153..
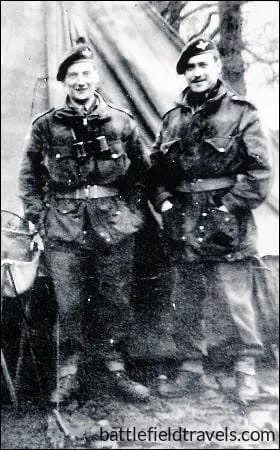
One of the paratroopers in the 7th Battalion, The Parachute Regiment, was Lieutenant Richard Todd, who had been an aspiring actor before the war and would continue his acting career after the war.
When Darryl F. Zanuck produced his blockbuster 1962 movie ‘The Longest Day’, Richard Todd would play the role of Major John Howard at Pegasus Bridge.
Despite these reinforcements, Howard’s force remained dangerously exposed. German armoured units of 21st Panzer Division were known to be stationed around Caen, and if they reacted quickly they could potentially reach the bridges before the airborne forces had fully consolidated their positions.
Initial German responses
Meanwhile, the surviving German soldiers from the bridge garrisons had begun spreading the alarm. The Caen Canal bridge lay within the sector of 716. Infanterie-Division, a static coastal defence formation commanded by Generalleutnant Wilhelm Richter. Units of this division were responsible for defending the coastal approaches to Caen and manning strongpoints along the beaches and inland waterways.
The garrison at Bénouville had been small, and the sudden arrival of gliders beside the bridge had caused confusion among the defenders. However, nearby German units soon began probing toward the bridge to determine the nature of the attack.
Major Hans Schmidt, who was responsible for the bridges, could hear the shooting and set off from Ranville in his staff car. As Schmidt’s vehicle attempted to cross the Ranville Bridge, the British paratroopers opened fire, killing his motorcycle escort and wounding Major Schmidt and his driver.18Ambrose, Pegasus Bridge (1984), pp. 94-95..
First German counterattacks (01:30 – 06:00 hours)
D-Company defensive posture
Major Howard had deployed his force with Wood’s platoon and the engineers at the eastern edge of the Bénouville Bridge. On the west side of the canal, Brotheridge’s platoon held the café and the south side of the road, while Smith’s platoon held the bunkers on the north side of the road. Fox and Thornton’s platoon was deployed forward near the Bénouville T-Junction, with the only undamaged PIAT (Projector Infantry Anti-Tank – similar to a bazooka). Sweeney’s platoon was alone at the Ranville Bridge.
German armoured counterattack (~01:30 hours)
The first significant German counterattack occurred shortly before 01:30 hours. A German Panzer Mark IV tank, soon followed by a second tank, approached the canal bridge from the direction of Bénouville along the road running south toward Caen. The vehicles advanced cautiously toward the crossing, probing the British defences. Unlike typical practice in urban areas, the tanks were not preceded by infantry reconnaissance elements.
As the tank moved onto the bridge approach, it was engaged by a PIAT team commanded by Sergeant Wagger Thornton. Firing from about 20 metres range, Thornton’s team disabled the vehicle, blocking the road leading to the bridge. The tank’s ammunition began to detonate and created a spectacular pyrotechnics show, not only for the paratroopers at the bridge, but for the 5th Brigade paratroopers moving to reinforce them. The second German tank and the infantry withdrew and determined that they would have to wait until dawn before the next attempt.
Arrival of 7th Parachute Battalion
As the tank was exploding, the first elements of 7 Para, including Lieutenant Richard Todd and Colonel Pine-Coffin, arrived at the bridge site. They immediately began to occupy their pre-planned defensive positions on the west bank, illuminated by the burning German tank. At 02:10 hours, Howard’s D-Company was pulled back into reserve and occupied a position between the bridges.19Pine-Coffin, R.G. (1944) Report on the Action Fought at RANVILLE and BENOUVILLE brs on night 5/6 June and day 6 June 1944., 7th Parachute Battalion. Available at: https://www.pegasusarchive.org/normandy/war_7thBatt.htm (Accessed: 03 April 2026).
This engagement represented one of the earliest anti-armour actions of the Normandy campaign. The destruction of the vehicle not only prevented the immediate recapture of the bridge but also blocked the narrow road approach, complicating further German attempts to reach the crossing.20Ambrose, Pegasus Bridge (1984), pp. 100-101.
Attack by 192nd Panzergrenadier Regiment (~03:00 hours)
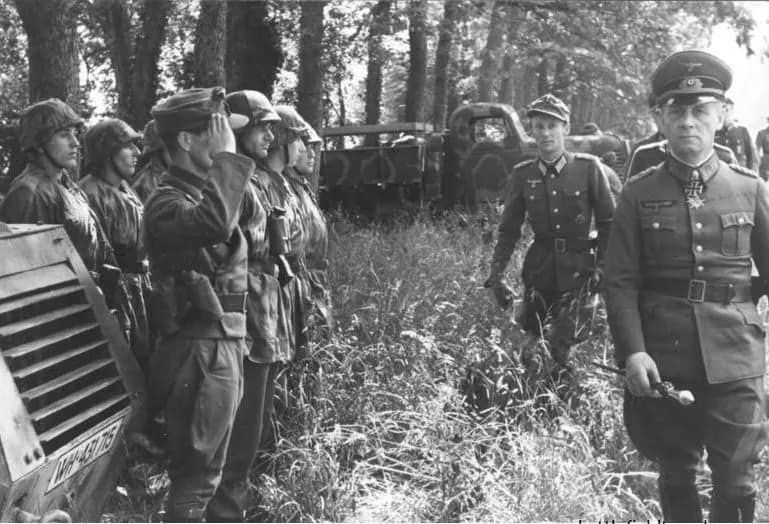
At his headquarters south of Caen, Generalmajor Edgar Feuchtinger, Commander of 21st Panzer Division, was notified of the British activity around Bénouville and Ranville at about 01:30 hours. He immediately assembled his armoured forces in response, but was under strict orders not to commit until personally approved by the Führer, who was sleeping. Consequently, he relied on local forces to counterattack until the broader situation in Normandy became clearer.
At 03:00 hours, Feuchtinger ordered the 192nd Panzergrenadier Regiment, located north of Caen, on the west side of the Canal, to retake the bridge. The Regiment’s 8th Heavy Grenadier Company was well-equipped but lacked tanks. Its attack drove the lightly armed British paratroopers back into the middle of Bénouville but could not dislodge them. The Germans dug in to await the arrival of tanks from the 21st Panzer Division. German tankers recalled waiting through the night for the order to counterattack.21Pine-Coffin (1944) Report on the Action Fought at RANVILLE and BENOUVILLE (7th Parachute Battalion).
German command paralysis
German command and control in the Caen sector was further complicated by the British 6th Airborne Division’s airborne landings taking place east of the Orne, and the US Airborne’s landings further west on the Cotentin Peninsula around Sainte Mere Eglise. Parachute drops, glider landings, and sabotage operations were reported throughout the region, creating uncertainty about the main Allied objectives. Many German units initially believed that the airborne landings were diversionary actions rather than the opening phase of a major invasion.
At dawn, British paratroopers from 7 Para knocked on the door of the Gondrée house. Georges and Thérèse Gondrée were greatly relieved to find the British in charge of their town. The Gondrée house was the first house to be liberated in the Allied invasion of Europe.
Link-up with seaborne forces (07:25–13:00 hours)
Expanding the perimeter
By first light on 6 June, Major John Howard’s coup de main force and 7 Para had held the bridges for more than six hours. Although the initial German probes had been repelled, the situation remained precarious. The defenders were lightly armed, ammunition was limited, and reports continued to circulate of German armour assembling around Caen.
During the early morning hours, the defensive perimeter around the bridges gradually expanded as additional airborne troops reached the area. The scattered parachute drops during the night had provided a steadily growing reinforcement of Howard’s position. Small groups of paratroopers from the 5th Parachute Brigade continued to arrive and reinforce the perimeter.
As the sun rose, German snipers became active and began sniping at any movement in the British perimeter, inflicting additional casualties. Four British soldiers under Corporal Wally Parr occupied the German anti-tank gun bunker on the south side of the Bénouville Bridge. They soon figured out how to operate the gun and began firing, with mixed results, into potential sniper positions.22Pine-Coffin (1944) Report on the Action Fought at RANVILLE and BENOUVILLE (7th Parachute Battalion).
Sword Beach landings
The main Allied seaborne invasion began soon after dawn, across a frontage of nearly 100 kilometres. Six thousand ships of all types and five thousand aircraft supported the landing of more than 127,000 troops on the Normandy beaches. The seaborne assault on Sword Beach, spearheaded by the British 3rd Infantry Division, began shortly after 07:25 hours, when the first assault waves reached the beaches near the port city of Ouistreham. The landings met resistance but progressed steadily, and by mid-morning, British infantry had begun advancing inland toward their objectives.23Ambrose, Pegasus Bridge (1984), p. 109.

Ahead of the advancing forces, the massive naval guns of the ships standing offshore bombarded pre-planned targets. For the paratroopers at Bénouville, the ground shook every time a shell landed. At about 08:00 hours, a flight of Spitfires flew overhead, and Howard laid out the system of marker panels to indicate that the bridges were under Allied control. The Spitfires responded with victory rolls.
At around 09:00 hours, Major General Gale, Commander of 6th Airborne Division, arrived with Brigadier Hugh Kindersley, Commander 6th Air Landing Brigade, and Brigadier Nigel Poett, Commander 5th Parachute Brigade. Gale established his headquarters at Ranville and congratulated Howard’s D Company as he passed through to inspect the west bank defences.
Continued German attacks
The Germans continued to attack the Bénouville Bridge. Just after 09:00 hours, two German gunboats approached from the Ouistreham direction, both firing on the Bénouville Bridge with their auto-cannon. D Company disabled the lead boat with a PIAT shot and captured the crew.
A German fighter-bomber made a low bombing pass against the bridge and struck the bridge tower with its bomb. Fortunately, the bomb was a dud and bounced into the water. Howard and his men were impressed by the German pilot’s accuracy.
Two German frogmen attempted a swimming approach to emplace explosives on the bridge, but both were dealt with by riflemen on the canal banks.
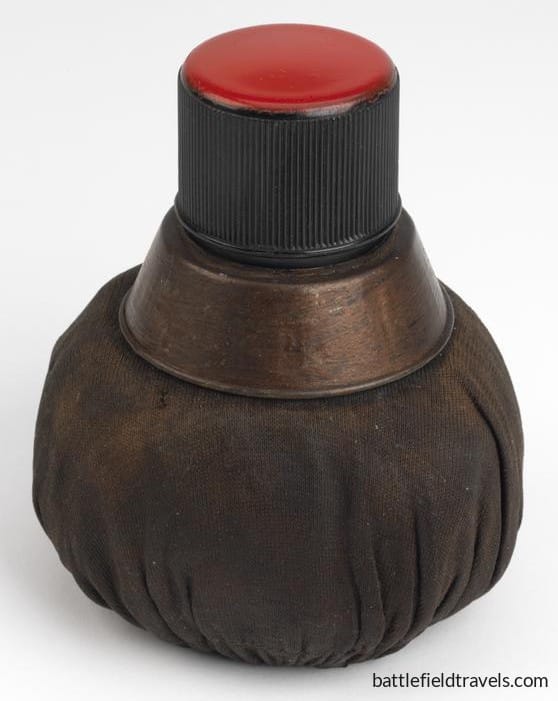
The fighting around Bénouville continued through the morning, and the 7 Para companies on the west bank took significant casualties. Several German Nebelwerfer half-tracks and tanks joined the attacks. The paratroopers knocked out at least one more tank with a hand-thrown Gammon Bomb (a fabric bag grenade that detonated on impact).
⚔️ Go deeper — Members get exclusive access to the Deep Research Collection, Field Notes, and monthly Research Dispatches. Try membership free for 7 days, cancel anytime. From $9/month.
Approach of the 1st Special Service Brigade
Among the first units landing at Sword Beach was the 1st Special Service Brigade, commanded by Brigadier Simon Fraser, Lord Lovat. This formation comprised several commando units tasked with advancing rapidly inland to link up with the airborne forces holding the Orne bridges.246th Airborne Div (1944), OPERATION INSTRUCTION No.1.
The brigade included:
• No. 3 Commando
• No. 4 Commando, which included the French Troop under Commandant Philippe Kieffer
• No. 6 Commando
• No. 45 Royal Marine Commando
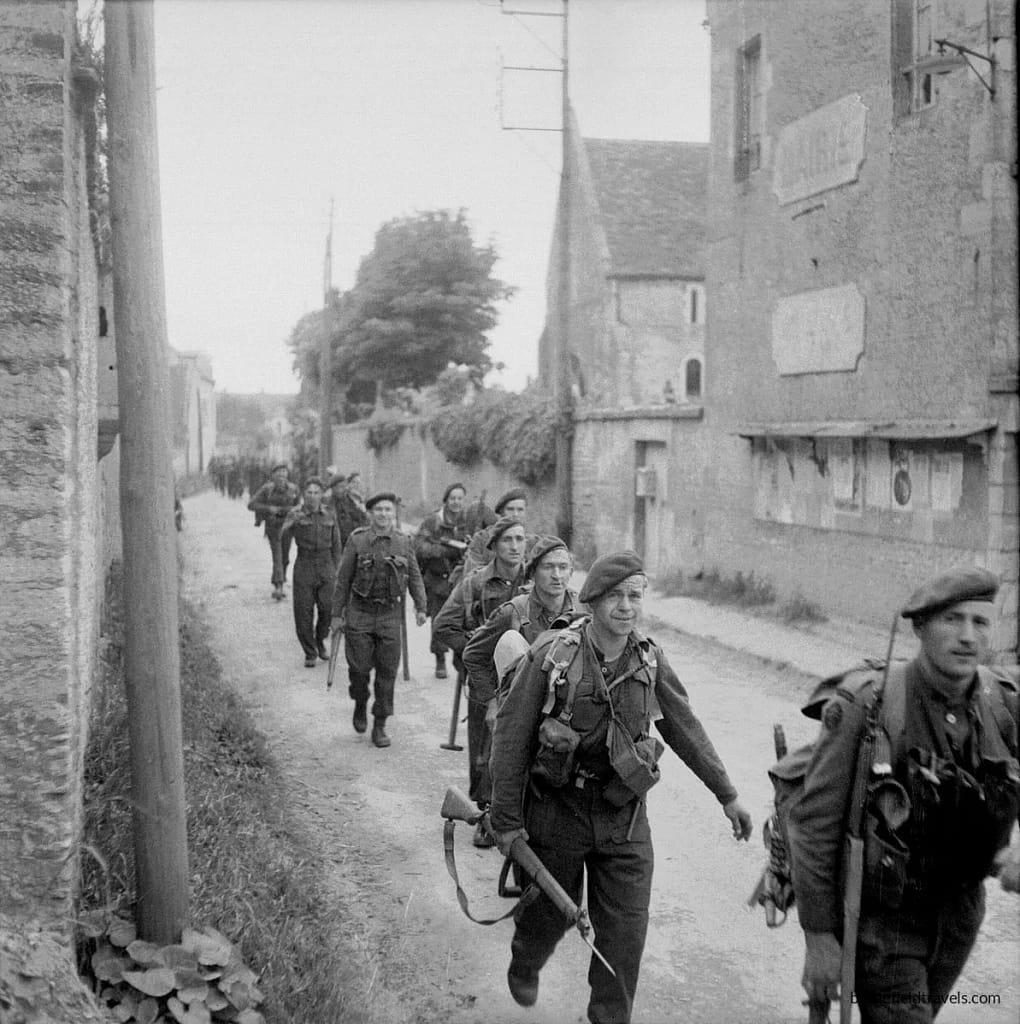
After landing on Sword Beach during the morning, Lovat’s commandos moved quickly inland along the road and canal routes leading toward Bénouville and Ranville. The advance was conducted at speed, as the commandos were aware that the airborne troops holding the bridges might soon face stronger German counterattacks.
As the column approached the canal bridge shortly after 13:00 hours, the leading elements of No. 4 Commando moved ahead toward the crossing. Their approach was signalled by one of the most memorable episodes of the Normandy invasion.
Piper Bill Millin
Accompanying the brigade was Piper Bill Millin, personal piper to Lord Lovat. As the commandos advanced along the canal road toward Pegasus Bridge, Millin marched at the head of the column playing traditional Scottish pipe tunes, including Highland Laddie and Blue Bonnets Over the Border. Although the practice of piping troops into battle had largely disappeared from modern warfare, Lovat had insisted that the piper accompany the brigade during the advance.
The sound of the bagpipes carried across the canal as the commandos approached the bridge. For the airborne troops defending the crossing, the sight of the advancing commandos — and the unmistakable sound of the pipes — signalled that relief had finally arrived.25Pine-Coffin (1944) Report on the Action Fought at RANVILLE and BENOUVILLE (7th Parachute Battalion).

Lord Lovat’s force links up with Major Howard
At around 13:15 hours, the leading elements of Lovat’s brigade crossed Pegasus Bridge, linking up with Major Howard’s exhausted defenders. The two forces greeted each other briefly before the commandos continued moving toward their next objectives east of Ranville. Perhaps most importantly, the Commandos were accompanied by several Churchill tanks that took up positions in support of the paratroopers around the bridge.
Among the commandos were the men of No. 4 Commando’s French Troop, the only French soldiers landing with the initial Allied invasion force. Led by Commandant Philippe Kieffer, these troops advanced alongside their British counterparts and participated in the subsequent fighting around the canal and nearby villages.
The link-up between the airborne and seaborne forces marked a crucial milestone in the Normandy invasion. Howard’s coup de main force had successfully held the bridges for nearly thirteen hours, preventing German demolition teams from destroying the crossings and blocking early counterattacks against the eastern flank of the beachhead.
With the arrival of the commandos and advancing units from the 3rd Infantry Division, the defence of the bridges could now be integrated into the wider Allied front. However, German forces around Caen were beginning to organise more substantial counterattacks, and the fighting around the Orne bridgehead would continue throughout the remainder of D-Day and into the following days.
Holding the Orne Bridgehead (Afternoon 6 June – 7 June)
21st Panzer Division counterattacks
Although the link-up with Lord Lovat’s commandos secured the immediate objective, the Orne bridgehead remained exposed throughout the afternoon and evening of 6 June 1944. German commanders around Caen were gradually beginning to understand the scale of the Allied invasion, and elements of 21st Panzer Division were preparing counterattacks to drive the airborne forces back across the Orne and retake the bridges.
The terrain around the canal and river crossings again played a decisive role. The waterways and their embankments channelled movement along a limited road network, forcing German units to approach the bridges through the villages of Bénouville, Le Port, and Ranville. These urban areas channelled movement and exposed attacking vehicles to anti-tank weapons positioned along the road approaches.
One of the most serious threats developed along the road running south from Pegasus Bridge toward Caen. Colonel Hans von Luck’s 125th Panzergrenadier Regiment, equipped with tanks and mechanised infantry, attempted to advance toward the canal crossing in order to isolate the airborne defenders and reopen the route to the coast. British troops responded by deploying PIAT anti-tank teams and positioning machine-guns to cover the narrow road approaches. All German attempts were beaten back, and the Germans lost 13 of the 17 tanks engaged in the attack.26Ambrose, Pegasus Bridge (1984), p. 126..
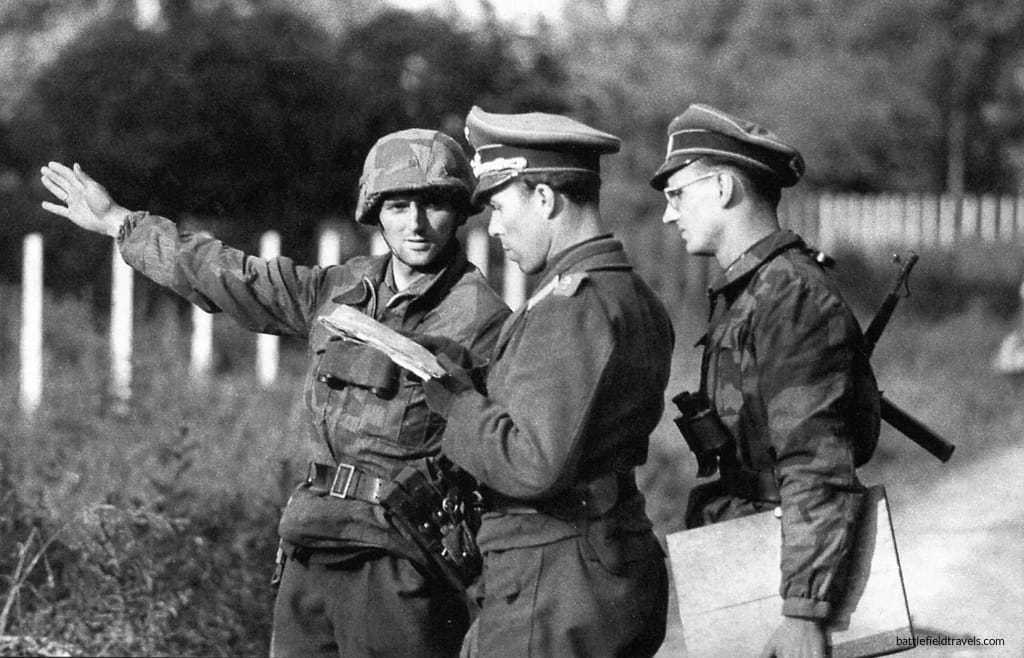
6th Airborne Division operations east of the Orne River
Meanwhile, additional units of the 6th Airborne Division continued to consolidate the bridgehead east of the Orne. By the afternoon of D-Day, the 5th Parachute Brigade had secured Ranville, which became the centre of the airborne defensive line. Patrols pushed outward from the village to establish contact with neighbouring units and to monitor German movements from Caen.
Further north and east, the 3rd Parachute Brigade was engaged in separate actions against the Merville Battery and the bridges over the River Dives; operations intended to delay German reinforcements moving against the invasion beaches.
Allied artillery batteries landed through the Sword beachhead and began to influence the battle. British batteries were able to engage German movements on the roads leading from Caen toward the Orne, disrupting attempts to organise a coordinated counterattack.
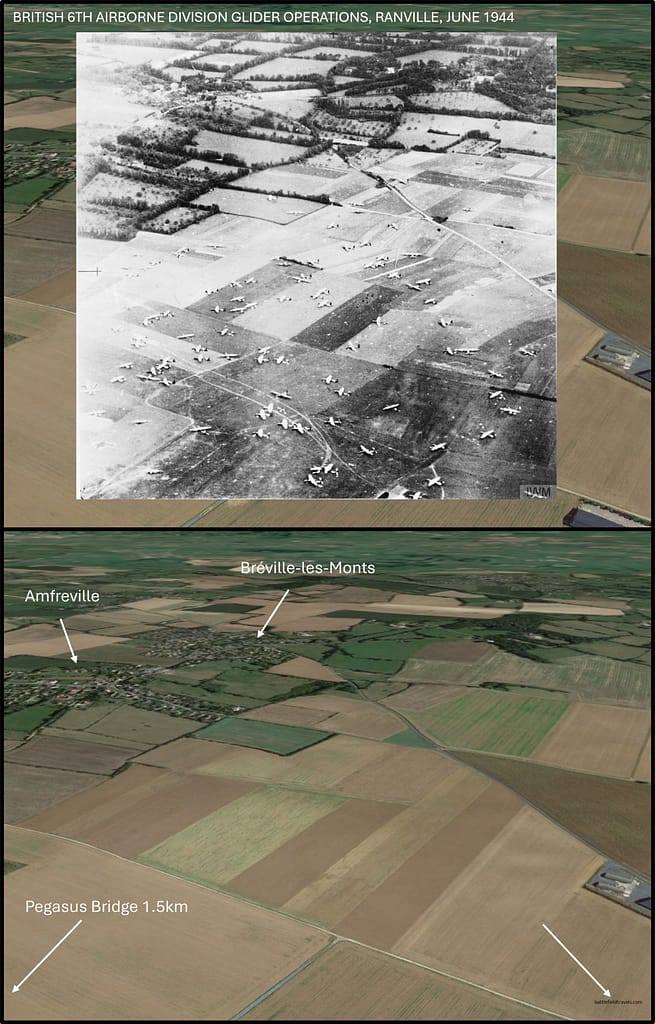
Bridgehead stabilised
By nightfall on 6 June, the bridgehead had stabilised. The airborne troops and commandos holding the canal and river crossings had been reinforced by advancing units from the seaborne landings, and the defensive perimeter east of the Orne had expanded to include Ranville and surrounding villages.
At around 21:15 hours, the 2nd Battalion, Royal Warwickshire Regiment of the 185th Infantry Brigade arrived from Sword Beach and began relieving the paratroopers at the bridges. At around midnight, Howard handed over command of the bridges to the Warwickshires, and his company left to join the rest of their battalion at Ranville, where they also linked up with Captain Priday and the missing 22 Platoon.
During the night and into 7 June, engineers strengthened the bridge defences and improved the road network connecting the airborne lodgement with Sword Beach. Anti-tank guns and additional infantry units were deployed to guard the approaches to the bridges in anticipation of further German attacks.
Although German forces continued to launch probing attacks over the following days, the opportunity to retake the crossings on D-Day had passed. The Orne bridgehead would remain a key sector of the Allied front throughout the battle for Normandy, anchoring the eastern edge of the beachhead, as operations around Caen unfolded in the weeks that followed.27Ellis, Victory in the West, Vol. I (1962), pp. 227-228.

Outcomes of the coup de main operation
The coup de main assault on the Caen Canal and Orne River bridges was one of the most successful small-unit airborne operations of the Second World War. Within minutes of landing, Major John Howard’s coup de main force had secured both bridges intact and, over the following hours, the lightly armed airborne troops held the crossings against repeated German probes until relieved by advancing seaborne forces.
Tactical Success
At the tactical level, the operation achieved complete surprise. The German garrisons defending the bridges were overwhelmed before they could organise a coordinated defence or detonate the demolition charges prepared on the structures. The precision of the glider landings proved decisive. Despite landing in darkness and navigating without modern electronic aids, the leading glider touched down within metres of the canal bridge, placing the assault force directly beside the objective.
This extraordinary accuracy allowed Howard’s men to move immediately from the wrecked gliders into the assault. German sentries had only moments to react before British troops were already crossing the bridge and clearing nearby defensive positions. The attached Royal Engineers quickly located and severed the demolition wiring, ensuring the bridge could not be destroyed.
Although the coup de main force was lightly armed, the defenders made effective use of the terrain around the bridges during the subsequent fighting. The narrow road and embankments along the canal and river restricted German vehicles’ manoeuvrability, allowing PIAT teams and small-arms fire to dominate the approaches. German probes during the night and early morning were repelled before they could build sufficient strength to mount a coordinated assault.
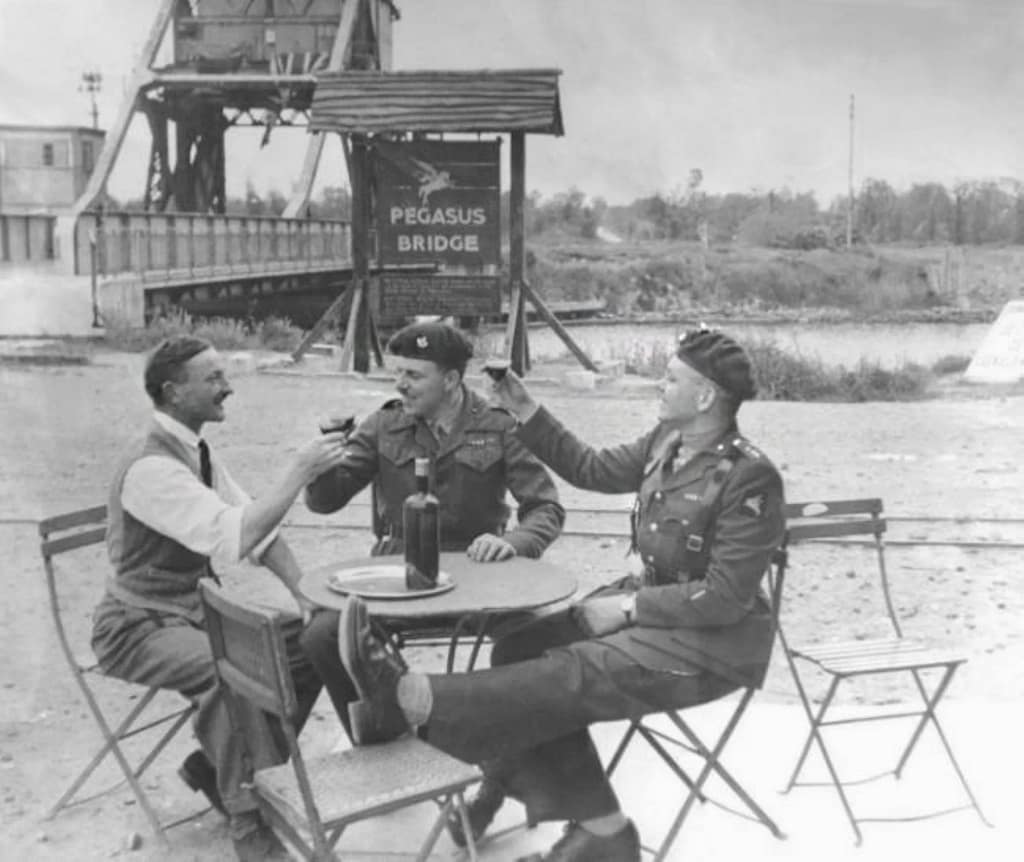
Operational Impact
The capture of Pegasus and Horsa Bridges had immediate operational consequences for the Normandy invasion. The bridges formed the eastern anchor of the Allied beachhead and prevented German armoured units stationed around Caen from striking the exposed flank of the landings at Sword Beach.
Had German forces retained control of the crossings — or succeeded in demolishing them before the airborne assault — the Allied airborne troops east of the Orne would have been isolated from the beachhead. German armour could potentially have crossed the waterways and advanced toward the coast during the early hours of the invasion, when the Allied landing forces were still disorganised.
Instead, the successful seizure of the bridges ensured that the Caen Canal and River Orne became a defensive barrier protecting the eastern flank of the Allied lodgement. This allowed British forces landing on Sword Beach to advance inland without the immediate threat of armoured counterattacks from the east.

Casualties
Compared with the objective’s strategic importance, casualties among the coup de main force were relatively light. Major Howard’s force suffered two killed and fourteen wounded, while 7 Para suffered 18 killed and 36 wounded.
Among the first casualties was Lieutenant Den Brotheridge, mortally wounded while leading the assault across the canal bridge. Brotheridge is widely recognised as the first Allied officer killed during the Normandy invasion.
German losses were heavier. Most of the bridge garrisons were killed or captured during the assault, and numerous German armoured vehicles were destroyed during the early counterattacks against the bridgehead.
The Pegasus Bridge battlefield today
Pegasus Bridge and the surrounding villages of Bénouville, Le Port, and Ranville form one of the most accessible and clearly interpreted battlefield areas of the Normandy campaign. Unlike many other D-Day locations where post-war development has altered the terrain, the landscape around the Caen Canal and River Orne remains remarkably similar to its appearance in June 1944. The waterways, roads, and surrounding fields still limit the approaches to the narrow crossing points that made the bridges such critical objectives during the opening hours of Operation Overlord.
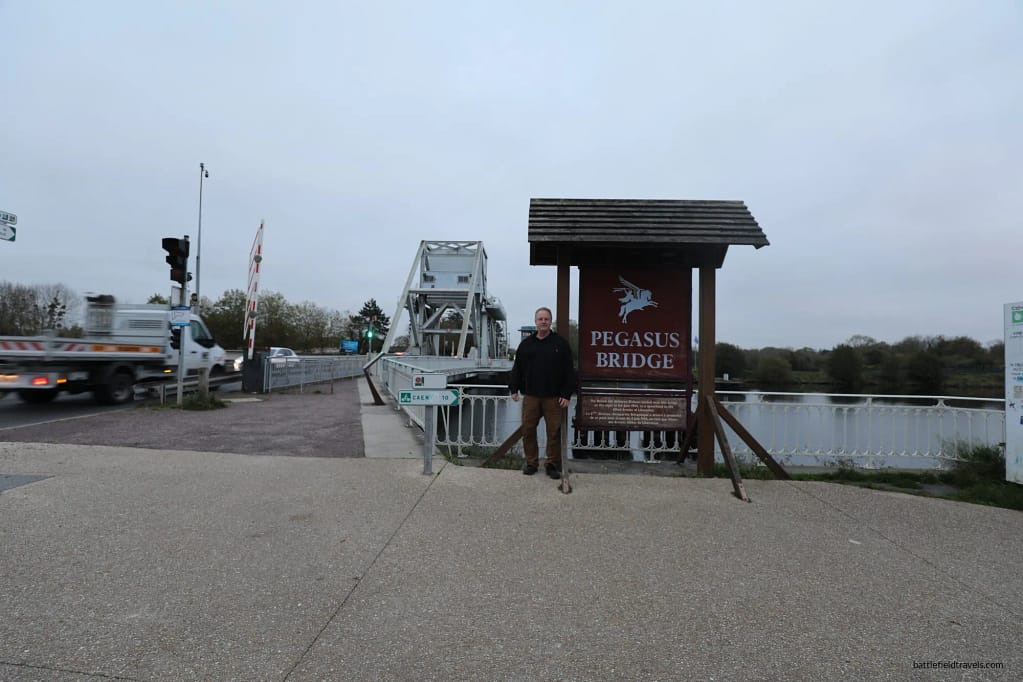
Bénouville and Pegasus Bridge
The modern road bridge at Bénouville is of a similar design to the wartime bridge, and stands on the same site as the original bridge seized by Major John Howard’s men in the early minutes of D-Day. In 1994, the wartime bridge was replaced by a wider structure to accommodate modern traffic, but the original steel bascule bridge was carefully preserved and relocated a short distance away within the grounds of the nearby Pegasus Memorial Museum. Visitors can walk across this original bridge, which remains one of the most authentic surviving artefacts of the Normandy landings.
Pegasus Memorial Museum (Mémorial Pegasus)
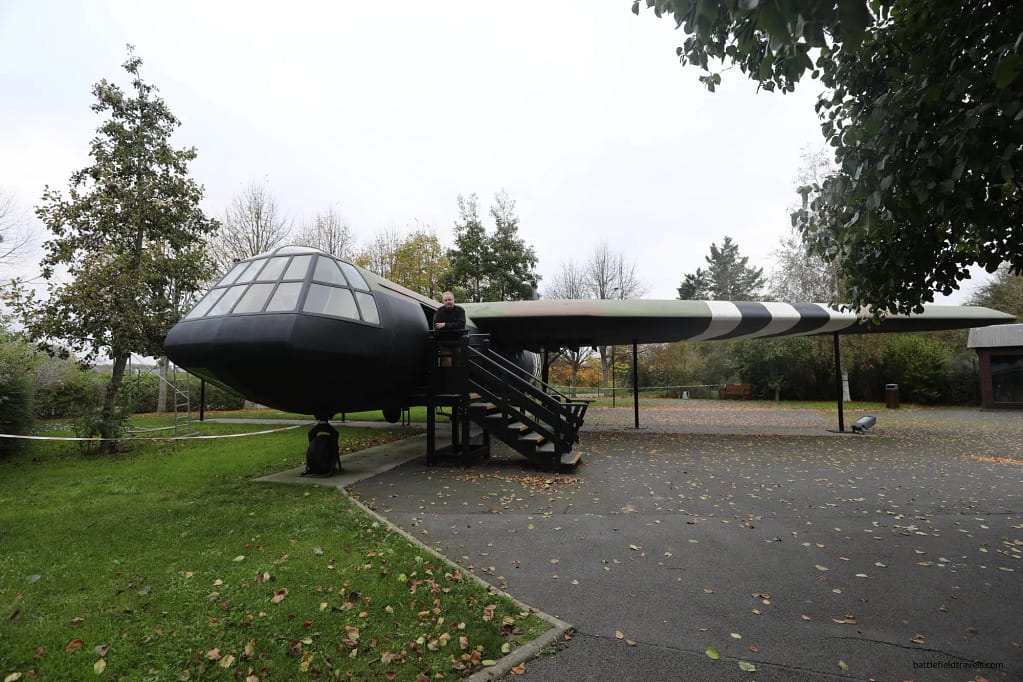
The Pegasus Memorial Museum (Mémorial Pegasus) forms the centrepiece of the battlefield site. The museum displays the preserved bridge along with a full-scale replica of a Horsa glider, allowing visitors to appreciate the scale of the aircraft used in the assault. Exhibits include weapons, uniforms, personal equipment, and detailed accounts of the airborne operation. The museum also presents the broader story of the 6th Airborne Division, including the parachute drops east of the Orne and the fighting that followed during the Normandy campaign.
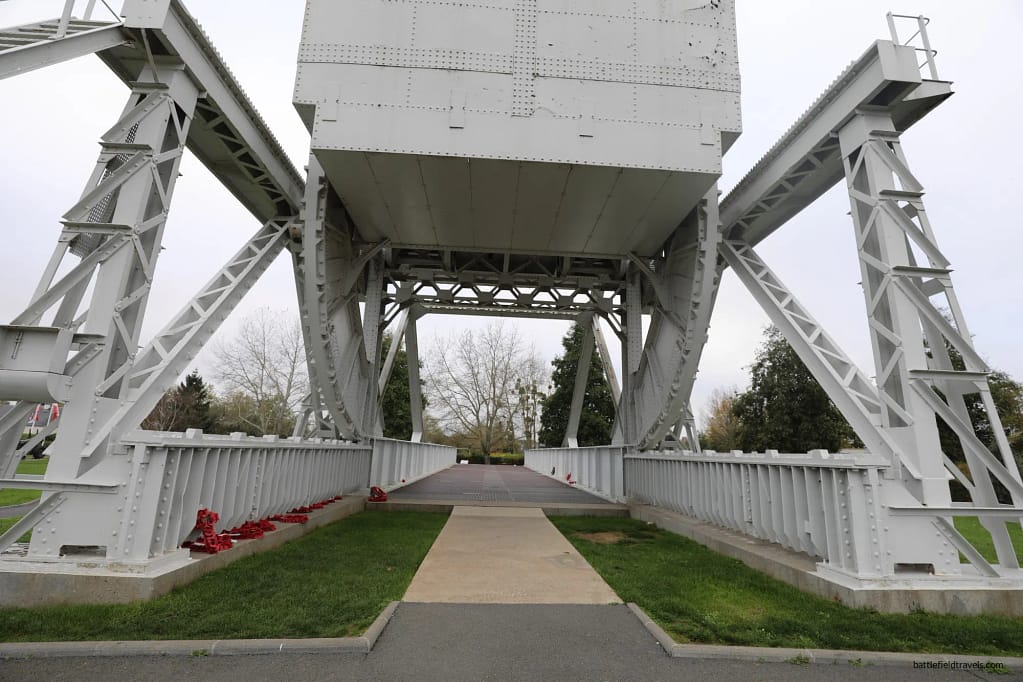
Key landmarks around Pegasus Bridge
On the eastern bank of the Caen Canal, immediately south of the bridge, concrete plinths mark the sites where the first three gliders touched down in the early minutes of D-Day. When you see how close they landed to the bridge, you have to admire the skill and audacity of those glider pilots!
Just beside the canal bridge on the west bank is the historic Café Gondrée, one of the most famous buildings associated with the D-Day landings. The café occupies a house that stood immediately beside the bridge during the battle and was among the first buildings liberated by Allied troops on the morning of 6 June 1944. The establishment remains in the Gondrée family’s hands and has become an informal memorial to the airborne troops who fought in the area.
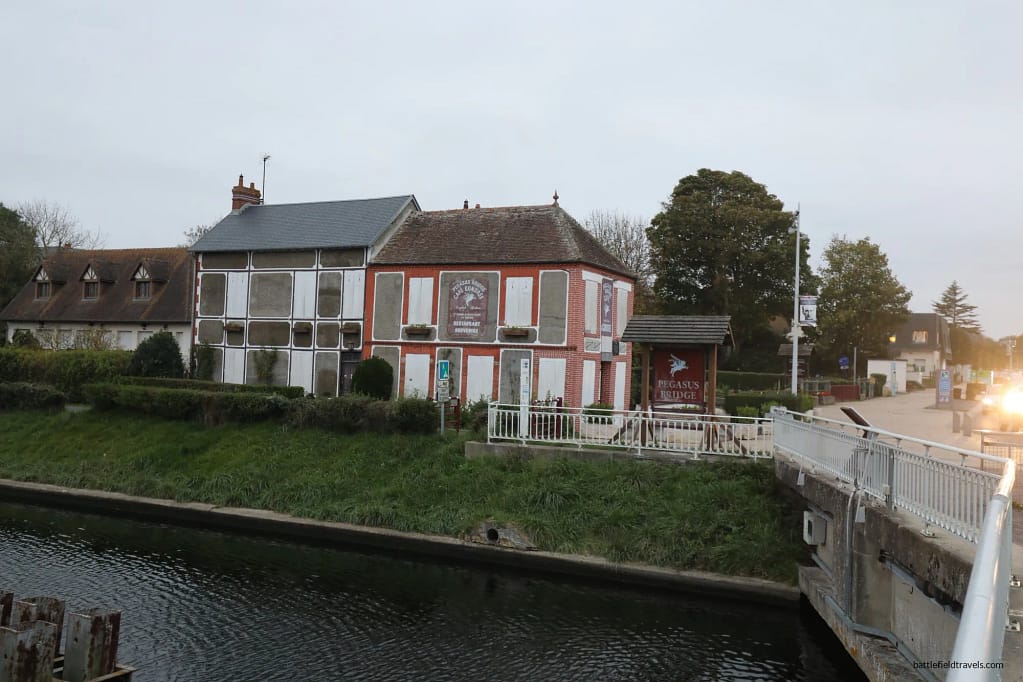
Ranville and Horsa Bridge
About 400 metres east of the canal lies the bridge over the River Orne, known today as Horsa Bridge. Although modified slightly over the years, the crossing remains close to its wartime form and marks the second objective seized during the glider assault. The surrounding countryside retains much of its original layout, allowing visitors to trace the routes taken by the gliders and the assault forces as they secured the bridge.
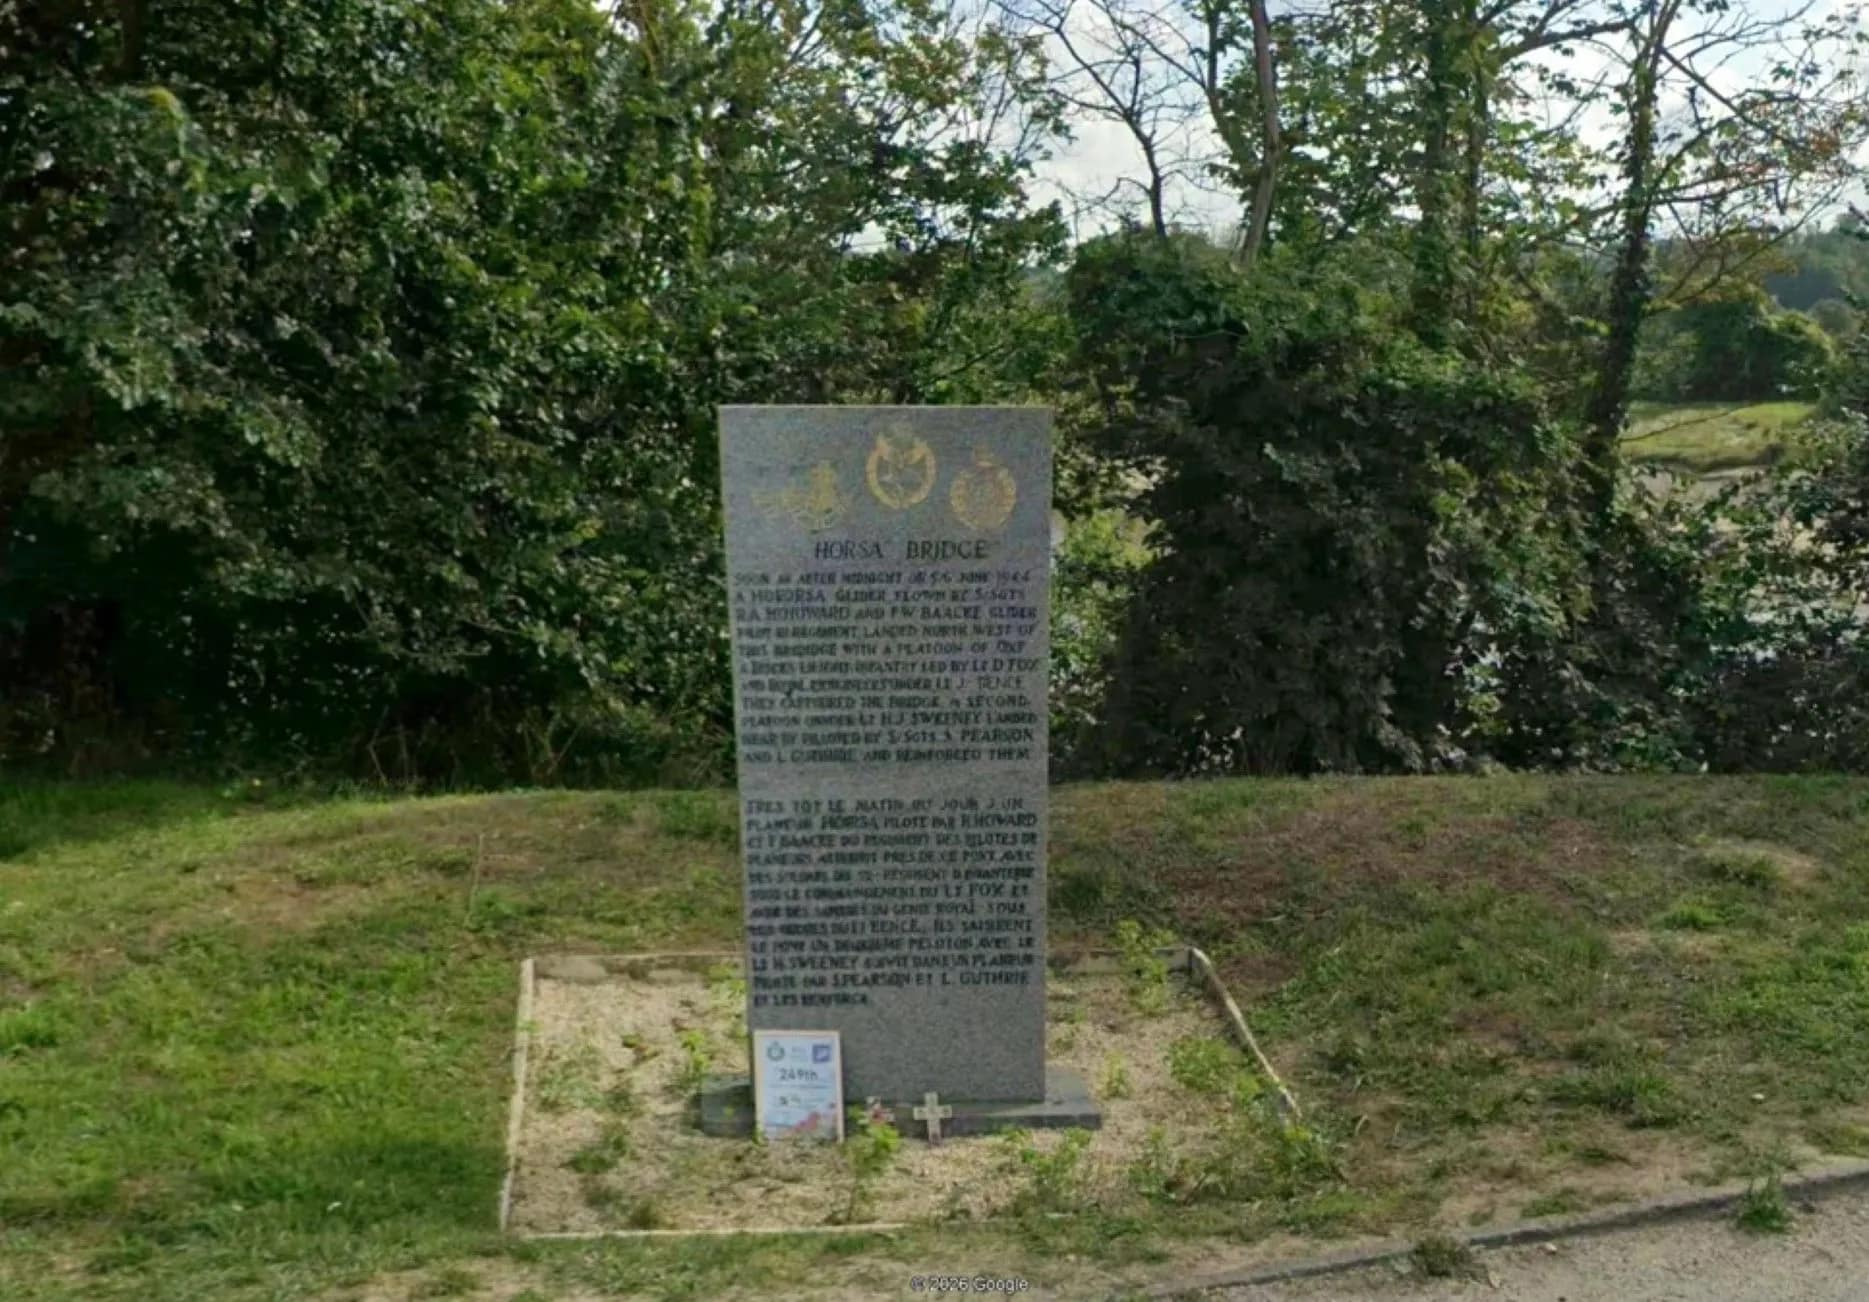
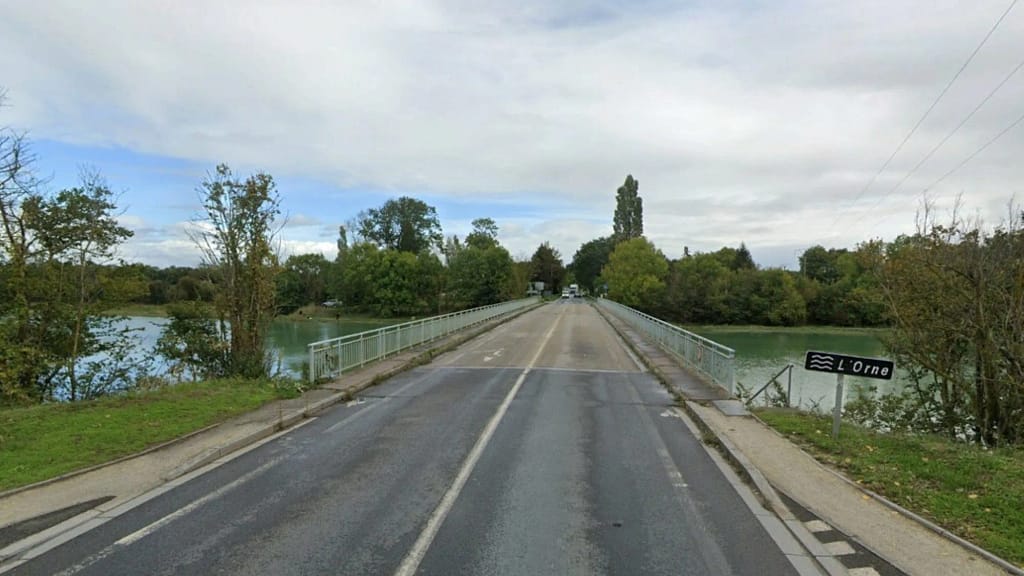
The nearby village of Ranville was one of the first settlements liberated in France during the Normandy invasion. The village became the focal point of the airborne defensive line east of the Orne, and it remains closely associated with the history of the 6th Airborne Division. On the edge of the village is the Ranville War Cemetery, where many of the airborne troops killed during the operation are buried, including Lieutenant Den Brotheridge, the first Allied officer killed on D-Day.
Influence of terrain
Walking the ground around Pegasus Bridge reveals how the terrain shaped the events of the battle. The canal and river run through a narrow corridor bordered by raised embankments and open farmland. The roads approaching the bridges remain confined to these narrow approaches, making it clear how a small airborne force could dominate the crossing points once the bridges had been secured. The landing fields east of the canal — where the Horsa gliders crash-landed shortly after midnight — are still visible and give a strong impression of the precision required for the assault.

Pegasus and Horsa Bridges – additional images
Found this useful? Buy me a coffee — it helps fund future battlefield research


Authored by Mick Prictor, a retired military officer with 40 years’ service, and a military historian specialising in terrain-focused analysis of tactics, doctrine, and command decision-making in land warfare. His work draws on extensive battlefield fieldwork—more than 280 sites worldwide—and one of the world’s largest private collections of historic military arms, uniforms, and equipment. About me
❓ Test Your D-Day Knowledge
Twenty questions covering the airborne operations, invasion beaches, commanders, forces and fighting of 6 June 1944.
20 questions · 60% to pass · expect a challenge
📚 Notes and References
Notes
- 1Max Hastings, Overlord: D-Day and the Battle for Normandy (London: Michael Joseph, 1984), pp. 29–33. ↩︎
- 2Carlo D’Este, Decision in Normandy (London: Collins, 1983), pp. 73–74. ↩︎
- 3Royle, Major J.P. (1944) REPORT ON OPERATION ‘OVERLORD’ BY MAJOR J.P. ROYLE, 1 Wing, GLIDER PILOT REGIMENT, No.1 Wing, the Glider Pilot Regiment. Available at: https://www.pegasusarchive.org/normandy/war_1wing.htm#Appendix%20%22F%22 (Accessed: 03 April 2026). ↩︎
- 4Niklas Zetterling, Normandy 1944: German Military Organisation, Combat Power and Organisational Effectiveness (Winnipeg: J.J. Fedorowicz, 2000), pp.99–104. ↩︎
- 56th Airborne Div, Chief of Staff. (17 May 1944) 6 AIRBORNE DIV OPERATION INSTRUCTION No.1, The 6th Airborne Division in Normandy. Available at: https://www.pegasusarchive.org/normandy/frames.htm (Accessed: 03 April 2026). ↩︎
- 6L. F. Ellis, Victory in the West, Vol. I (1962), pp. 149–156. ↩︎
- 7Stephen Ambrose, Pegasus Bridge (New York: Simon & Schuster, 1984), p. 42. ↩︎
- 8Royle (1944), Report on Operation ‘Overlord’. (Glider Pilot Regiment). ↩︎
- 9Royle (1944), Report on Operation ‘Overlord’. (Glider Pilot Regiment). ↩︎
- 10Ambrose, Pegasus Bridge (1984), p. 72. ↩︎
- 11Ambrose, Pegasus Bridge (1984), p. 75. ↩︎
- 12Ellis, Victory in the West, Vol. I (1962), p. 150. ↩︎
- 13Ambrose, Pegasus Bridge (1984), p. 81. ↩︎
- 14Royle (1944), Report on Operation ‘Overlord’. (Glider Pilot Regiment). ↩︎
- 15“The Coup de Main Attack on Pegasus & Horsa Bridges.” Lightbobs, www.lightbobs.com/1944-pegasus-bridge-coup-de-main.html. Accessed 1 Apr. 2026. ↩︎
- 16Ambrose, Pegasus Bridge (1984), pp. 89-91. ↩︎
- 17Ellis, Victory in the West, Vol. I (1962), pp. 152–153. ↩︎
- 18Ambrose, Pegasus Bridge (1984), pp. 94-95. ↩︎
- 19Pine-Coffin, R.G. (1944) Report on the Action Fought at RANVILLE and BENOUVILLE brs on night 5/6 June and day 6 June 1944., 7th Parachute Battalion. Available at: https://www.pegasusarchive.org/normandy/war_7thBatt.htm (Accessed: 03 April 2026). ↩︎
- 20Ambrose, Pegasus Bridge (1984), pp. 100-101. ↩︎
- 21Pine-Coffin (1944) Report on the Action Fought at RANVILLE and BENOUVILLE (7th Parachute Battalion). ↩︎
- 22Pine-Coffin (1944) Report on the Action Fought at RANVILLE and BENOUVILLE (7th Parachute Battalion). ↩︎
- 23Ambrose, Pegasus Bridge (1984), p. 109. ↩︎
- 246th Airborne Div (1944), OPERATION INSTRUCTION No.1. ↩︎
- 25Pine-Coffin (1944) Report on the Action Fought at RANVILLE and BENOUVILLE (7th Parachute Battalion). ↩︎
- 26Ambrose, Pegasus Bridge (1984), p. 126. ↩︎
- 27Ellis, Victory in the West, Vol. I (1962), pp. 227-228. ↩︎
Resources & References
Primary & Official Histories
- L. F. Ellis, Victory in the West, Vol. I: The Battle of Normandy (London: HMSO, 1962).
- Royle, Major J.P. (1944) REPORT ON OPERATION ‘OVERLORD’ BY MAJOR J.P. ROYLE, 1 Wing, GLIDER PILOT REGIMENT, No.1 Wing, the Glider Pilot Regiment. Available at: https://www.pegasusarchive.org/normandy/war_1wing.htm#Appendix%20%22F%22 (Accessed: 03 April 2026).
- 6th Airborne Division, Chief of Staff. (17 May 1944) 6 AIRBORNE DIV OPERATION INSTRUCTION No.1, The 6th Airborne Division in Normandy. Available at: https://www.pegasusarchive.org/normandy/frames.htm (Accessed: 03 April 2026).
- Pine-Coffin, R.G. (1944) Report on the Action Fought at RANVILLE and BENOUVILLE brs on night 5/6 June and day 6 June 1944., 7th Parachute Battalion. Available at: https://www.pegasusarchive.org/normandy/war_7thBatt.htm (Accessed: 03 April 2026).
- RAF 2nd Tactical Air Force Operations Records, The National Archives (UK).
Secondary Sources (Cited in Footnotes)
- Stephen Ambrose, D-Day, June 6, 1944: the climactic battle of World War II. (Simon and Schuster, New York, 1994).
- Stephen Ambrose, Pegasus Bridge (New York: Simon & Schuster, 1984).
- Carlo D’Este, Decision in Normandy (London: Collins, 1983).
- Max Hastings, Overlord: D-Day and the Battle for Normandy (Simon and Schuster, New York, 1984).
- “The Coup de Main Attack on Pegasus & Horsa Bridges.” Lightbobs, www.lightbobs.com/1944-pegasus-bridge-coup-de-main.html. Accessed 1 Apr. 2026.
- Niklas Zetterling, Normandy 1944: German Military Organisation, Combat Power and Organisational Effectiveness (Winnipeg: J.J. Fedorowicz, 2000).
Recommended Additional Works
- Carlo D’Este, Decision in Normandy (London: Collins, 1983).
- Chester Wilmot, The Struggle for Europe (London: Collins, 1952).
- Antony Beevor, D-Day: The Battle for Normandy. (London: Penguin Books, 2009).
- Georges Bernage, D-Day Landing Beaches: The Guide (Bayeux: Heimdal, 2009).
- David Fraser, And We Shall Shock Them: The British Army in the Second World War (London: Cassell, 1983).
- Ken Ford, D-Day 1944 (3): Gold & Juno Beaches (Oxford: Osprey Campaign Series, 2002).
- Cornelius Ryan, The Longest Day: June 6, 1944. (Simon and Schuster, New York, 1959).
Cartography & Terrain Analysis
- GSGS 4347 series 1:50,000 Normandy maps (Allied issue, 1944).
- Google Earth Pro terrain analysis: Ouistreham to Lebisey Wood axis.
- Field survey: Hermanville, Ouistreham, Lion-sur-Mer, and Pegasus Bridge environs.
📚 Further Reading
This battle study nests within the broader analytical framework explored in the Research Hub, where operational methods, operating environments, armies, commanders, and weapons are examined across conflicts and eras. The links below connect related studies across the wider body of battlefield analysis on the BattlefieldTravels site.
⚔️ Explore all battle studies from World War Two 1939-1945
🏛️Explore the museum of World War Two historic artefacts
The book list for this conflict includes the leading campaign studies, memoirs, and operational analyses of the D-Day landings, selected specifically to complement this battlefield study.
📚World War Two – Recommended Reading
🗞️ For updates on new battlefield studies and research insights, you can subscribe to the Newsletter.
Related Battle Studies, Museum Pieces & Reading Resources
 ⚔️ D-Day: Brecourt Manor assault, Easy Company, 506th PIR,
6 June 1944
 📝 🔒Field Note: XXX Corps Orders, Leopoldsburg, Belgium, 15 Sep 1944
 ⚔️ D-Day: Utah Beach landings,
6 June 1944
 ⚔️ D-Day: US Airborne Operations, Sainte-Mere-Eglise,
6 June 1944
 ⚔️ D-Day: Battle for La Fière Causeway,
6-9 June 1944
 ⚔️ D-Day: Gold Beach landings,
6 June 1944
🧭 Battlefield Travel Guide: Pegasus Bridge & Horsa Bridge (6 June 1944)
- Location: Bénouville and Ranville, Normandy, France — spanning the Caen Canal (Canal de Caen à la Mer) and the River Orne.
- Coordinates (central): 49.24° N, 0.27° W
Getting There
- By Car: Approximately 15 minutes from Caen via the N814 and D514. Parking is available at the Pegasus Memorial Museum and near the bridge.
- The site lies just inland from the Normandy coast, about 6 km from Sword Beach.
- The Pegasus Memorial Museum provides the best starting point for orientation.
Site Orientation
- Pegasus Bridge spans the Caen Canal at Bénouville; Horsa Bridge crosses the River Orne approximately 400 metres to the east at Ranville.
- The original 1944 Pegasus Bridge is preserved within the museum grounds; the current bridge is a modern replacement on the original site.
- The battlefield is defined by a narrow corridor between canal and river, restricting movement to a small number of crossing points.
- The glider landing zones lay immediately southeast of Pegasus Bridge, in the open fields between the canal and Bénouville.
- The short distance between the bridges allows the entire battlefield to be explored on foot.
Museums & Visitor Centres
- Pegasus Memorial Museum (Mémorial Pegasus): Houses the original bridge, a full-scale Horsa glider replica, and detailed exhibits on the 6th Airborne Division.
- Displays include weapons, uniforms, and accounts of the coup de main assault and subsequent defence.
- Café Gondrée: Located beside the bridge, traditionally regarded as the first building liberated on D-Day.
On-Site Experience
- Stand on the eastern bank of the canal and look southeast toward the glider landing fields to appreciate the precision of the night landings.
- Walk across Pegasus Bridge and observe the exposed nature of the crossing and its approaches.
- Move east to Horsa Bridge and note the continuation of the corridor formed by the river and canal.
- Consider the requirement for speed and surprise: both bridges were secured within minutes, preventing demolition.
- The flat terrain and limited cover highlight the vulnerability of any delayed or disorganised assault.
Nearby Points of Interest
- Ranville War Cemetery: Final resting place of many airborne troops; Ranville was the first village liberated on D-Day.
- Merville Battery: Key 6th Airborne objective located to the east.
- Sword Beach: Approximately 6 km north, where seaborne forces linked with the airborne troops.
- Bénouville and Le Port: Areas of German counterattacks moving north from Caen toward the bridges.
Practical Tips
- The battlefield is compact; allow 1–2 hours for the bridges and additional time for the museum.
- Walk between Pegasus and Horsa Bridges to understand the coordination of the coup de main operation.
- The canal towpath provides excellent perspectives on the ground and approach routes.
- Early morning or late afternoon offers the best light for terrain appreciation and photography.
- The terrain is flat and easily accessible, suitable for all visitors.
FAQ: Pegasus Bridge and Horsa Bridge (6 June 1944)
Pegasus Bridge was one of the most critical objectives assigned to the British airborne forces during Operation Overlord. The bridge crossed the Caen Canal and, together with the nearby Orne River bridge (later known as Horsa Bridge), controlled the main east–west routes north of Caen. If German forces retained control of these crossings, armoured units could have moved west toward Sword Beach and attacked the exposed flank of the Allied landings. By capturing the bridges intact, British airborne troops secured the eastern flank of the Normandy beachhead.
Pegasus Bridge was captured by D Company, 2nd Battalion Oxfordshire and Buckinghamshire Light Infantry, commanded by Major John Howard. The assault force landed beside the bridge in six Horsa gliders during the first minutes of 6 June 1944 as part of the British 6th Airborne Division. Within minutes of landing, the soldiers stormed the bridge and cleared the German defenders before demolition charges could be detonated.
Instead of parachuting onto distant drop zones, the British assault force landed directly beside the objective using Horsa gliders. The gliders were released from their tow aircraft shortly before reaching the Normandy coast and descended silently toward the landing zones beside the bridges. The first glider touched down only about fifty metres from Pegasus Bridge at 00:16 hours on D-Day, allowing the assault force to rush the bridge immediately and capture it within minutes.
Horsa Bridge was the nearby bridge over the River Orne, located approximately 400 metres east of Pegasus Bridge. It was captured at the same time as the canal bridge during the glider assault. Together, the two bridges formed the key crossings over the canal and river north of Caen, and both had to be secured to protect the eastern flank of the Normandy invasion.
Lieutenant Den Brotheridge of the Oxfordshire and Buckinghamshire Light Infantry is widely regarded as the first Allied soldier killed during the Normandy invasion. Brotheridge was mortally wounded while leading the assault across Pegasus Bridge during the opening moments of the attack.
Yes. Pegasus Bridge is one of the most accessible and well-preserved D-Day battlefield sites in Normandy. The original 1944 bridge has been preserved at the Pegasus Memorial Museum near Bénouville, where visitors can also see a replica Horsa glider and exhibits on the British airborne operations. The nearby villages of Ranville and Bénouville, along with the Ranville War Cemetery, remain closely associated with the events of 6 June 1944.
Subscribe to Battlefield Travels and receive a free E-Book Battlefield Guide
Unlock expert battlefield analysis, campaign reconstructions, and historical insights drawn from firsthand exploration and primary sources.
🗺️ You’ll receive:
🎖️ Exclusive historical insights you won’t find elsewhere
📘 A free eBook: 10 Tips for Exploring Historic Battlefields
📰 New battlefield studies straight to your inbox as they are published

⚔️ Go deeper — Members get exclusive access to the Deep Research Collection, Field Notes, and monthly Research Dispatches. Try membership free for 7 days, cancel anytime. From $9/month.
Been waiting eagerly for this!
Fantastic account of these magnificent operations! Thanks so much!
Thanks Tom. Yes, Pegasus Bridge is still the gold standard for a ‘coup de main’ operation. Have you read my article on the 1970 Son Tay Raid? A US operation that was incredibly well prepared and executed, but let down by the intelligence assessments.
https://battlefieldtravels.com/son-tay-prison/
Mick