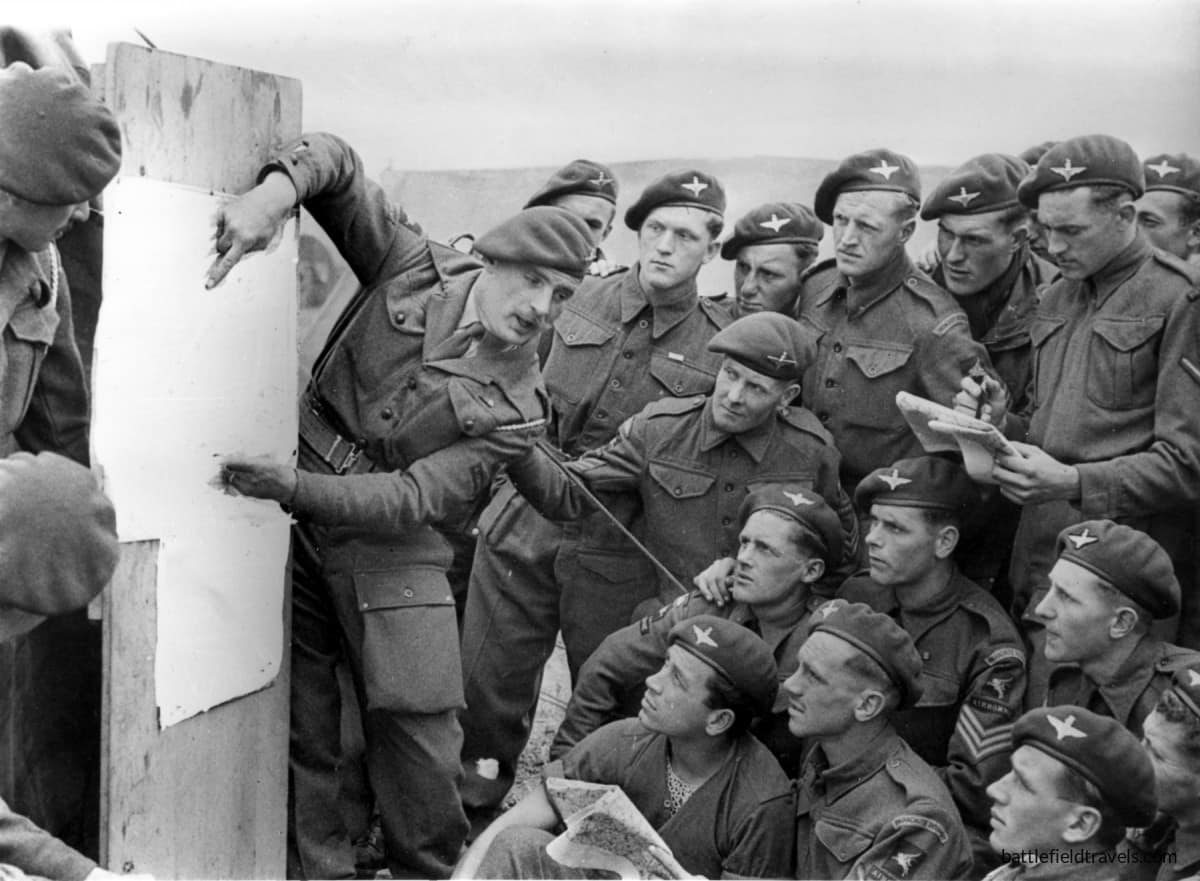
Operation TONGA: Ranville, Merville Battery and the Orne Bridgehead — securing D-Day’s most vulnerable flank!
On the night of 5–6 June 1944, British airborne forces fought to secure the eastern flank of the Normandy landings. In scattered night drops across flat, featureless ground east of the Orne River, they captured Ranville, the first village liberated in France, stormed the Merville Battery with barely a fifth of their planned strength, and withstood German counterattacks from Amfreville and the Bois du Monts until reinforced by Lord Lovat’s commandos and the Highland Division. This is the story of that operation, and what the terrain still reveals.
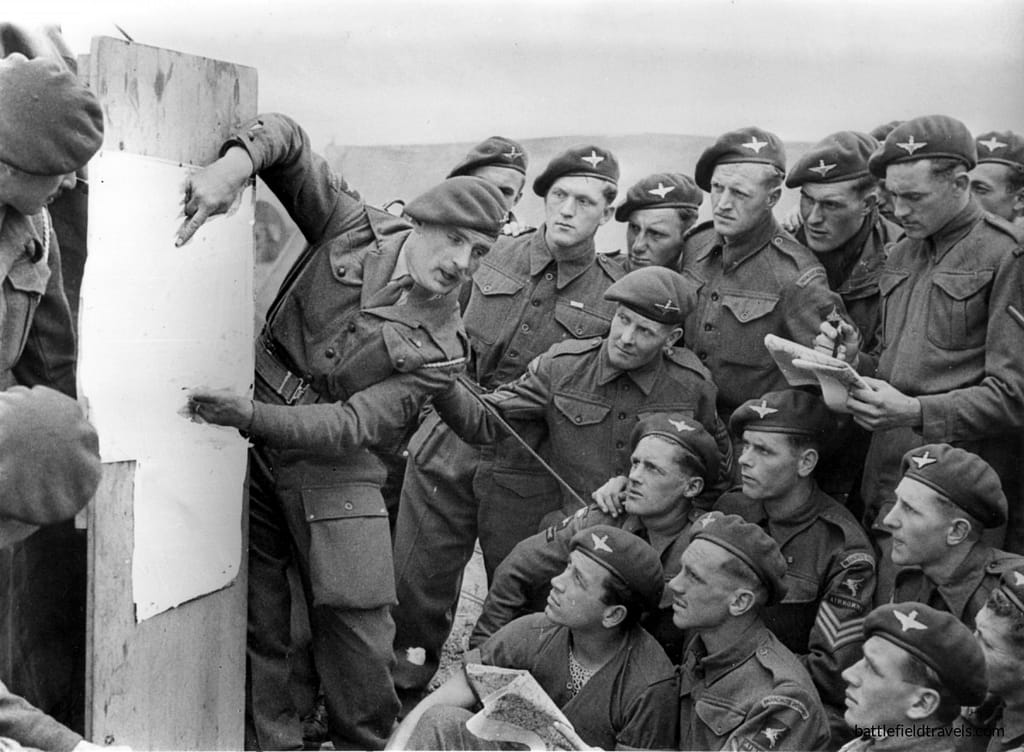
Key facts
Google Earth map – location of Ranville
Normandy series of battlefield studies
This article is part of a series exploring the D-Day airborne and amphibious battlefields on 6 June 1944 and the immediate aftermath. Click on the hotlinks to open the battlefield study.
Strategic Context – Operation OVERLORD
Allied Grand Strategy
By 1944, the Western Allies had resolved to open a second front in Europe. The Soviet Union had been carrying the main burden of the land war since 1941 while suffering immense casualties, and Stalin pressed Roosevelt and Churchill for direct action in France to relieve pressure on the Eastern Front. The Anglo-American response was Operation Overlord, the cross-Channel assault designed to break into north-west Europe and defeat Nazi Germany.1Max Hastings, Overlord: D-Day and the Battle for Normandy (London: Michael Joseph, 1984), pp. 29–33.
D-Day Operational Framework
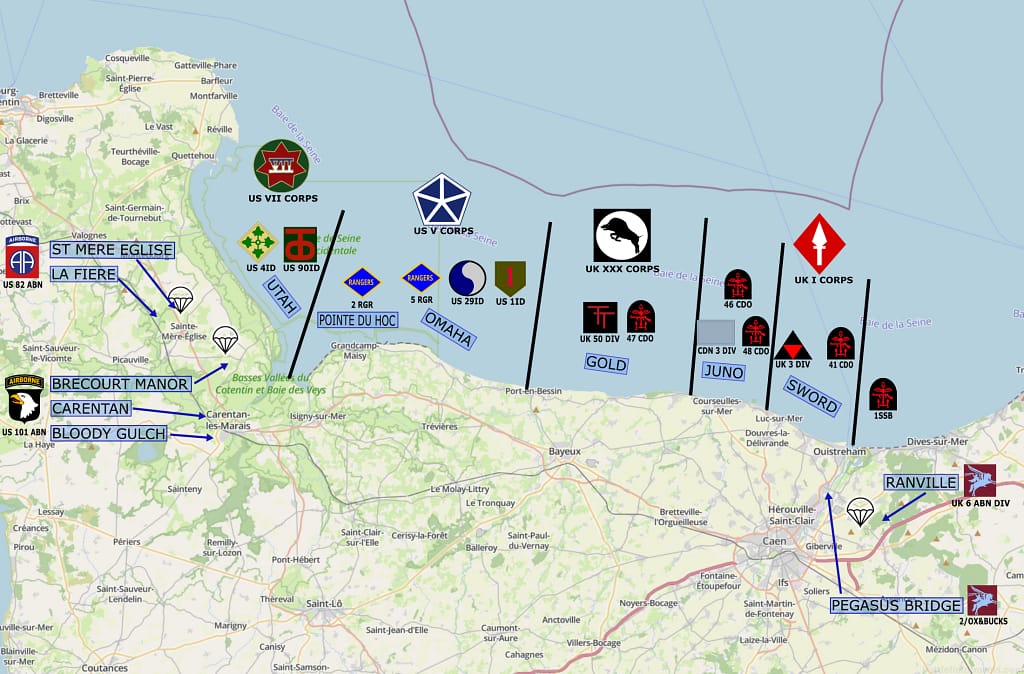
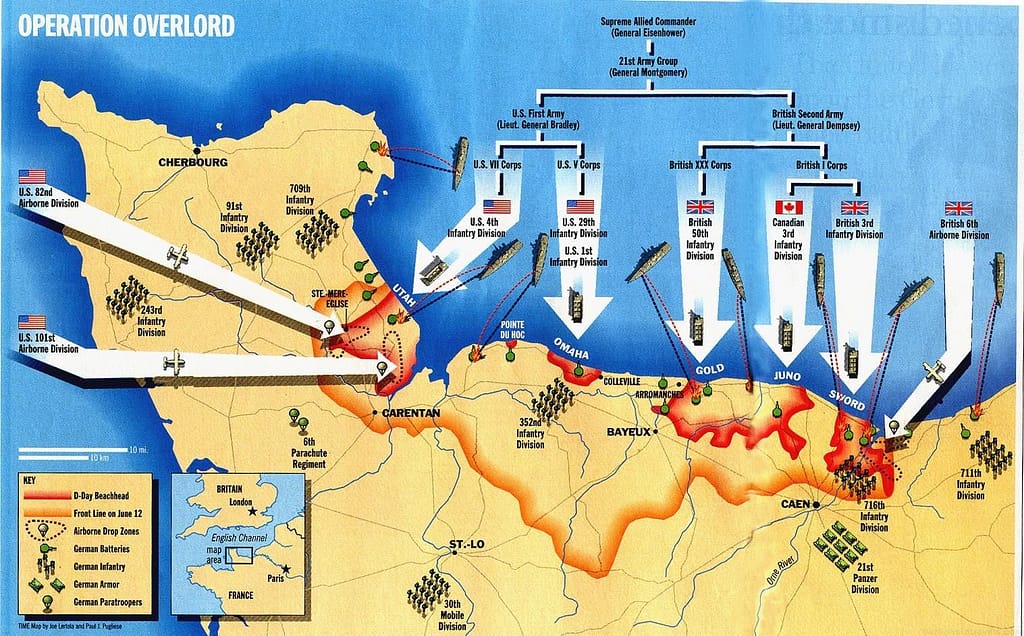
The invasion was planned for early summer 1944, when tides and moonlight favoured large-scale amphibious operations. Supreme Headquarters Allied Expeditionary Force (SHAEF), commanded by General Dwight D. Eisenhower, allocated distinct sectors across a fifty-mile frontage of Normandy coastline. The U.S. First Army under General Omar N. Bradley would land on the western beaches (Utah and Omaha), while the British Second Army under General Miles Dempsey would assault the central and eastern sectors (Gold, Juno, Sword). Each beachhead had a defined operational purpose in building a continuous lodgement.2Carlo D’Este, Decision in Normandy (London: Collins, 1983), pp. 73–74.
In advance of the seaborne invasion, the American 82nd and 101st Airborne Divisions would land behind Utah Beach to seize the critical beach exits and secure the western flank of the invasion.
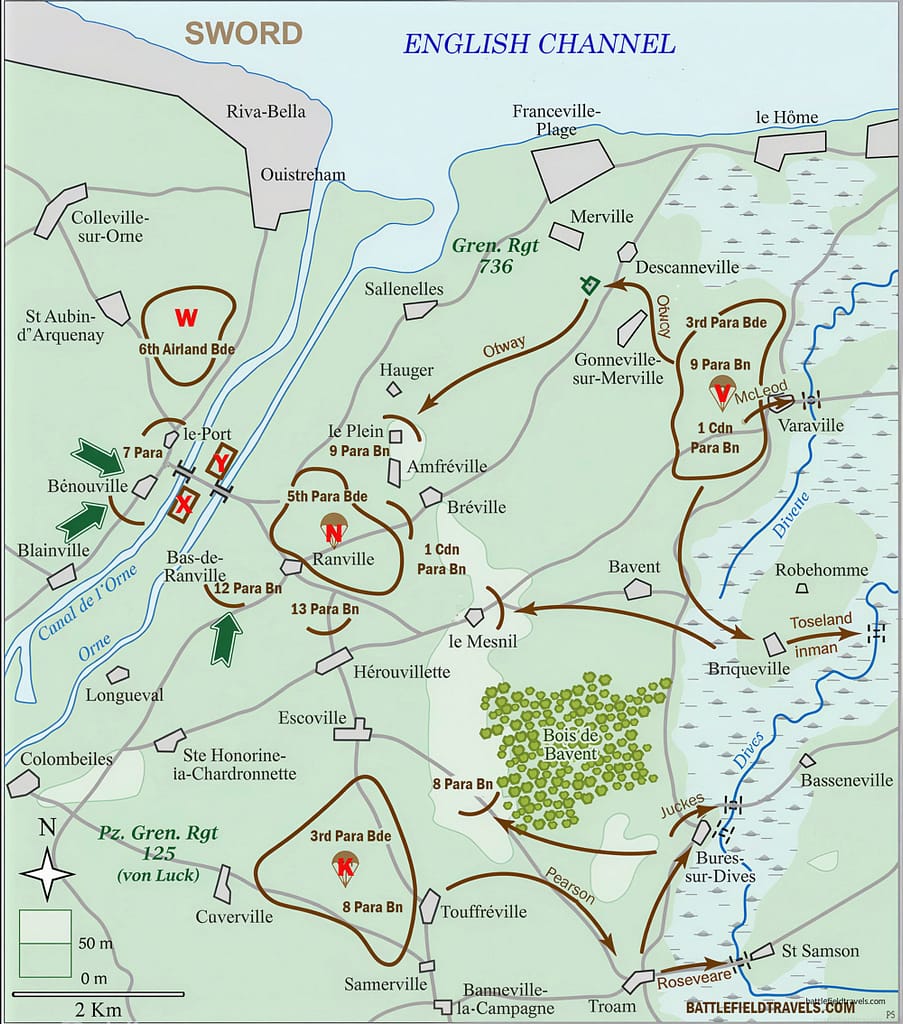
The biggest threat to the invasion was the mass of German armoured reserves around Le Havre and the mouth of the Seine. If these powerful forces could reach the landing beaches, the invasion risked outright failure. Consequently, the eastern flank of the invasion would be secured by the British 6th Airborne Division, landing on the eastern side of the Orne River. The division’s mission covered the Merville coastal artillery battery, the bridges over the Dives River, the town of Ranville, and the critical bridges over the Caen Canal and Orne River.
The Eastern Flank Problem
How to secure the eastern flank?
The Allied plan for Operation Overlord was built around a simple and brutal geographical reality. The five landing beaches stretched from Utah in the west to Sword in the east. Sword Beach, the easternmost landing, was anchored on the mouth of the Orne River and the Caen Canal, a natural defensive line the Germans could use to concentrate armoured forces against the beachhead’s most exposed flank. If the Germans controlled the east bank of the Orne River, the Allies would have enormous difficulty taking Caen and breaking out to the east. Also, if the Germans held the Orne RIver crossings, Panzer formations could attack into the vulnerable landing beaches before they could build adequate strength.
The solution was the British 6th Airborne Division, commanded by Major-General Richard Gale. Its mission was to land east of the Orne in the hours before the seaborne landings, seize or destroy the bridges over the Caen Canal and the Orne River, neutralise the Merville coastal artillery battery, destroy several key bridges over the River Dives to delay German reinforcement from the east, and establish a defensive bridgehead that could hold until the heavier landing forces crossed the Orne to relieve them.
It was a mission that demanded simultaneous action across a wide area by forces that would be scattered, lightly-armed, and cut off from immediate support. The plan was ambitious. The execution, as we shall see, was something close to miraculous.
Terrain reality
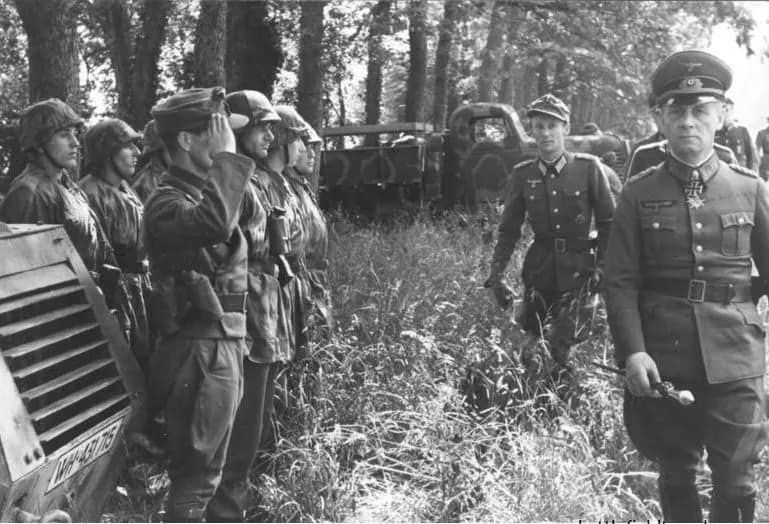
The terrain east of the Orne shaped everything that followed. In satellite view, the ground appears deceptively benign: a patchwork of fields, orchards, and small Norman villages connected by narrow roads and sunken lanes. From the air the field boundaries are clearly defined, the villages identifiable, the landmarks obvious. At ground level, in the early hours of 6 June 1944, in darkness, under fire, with a heavy equipment load, the same ground proved disorienting and challenging to navigate.
The area east of the Orne is flat. Unlike the Cotentin Peninsula to the west, where the American airborne divisions at least had the distinctive silhouette of the Merderet and Douve flood plains as orientation features, the ground around Ranville offered almost nothing to a descending paratrooper trying to establish his position in the dark. The hedgerows, orchards, and field boundaries that divided the region made cross-country movement difficult and visual orientation nearly impossible. Several officers later recorded that the first moment of orientation for many scattered paratroopers was the sound of the German counterattack at Pegasus Bridge. They could hear where the fight was going on, even if they could not see it.
Opposing Forces – D-Day eastern flank
 Allied Forces
 Allied Forces
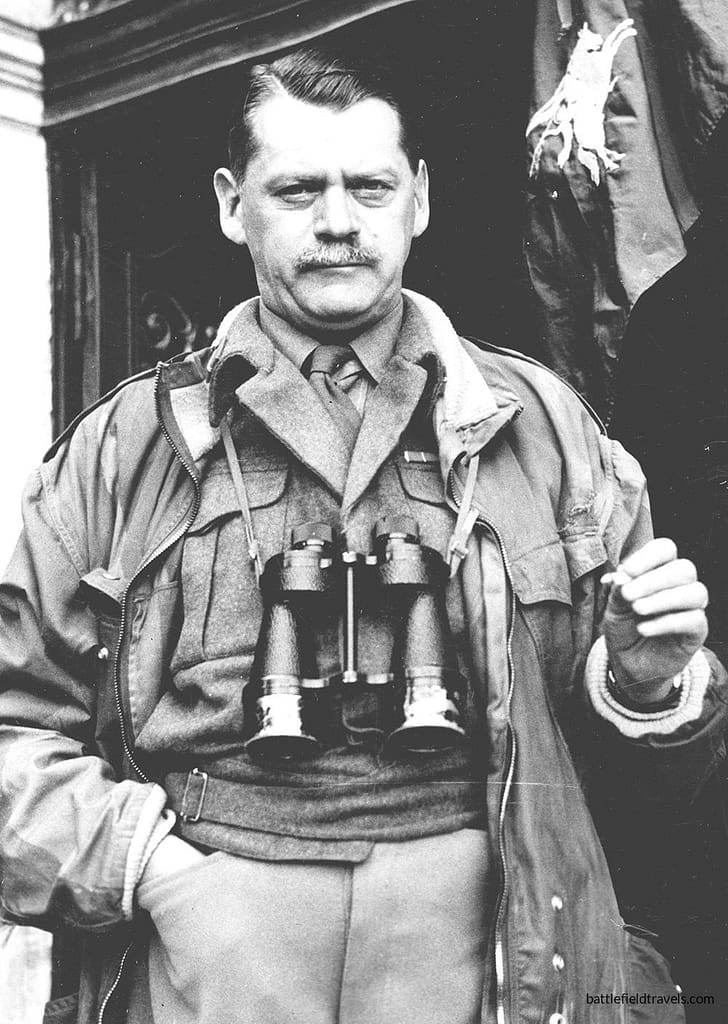
The operation east of the Orne was conducted by 6th Airborne Division (Maj-Gen Richard Gale), comprising two parachute brigades, an airlanding brigade, and supporting artillery, engineers, and armour.
6th Airborne was actually the second of two airborne divisions raised by the British Army during the war. The other was 1st Airborne Division, which would serve in the Bruneval Raid, Norway, North Africa, and Operation Market Garden.
6th Airborne Division was raised from the existing 3rd Parachute Brigade and two battalions (2nd Ox and Bucks and 1st Ulster Rifles) transferred from 1st Airborne Division.
The division’s first combat mission was the D-Day invasion. After serving in Normandy until September 1944, it was withdrawn for refitting in England, but returned to Belgium to help blunt the German Ardennes Offensive.
6th Airborne DIvision
Coup de Main Force (Major John Howard):
- D Company, 2nd Battalion, Oxfordshire and Buckinghamshire Light Infantry.
- Glider Pilot Regiment crews.
- Royal Engineers detachment.
3rd Parachute Brigade (Brigadier James Hill):
- 8th Parachute Battalion. (Lieutenant-Colonel Alastair “Jock” Pearson)
- 9th Parachute Battalion. (Lt-Col Terrence B.H. Otway):
- 1st Canadian Parachute Battalion. (Lieutenant-Colonel J.A. Nicklin):
5th Parachute Brigade (Brigadier Nigel Poett):
- 7th Parachute Battalion. (Lt-Col Richard. G. Pine-Coffin):
- 12th Parachute Battalion. (Lieutenant-Colonel A.P. “Johnny” Johnson)
- 13th Parachute Battalion. (Lieutenant-Colonel Peter J. Luard)
- (Note: Among the junior officers was Lieutenant Richard Todd, adjutant of 7 Para, who assisted in coordinating defences at Pegasus Bridge and later became well-known for portraying Major John Howard in The Longest Day.
6th Airlanding Brigade (Brigadier Hugh Kindersley):
- 2nd Battalion, Oxfordshire and Buckinghamshire Light Infantry. (Lieutenant-Colonel Michael Roberts)
- 1st Battalion, Royal Ulster Rifles. (Lieutenant-Colonel Robert “Hank” Carson)
- 12th Battalion, Devonshire Regiment. (Lieutenant-Colonel Dick Stevens)
- Armoured Reconnaissance Regiment with Tetrarch light tanks (landed by Hamilcar glider), plus supporting artillery and engineers.
Supporting units
- Glider Pilot Regiment
- Royal Engineers
- Airland artillery
1st Special Service Brigade
Brigadier Simon Fraser ‘Lord Lovat’ and his commandos landed on Sword Beach and advanced inland to reinforce the airborne bridgehead at Bénouville and Ranville.:
- No. 3 Commando
- No. 4 Commando, which included the French Troop under Commandant Philippe Kieffer
- No. 6 Commando
- No. 45 Royal Marine Commando
51st (Highland) Division
Maj-Gen Bullen-Smith’s 51st Highland Division began crossing into the bridgehead from 8 June onwards, taking over the defence line from the paratroopers and expanding east into Amfreville and the Bois du Monts.
152nd Infantry Brigade (Brigadier D.H. Haugh)
- 2nd Battalion, Seaforth Highlanders
- 5th Battalion, Seaforth Highlanders
- 5th Battalion, Queen’s Own Cameron Highlanders
153rd Infantry Brigade (Brigadier H. “Nap” Murray)
- 5th Battalion, Black Watch
- 1st Battalion, Gordon Highlanders
- 5th/7th Battalion, Gordon Highlanders
154th Infantry Brigade (Brigadier J.A. Hopwood)
- 1st Battalion, Black Watch (Royal Highland Regiment)
- 7th (Fife) Battalion, Black Watch
- 7th Battalion, Argyll and Sutherland Highlanders
Divisional troops:
- 1st/7th Battalion, Middlesex Regiment (support/machine-gun battalion)
- 2nd Derbyshire Yeomanry, Royal Armoured Corps (reconnaissance)
- 126th, 127th, and 128th Field Regiments, Royal Artillery
- 61st Anti-Tank Regiment, Royal Artillery
 German Forces engaged against 6th Airborne DIvision
 German Forces engaged against 6th Airborne DIvision
716th Infantry Division
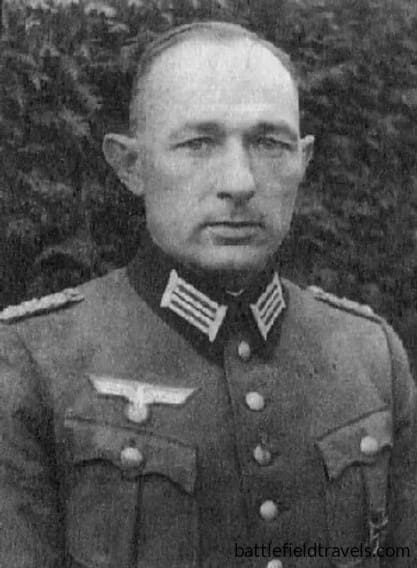
Coastal defences in the Caen sector were the responsibility of the German 716th Infantry Division, commanded by Generalleutnant Wilhelm Richter. This was a static coastal formation.
The garrisons around Ranville, the Caen Canal Bridge and Orne Bridge were drawn from Grenadier-Regiment 736, and commanded by Major Hans Schmidt from his small headquarters at Ranville. Each bridge was defended by a detachment of 15-20 men, supported by at least one anti-tank gun, light machine guns and demolition parties tasked with destroying the bridges if required.
Merville Battery (Stützpunkt 05): four casemates, each housing a 100mm Czech gun (believed by Allied intelligence to be 150mm). The battery was garrisoned by approximately 130 men under Hauptmann Raimund Steiner.3Niklas Zetterling, Normandy 1944: German Military Organisation, Combat Power and Organisational Effectiveness (Winnipeg: J.J. Fedorowicz, 2000), pp.99–104.
The troops were of mixed quality, including older soldiers and foreign conscripts from Eastern Europe.
716. Infanterie-Division Order of Battle
- Grenadier-Regiment 726 (Oberst Walter Korfes) — I, II, and III Battalions, plus Ost-Bataillon 439 (Ukrainian conscripts) attached as a fourth battalion. On D-Day, I and III Battalions were actually under the operational command of the neighbouring 352nd Infantry Division, covering the sector that included Omaha Beach.
- Grenadier-Regiment 736 (Oberst Ludwig Krug) — with Ost-Bataillon 642 attached, covering the sector including Sword Beach and the Orne/Pegasus Bridge area. This regiment confronted 6th Airborne Division on D-Day.
- Artillerie-Regiment 1716 (Oberstleutnant Helmut Knüppe) — three artillery battalions, equipped mostly with captured or foreign-manufactured pieces (Czech 10cm leFH 14/19(t) howitzers and French 15.5cm sFH 414(f) pieces).
- Panzerjäger-Abteilung 716 (Oberleutnant Kurt Kaergel) — the divisional anti-tank battalion.
Caen sector reserves
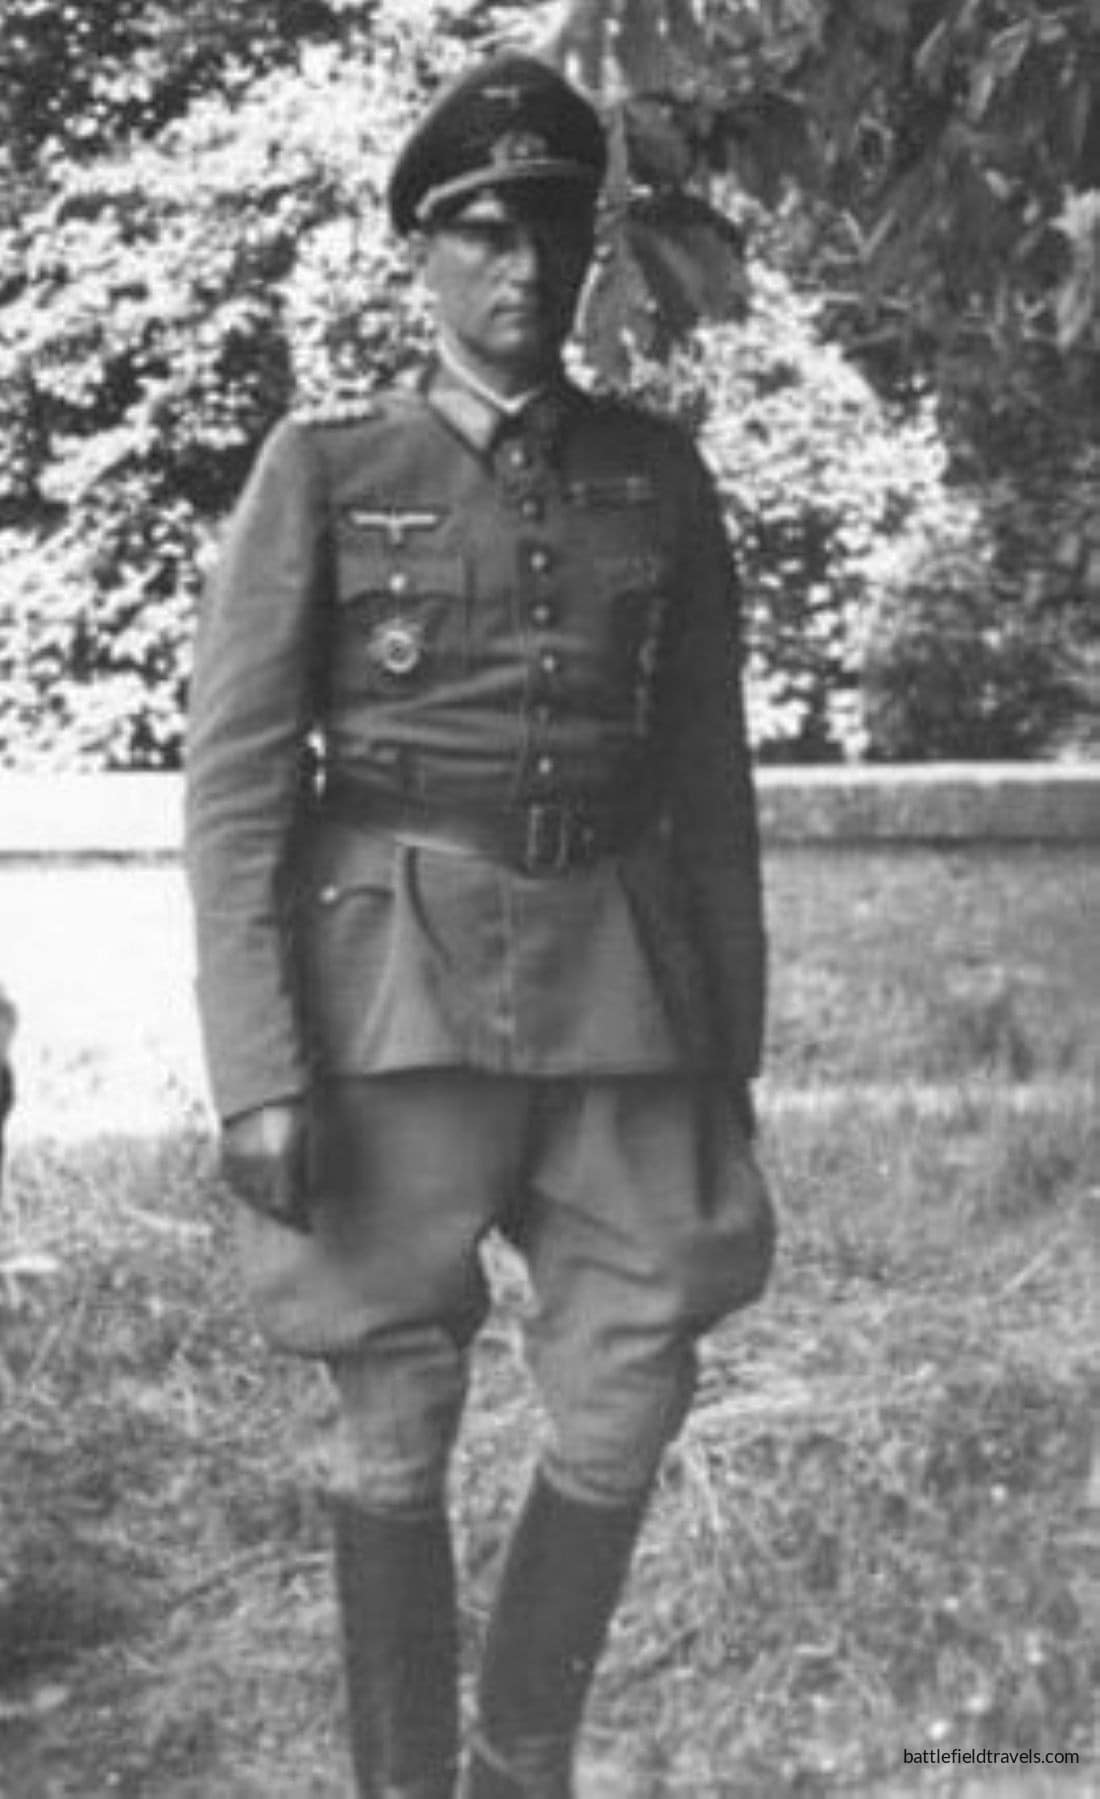
Behind this thin forward screen lay the principal mobile reserve in the sector: the 21st Panzer Division, commanded by Generalmajor Edgar Feuchtinger. Stationed south and east of Caen, the division was the only German armoured formation positioned close enough to the landing area to intervene rapidly on 6 June.
The division’s core combat elements included:
- Panzer-Regiment 22 (Colonel Hermann von Oppeln-Bronikowski), equipped with a mix of Panzer IV tanks and converted French armoured vehicles.
- Panzergrenadier-Regiment 125 (Colonel Hans von Luck), mechanised infantry.
- Panzergrenadier-Regiment 192 (Colonel Josef Rauch), mechanised infantry.
- Artillerie-Regiment 155, equipped with towed and self-propelled guns.
- Assault gun, anti-tank, engineer, and reconnaissance units, including elements of Panzerjäger-Abteilung 200 and divisional reconnaissance battalions.
6th Airborne Division: Operation TONGA

6th Airborne Division’s mission, codenamed ‘Operation TONGA’, was threefold46th Airborne Div, Chief of Staff. (17 May 1944) 6 AIRBORNE DIV OPERATION INSTRUCTION No.1, The 6th Airborne Division in Normandy. Available at: https://www.pegasusarchive.org/normandy/frames.htm (Accessed: 03 April 2026):
- Capture the Caen Canal and River Orne bridges intact (the coup de main).
- Destroy bridges over the River Dives further east to delay German reinforcements moving from the direction of the Seine.
- Establish and hold a defensive perimeter east of the Orne until relieved by seaborne forces advancing inland from Sword Beach.
In addition to the coup de main force, the bulk of 6th Airborne Division was tasked with securing the surrounding area and reinforcing the bridgehead once the bridges had been captured. The division comprised:
- D Company, 2nd Battalion, Oxfordshire and Buckinghamshire Light Infantry (Major John Howard). Capture the Caen Canal and River Orne bridges intact
- 5th Parachute Brigade (7th, 12th and 13th Parachute Battalions), tasked with securing Ranville and reinforcing the bridgehead east of the Orne.
- 3rd Parachute Brigade (8th and 9th Parachute Battalions, 1st Canadian Parachute Battalion), assigned to destroy bridges over the River Dives and neutralise the German artillery battery at Merville.
- 6th Airlanding Brigade The brigade’s task was to reinforce the divisional perimeter — Sainte-Honorine, Escoville, and the high ground known as Ring Contour 72 near Le Bas de Ranville
- Supporting units, including airborne artillery, engineers, and anti-tank elements.
In total, approximately 8,500 troops of the 6th Airborne Division would land east of the Orne River on D-Day. However, the immediate success of the operation depended on the small glider-borne assault force capturing the bridges in the opening minutes of the invasion.5L. F. Ellis, Victory in the West, Vol. I (1962), pp. 149–156.
The Coup de Main: Pegasus and Horsa Bridges
“Ham and Jam”
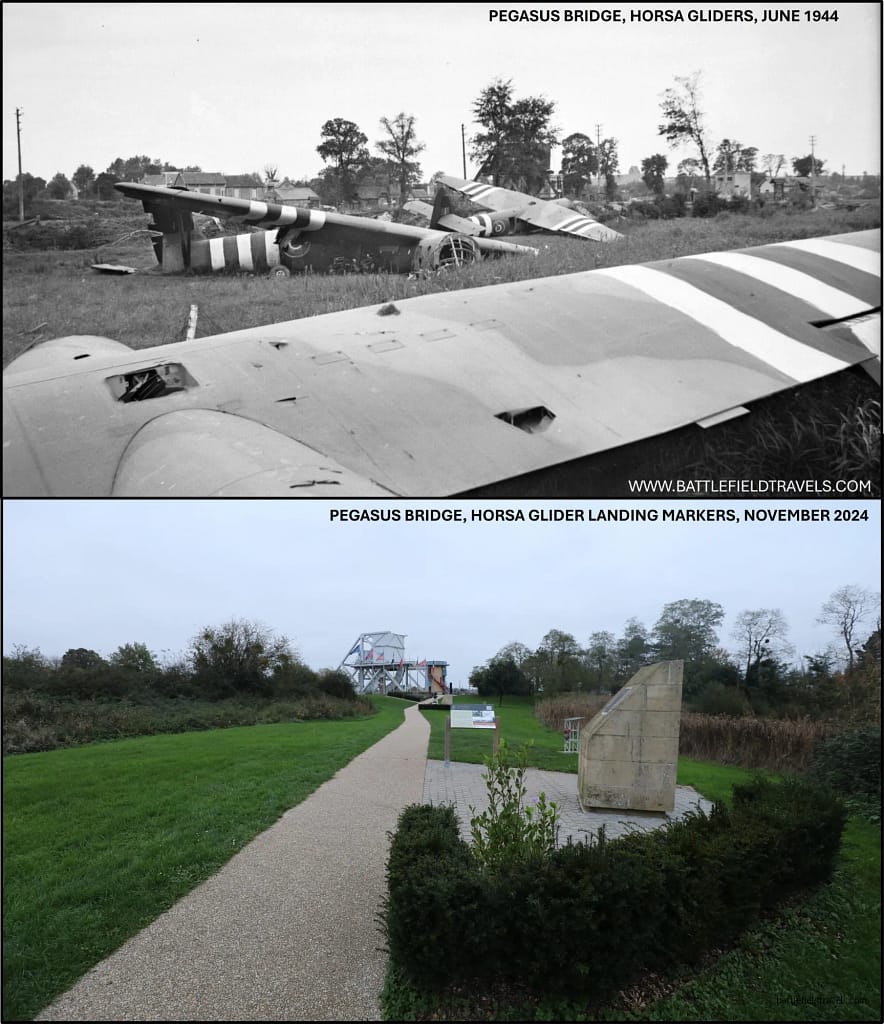
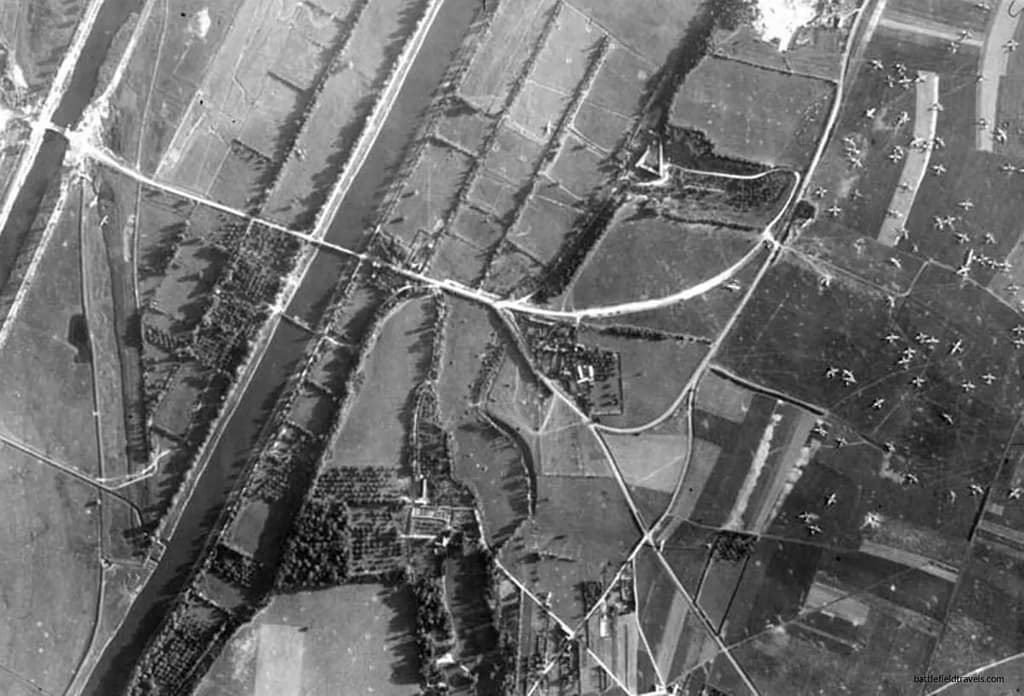
At 22:56 on 5 June, six Horsa gliders carrying Major John Howard’s reinforced D Company, 2nd Battalion Oxfordshire and Buckinghamshire Light Infantry, took off under tow from RAF Tarrant-Rushton, released over the Channel coast, and glided the final miles in silence. At 00:16 on 6 June, Staff Sergeant Jim Wallwork landed Glider No. 1 within about fifty metres of the Caen Canal bridge at Bénouville, one of the most celebrated feats of precision flying of the entire war. Glider No.2 and Glider No. 3 landed immediately behind him, within metres of the bridge. Gliders No. 5 and 6 landed near the Orne River bridge at Ranville. Due to a navigation error by the tow aircraft, Glider No. 4, with 22 Platoon embarked, landed nearly 12 kilometres away, at the Dives River near Périers-en-Auge.
The German defenders on the Caen Canal and Orne bridges were caught completely unprepared. Lieutenant Den Brotheridge led the rush across the canal bridge and was killed almost immediately. He was very likely the first Allied soldier to die by enemy action on D-Day. Within minutes both bridges were in British hands, intact and undamaged. Howard’s success signal, radioed and confirmed by carrier pigeon, was the codeword “Ham and Jam” (both bridges captured, both bridges intact).
Holding the bridges
Howard’s force, fewer than 200 men, now had to hold two bridges against whatever the Germans could bring against them, with no idea when, or whether, reinforcement would come. Reinforcements arrived in stages through the early hours: scattered paratroopers of 7th Parachute Battalion finding their way to the bridges in the dark, then Pine-Coffin’s more organised main body pushing through to extend the perimeter into Ranville itself. The full story of the coup de main — the training, the glider pilots, the fighting at the bridges through the rest of D-Day — is covered in detail in the BattlefieldTravels study of Pegasus Bridge. What matters for the Ranville narrative is the handover. Howard’s men held the vital ground open long enough for 5th Parachute Brigade to arrive and turn a coup de main into the division’s bridgehead.
The scattered parachute drop
Why were the parachute drops so dispersed?
The main airborne phase began at approximately 00:50 hours on 6 June 1944, when the leading aircraft of 6th Airborne Division commenced dropping paratroopers. The drop experienced many of the same problems as the American airborne drops on the Cotentin Peninsula.
Intense antiaircraft fire forced aircraft to take evasive action, altering course, speed, and altitude at precisely the moment when accurate navigation was most critical. Cloud cover over the coast intermittently obscured ground features. Night navigation over featureless terrain was already at the limit of what aircraft crews could achieve with the equipment available. Heavily laden paratroopers carrying weapons, ammunition, equipment containers, and personal kit that sometimes exceeded their own body weight, took measurably longer to exit the aircraft than they had in training. Each additional second in the door translated to additional distance between jumpers, further dispersing the already scattered units.
Little Groups of Paratroopers (LGOP)
During my time in the 82nd Airborne Division, we referred to Little Groups of Paratroopers (LGOP) as being part of the airborne culture. LGOPs would be scattered all over the objective area, but they would coalesce under junior leaders, exercise initiative, improvise, and achieve their mission. This is exactly what happened with 6th Airborne Division on D-Day.
Every unit of 6th Airborne commenced its mission at reduced strength. Equipment containers carrying mortars, anti-tank weapons, radios, and medical supplies were scattered across a wide area, and many were never recovered. Officers assembled whoever they could find in the first hours after landing and moved toward their objectives with whatever strength they had. The plan had anticipated some dispersion but the reality exceeded those margins.
What is remarkable in retrospect is how little this ultimately mattered. The officers and NCOs of 6th Airborne were trained to act on initiative, to pursue objectives with whatever force was available, and to improvise when the plan no longer matched the situation. That culture, the same culture the American airborne units had demonstrated on the Cotentin, proved more resilient than the force levels the plan had assumed.
5th Parachute Brigade: Ranville and the Orne Bridgehead
Seizure of Ranville
The 5th Parachute Brigade, commanded by Brigadier Nigel Poett, was responsible for securing Ranville and establishing the divisional defensive perimeter east of the Orne. The most important unit for the initial seizure was the 7th Parachute Battalion under Lieutenant-Colonel R.G. Pine-Coffin, whose mission was to reinforce Major John Howard’s coup de main force at the Caen Canal and Orne bridges. Pine-Coffin would also extend the defensive perimeter into Ranville itself.6Pine-Coffin, R.G. (1944) Report on the Action Fought at RANVILLE and BENOUVILLE brs on night 5/6 June and day 6 June 1944., 7th Parachute Battalion. Available at: https://www.pegasusarchive.org/normandy/war_7thBatt.htm (Accessed: 03 April 2026).
The relationship between the Caen Canal Bridge, Orne River Bridge, and Ranville was important, and became more so as 6 June progressed. Howard held the bridges against German counterattack from the west while Pine-Coffin’s paratroopers, arriving in scattered groups through the early morning hours, reinforced the bridgehead and pushed the defensive line west into Benouville and east into Ranville. Walking the ground today, the proximity of these two actions is immediately apparent: Caen Canal Bridge (Pegasus Bridge) and Ranville are barely two kilometres apart. What appears on maps as two distinct tactical objectives was, in the experience of the men who fought there, a single continuous engagement.
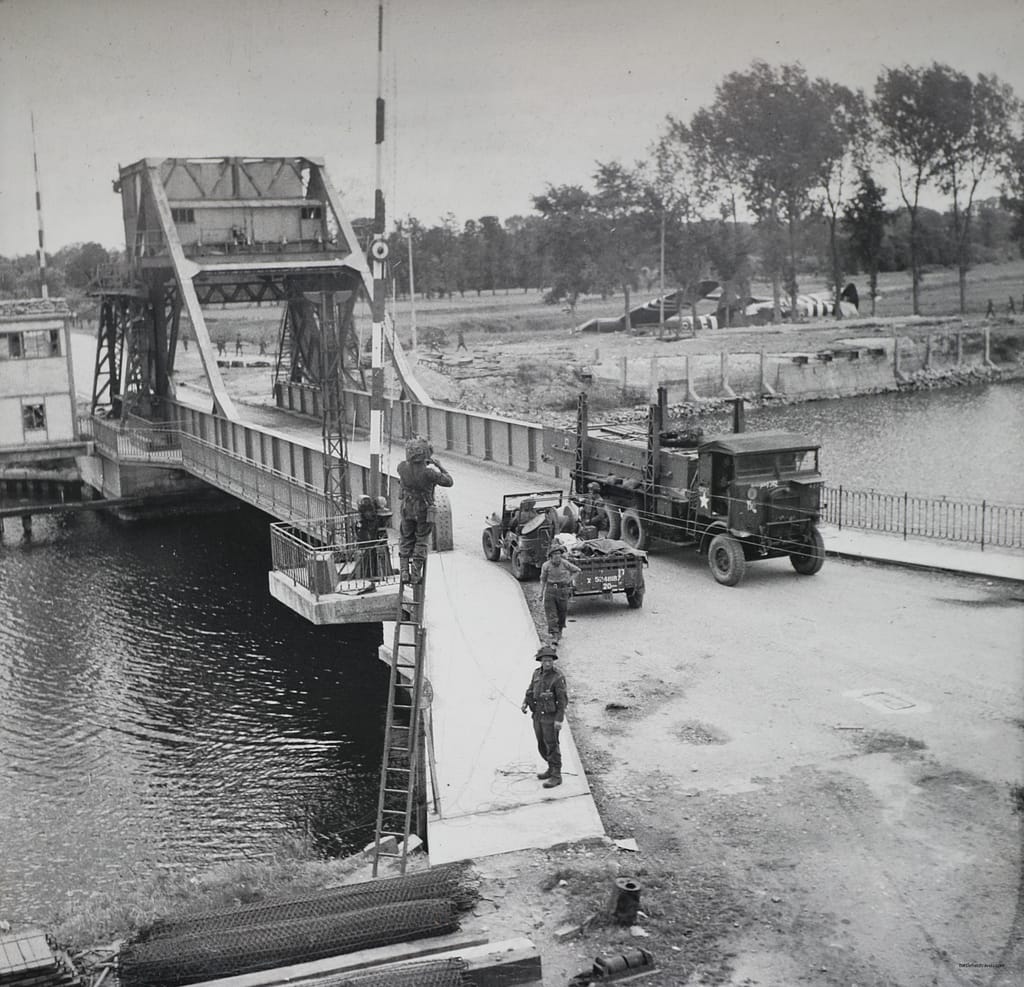
Defending the bridgehead
Ranville offered Pine-Coffin’s depleted battalion a defensible position that compensated partly for their reduced numbers. The Norman village, with its stone houses, enclosed gardens, and narrow lanes, was terrain that suited a thin defensive line. Stone walls and building corners gave cover and fields of fire. The hedgerows and lanes channelled German infantry attempting to probe the perimeter into fire lanes. Pine-Coffin organised his scattered companies into a perimeter and waited for what would come.
The German response was a series of probes and counterattacks from the south and east, as elements of the 716th Infantry Division and, later, the 21st Panzer Division attempted to break through to the canal crossings. The fighting on 6 June and the days immediately following was sustained and costly. 7th Para was reduced to about half its strength by 8 June. And yet the perimeter held.
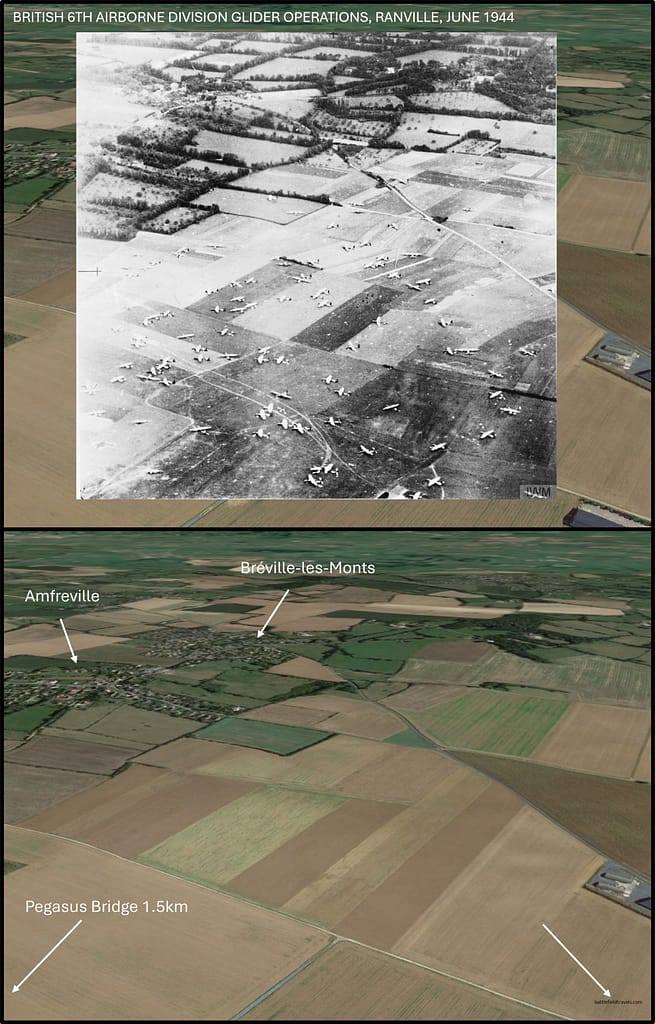
Ranville today is quiet and largely unchanged from 1944. The roads, the village outline, and even the shapes of the surrounding fields remain recognisable from wartime aerial photographs. The paratroopers who fought here would recognise the ground.
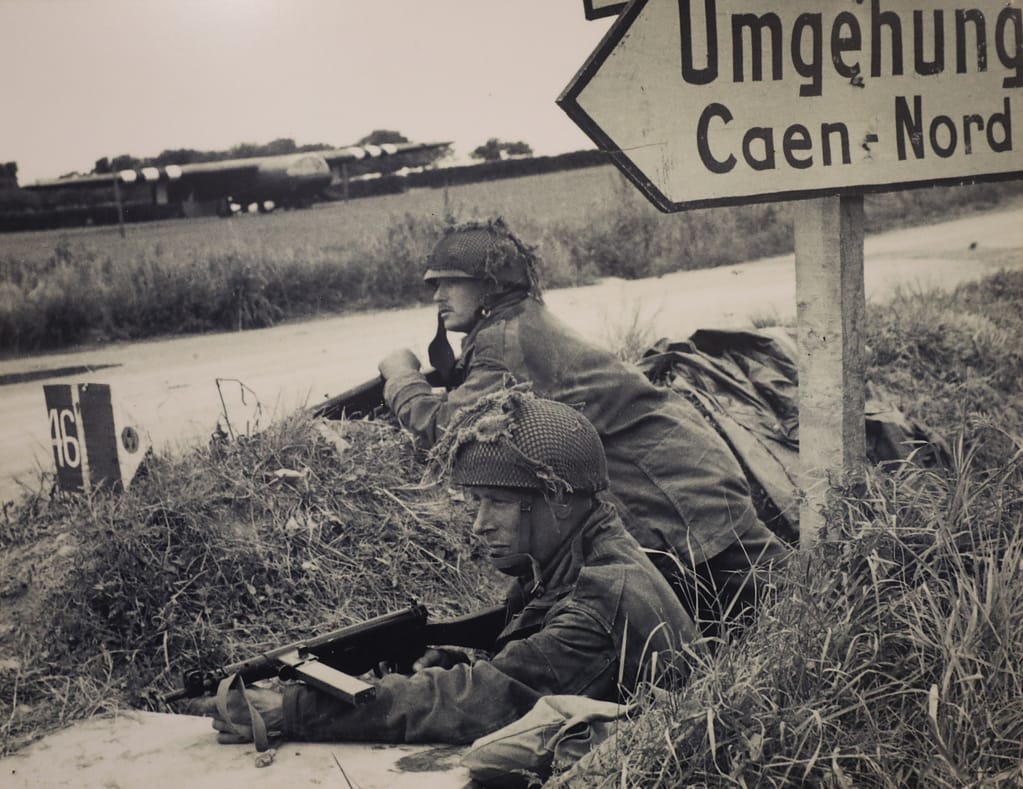
3rd Parachute Brigade: The Merville Battery
The Intelligence Problem
While Pine-Coffin’s men were fighting to hold Ranville, a very different action was already under way eight kilometres to the northeast
Merville Battery was identified by Allied intelligence as a potentially decisive threat to the Sword Beach landings. The assessment was that the battery contained four 150mm guns capable of firing on the invasion beaches at ranges that would make the seaborne landings prohibitively costly. The battery had to be neutralised before dawn on 6 June.
The intelligence was wrong on the guns. When the 9th Parachute Battalion finally broke into the battery position, they found four Austro-Hungarian 100mm pieces from the First World War. Certainly effective weapons, but significantly less dangerous than the long-range 150mm guns the planners had feared. The distinction mattered: 100mm guns could reach Sword Beach, but with a lighter shell, less accuracy at range, and less destructive effect than the 150mm weapons that had dominated the pre-operation threat assessment.
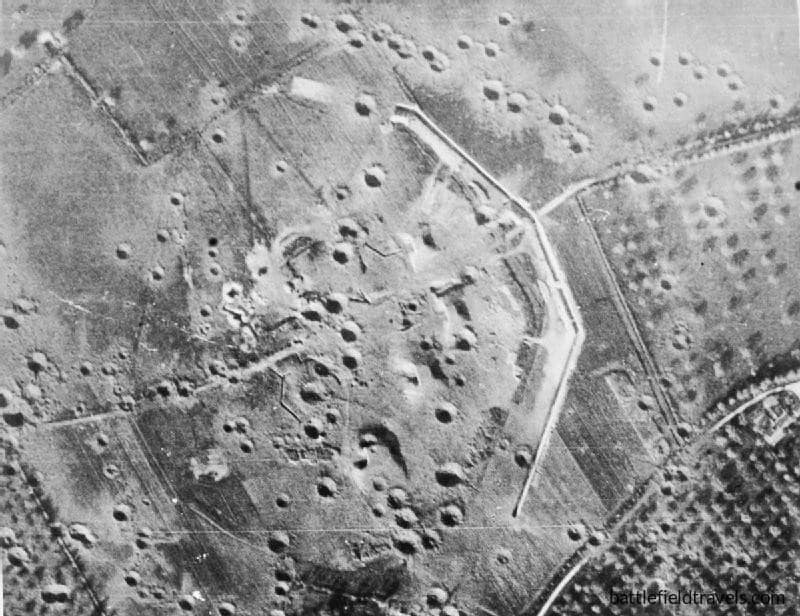
Merville Battery – Otway’s Problem
Prior to the drop, 100 Lancaster bombers made an ‘Oboe’ drop (radio frequency guided) of 4,000lb blockbuster bombs, few of which hit teh intended target area.
The 9th Parachute Battalion’s drop was probably the most scattered of any unit in 6th Airborne Division on D-Day, with one stick being dropped 30 miles east of the Merville Battery. Lieutenant-Colonel Terence Otway assembled his force at the forming-up point to find fewer than 150 men; about one-fifth of his battalion’s established strength. The heavy weapons were missing. The mine-clearing equipment was gone. Most of the medical detachment was gone. Three gliders carrying a coup de main party of engineers were supposed to land directly on the battery position simultaneously with the ground assault; two of them missed entirely.
Otway’s timetable had no room for adjustment. The battery had to be destroyed by 04:50 hours.7Lt. Col. T.H.B. Otway. (1944) Report on the Capture of Coastal Bty Position at 155775 by 9 Para Bn 6 Jun 44. Available at: https://www.pegasusarchive.org/normandy/war_7thBatt.htm (Accessed: 03 April 2026). If the Royal Navy did not receive confirmation of mission success, the backup plan was a naval bombardment of the Merville Battery at H-Hour. If Otway’s paratroopers were still on the position, this would place them at extreme risk. His mission was a no-fail mission. The battery, even with its lighter-than-feared armament, represented a genuine threat to the Sword Beach landings.
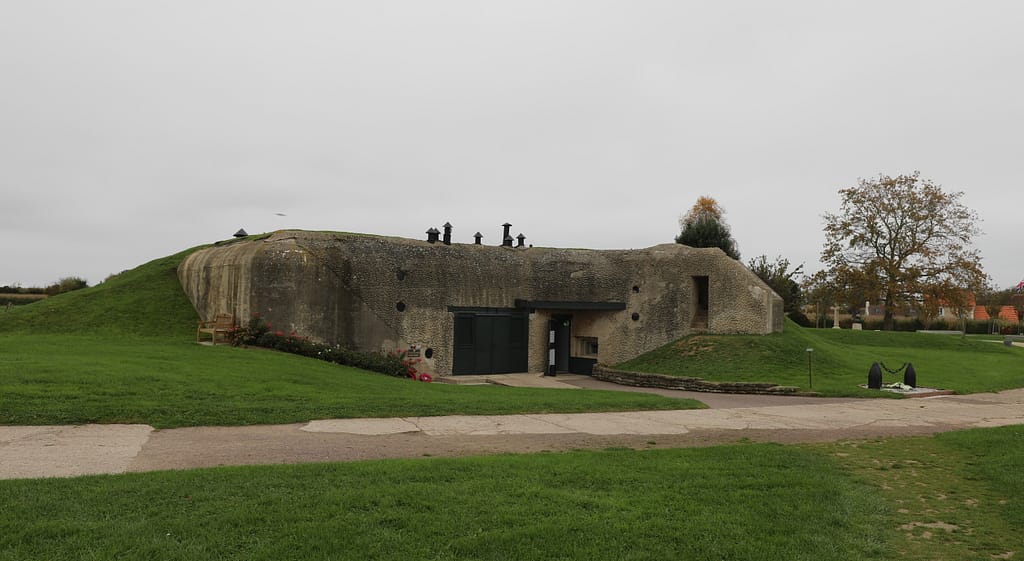
The Assault on Merville Battery
The approach Otway’s reduced force took to the Merville Battery was about as tactically sound as the circumstances allowed. The battery was oriented toward the coast, so its casemates faced northwest toward Sword Beach. Otway’s paratroopers approached from the southeast and struck the position at its most vulnerable point. The heavy concrete of the casemates, impervious to small arms and light demolition charges from the front, was less well defended from behind. The garrison of approximately 130 men under Hauptmann Raimund Steiner was oriented toward the sea threat, not the land threat that arrived from an unexpected direction.
The assault was savage and brief. Breaking through the wire and minefields under covering fire, fighting through the casemates with grenades, Sten guns, and bayonets at close quarters, Otway’s men cleared the position by about 05:00 hours. Casualties were severe, with more than fifty percent of the assault force killed or wounded. The guns were disabled with Gammon bombs and improvised charges rammed into breeches and barrels. The success signal was sent. The naval bombardment was called off.8Lt. Col. T.H.B. Otway. (1944) Report on the Capture of Coastal Bty Position at 155775 by 9 Para Bn 6 Jun 44. Available at: https://www.pegasusarchive.org/normandy/war_7thBatt.htm (Accessed: 03 April 2026).
Otway’s paratroopers withdraw
Then Otway withdrew. With barely enough men left to constitute a fighting patrol, unable to hold the position against counterattack, he pulled his survivors out before dawn. Of the 150 paratroopers who commenced the attack, 70 were killed, wounded or missing. The Germans reoccupied the battery later that day and got two of the guns back into limited action. The battery was never permanently destroyed until it was eventually bypassed and isolated as the front moved east.
Otway’s operation is sometimes assessed as a partial failure because the guns were not permanently disabled and the Germans reoccupied the position. This judgement misses the tactical reality. The mission was to neutralise the battery before the Sword Beach landings, and this was achieved. The guns that later came back into limited action did so after the lodgement was established and the window for decisive interference had passed. Measured against the actual mission, 9th Para succeeded. Albeit at high cost.
Merville Battery Today
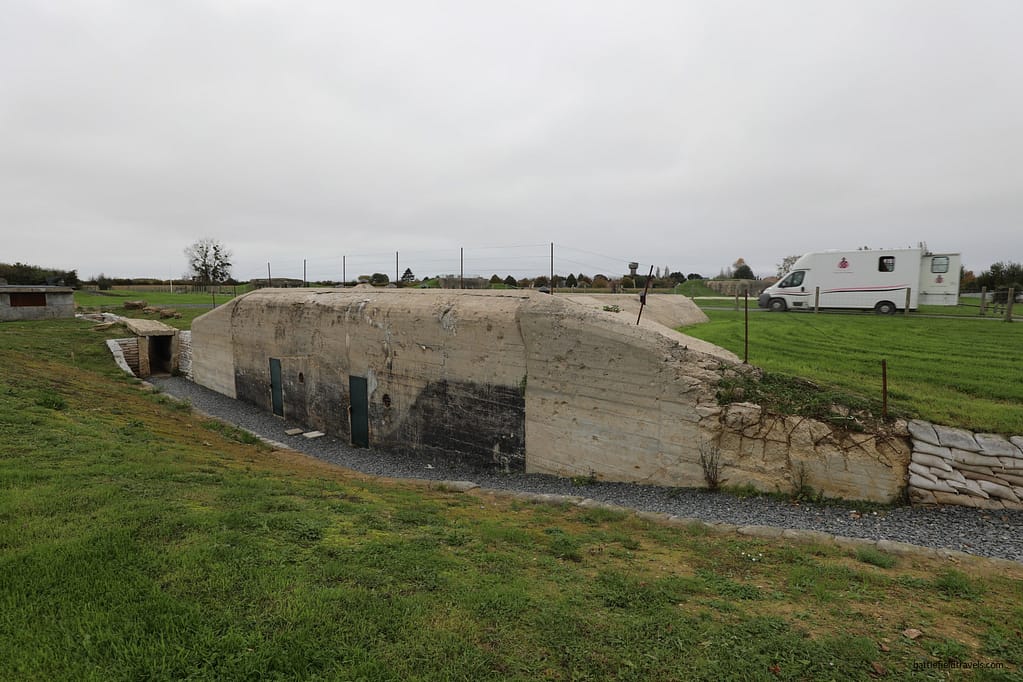
The Merville Battery is one of the best-preserved D-Day sites in Normandy — and one of the least-visited by the standard tour itineraries that concentrate on the American beaches to the west. The battery is about eight kilometres northeast of Ranville. The casemates and fire direction centre are intact, the perimeter is walkable, and it includes an excellent museum.
When you walk the battery perimeter today, several things become immediately apparent. The casemate walls are six feet of reinforced concrete, so the fact that Otway’s paratroopers destroyed the guns inside them with improvised charges is a tribute to ingenuity as much as courage. Also, the embrasures face northwest toward the sea. An attacking force coming from the landward side was approaching from a direction the defensive architecture was not designed to resist.
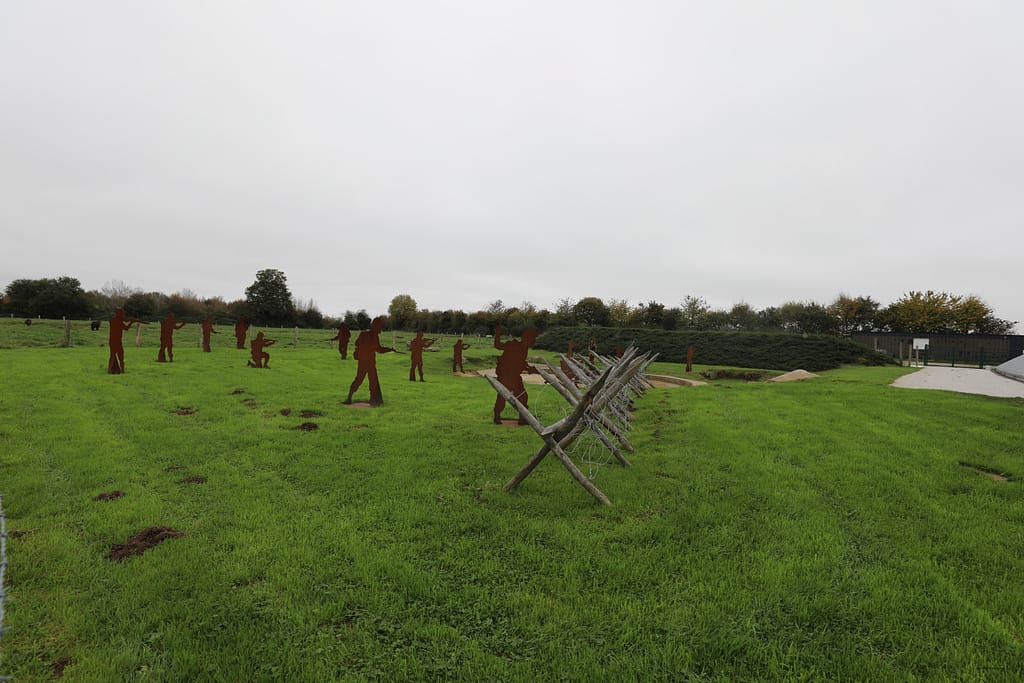
The assault breach point is now marked with steel profile figures, silhouettes of paratroopers at the moment of the break-in. The interpretation is effective without being sentimental. You can stand at the breach point, look back across the approach ground that Otway’s 150 men covered in the early morning darkness of 6 June, and understand immediately what they faced and why they succeeded.
Merville Redoubt, circa 1790
A bonus discovery at the Merville site rewards the visitor who looks beyond the D-Day interpretation. About two kilometres northwest of Merville Battery is the Merville Redoubt, a Napoleonic-era fort built around 1790 to defend the Orne River estuary. The layering of military history at a single location is a reminder that the ground east of the Orne has been militarily significant across centuries.

3rd Parachute Brigade: The Dives Bridges
Denying the eastern approaches
While the Merville Battery assault was the 3rd Parachute Brigade’s most dramatic operation on D-Day, it was not the only one. The brigade’s other two battalions, the 8th Parachute Battalion and the 1st Canadian Parachute Battalion, were tasked with destroying several bridges over the River Dives to the east, preventing German reinforcement from that direction.
1st Canadian Parachute Battalion had three primary tasks. A Company would protect the left flank of 9 Para during its attack on Merville Battery. B Company was to destroy Robehomme Bridge and secure Robehomme Hill. C Company was to destroy the Varraville Bridge and neutralise enemy positions around Varraville.9Lt. Col. J.A. Nicklin. (1944) War Diary 1st Canadian Parachute Battalion 6 Jun 44. Available at: https://www.pegasusarchive.org/normandy/war_1stCdnBatt.htm (Accessed: 03 April 2026).
8th Parachute Battalion was tasked with destroying the Bures and Troarn bridges. The battalion was badly scattered on landing with only about 140 making the battalion RV and without the required demolition equipment. 8 Para was able to improvise and blow the Bures Bridge on time. The Troarn Bridge was blown later in the day.10Lt. Col. A.S. Pearson. (1944) War Diary 8 Para Bn 6 Jun 44. Available at: https://www.pegasusarchive.org/normandy/war_8thBatt.htm (Accessed: 03 April 2026).
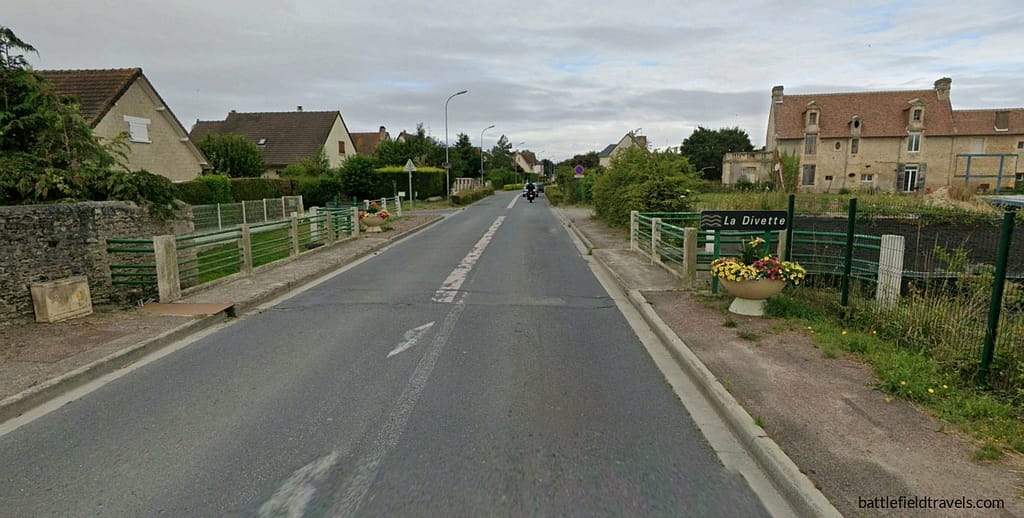
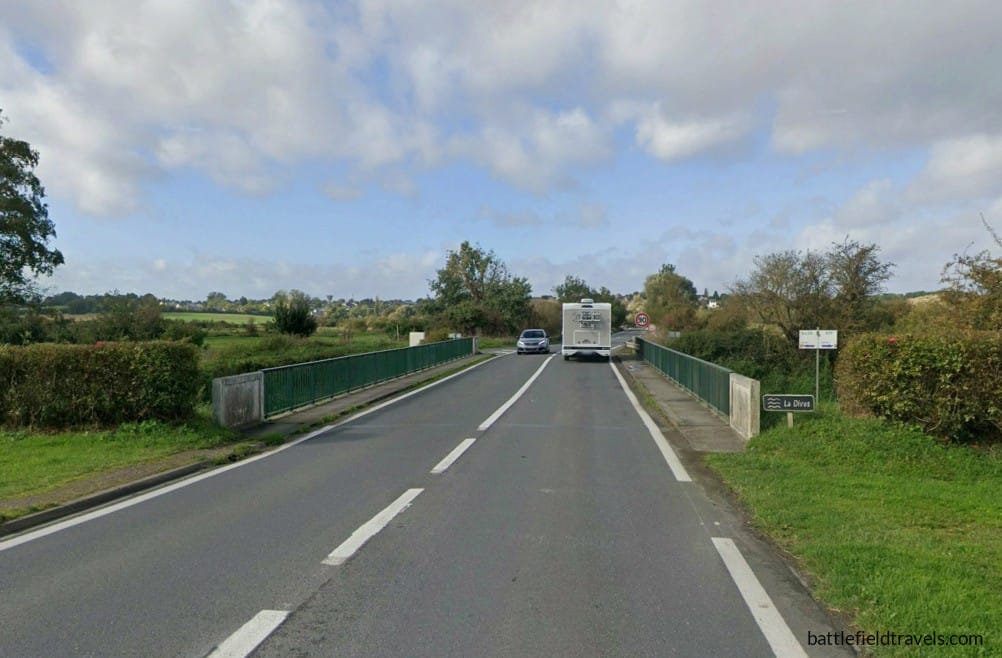
The Dives River bridges are the least-visited and least-written-about element of the 6th Airborne operation on D-Day. The standard D-Day itinerary rarely reaches them, yet their destruction was operationally significant. The Dives formed the eastern boundary of the airborne lodgement, and intact bridges across it would have given German forces a direct route to attack the bridgehead from the east.
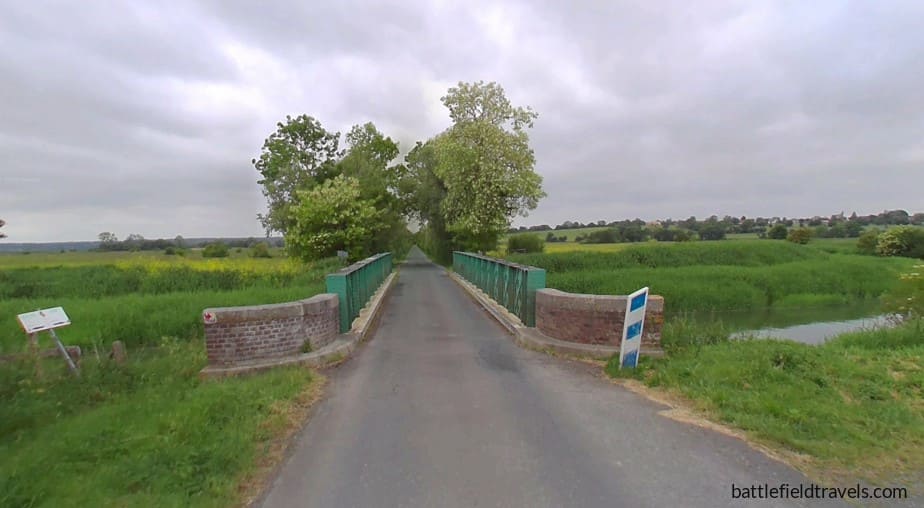
How dispersion helped the 3rd Para Bde
In a curious inversion of the general experience, the scattered drop actually assisted the Dives bridge operation. Individual sticks, landing widely dispersed across the eastern area, found themselves near different bridge objectives and attacked them independently with whatever personnel and explosives they had available. Several sticks achieved their objectives with tiny groups of men acting entirely on their own initiative, far from any formed unit, following the simple instruction to destroy any bridge they reached.
Sword Beach landings and the link-up
The main Allied seaborne invasion began soon after dawn, across a frontage of nearly 100 kilometres. Six thousand ships of all types and five thousand aircraft supported the landing of more than 127,000 troops on the Normandy beaches. The seaborne assault on Sword Beach, spearheaded by the British 3rd Infantry Division, began shortly after 07:25 hours, when the first assault waves reached the beaches near the port city of Ouistreham. The landings met resistance but progressed steadily, and by mid-morning, British infantry had begun advancing inland toward their objectives.11Ambrose, Pegasus Bridge (1984), p. 109.

The link-up with Lord Lovat’s commandos
Among the first units landing at Sword Beach was the 1st Special Service Brigade, commanded by Brigadier Simon Fraser, Lord Lovat. This formation comprised several commando units tasked with advancing rapidly inland to link up with the airborne forces holding the Orne bridges.126th Airborne Div (1944), OPERATION INSTRUCTION No.1.
After landing on Sword Beach during the morning, Lovat’s commandos moved quickly inland along the road and canal routes leading toward Bénouville and Ranville. The advance was conducted at speed, as the commandos were aware that the airborne troops holding the bridges might soon face stronger German counterattacks.
As the column approached the canal bridge shortly after 13:00 hours, the leading elements of No. 4 Commando moved ahead toward the crossing. Their approach was signalled by one of the most memorable episodes of the Normandy invasion.
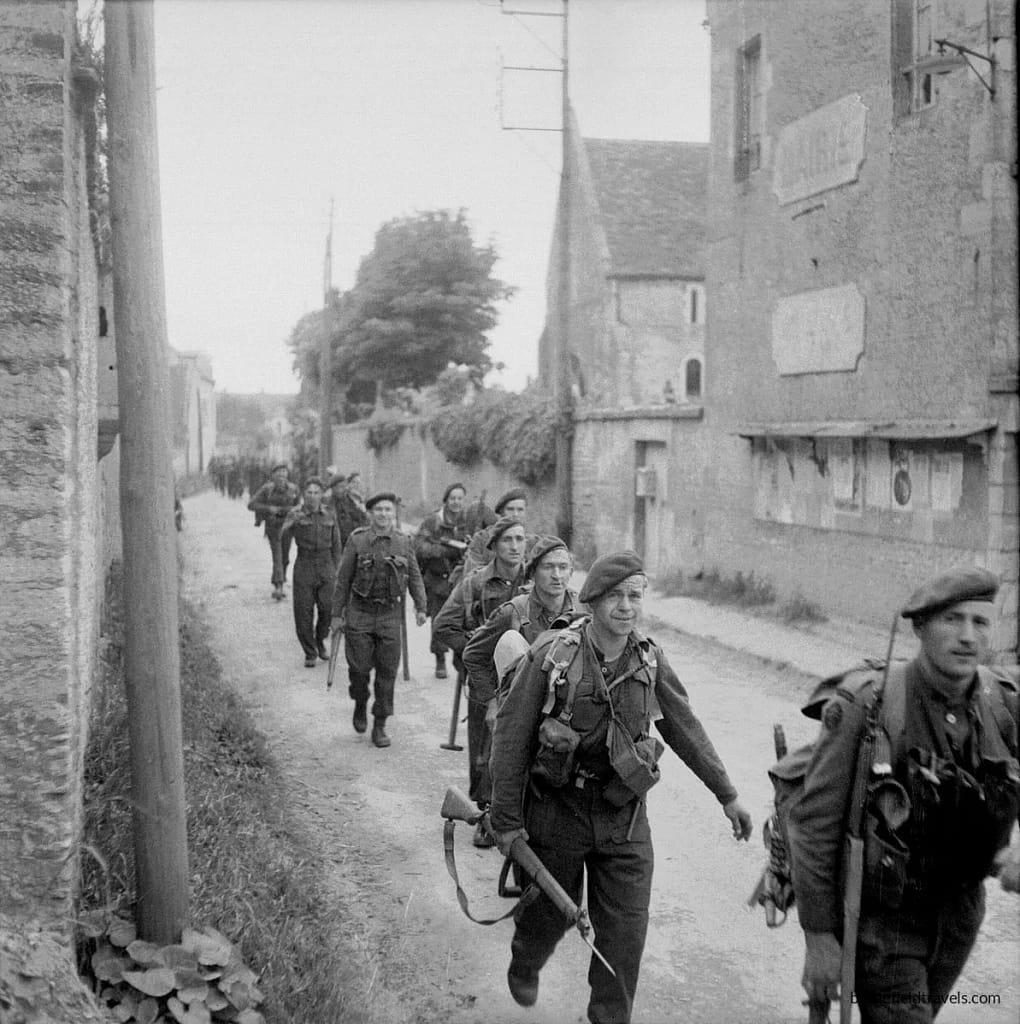
Piper Bill Millin
Accompanying the brigade was Piper Bill Millin, personal piper to Lord Lovat. As the commandos advanced along the canal road toward Pegasus Bridge, Millin marched at the head of the column playing traditional Scottish pipe tunes, including Highland Laddie and Blue Bonnets Over the Border. Although the practice of piping troops into battle had largely disappeared from modern warfare, Lovat had insisted that the piper accompany the brigade during the advance.
The sound of the bagpipes carried across the canal as the commandos approached the bridge. For the airborne troops defending the crossing, the sight of the advancing commandos — and the unmistakable sound of the pipes — signalled that relief had finally arrived.13Pine-Coffin (1944) Report on the Action Fought at RANVILLE and BENOUVILLE (7th Parachute Battalion).
Lovat arrived at Pegasus Bridge famously late. By his own account, he was a few minutes behind the agreed schedule, which prompted the equally famous exchange with Howard.
John Howard “About bloody time”
Lord Lovat: “John, today history is being made.”
Lovat instructed Bill Millin not to pipe over the Caen Canal bridge given the firefight going on there. But he did pipe the commandos across the Orne River bridge under fire, in defiance of the convention that restricted pipers to non-combat roles. The image of a kilted piper, bridge under fire, commandos double-timing across, has become one of the defining images of D-Day. Unfortunately, the commandos paid for the bravado, with several killed by German sniper fire as they crossed.

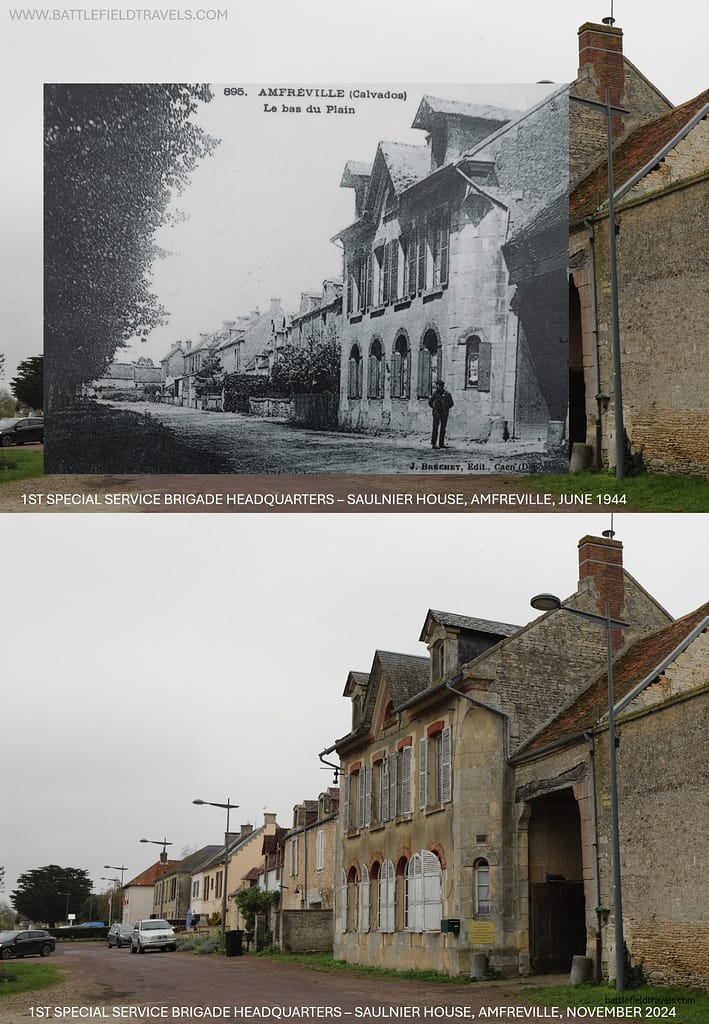
Saulnier House – Headquarters 1st SSB
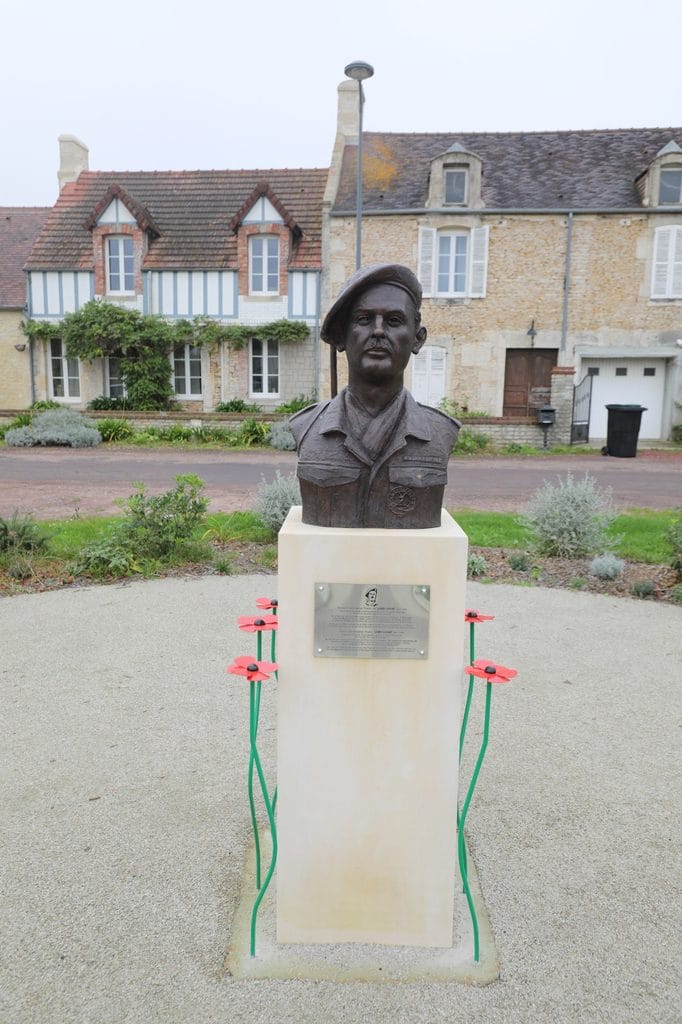
The Saulnier House on rue des Champs Saint-Martin in Amfreville became the headquarters for Lovat’s 1st Special Service Brigade as the commandos established themselves in the bridgehead. It is still there. The Saulnier House today is remarkably unchanged from its 1944 appearance, except for the bust of Lord Lovat in the forecourt. This building served as a command post in one of the most critical sectors of the Normandy operation; today it sits quietly on a Norman village street, marked by a plaque and the bust, known to researchers but largely bypassed by the tour buses that follow the standard D-Day itineraries.
Lord Lovat’s presence in the Normandy story extends well beyond this single location. He had been at Dieppe in 1942, commanding the only genuinely successful element of that disastrous raid. He was at Pegasus Bridge on D-Day. Peter Lawford played him, with all his eccentricities, in Darryl F. Zanuck’s 1962 movie The Longest Day.
21st Panzer Division counterattacks
Delayed commitment of German counterattack forces
Although the link-up with Lord Lovat’s commandos secured the immediate objective, the Orne bridgehead remained exposed throughout the afternoon and evening of 6 June 1944. German commanders around Caen were gradually beginning to understand the scale of the Allied invasion, and elements of 21st Panzer Division were preparing counterattacks to drive the airborne forces back across the Orne and retake the bridges.
The terrain around the canal and river crossings again played a decisive role. The waterways and their embankments channelled movement along a limited road network, forcing German units to approach the bridges through the villages of Bénouville, Le Port, and Ranville. These urban areas channelled movement and exposed attacking vehicles to anti-tank weapons positioned along the road approaches.
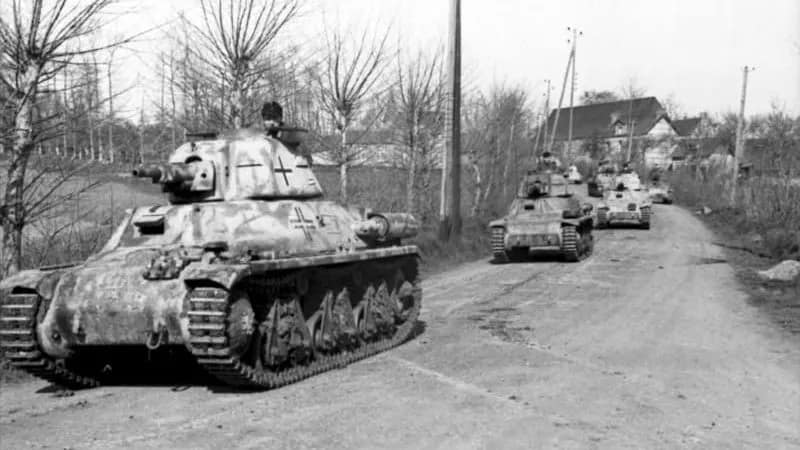
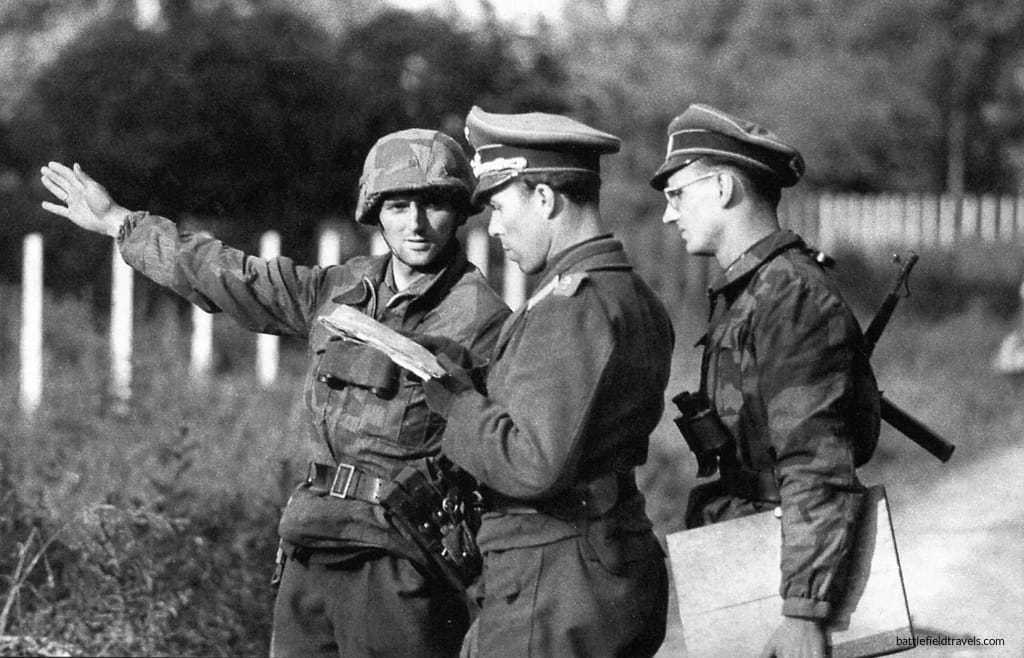
125th Panzergrenadier Regiment attack
One of the most serious threats developed along the road running south from Pegasus Bridge toward Caen. Colonel Hans von Luck’s 125th Panzergrenadier Regiment, equipped with tanks and mechanised infantry, attempted to advance toward the canal crossing in order to isolate the airborne defenders and reopen the route to the coast. British troops responded by deploying PIAT anti-tank teams and positioning machine-guns to cover the narrow road approaches. All German attempts were beaten back, and the Germans lost 13 of the 17 tanks engaged in the attack.14Ambrose, Pegasus Bridge (1984), p. 126..
Reinforcement by 51st Highland Division
Relief by heavy seaborne forces
The paratroopers could not hold the eastern perimeter indefinitely. 6th Airborne was lightly armed by design. Their equipment capacity was constrained by what could be carried through a parachute door or loaded into a Horsa or Hamilcar gliders. This meant they arrived without the artillery, armour, and heavy support weapons that a sustained defensive battle eventually demands.
Elements of the 51st (Highland) Division landed at Juno Beach on D-Day, with the bulk of the division landing on D+1. The division crossed the Orne and assumed responsibility for the defensive line. The Highlanders pushed eastward into Amfreville and the Bois du Monts, clearing ground that the paratroopers had held against repeated German counterattacks since the early hours of D-Day.

Battle of Bréville-les-Mont
The 51st Highland Division’s first direct contribution to the fighting was in one of the most intense battles of the D-Day landings. Over 7/8 June, the German 346th Infantry Division, responding rapidly from Le Havre, breached the 6th Airborne Division position around the village of Bréville-les-Mont. Over the next four days, Gale’s understrength parachute battalions and Lovat’s 1st SSB engaged in a see-saw battle for control of the bridgehead.
On 11 June, 5th Battalion of the Black Watch Regiment, attached to 3rd Parachute Brigade for the action, attacked Bréville-les-Monts across open ground and was thrown back with roughly 200 casualties. The following day, a German counterattack destroyed the battalion’s anti-tank guns and forced the survivors back into the woods to join 9th Parachute Battalion’s line. With the position still dangerously exposed, Major-General Gale committed a fresh assault that evening. 12th Parachute Battalion, supported by 12th Devons and tanks of the 13th/18th Royal Hussars fought its way into the village and secured it by nightfall, at a cost that left 12th Para barely able to muster a company from what had gone in as a full battalion.
Tragedy followed almost immediately: a communications failure led 51st Highland’s own gunners to believe Bréville was still in German hands, and their artillery shelled the village after its capture, killing 12 Para’s commanding officer, Lieutenant-Colonel Johnson, and wounding Lord Lovat and Brigadier Hugh Kindersley of 6th Airlanding Brigade. On 13 June, the 51st (Highland) Division formally took over responsibility for the southern sector of the Orne bridgehead, the action that finally closed the last gap in 6th Airborne’s perimeter.

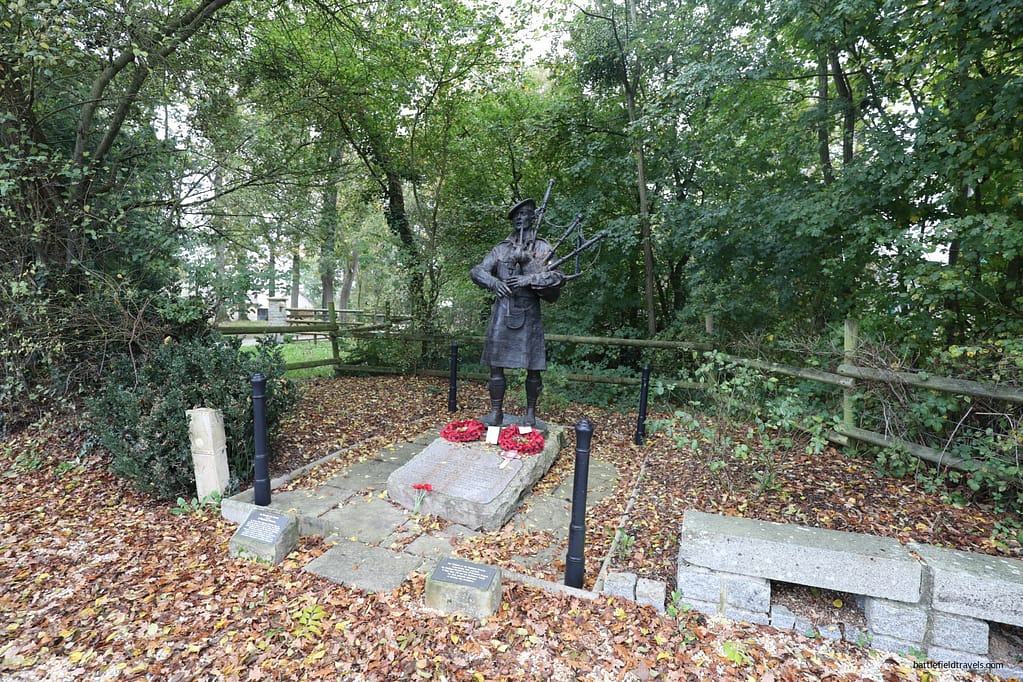
51st Highland Division monument
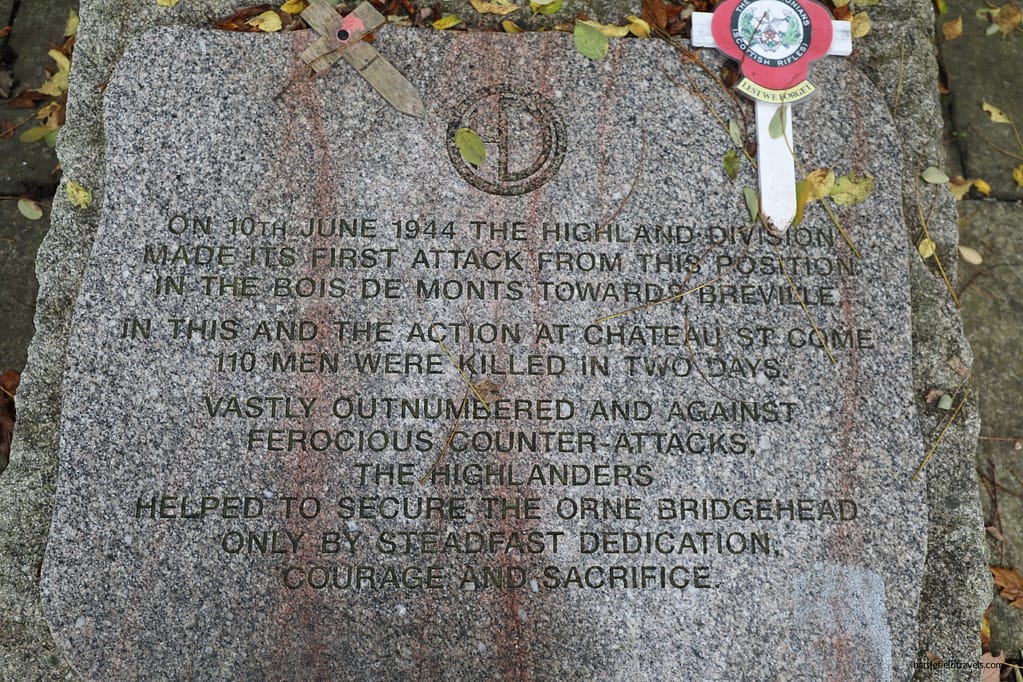
Their relief of 6th Airborne allowed the paratroopers to withdraw into reserve after nearly a week of continuous action. The eastern flank was secure. A monument to the 51st Highland Division stands near Bréville-les-Monts today, marking the ground where they defended against major German counterattacks from 10 June 1944 onwards. A quiet acknowledgement of a contribution that the standard D-Day narrative, focused on the dramatic airborne operations of 6 June, tends to underplay.
Terrain and Decision-Making
Operational-level terrain influences
6th Airborne Division’s D-Day operation offers an instructive study in how terrain perception and terrain misperception shaped tactical outcomes at multiple levels.
At the operational level, the flat, featureless terrain east of the Orne was perceived by planners as manageable for a night airborne drop, but proved significantly more difficult to navigate than anticipated. The hedgerows, field boundaries, and absence of distinctive features that made the ground easy to map made it almost impossible to navigate in darkness. The paratroopers who landed correctly knew where they were. The majority who landed dispersed did not, and in flat, enclosed Norman countryside at night, standard rally methods failed. The German counterattack at Pegasus Bridge became, ironically, the most reliable orientation feature available to scattered paratroopers trying to find their units.
Tactical-level terrain influences
At the tactical level, individual unit commanders such as Otway at Merville, Pine-Coffin at Ranville, the Canadian company commanders at the Dives, exercised mission command even when their planned resources had been stripped away. Each identified what terrain advantage remained available and acted on it. Otway exploited the landward blind spot of the coastal battery. Pine-Coffin exploited the defensive properties of a Norman village. The Canadian Para sticks exploited the opportunities they saw in front of them by destroying whatever bridges they found.
What the ground east of the Orne reveals, and what no map or document fully conveys, is the fundamental difficulty of navigation in darkness, and the corresponding scale of what 6th Airborne achieved despite that difficulty. Standing on the flat, hedgerow-divided ground around Ranville today, in daylight, with modern maps and GPS, the positional challenge of a night parachute drop becomes understandable. The fact that lightly armed paratroopers, scattered across this ground in darkness, assembled enough strength to take every major objective on schedule is among the most remarkable achievements of the entire Normandy campaign.
Outcomes and Legacy
The eastern flank of the Allied beachhead was secure by nightfall on 6 June 1944. The price was high. 6th Airborne Division suffered significant casualties in the first week, killed, wounded, and missing, including many lost in the scattered drop before a shot was fired. And yet every major objective was taken. The Orne bridges were seized and held. Ranville was the first French village liberated. The Merville Battery was neutralised at the critical moment. The Dives bridges were destroyed. Lord Lovat’s commandos crossed from Sword Beach and linked with the airborne in time to help hold the perimeter against 21st Panzer’s counterattacks.
The operation demonstrated both the strengths and the inherent vulnerabilities of airborne warfare. The strengths were initiative, training, and the ability to act decisively with limited resources under time-critical constraints. The vulnerabilities were the dispersion of the drop, the lack of heavy weapons and equipment, and the inability to hold against sustained armoured attack without relief from the seaborne forces.
6th Airborne’s D-Day operation also demonstrated something less often acknowledged: the importance of mission command over the detailed plan. The plan did not survive contact with the dispersed drop. The commander’s intent to secure the eastern flank and hold until relieved survived everything thrown at it. The officers and men who executed that concept, in groups of five, ten, and twenty rather than the companies and battalions the plan assumed, made the difference between a successful lodgement and a potential catastrophe on the eastern flank of the Allied invasion.
The 6th Airborne Division battlefield today
The ground east of the Orne is one of the best-preserved airborne battlefields of the Second World War, and one of the most accessible from the main D-Day sites near Bayeux and Caen. A day exploring this sector provides a different perspective on D-Day from the better-known American beaches to the west. The area is quieter, less crowded, and analytically interesting because the standard narratives are less well known.
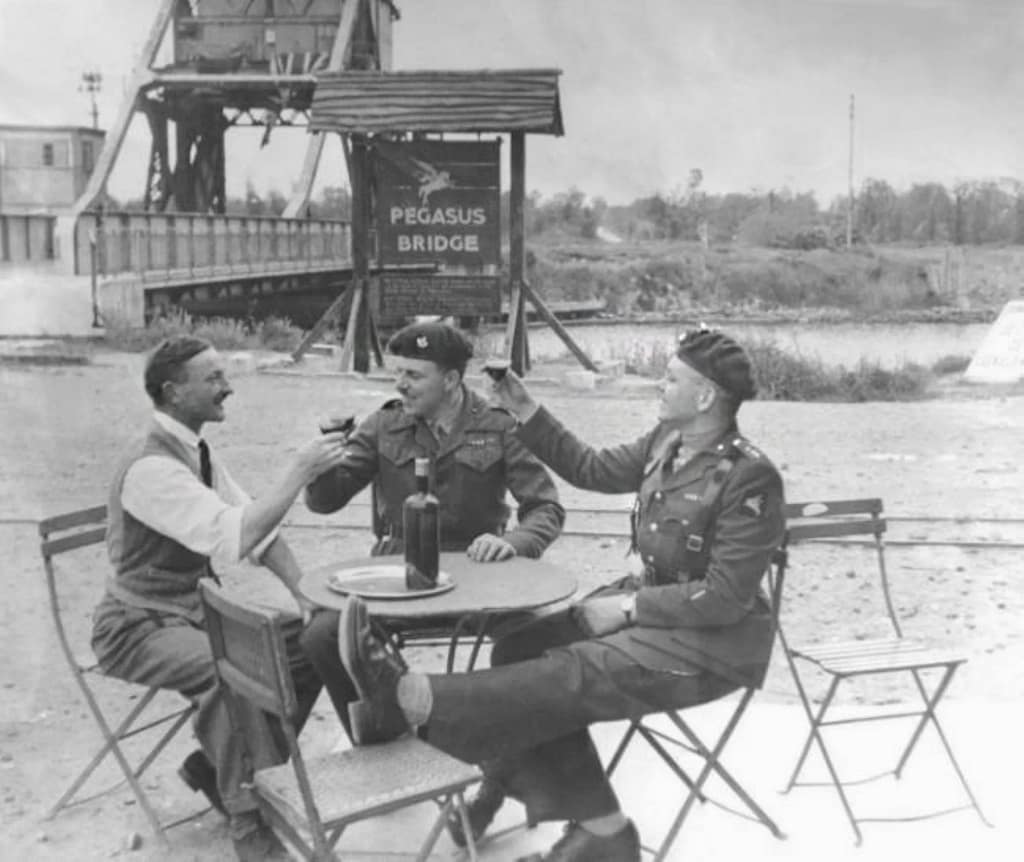
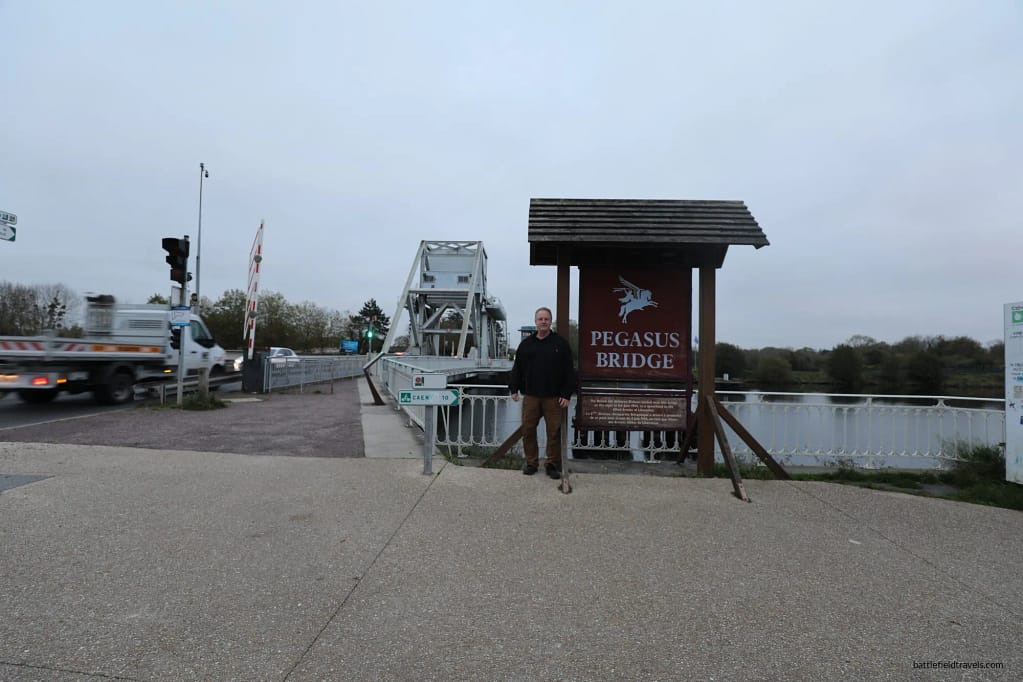
Pegasus Bridge
I have written extensively about the Caen Canal and Orne River Bridge battle sites in my Pegasus Bridge article. This is the best place start an exploration of the 6th Airborne Division D-Day battlefields. The bridge site, the visitor centre, the original bridge, and the marked locations of the glader landings all help bring it vividly to life.
Bréville-les-Mont
Bréville-les-Mont is a sleepy Norman hamlet today, but was the site of some of the mst intense fighting of the D-Day landings and their aftermath. Some British and German units emerged from this fighting with 60-80% losses. The site is now well commemorated with monuments.
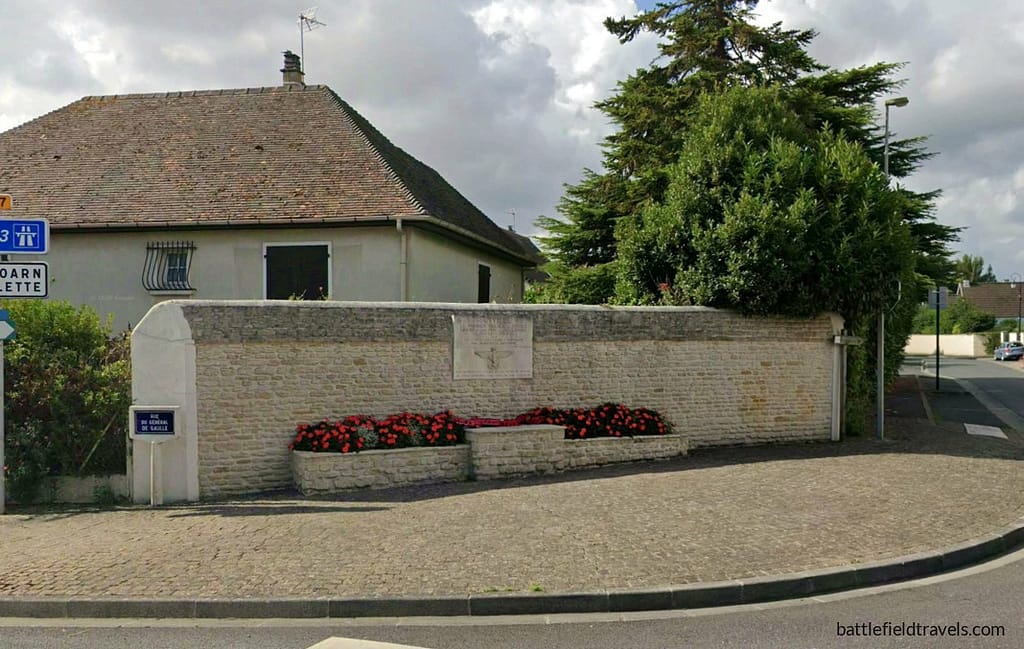
Ranville
Ranville retains its Norman village character largely unchanged from 1944. A then-and-now comparison between wartime aerial photographs and the current ground reveals that the roads, village outlines, and even the shapes of the surrounding fields are recognisable after eighty years. The same ground the paratroopers defended is still there, available for examination.
Amfreville
The Saulnier House on rue des Champs Saint-Martin in Amfreville, Lord Lovat’s brigade headquarters, marked by a bust of Lovat on the exterior wall, is almost entirely unchanged from its 1944 appearance. It is bypassed by most visitors, but accessible to anyone who knows to look for it. The Bois du Monts and the Amfreville area, scenes of sustained German counterattacks in the days after D-Day, remain rural and wooded; less interpreted than Ranville or Merville, but offering a clear sense of the terrain over which the fighting took place.
Merville Battery
The Merville Battery is the highlight of the eastern sector for the serious military history visitor. Well-preserved, thoughtfully interpreted, and far less crowded than the major American sites, it offers direct access to the casemates, the assault breach point marked with steel profile figures, and an excellent museum. The bonus discovery of the adjacent Napoleonic-era Merville Redoubt adds historical depth to a site that is already extraordinarily rich.
Allow a full day for the eastern sector: Pegasus Bridge and the Ranville area in the morning, the Saulnier House at Amfreville around midday, and the Merville Battery in the afternoon. The combination gives a complete picture of 6th Airborne Division’s D-Day operation and connects the individual tactical actions into the operational whole that secured the Allied eastern flank.
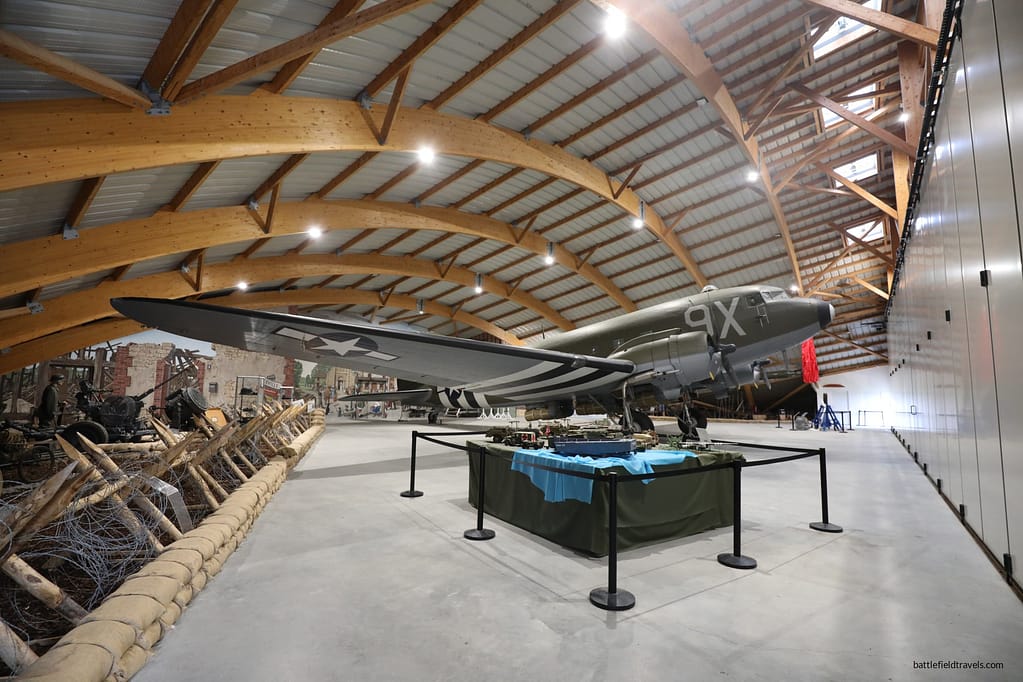
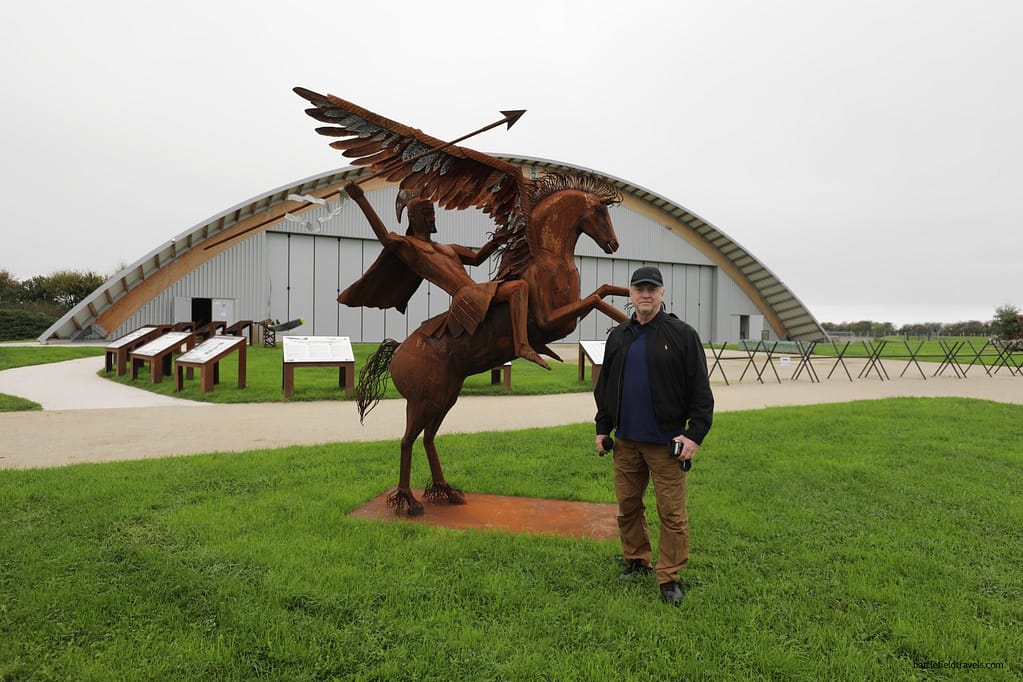
RAF Tarrant Rushton today
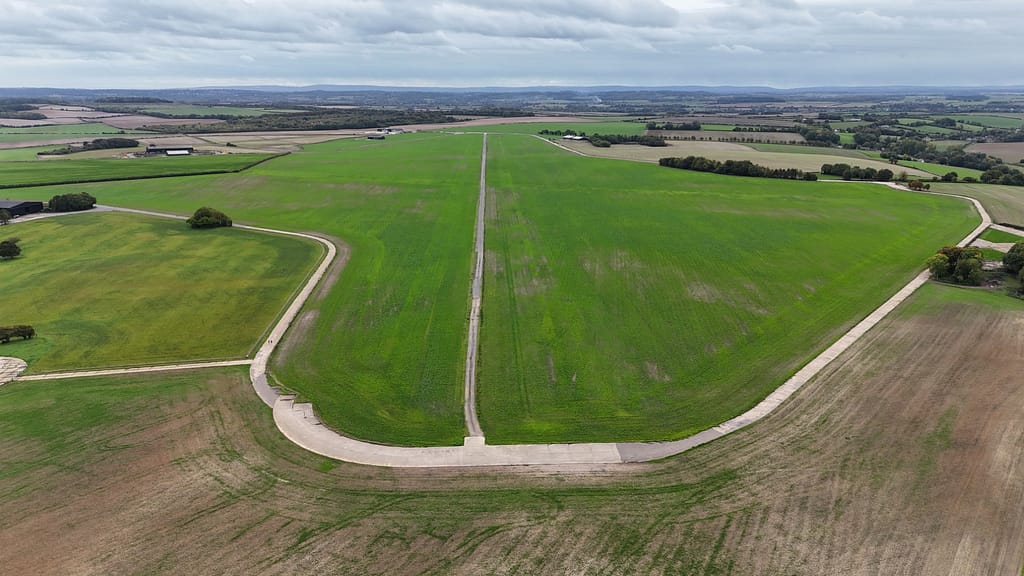
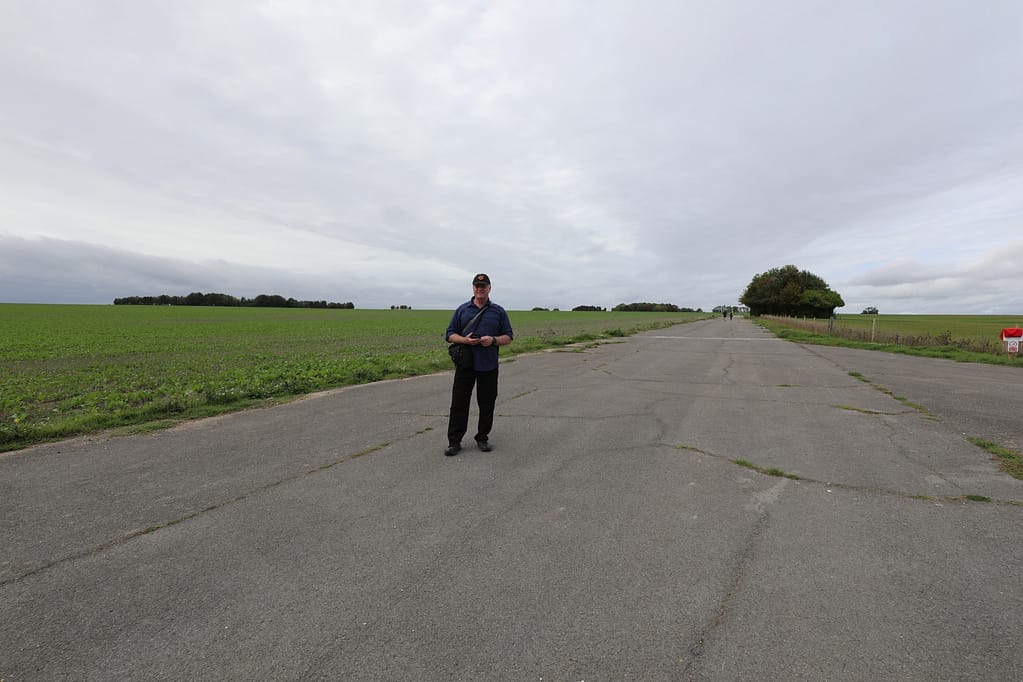
During my October 2026 battlefield research trip, I visited RAF Tarrant Rushton in Dorset, where six Horsa gliders carrying Major John Howard’s coup de main force departed on the evening of 5 June 1944. Their mission was to seize the bridges over the Caen Canal and River Orne. The airfield also supported subsequent glider operations involving other elements of the British 6th Airborne Division on D-Day and beyond.

Found this useful? Buy me a coffee — it helps fund future battlefield research


Authored by Mick Prictor, a retired military officer with 40 years’ service, and a military historian specialising in terrain-focused analysis of tactics, doctrine, and command decision-making in land warfare. His work draws on extensive battlefield fieldwork—more than 280 sites worldwide—and one of the world’s largest private collections of historic military arms, uniforms, and equipment. About me
❓ Test Your D-Day Knowledge
Twenty questions covering the airborne operations, invasion beaches, commanders, forces and fighting of 6 June 1944.
20 questions · 60% to pass · expect a challenge
📚 Notes and References
Notes
- 1Max Hastings, Overlord: D-Day and the Battle for Normandy (London: Michael Joseph, 1984), pp. 29–33. ↩︎
- 2Carlo D’Este, Decision in Normandy (London: Collins, 1983), pp. 73–74. ↩︎
- 3Niklas Zetterling, Normandy 1944: German Military Organisation, Combat Power and Organisational Effectiveness (Winnipeg: J.J. Fedorowicz, 2000), pp.99–104. ↩︎
- 46th Airborne Div, Chief of Staff. (17 May 1944) 6 AIRBORNE DIV OPERATION INSTRUCTION No.1, The 6th Airborne Division in Normandy. Available at: https://www.pegasusarchive.org/normandy/frames.htm (Accessed: 03 April 2026) ↩︎
- 5L. F. Ellis, Victory in the West, Vol. I (1962), pp. 149–156. ↩︎
- 6Pine-Coffin, R.G. (1944) Report on the Action Fought at RANVILLE and BENOUVILLE brs on night 5/6 June and day 6 June 1944., 7th Parachute Battalion. Available at: https://www.pegasusarchive.org/normandy/war_7thBatt.htm (Accessed: 03 April 2026). ↩︎
- 7Lt. Col. T.H.B. Otway. (1944) Report on the Capture of Coastal Bty Position at 155775 by 9 Para Bn 6 Jun 44. Available at: https://www.pegasusarchive.org/normandy/war_7thBatt.htm (Accessed: 03 April 2026). ↩︎
- 8Lt. Col. T.H.B. Otway. (1944) Report on the Capture of Coastal Bty Position at 155775 by 9 Para Bn 6 Jun 44. Available at: https://www.pegasusarchive.org/normandy/war_7thBatt.htm (Accessed: 03 April 2026). ↩︎
- 9Lt. Col. J.A. Nicklin. (1944) War Diary 1st Canadian Parachute Battalion 6 Jun 44. Available at: https://www.pegasusarchive.org/normandy/war_1stCdnBatt.htm (Accessed: 03 April 2026). ↩︎
- 10Lt. Col. A.S. Pearson. (1944) War Diary 8 Para Bn 6 Jun 44. Available at: https://www.pegasusarchive.org/normandy/war_8thBatt.htm (Accessed: 03 April 2026). ↩︎
- 11Ambrose, Pegasus Bridge (1984), p. 109. ↩︎
- 126th Airborne Div (1944), OPERATION INSTRUCTION No.1. ↩︎
- 13Pine-Coffin (1944) Report on the Action Fought at RANVILLE and BENOUVILLE (7th Parachute Battalion). ↩︎
- 14Ambrose, Pegasus Bridge (1984), p. 126. ↩︎
Sources and Further Reading
Primary & Official Histories
- L. F. Ellis, Victory in the West, Vol. I: The Battle of Normandy (London: HMSO, 1962).
- Royle, Major J.P. (1944) REPORT ON OPERATION ‘OVERLORD’ BY MAJOR J.P. ROYLE, 1 Wing, GLIDER PILOT REGIMENT, No.1 Wing, the Glider Pilot Regiment. Available at: https://www.pegasusarchive.org/normandy/war_1wing.htm#Appendix%20%22F%22 (Accessed: 03 April 2026).
- 6th Airborne Division, Chief of Staff. (17 May 1944) 6 AIRBORNE DIV OPERATION INSTRUCTION No.1, The 6th Airborne Division in Normandy. Available at: https://www.pegasusarchive.org/normandy/frames.htm (Accessed: 03 April 2026).
- Pine-Coffin, R.G. (1944) Report on the Action Fought at RANVILLE and BENOUVILLE brs on night 5/6 June and day 6 June 1944., 7th Parachute Battalion. Available at: https://www.pegasusarchive.org/normandy/war_7thBatt.htm (Accessed: 03 April 2026).
- Otway, T.H.B. (1944) Report on the Capture of Coastal Bty Position at 155775 by 9 Para Bn 6 Jun 44. Available at: https://www.pegasusarchive.org/normandy/war_7thBatt.htm (Accessed: 03 April 2026). ↩︎
- Nicklin, J.A. (1944) War Diary 1st Canadian Parachute Battalion 6 Jun 44. Available at: https://www.pegasusarchive.org/normandy/war_1stCdnBatt.htm (Accessed: 03 April 2026). ↩︎
- Pearson, A.S. (1944) War Diary 8 Para Bn 6 Jun 44. Available at: https://www.pegasusarchive.org/normandy/war_8thBatt.htm (Accessed: 03 April 2026).
- RAF 2nd Tactical Air Force Operations Records, The National Archives (UK).
Secondary Sources (Cited in Footnotes)
- Stephen Ambrose, D-Day, June 6, 1944: the climactic battle of World War II. (Simon and Schuster, New York, 1994).
- Stephen Ambrose, Pegasus Bridge (New York: Simon & Schuster, 1984).
- Carlo D’Este, Decision in Normandy (London: Collins, 1983).
- Max Hastings, Overlord: D-Day and the Battle for Normandy (Simon and Schuster, New York, 1984).
- “The Coup de Main Attack on Pegasus & Horsa Bridges.” Lightbobs, www.lightbobs.com/1944-pegasus-bridge-coup-de-main.html. Accessed 1 Apr. 2026.
- Niklas Zetterling, Normandy 1944: German Military Organisation, Combat Power and Organisational Effectiveness (Winnipeg: J.J. Fedorowicz, 2000).
Recommended Additional Works
- Carlo D’Este, Decision in Normandy (London: Collins, 1983).
- Chester Wilmot, The Struggle for Europe (London: Collins, 1952).
- Antony Beevor, D-Day: The Battle for Normandy. (London: Penguin Books, 2009).
- Georges Bernage, D-Day Landing Beaches: The Guide (Bayeux: Heimdal, 2009).
- David Fraser, And We Shall Shock Them: The British Army in the Second World War (London: Cassell, 1983).
- Ken Ford, D-Day 1944 (3): Gold & Juno Beaches (Oxford: Osprey Campaign Series, 2002).
- Cornelius Ryan, The Longest Day: June 6, 1944. (Simon and Schuster, New York, 1959).
Cartography & Terrain Analysis
- GSGS 4347 series 1:50,000 Normandy maps (Allied issue, 1944).
- Google Earth Pro terrain analysis: Ouistreham to Lebisey Wood axis.
- Field survey: Hermanville, Ouistreham, Lion-sur-Mer, and Pegasus Bridge environs.
Author’s Fieldwork
Personal ground reconnaissance, Ranville, Amfreville, Merville Battery, and Bois du Monts, Normandy. Drone photography and GIS terrain analysis. The then-and-now aerial comparison of the glider landing zones around Bréville-Amfreville confirms the remarkable continuity of the Norman field and road pattern eighty years after the operation.
Further Reading
This battle study nests within the broader analytical framework explored in the Research Hub, where operational methods, operating environments, armies, commanders, and weapons are examined across conflicts and eras. The links below connect related studies across the wider body of battlefield analysis on the BattlefieldTravels site.
⚔️ Explore all battle studies from World War Two 1939-1945
🏛️Explore the museum of World War Two historic artefacts
The book list for this conflict includes the leading campaign studies, memoirs, and operational analyses of the D-Day landings, selected specifically to complement this battlefield study.
📚World War Two – Recommended Reading
🗞️ For updates on new battlefield studies and research insights, you can subscribe to the Newsletter.
Related Battle Studies, Museum Pieces & Reading Resources
 ⚔️ D-Day: Brecourt Manor assault, Easy Company, 506th PIR,
6 June 1944
 ⚔️ D-Day: Sword Beach landings,
6 June 1944
 ⚔️ D-Day: Utah Beach landings,
6 June 1944
 ⚔️ D-Day: Battle for La Fière Causeway,
6-9 June 1944
 ⚔️ D-Day: US Airborne Operations, Sainte-Mere-Eglise,
6 June 1944
 ⚔️ D-Day: 101st Airborne Division and the Battle of Bloody Gulch,
13 June 1944
🧭 Battlefield Travel Guide: 6th Airborne Division — Eastern Flank (6 June 1944)
- Location: East of the River Orne and Caen Canal, Normandy, France — spanning Bénouville, Ranville, Amfreville, Bréville, the Bois du Monts, and the Merville and Dives sectors further east.
- Coordinates (central, Ranville): 49.23° N, 0.26° W
Getting There
- By Car: The whole sector sits within a 10–15 minute drive of Caen via the D514 and D223. Pegasus Bridge and Ranville form the natural western anchor; Merville Battery lies roughly 15 minutes further north-east along the coast road.
- The area sits just inland from Sword Beach, with Ouistreham and the coast approximately 6–8 km to the north.
- The Pegasus Memorial Museum in Ranville is the best single starting point for orientation before exploring the wider sector.
Site Orientation
- The sector divides naturally into three zones: the bridgehead itself (Pegasus and Horsa Bridges, Ranville), the inland defensive perimeter (Amfreville, Bréville, and the Bois du Monts), and the outlying objectives (Merville Battery to the north-east, the Dives bridges further east still).
- Ranville and Amfreville are barely two kilometres apart, and both sit within easy walking or short driving distance of Pegasus Bridge — the whole bridgehead can be understood as a single continuous piece of ground.
- The terrain east of the Orne is notably flat and featureless compared to the bocage further inland, which made night navigation for the scattered parachute drop especially difficult — this is worth appreciating on the ground, not just on the map.
- Merville Battery sits in open coastal ground, oriented seaward — its casemates face the coast, not the landward approach the paratroopers actually used.
- The Dives bridges (Varaville, Robehomme, Bures) lie further east again and see very few visitors; reaching all three in one day requires a car and a clear plan.
Museums & Visitor Centres
- Pegasus Memorial Museum (Mémorial Pegasus), Ranville: Houses the original Pegasus Bridge, a full-scale Horsa glider replica, and detailed exhibits covering the whole of 6th Airborne Division’s operation, not just the coup de main.
- Musée de la Batterie de Merville: Set within the original battery casemates, with exhibits on Otway’s assault, the German garrison, and the wider coastal defence system. One of the best-preserved and least-crowded major D-Day sites in Normandy.
- Café Gondrée, Bénouville: Beside Pegasus Bridge, traditionally regarded as the first building liberated on D-Day.
- Ranville War Cemetery: The largest Commonwealth war cemetery from the D-Day operations, and the resting place of many 6th Airborne personnel, including some of the officers named in this study.
On-Site Experience
- Start at Pegasus Bridge and walk the short distance to Ranville village to appreciate how close the coup de main and the 5th Parachute Brigade’s defence of the village really were to each other.
- Visit the Saulnier House on rue des Champs Saint-Martin in Amfreville — Lord Lovat’s brigade headquarters, marked by a bust of Lovat and almost unchanged since 1944.
- Walk the ground at Bréville and the Bois du Monts, scene of sustained German counterattacks against the perimeter through mid-June, including the action in which three senior officers — Lovat, Kindersley, and Johnson — were hit by a single misdirected artillery barrage.
- At Merville Battery, stand at the landward breach point, marked today with steel silhouette figures, and look back across the ground Otway’s 150 men covered in darkness — then walk around to the seaward face and note how differently the position was designed to be attacked.
- The adjacent Merville Redoubt, a Napoleonic-era fortification, is easy to miss but adds real depth — three centuries of military use on the same small piece of ground.
- If time allows, drive out to at least one of the Dives bridges (Robehomme is the most atmospheric and least altered) to appreciate how isolated the Canadian Parachute Battalion’s demolition parties really were on the night of the drop.
Nearby Points of Interest
- 51st Highland Division Memorial, Bréville-les-Monts: Marks the ground the Highland Division took over from the paratroopers from D+1 onward, and the site of the costly Battle of Bréville.
- Sword Beach: Museum of the Atlantic Wall. Approximately 6–8 km north, where Lord Lovat’s commandos and the seaborne forces landed before advancing inland to relieve the airborne bridgehead.
- Pointe du Siège and the Orne estuary: Useful for understanding the coastal geography that made the Merville Battery a genuine, if overestimated, threat to the invasion fleet.
- Château Saint-Côme, near Bréville: Scene of continued fighting in the weeks after D-Day as the front stabilised south of the initial airborne perimeter.
Practical Tips
- Allow a full day to do the sector justice: Pegasus Bridge and Ranville in the morning, the Saulnier House and Bréville/Bois du Monts around midday, and Merville Battery in the afternoon.
- A car is genuinely necessary to cover the full sector in one visit — the bridgehead itself is walkable, but Merville and the Dives bridges are several kilometres further out.
- This sector sees far fewer visitors than the American beaches to the west, which makes for a quieter, more contemplative visit — but also means some sites (the Dives bridges especially) have minimal on-site interpretation, so arrive with background reading done.
- Early morning or late afternoon light is best for photography across the flat, open ground east of the Orne, particularly at Merville and along the Ranville aerial-photograph comparison points.
- Combine this sector with a visit to Sword Beach itself to complete the picture of how the airborne and seaborne operations connected on 6 June.
FAQ: 6th Airborne Division operations on the eastern flank of the D-Day beaches (6 June 1944)
The Orne River and Caen Canal formed a natural line the Germans could use to push armoured reserves against Sword Beach’s exposed eastern flank. The 6th Airborne Division was dropped east of the river specifically to seize the crossings, destroy the Merville Battery, blow the Dives bridges, and hold a defensive bridgehead until seaborne forces could relieve them — protecting the entire invasion’s most vulnerable flank.
It was the radio codeword Major John Howard’s coup de main force sent the moment both the Caen Canal and Orne River bridges were captured intact — “Ham” confirming the bridges were taken, “Jam” confirming they were undamaged. The signal, sent within minutes of the gliders landing at 00:16 on 6 June 1944, was one of the first pieces of good news received from any Allied unit on D-Day.
The mission was to neutralise the battery before the Sword Beach landings, not to destroy it forever. Lieutenant-Colonel Otway’s badly depleted force disabled the guns and called off the planned naval bombardment at the critical moment — the guns came back into limited German use only after the Allied lodgement was already secure and the window for interfering with the landings had passed.
Lieutenant Den Brotheridge, leading the rush across the Caen Canal bridge (later Pegasus Bridge) moments after his glider landed, is widely credited as the first Allied soldier killed by enemy fire on 6 June 1944.
The division suffered significant casualties in the first week alone, including many men lost during the scattered night drop before any fighting began. Despite this, every major objective — the Orne bridges, Ranville, the Merville Battery, and the Dives crossings — was secured on schedule.
Yes. The sites are within about a 20-minute drive of each other east of Caen. A full day allows time for Pegasus Bridge and Ranville in the morning, Amfreville and Bréville around midday, and the Merville Battery and its museum in the afternoon.
Subscribe to Battlefield Travels and receive a free E-Book Battlefield Guide
Unlock expert battlefield analysis, campaign reconstructions, and historical insights drawn from firsthand exploration and primary sources.
🗺️ You’ll receive:
🎖️ Exclusive historical insights you won’t find elsewhere
📘 A free eBook: 10 Tips for Exploring Historic Battlefields
📰 New battlefield studies straight to your inbox as they are published

⚔️ Go deeper — Members get exclusive access to the Deep Research Collection, Field Notes, and monthly Research Dispatches. Try membership free for 7 days, cancel anytime. From $9/month.