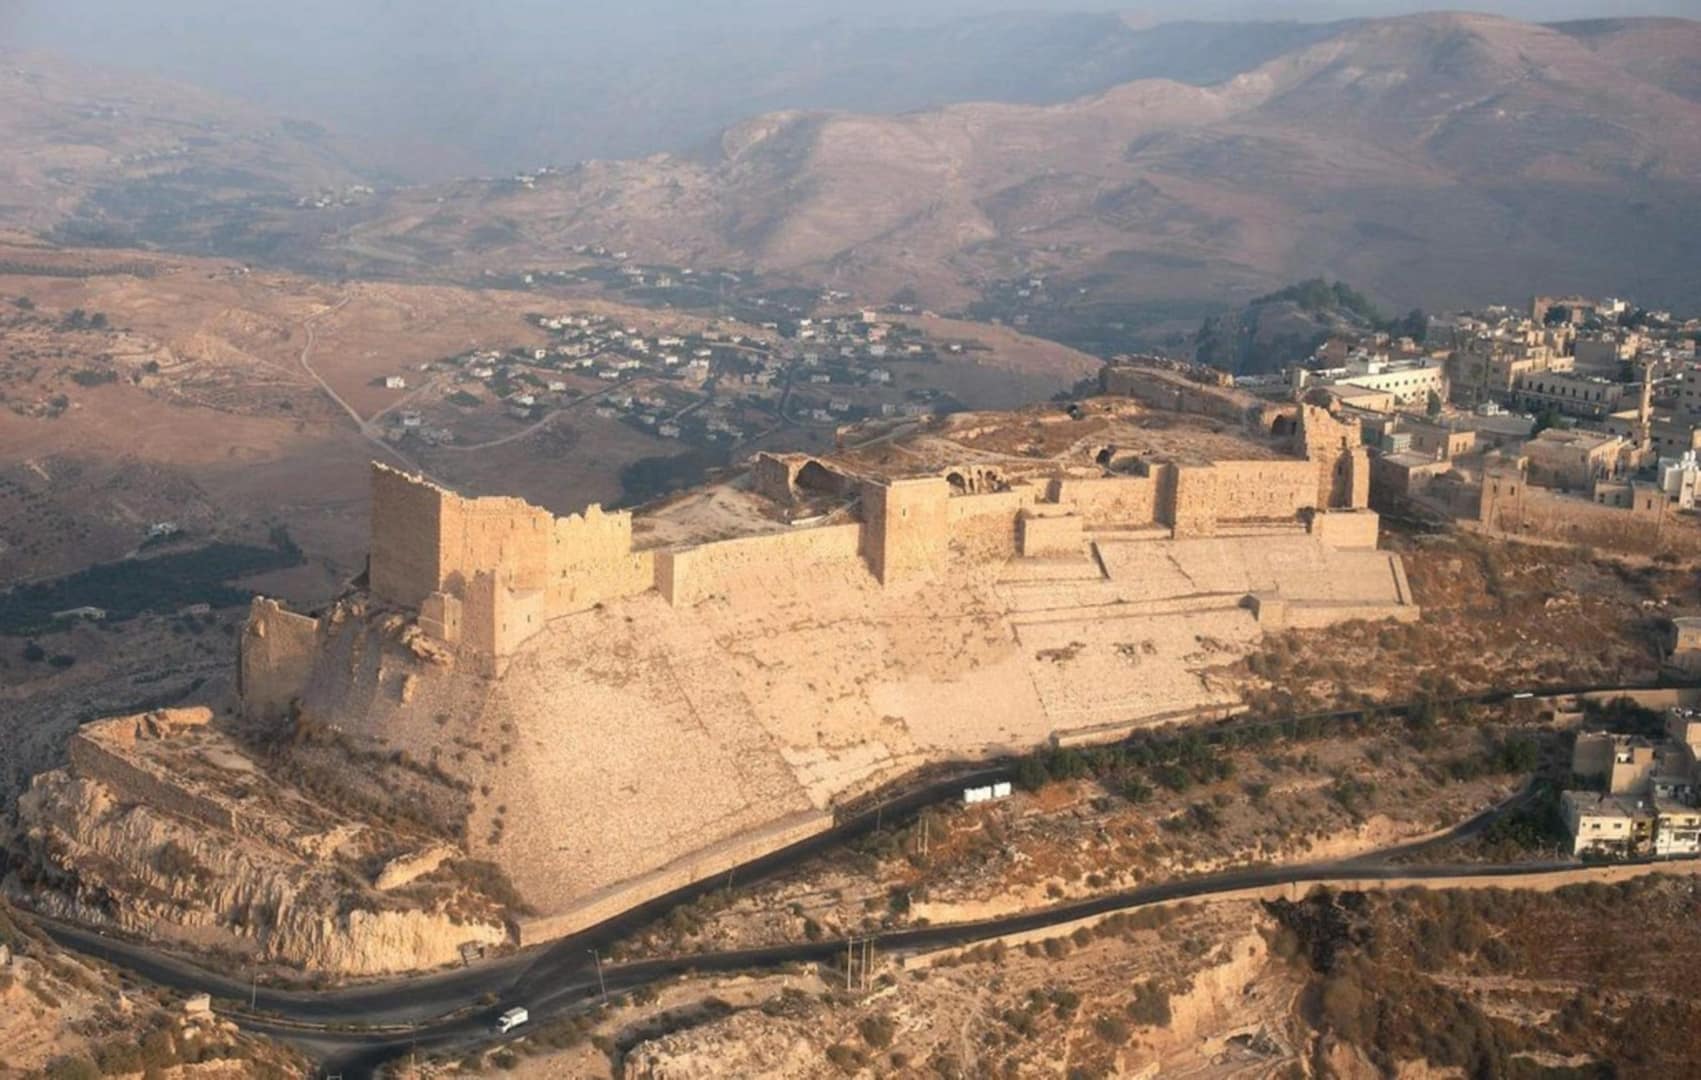
Kerak Castle: Crusader fortress under siege in the desert of Moab!
High on the plateau above the Dead Sea, Kerak Castle became a symbol of defiance during the Crusades. The Crusaders called it ‘Crac des Moabites‘ (Karak in Moab). From Reynald of Châtillon’s raids to Saladin’s relentless sieges, Kerak stood at the centre of Crusader and Islamic power struggles. Walking its ramparts today reveals why this fortress dominated trade, pilgrimage, and war in the Holy Land.
Key facts
Google Earth map – Location of Kerak Castle, Jordan
🎧 Prefer to listen? This article is also available as a 41-minute podcast
Tip: If Podbean overlay appears after pausing, click the × in the top-right corner to return to the player controls.
🧭🥾 Walking the Battlefield
My visit to Kerak in November 2021 was incredibly valuable, but too brief to fully study the conflicts that occurred here. It is on my To-Do List to revisit Kerak castle!
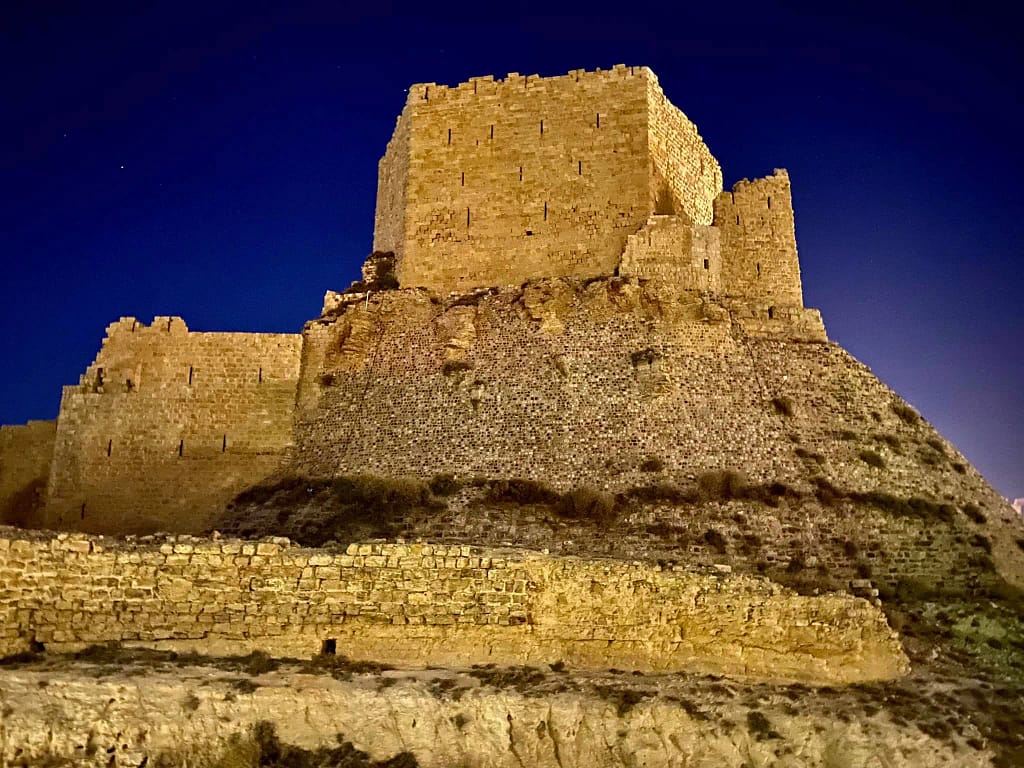
Kerak Castle is one of the best-preserved Crusader fortresses in the Middle East. The castle is a popular tourist destination, and archaeological preservation efforts are ongoing. Perched on a rocky spur in the middle of town, the castle still dominates the skyline around Al-Karak. In the 12th century it must have been a daunting task for any besieging army.
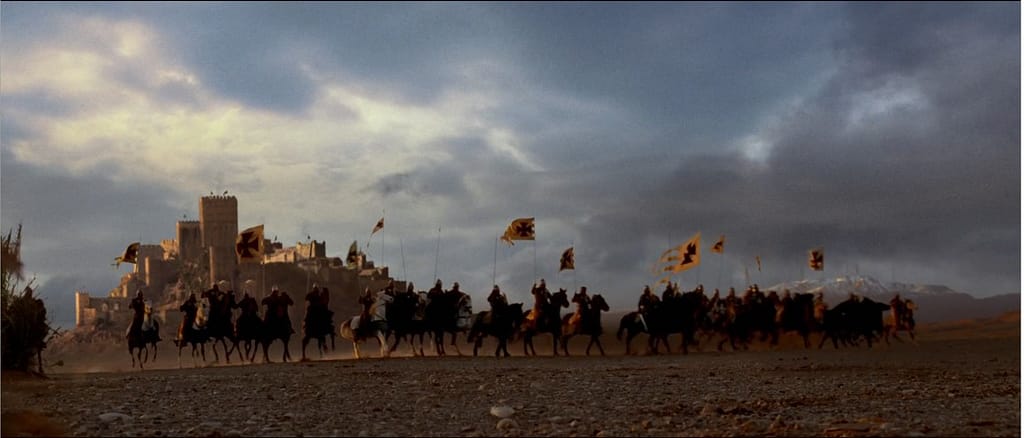
In popular culture, Raynald de Chatillon and his great fortress at Kerak are central themes in Ridley Scott’s 2005 movie ‘Kingdom of Heaven’.
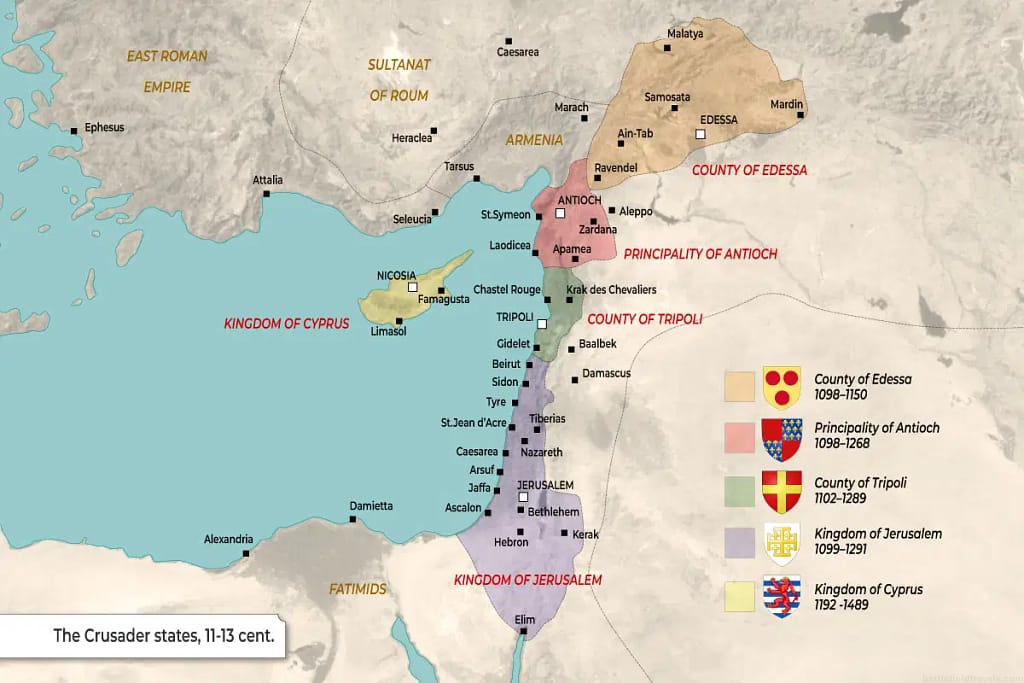
Strategic Context: the Crusader states
The Crusaders states in the 12th Century
By the late twelfth century, the Crusader Kingdom of Jerusalem had survived nearly a century in the Levant, but its position was increasingly precarious. The balance of power was shifting: the Muslim world, once fragmented among rival dynasties, was being united under the leadership of Salah ad-Din Yusuf ibn Ayyub—better known as Saladin. From Cairo and Damascus he directed a coordinated strategy to isolate and eventually crush the Crusader states.
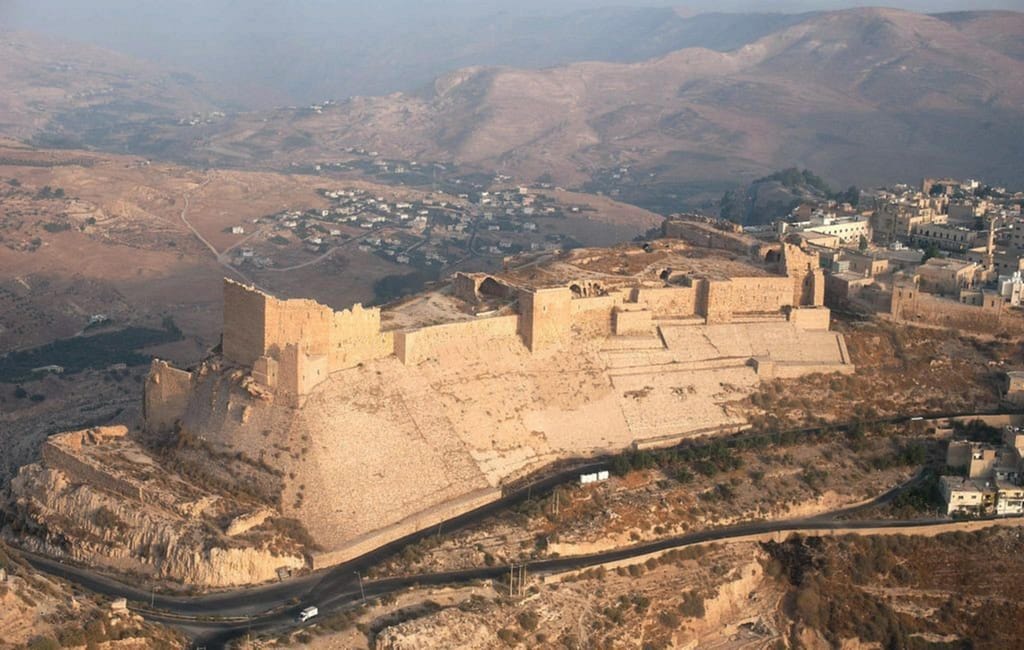
Kerak Castle
Kerak Castle, in present-day Jordan, was built around 1140 by ‘Pagan the Butler’, Lord of Oultrejordain. The castle played a crucial role during the late 12th century as a strategic outpost of the Crusader Kingdom of Outremer. Kerak stood astride the ancient King’s Highway, the vital north–south route linking Damascus, Aqaba, and ultimately Mecca. Kerak dominated trade and military routes between Egypt, Syria, and Arabia. It also served as a staging point for Crusader raids into Saracen-held territories. Within this contested landscape, Kerak Castle became one of the key flashpoints. Whoever held Kerak controlled trade, taxation, and communications across Transjordan. For the Ayyubids, it was an intolerable obstacle in their rear; for the Crusaders, it was a bastion that projected power deep into Muslim lands.
Raynald of Châtillon, the Lord of Oultrejordain
The man who made Kerak infamous was Raynald of Châtillon, the Lord of Oultrejordain. Raynald ruled Kerak from about 1176 onwards. Reckless, ambitious, and implacably hostile to Islam, Raynald used the fortress as a base for raids far beyond the Jordan valley. He plundered caravans on the pilgrim road, attacked Muslim towns, and in 1182 even attempted to launch ships from the Red Sea to raid the holy cities of Mecca and Medina. These provocations outraged Saladin, who regarded Raynald not only as a personal enemy but as a threat to the cohesion of the Islamic world.
For the Crusaders, Kerak was more than just another castle. Its massive concentric walls, dominating towers, and sheer cliffs made it one of the strongest fortresses in the Latin East. It served as a forward outpost, shielding Jerusalem from incursions from the east, and as a symbol of Christian dominance over the plateau. Yet its very strength made it a target. Saladin could not leave Kerak unchallenged if he hoped to dismantle the Crusader kingdom.
So, in the 1180s, Kerak became the objective of a series of sieges. Each was not an isolated event, but part of the larger contest between Saladin’s unifying jihad and the Crusaders’ attempt to maintain their fragile foothold in the Holy Land. The castle stood not only as a fortress of stone, but as a focal point for clashing ideologies, ambitions, and faiths.
Opposing Forces: Crusaders vs Saracens
 Crusader Forces
 Crusader Forces
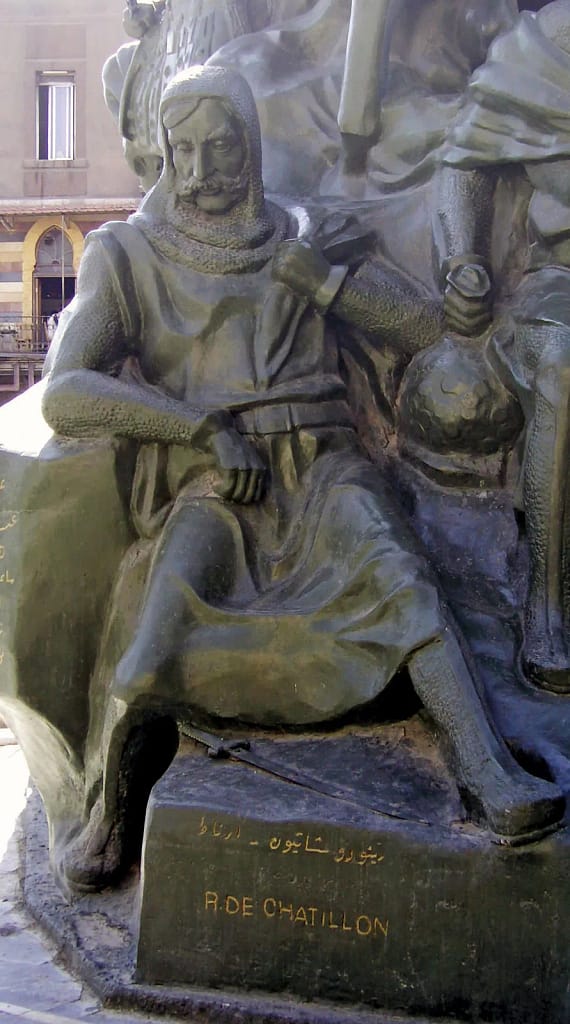
For most of the period, Kerak’s defenders were led by Raynald de Châtillon. The garrison comprised Raynald’s own retainers reinforced by other contingents of Crusaders, militias and mercenaries. The Crusaders were a mix of the descendants from the First Crusade a hundred years earlier, and waves of crusaders and adventurers who had later migrated to the Crusader states. Kerak was a formidable defensive stronghold, perched on a steep-sided rocky spur, and reinforced with thick stone walls and defensive towers.
Raynald de Châtillon’s defiant stance against Saladin made him a significant figure in Crusader history. His raids on Saracen-held territories, including attacks on Mecca-bound caravans, provoked Saladin and made Kerak a prime target for retribution.
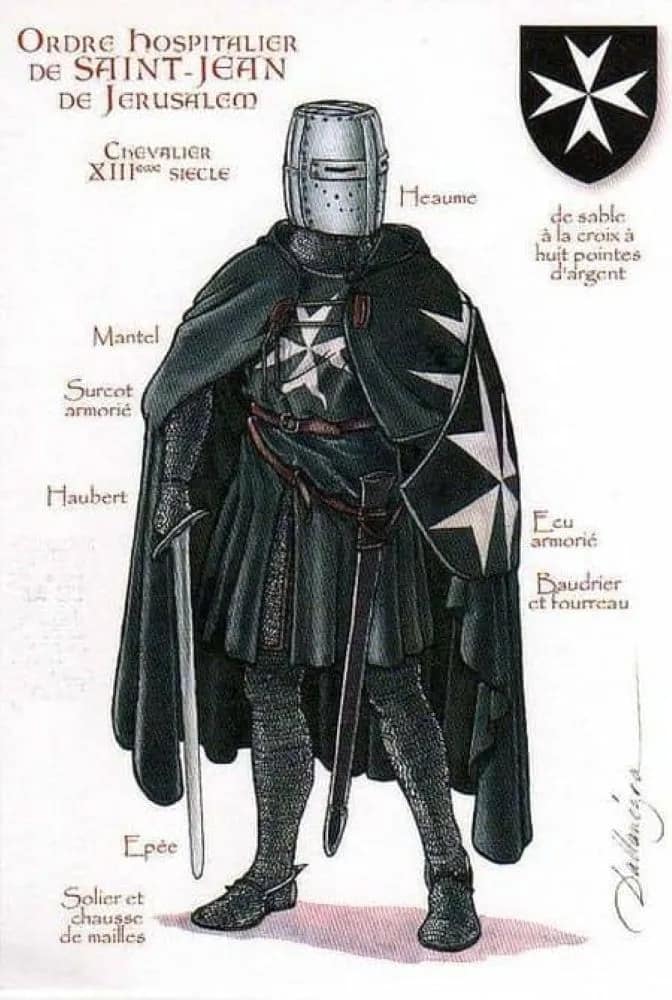
Image: Knight Hospitaller, 2nd Crusade era. Pinterest
 Saracen Forces
 Saracen Forces
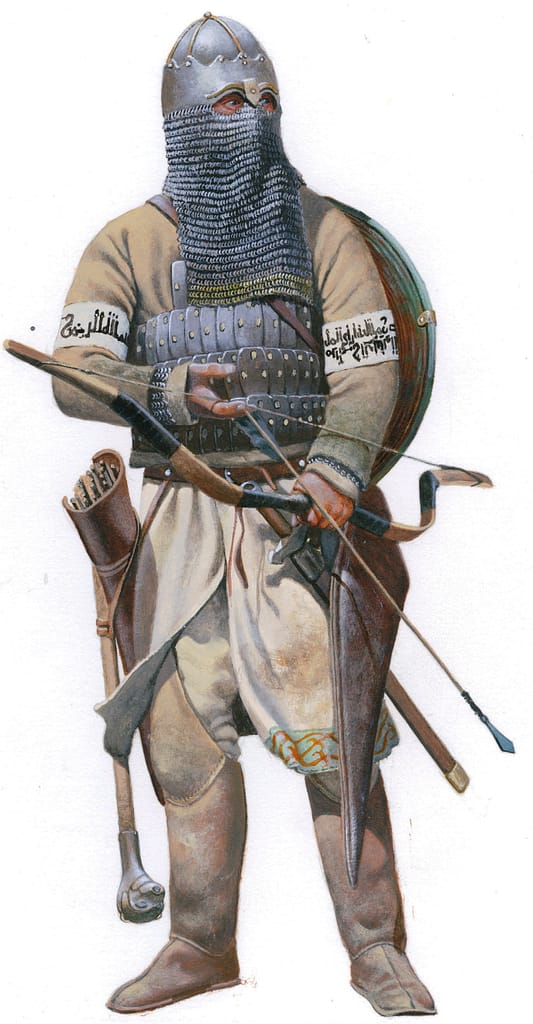
Saladin, a brilliant military strategist, led the Ayyubid army against Kerak. His forces comprised Syrians, Arabs, Mamluks, Egyptians, Kurds, and other contingents. At various times during the Crusades-era, these nations allied with or against each other and the Crusader states. Saladin was the first leader to largely unite the Middle East Muslim nations against the Crusader states. Also of note, the Saracens had engineers skilled in the use of trebuchets, mangonels, and other siege weapons.
Saladin’s strategy focused on isolating Crusader settlements, cutting off supply routes, and besieging Crusader strongholds. The campaigns against Kerak were part of his broader objective to reclaim the Holy Land and eliminate the Crusader states.
Image: Seljuk Turk archer, Crusades era. Pinterest
Prelude to the 1183 Siege of kerak
Reynald de Châtillon was lord of Oultrejordain after his marriage to Stephanie of Milly, which gave him control of the great desert castles of Kerak and Montréal. This position gave him access to the caravan routes to Mecca and Medina, and from there he imagined striking directly at the Muslim holy lands.
The Red Sea Expedition
Around 1182–1183, Reynald outfitted a small fleet of ships (sources say perhaps five galleys, constructed in pieces at Kerak and then transported overland to the Gulf of Aqaba). Once launched, these vessels raided along the Red Sea coast, attacking Muslim shipping and disrupting the vital pilgrimage traffic to Mecca. Some of Reynald’s men even landed at port towns and are said to have threatened Jeddah, the gateway to Mecca itself.
Saladin’s Response
This was shocking to the Islamic world — for the first time since the rise of Islam, the holy cities themselves were under direct threat from Crusaders. Saladin took the matter very seriously, dispatching a naval squadron from Egypt to destroy Reynald’s makeshift fleet. The Christian raiders were caught and annihilated, and the few survivors were executed as a warning.
Aftermath
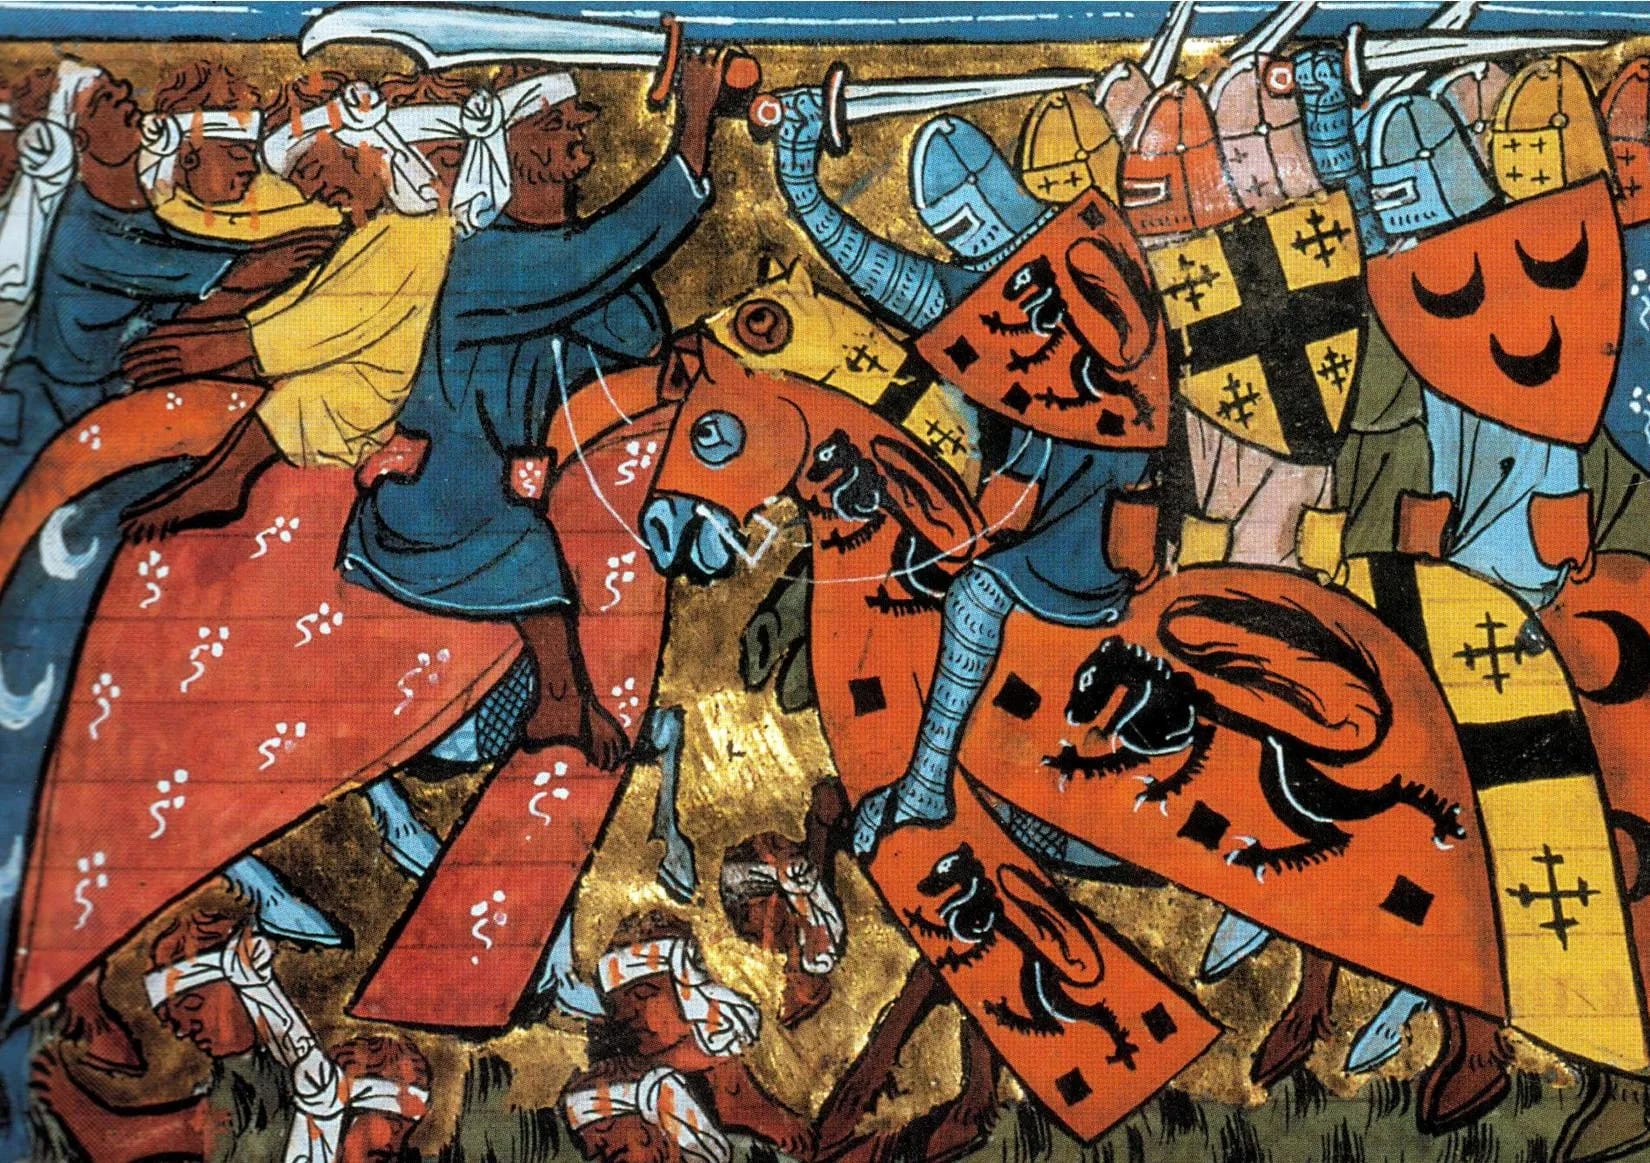
Reynald’s audacity cemented his reputation as a reckless, almost piratical warlord. Saladin never forgave him: when Reynald was captured after the Battle of Hattin in 1187, Saladin personally executed him (while sparing most of the other nobles), citing this Red Sea outrage and Reynald’s repeated attacks on caravans as justification.
In the Islamic world, the sanctity of pilgrims en route to the holy cities was inviolable; Reynald’s violence struck at the heart of Saladin’s legitimacy as protector of the faith. Raynald’s castle at Kerak thus became a target not just for military reasons, but as a matter of honour and religion.
⚔️ Go deeper — Members get exclusive access to the Deep Research Collection, Field Notes, and monthly Research Dispatches. Try membership free for 7 days, cancel anytime. From $9/month.
The Wedding Siege of 1183
Saladin’s chivalric gesture
Saladin struck at Kerak in late 1183, choosing his moment when much of the Latin nobility was gathered there for the marriage of Humphrey of Toron to Isabella of Jerusalem. Chroniclers describe the surreal juxtaposition of celebration and siege: feasting halls inside echoed with music while trebuchets outside hurled stones against the walls.
Saladin ordered his engines to concentrate fire on the newlywed’s tower — perhaps to send a symbolic message that dynastic alliances could not shield his enemies. Yet tradition records that Queen Mother Maria Comnena sent food from the banquet to Saladin’s camp, and he, showing chivalric restraint, redirected his bombardment away from the bridal chambers. The episode highlights the complex mixture of brutality and mutual codes of conduct that often coloured warfare in the Levant.
Baldwin IV raises the siege
As the siege continued, Baldwin IV, the leper king of Jerusalem, mustered a force to relieve Kerak. His forces, composed of knights from the religious orders, and contingents of mounted and dismounted men-at-arms, advanced towards the besieged fortress. Recognising the risk of being caught between the castle’s defenders and an approaching army, Saladin withdrew his forces before the Crusader reinforcements arrived. These events were depicted in Ridley Scott’s 2005 movie ‘Kingdom of Heaven‘. The siege demonstrated both the strength of Kerak’s defences and the difficulty of reducing such fortresses without a sustained blockade.

Renewed siege of 1184
The following year Saladin returned, determined not to leave the stronghold intact. This time he sought to cut off the fortress systematically, burning crops, blocking wells, and using heavier artillery. Again, however, the Franks organised relief. Baldwin IV and Guy of Lusignan led a large army toward Kerak. Saladin had not yet gathered the forces to risk a general engagement, so he withdrew once more. The war was becoming a cycle of provocation, siege, relief, and retreat — each round eroding the Kingdom of Jerusalem’s resources while deepening Saladin’s resolve to destroy Reynald.
The Final Reckoning, 1187–1189
The Battle of Hattin 1187
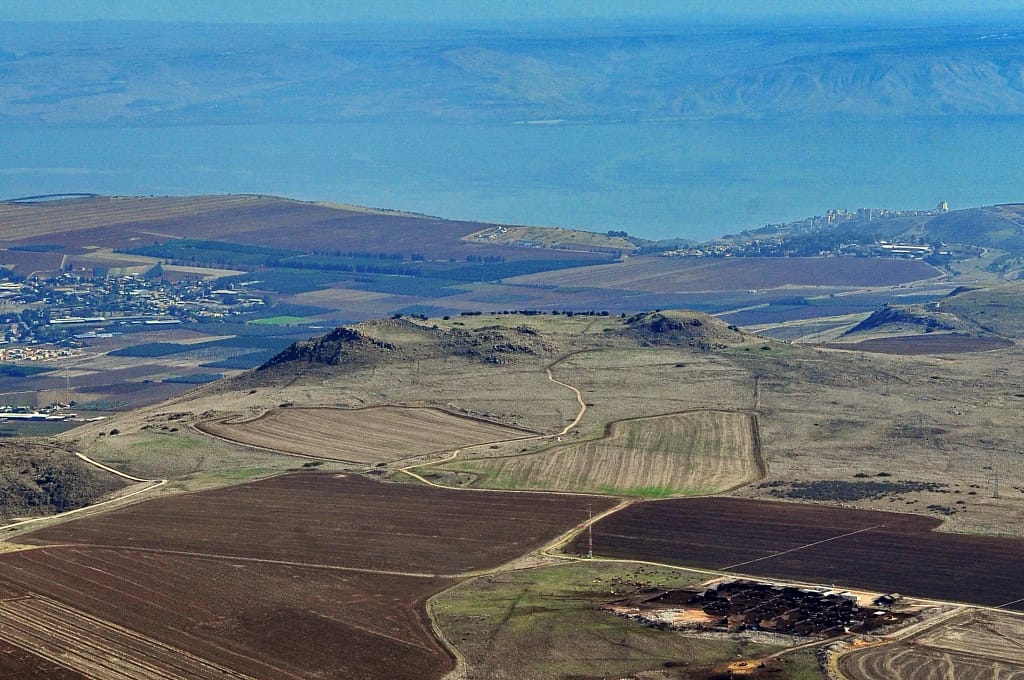
The Battle of Hattin (4 July 1187) was a crushing defeat that broke the power of the Crusader states. On the arid plateau west of the Sea of Galilee, beneath the twin volcanic peaks known as the Horns of Hattin, King Guy of Jerusalem led a Crusader host of perhaps 15,000–20,000 men into a carefully laid trap. Saladin’s army, numbering at least 30,000, cut the Christians off from water and harassed them relentlessly under the July sun.
Exhausted, parched, and demoralised, the Crusader army collapsed under repeated assaults. The Crusader True Cross relic, carried as a talisman of victory, was lost to the Saracens. King of Jerusalem, Guy de Lusignan, was captured along with Raynald de Châtillon. Saladin offered Guy a cup of ice water as a guarantee that he would not be harmed. Guy then passed the cup to Raynald, who was not part of the agreement. Saladin (or possibly one of his bodyguards) then beheaded Raynald.
Hattin was more than a battle—it was the death knell of Crusader military strength. Within weeks, Saladin’s forces were attacking all across the Levant. Almost every fortress and city fell in rapid succession: Acre, Jaffa, Nablus, Sidon, Beirut, and finally Jerusalem itself.

The Siege of Kerak, 1187–1189
With the field army destroyed, the great castles of the Transjordan—Kerak and Montréal—were left exposed. These had long been bastions of Crusader raiding into the desert and along the pilgrimage routes.
Reynald of Châtillon, lord of Kerak, had already perished at Hattin. His absence removed one of the Muslim world’s most hated antagonists, but it did not diminish the strategic value of the fortress. Kerak’s garrison, swollen with refugees from across the region, resisted ferociously.
Saladin began his investment of Kerak late in 1187. The fortress, under the control of Raynald’s widow, Stephanie of Milly, held out for more than a year. Supplies dwindled, and relief was impossible—Jerusalem itself was under imminent threat, and the Crusader states had no men to spare. By late 1188 or early 1189, Kerak finally capitulated under negotiated terms.
The Ayyubids repaired and strengthened Kerak’s walls, stationing Muslim garrisons inside. What had once been a Crusader springboard for raids into Arabia and the Red Sea now became a linchpin of Saladin’s defensive frontier, securing the desert approaches to Damascus and Egypt.

Outcomes of the battles for Kerak
The fall of Kerak in 1188 marked a turning point in the Crusades. Saladin’s victory consolidated Saracen control over the region and diminished Crusader territorial holdings. The loss of the massive Kerak fortess and other strongholds left the Crusaders with only a handful of outposts along the Mediterranean coast. For Saladin, the capture of Kerak enhanced his reputation as a military leader and eliminated a major centre of Crusader power.
The loss of Jerusalem and most of the Crusader holdings in the Holy Land prompted Pope Gregory VIII to call for a Third Crusade to reconquer the Holy Land. The call was taken up by King Phillip II of France, King Richard I (The Lionheart) of England, and Frederick Barbarossa, the Holy Roman Emperor. The Third Crusade was successful in recapturing Acre and Jaffa, but Jersusalem was never regained.
The battlefield today: exploring Kerak
Kerak Castle
Kerak Castle dominates the modern Jordanian town of Al-Karak, rising on a spur of rock that projects deep into the surrounding wadis. From a visitor’s perspective, the site immediately conveys why it was so formidable in the 12th century. The fortress commands every approach road, and the view from its ramparts stretches across the arid plateau toward the Dead Sea, the Jordan Valley, and south into the trade routes that once linked Damascus with the Red Sea.
What survives today is a fascinating mix of Crusader, Ayyubid, and later Mamluk construction. The thick Crusader curtain walls and towers remain visible, particularly along the northern and western sides where Saladin’s siege engines once pounded the defences. Inside, vaulted halls, kitchens, stables, and storage chambers remind the visitor that this was a living garrisoned town. Later Muslim rulers adapted and reinforced the structure, adding their own layers of military architecture.
Visitors can walk through the massive stone galleries cut into the rock — dark, barrel-vaulted chambers that once housed supplies and horses. During prolonged sieges, defenders relied on the hidden cisterns for water and endurance. The sheer scale of the subterranean works underlines why Kerak resisted for so long.

Al-Karak
Outside the castle walls, the modern town of Al-Karak has grown around the medieval fortress, and the urban setting can surprise those expecting an isolated ruin. Yet this juxtaposition highlights Kerak’s continuous role as a regional stronghold: from Crusader frontier fortress to Ayyubid citadel, Mamluk bastion, Ottoman garrison, and finally Jordanian heritage site.
For the battlefield visitor, Kerak rewards slow exploration. The surviving Crusader towers mark where Saladin’s armies once positioned their mangonels, while the cliff-like drops on three sides of the fortress remind you why direct assault was almost impossible. Standing on the battlements, it is easy to picture the 1183 wedding under bombardment, or the Crusader banners raised defiantly during the second siege.
Today Kerak is accessible by road from Amman or Madaba, and is included in most heritage itineraries through Jordan. Interpretive signage and a small museum in the castle complex help frame its layered history, though much of the experience comes from simply walking its massive halls and gazing across the stark Jordanian plateau that framed one of the most dramatic sieges of the Crusades.

Link to Jordanian Tourist Board Kerak Castle website
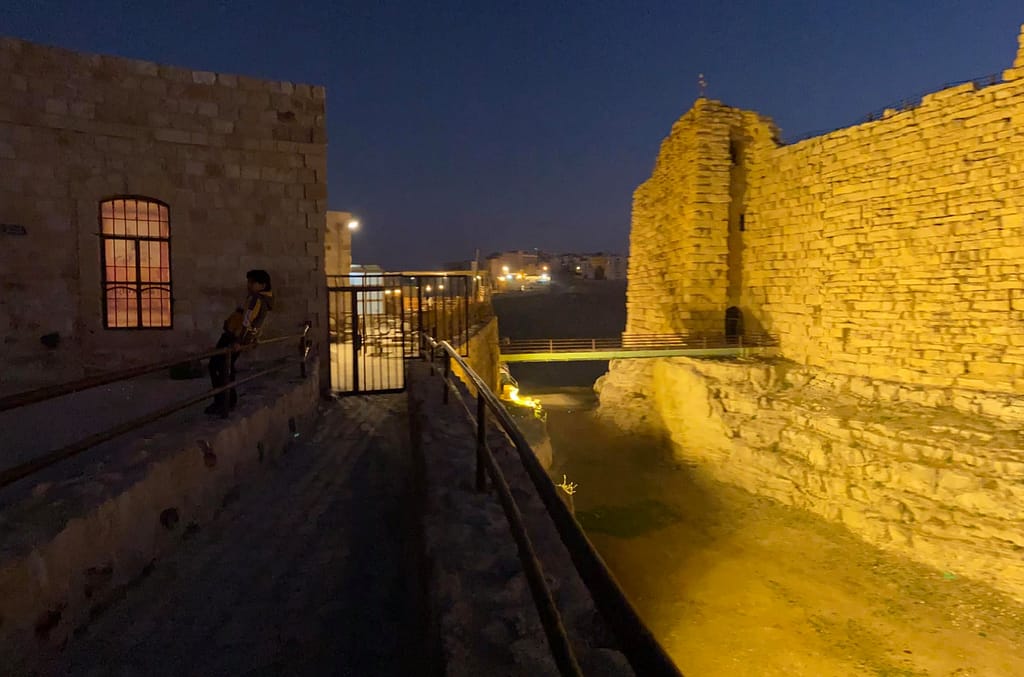
Additional Images of Kerak castle



Found this useful? Buy me a coffee — it helps fund future battlefield research


Authored by Mick Prictor, a retired military officer with 40 years’ service, and a military historian specialising in terrain-focused analysis of tactics, doctrine, and command decision-making in land warfare. His work draws on extensive battlefield fieldwork—more than 280 sites worldwide—and one of the world’s largest private collections of historic military arms, uniforms, and equipment. About me
Sources & Further Reading
Christopher Tyerman 2009. God’s War: A New History of the Crusades. Belknap Press.
Thomas Asbridge, 2010. The Crusades: The Authoritative History of the War for the Holy Land. Harpercollins.
John Man, 2016. Saladin. Corgi Books.
📚 Further Reading – The Crusades
This battle study nests within the broader analytical framework explored in the Research Hub, where operational methods, operating environments, armies, commanders, and weapons are examined across conflicts and eras. The links below connect related studies across the wider body of battlefield analysis on the BattlefieldTravels site.
⚔️ Explore all battle studies from the Crusades
🏛️Explore the Ancient and Medieval warfare weapons and equipment
The book list for this conflict includes the finest campaign studies, memoirs, and operational analyses available on the medieval warfare, selected specifically to complement this battlefield study.
📚Medieval Warfare – Recommended Reading
🗞️ For updates on new battlefield studies and research insights, you can subscribe to the Newsletter.
Related Battle Studies, Museum Pieces & Reading Resources


🧭 Battlefield Travel Guide: Kerak Castle & the Crusader Sieges
Getting There
- Nearest Town: Al-Karak, Jordan.
- Transport: About 2 hours by car from Amman via Highway 35; often included on heritage tours linking Madaba, Mount Nebo, and the King’s Highway.
- Parking: Free parking available near the castle entrance; access through the modern town centre.
Site Orientation
- Key Landmarks: Crusader towers and curtain walls, vaulted halls and stables, deep cisterns, and the Ayyubid/Mamluk layers atop the Crusader core.
- Walking Routes: Self-guided circuit of the walls and towers; descent into subterranean galleries and cisterns is a highlight.
- Best Vantage Points: Ramparts overlooking the King’s Highway and Dead Sea approaches vividly show why Kerak dominated trade and warfare.
Museums & Visitor Centres
- Kerak Archaeological Museum: Located within the castle, it holds artefacts from the Crusader and Islamic periods as well as earlier Moabite finds.
- Interpretive Displays: Panels in English and Arabic explain siege episodes, castle construction, and daily life.
- Nearby: Madaba Archaeological Park and mosaics, Mount Nebo, and Shobak Castle (another Crusader fortress).
On-Site Experience
- Atmosphere: Still imposing, with sweeping views across wadis and plains; the setting conveys why it was so difficult to besiege.
- Guides & Tours: Local guides available at the gate; many heritage tours include Kerak as a major stop.
- Exploration: Vaulted passages and hidden cisterns give a sense of garrison life under siege.
Nearby Points of Interest
- Shobak Castle: Another Crusader fortress further south on the King’s Highway.
- Madaba: Famous for Byzantine mosaics, often paired with Kerak on tours.
- Dead Sea: Within driving distance, offering a striking contrast to Kerak’s high plateau location.
Practical Tips
- When to Visit: Spring and autumn offer the most comfortable climate; summers can be hot on the plateau.
- Facilities: Restrooms, cafés, and shops in the modern town adjacent to the castle.
- Special Considerations: Wear sturdy shoes for uneven surfaces; some galleries are dimly lit, so a torch/phone light is useful.
FAQ: Sieges of Kerak (1183-1188)
In late 1183, Saladin besieged the Crusader castle at Kerak, held by Raynald of Châtillon and the garrison of Oultrejordain.
Despite being surrounded, the castle withstood the siege thanks to its formidable defences and timely Crusader relief under King Baldwin IV.
Not in 1183 — he withdrew when a relief force approached. He later captured Kerak permanently in 1188.
It controlled key caravan routes between Syria and Egypt, making it a strategic fortress of the Crusader Kingdom of Jerusalem.
Yes, the massive Crusader castle is well-preserved and open to visitors, with interpretive displays and panoramic views.
Subscribe to Battlefield Travels and receive a free E-Book Battlefield Guide
Unlock expert battlefield analysis, campaign reconstructions, and historical insights drawn from firsthand exploration and primary sources.
🗺️ You’ll receive:
🎖️ Exclusive historical insights you won’t find elsewhere
📘 A free eBook: 10 Tips for Exploring Historic Battlefields
📰 New battlefield studies straight to your inbox as they are published

⚔️ Go deeper — Members get exclusive access to the Deep Research Collection, Field Notes, and monthly Research Dispatches. Try membership free for 7 days, cancel anytime. From $9/month.