Skip to content
Home » Battle-Studies

Battle-Studies

Reconstructing the D-Day landings and subsequent Normandy Campaign through terrain analysis, primary sources and on-site fieldwork
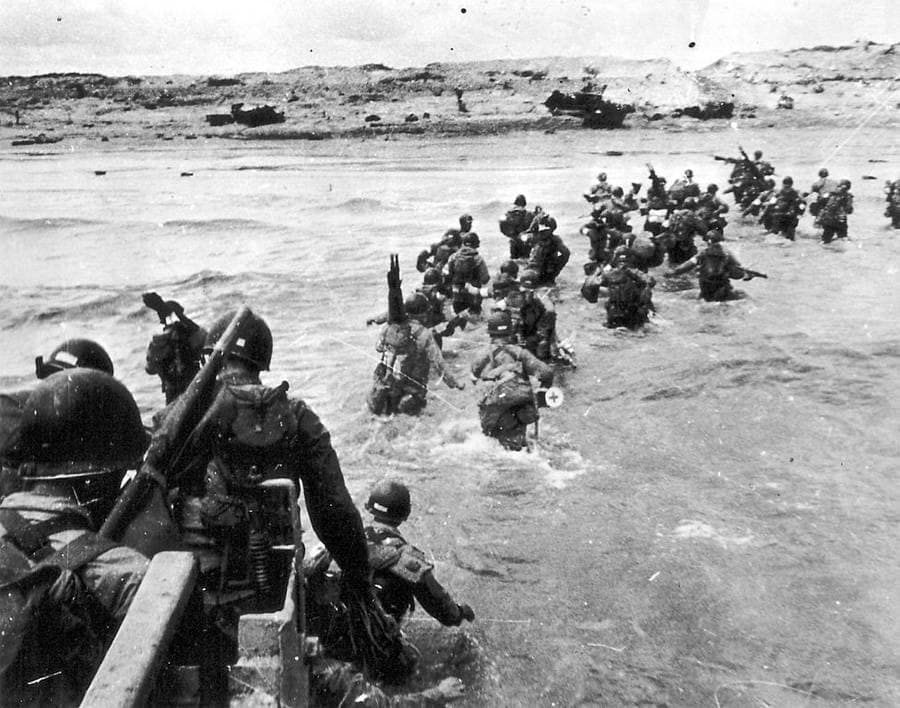
Omaha Beach, 1st Landing wave - 0635 hours
Omaha Beach, 1st Landing wave – 0635 hours
EXPLORE: BATTLES | WEAPONS & EQUIPMENT | READING | QUIZ

Key facts

🗺️ D-Day & the Normandy Landings, 6 June 1944
⚔️ Conflict: World War Two – Western Front
🪖 Major Allied forces: US First Army; British Second Army; US 82nd and 101st Airborne Divisions; British 6th Airborne Division
🪖 Major German forces: German Seventh Army; 84th Army Corps; 716th Infantry Division, 352nd Infantry Division and 21st Panzer Division
⭐ Principal Allied commanders: Dwight D. Eisenhower; Bernard Montgomery; Omar Bradley; Miles Dempsey
⭐ Principal German commanders: Gerd von Rundstedt; Erwin Rommel; Friedrich Dollmann
🎯 Strategic objective: Establish an Allied lodgement in Normandy for the liberation of north-west Europe
📌 Outcome: Allied victory; five beachheads established and airborne flanks secured, opening the Battle of Normandy.


🧭🥾 Walking the D-Day battlefields

Some aspects of the Normandy battlefields only become apparent when you walk the ground. The enormous distance across the exposed beaches at low tide, the surprisingly shallow folds and depressions that offered troops a way off Omaha Beach, and the importance of slightly raised roads across the flooded ground behind Utah are difficult to appreciate from maps and photographs alone.

I have spent many days exploring these battlefields: walking the beaches and exits, following the flooded lowlands and causeways, tracing airborne drop zones and glider landing grounds, climbing the bluffs above Omaha, and following the hedgerows, sunken lanes and narrow roads through which troops had to move inland. I have also stood where photographers stood on D-Day and in its immediate aftermath, capturing hundreds of ‘Then and Now’ images that help relate the surviving landscape to the events of 1944.

The invasion is often presented as five beaches and two airborne landings, but on the ground these were interconnected terrain problems. Beach exits determined where troops and vehicles could move inland; bridges and causeways became key terrain; villages controlled road networks; and apparently minor fields, hedgerows and folds in the ground shaped individual actions. At Pegasus Bridge, La Fière, Brecourt Manor and Omaha Beach, small pieces of terrain assumed importance far beyond their physical size.

This campaign study brings those pieces together. It follows the landings from the first gliders at Pegasus Bridge through the airborne operations, the five assault beaches and the fighting to consolidate the lodgement, linking the wider invasion plan to the individual battlefields I have explored on the ground.
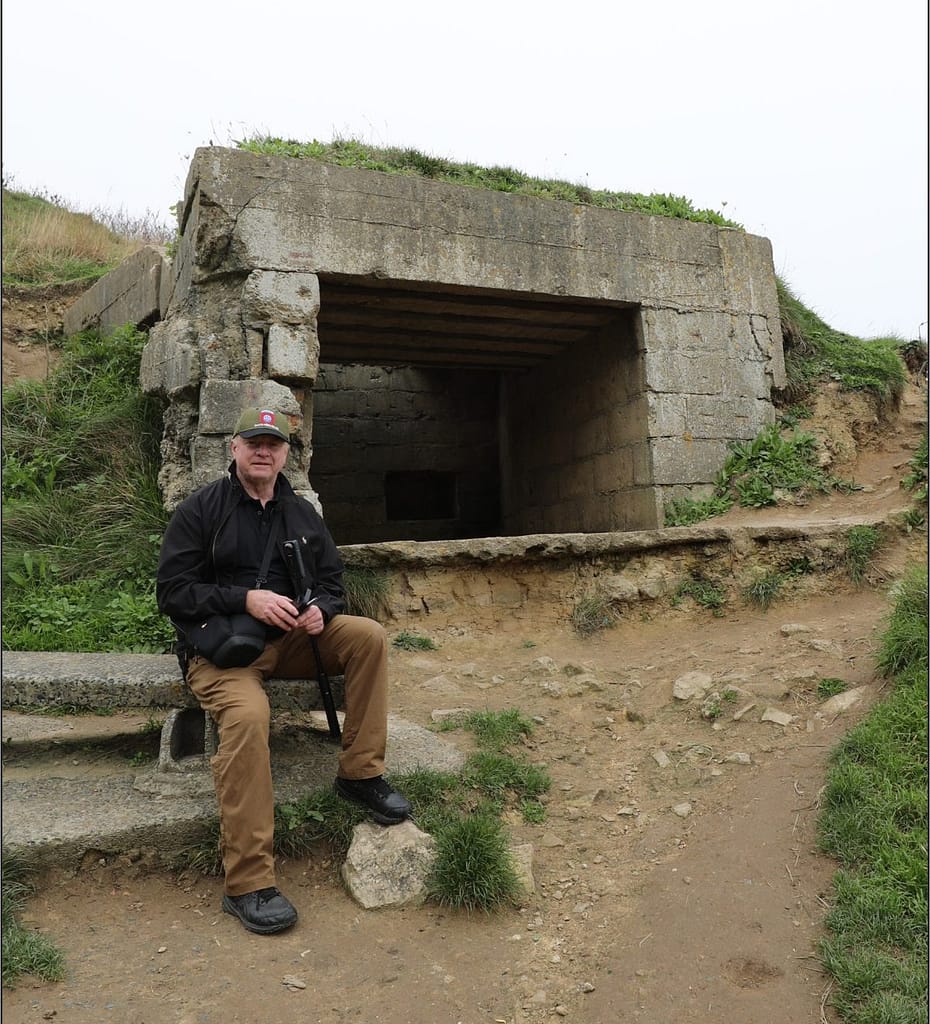
Omaha Beach WN73 Bunker
Bunker WN73, Vierville Draw, Omaha Beach

Normandy, 1944: Campaign Overview

Strategic Context: Operation Overlord

By the spring of 1944, the Western Allies had assembled the forces required to return to northwest Europe. Operation Overlord was intended to establish a secure lodgement in Normandy from which Allied armies could build up their strength, capture the ports and communications needed to sustain the campaign, and ultimately advance into Germany. Normandy offered suitable landing beaches within range of Allied air power and was less heavily defended than the Pas-de-Calais. An elaborate deception plan reinforced German expectations that the main invasion would fall farther north.

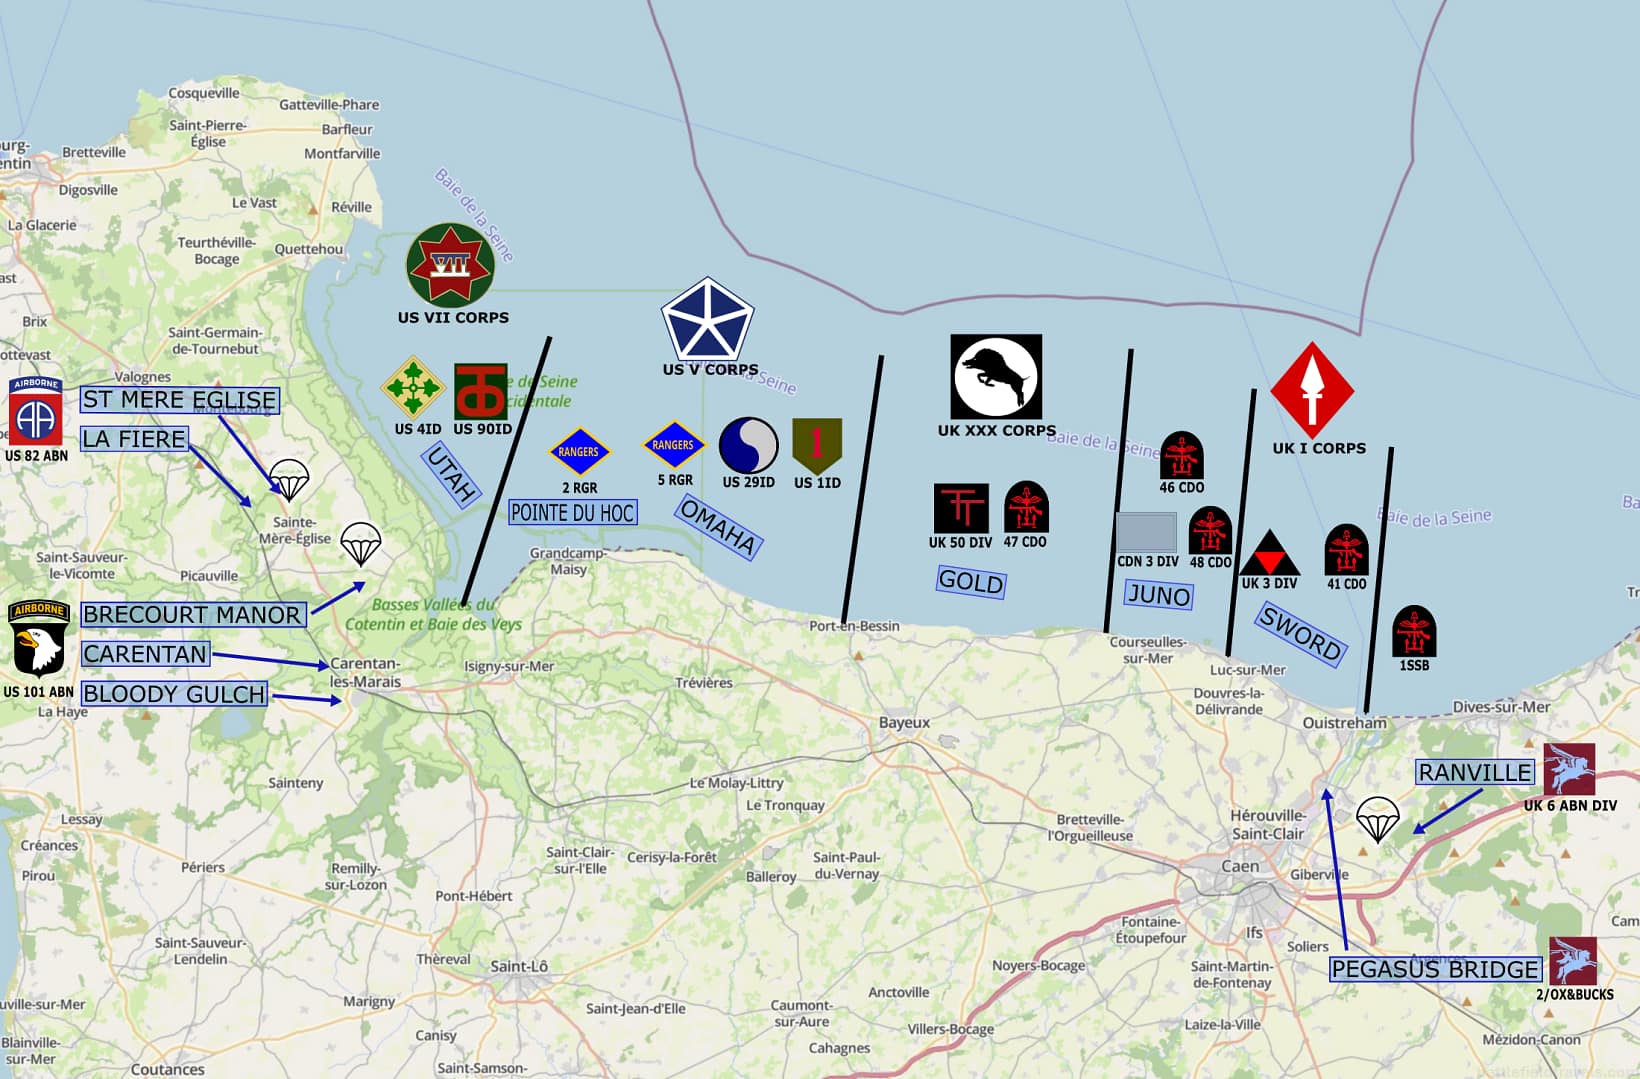
The invasion plan combined five amphibious assault beaches with airborne landings on both flanks. American forces would land at Utah Beach and Omaha Beach in the west, with the US 82nd and 101st Airborne Divisions securing the Cotentin approaches behind Utah. British and Canadian forces would land at Gold, Juno and Sword Beaches, while the British 6th Airborne Division protected the eastern flank beyond the Orne River. Naval gunfire, tactical air power and airborne operations were intended to isolate the battlefield and prevent German forces from destroying the lodgement before Allied strength could be built ashore.

Terrain was fundamental to the plan. Flooded lowlands restricted movement behind Utah; steep bluffs dominated Omaha; fortified coastal positions covered the beach exits. Rivers, canals, villages, ridgelines and the dense Norman bocage channelled movement inland. Beyond the enormous challenges of getting tens of thousands of troops and their equipment ashore, the Allies had to seize the terrain that would allow the five beachheads to survive and eventually become a single lodgement.

Pegasus Bridge: The first assault

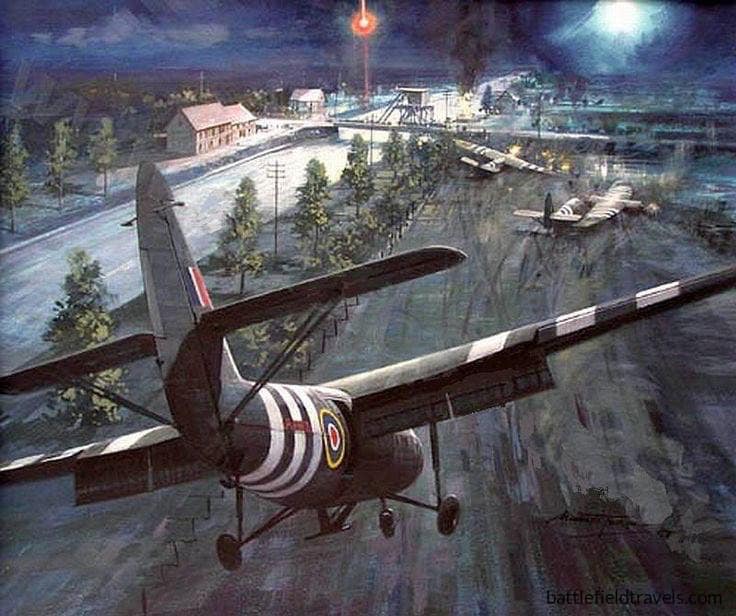
Ground combat began shortly after midnight on 6 June. At the eastern extremity of the invasion beaches, six Horsa gliders carried Major John Howard’s coup-de-main force on a silent approach to seize the two bridges spanning the Caen Canal and Orne River. Both crossings had to be captured intact. Their destruction would impede the advance from Sword Beach, while losing them to a German counterattack could expose the invasion’s eastern flank.

The Pegasus Bridge coup de main achieved extraordinary tactical surprise. Howard’s leading gliders landed within metres of the Caen Canal bridge, allowing the airborne troops to overwhelm the defenders before they could fire their demolition charges. The Orne River bridge was also secured. The problem then shifted from seizure. Howard’s small force had to hold the crossings until reinforced by the remainder of 6th Airborne Division and, eventually, heavier forces advancing inland from Sword Beach.
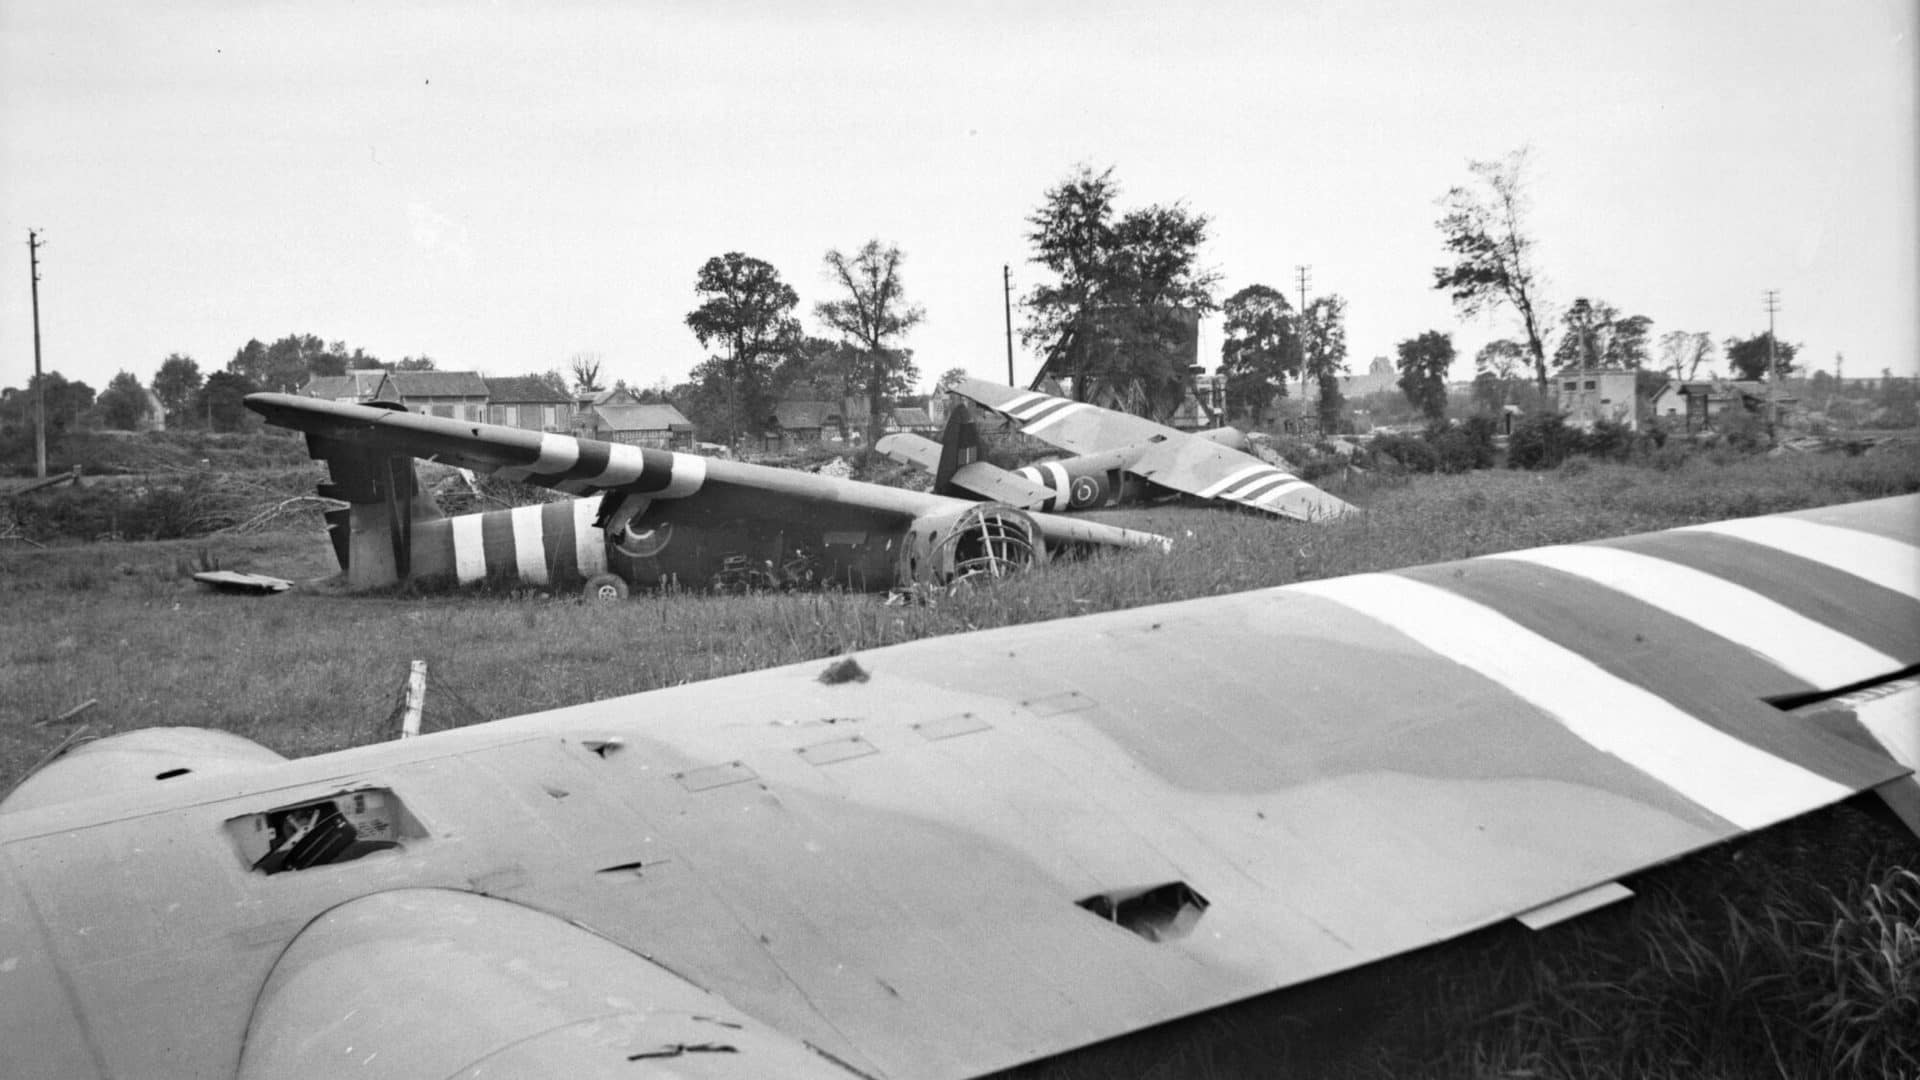
Pegasus Bridge, view over all Glider No. 2, Glider No. 1 and the Benouville Bridge visible in the background.

Ranville and Merville: Securing the eastern flank

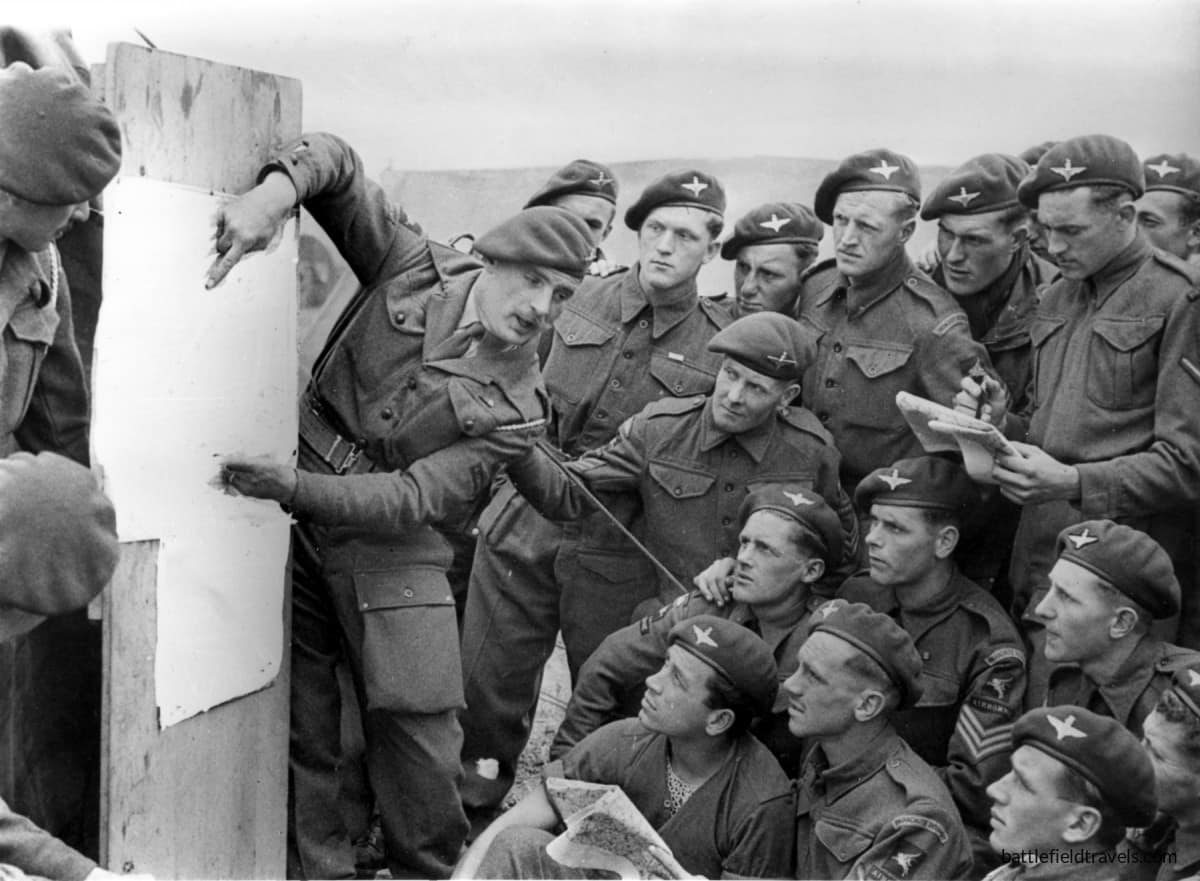
East of the Orne, the remainder of the British 6th Airborne Division landed by parachute and glider across a scattered series of drop and landing zones. Its tasks included destroying bridges over the River Dives, securing the high ground around Ranville and preventing German forces east of the Orne from interfering with the invasion beaches.

One of the most difficult objectives was neutralising the German coastal battery at Merville, whose guns were believed capable of firing on Sword Beach. Lieutenant Colonel Terence Otway’s 9th Parachute Battalion attacked despite severe dispersal during the airborne drop and the loss of much of its specialist equipment. The wider 6th Airborne Division operations at Ranville and Merville established a defensive bridgehead east of the Orne that would become the Allied invasion’s exposed eastern flank.

The British airborne operation therefore accomplished more than the spectacular seizure of Pegasus Bridge. It created a barrier between the invasion beaches and German forces approaching from the east, while preserving the crossings through which the airborne bridgehead could be reinforced.
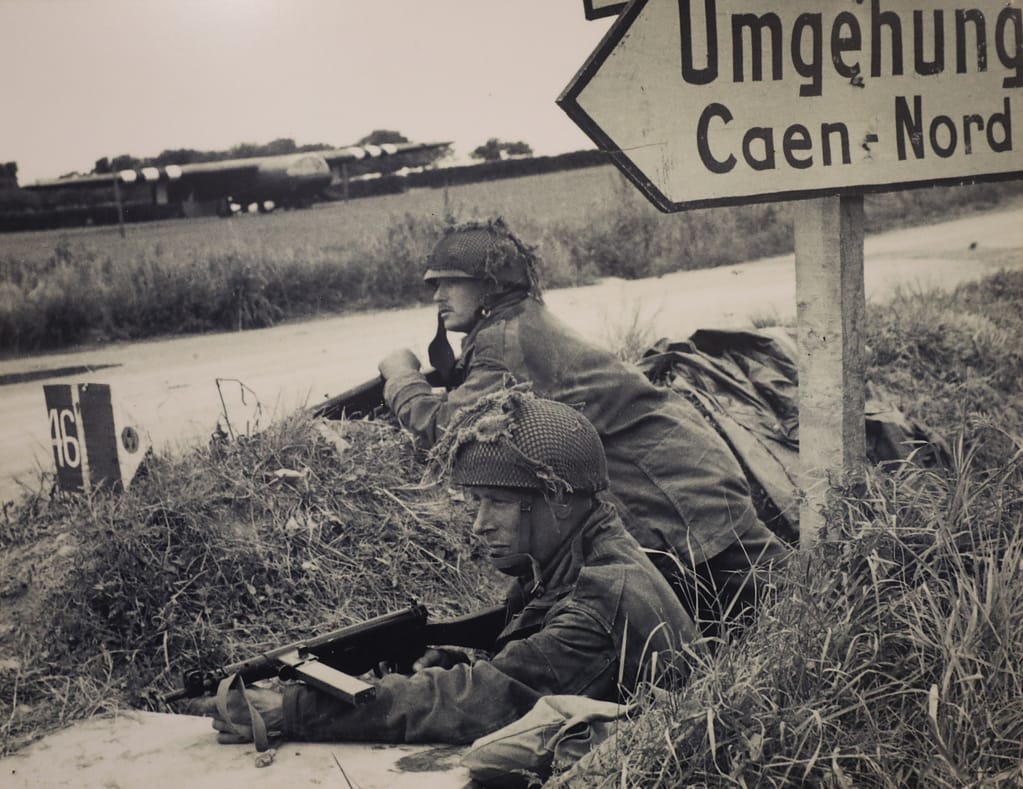
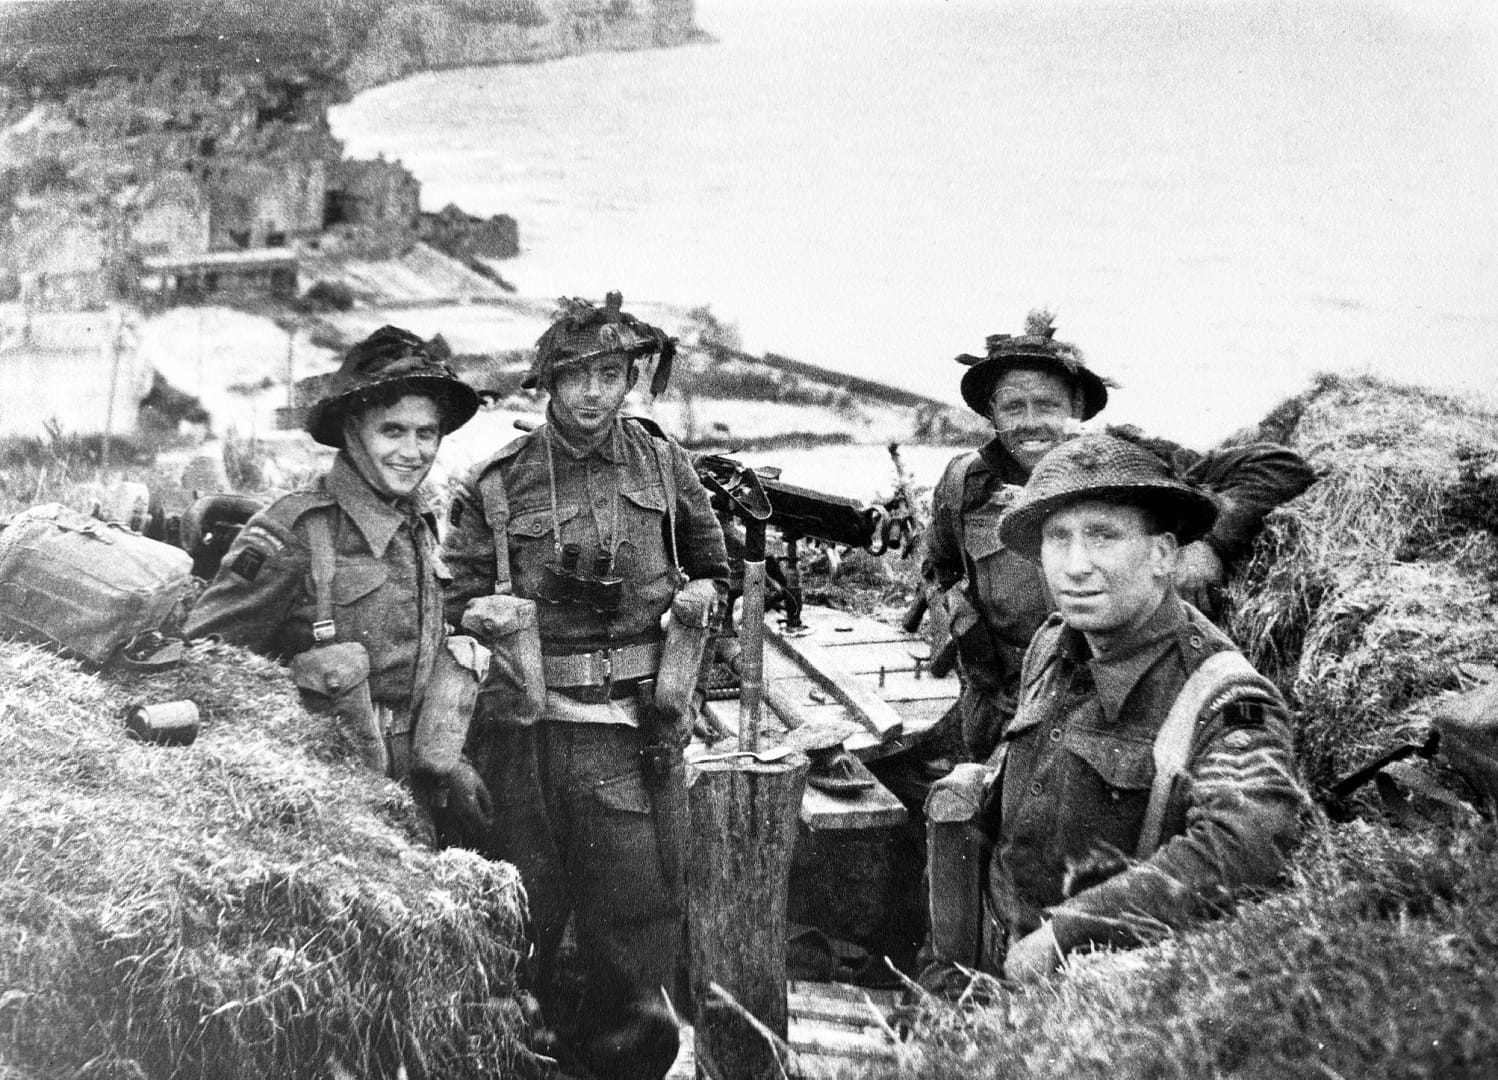
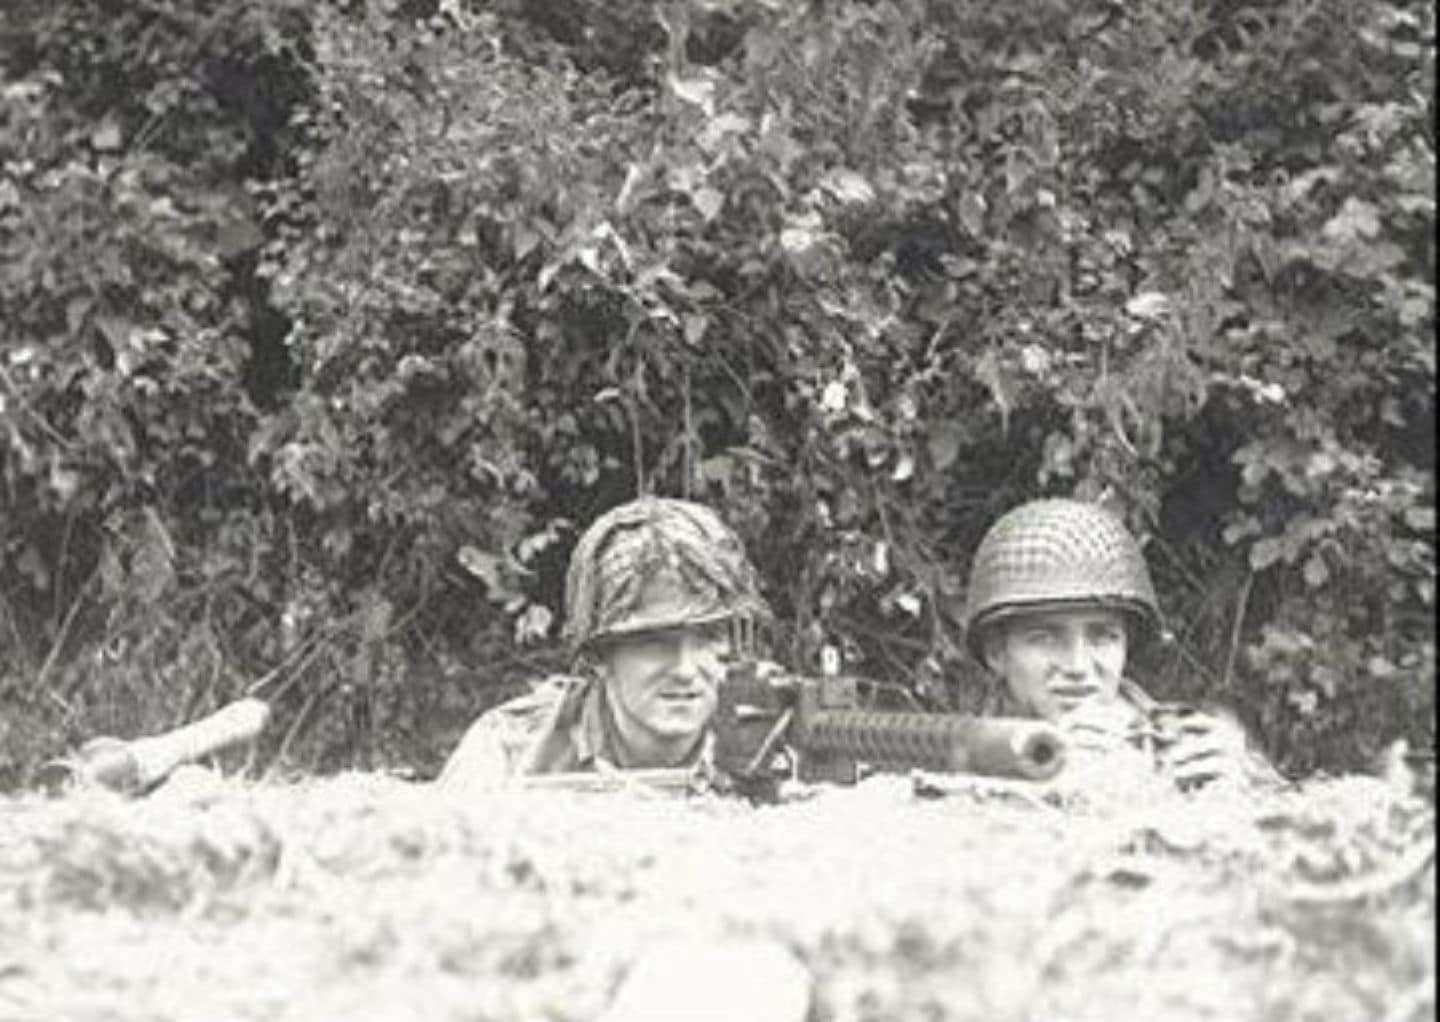
6th Airborne DIvision troops defending Ranville
6th Airborne Division troops defending Ranville

The American airborne operations: Securing the western flank

101st Airborne Division – Mission ALBANY

At the western end of the invasion area, the US 82nd and 101st Airborne Divisions descended into a very different landscape. German forces had deliberately flooded large areas behind Utah Beach, which meant villages and a small number of raised roads and causeways acquired disproportionate tactical importance. Scattered drops fragmented many airborne units, but also placed American paratroopers across the German rear areas.

The 101st Airborne Division was tasked principally with securing the four western exits from Utah Beach and disrupting German movement toward the invasion area. Paratroopers rallied in improvised groups and fought through the villages and hedgerows behind the coast. Near Sainte-Marie-du-Mont, Lieutenant Richard Winters led a small force from Easy Company, 506th Parachute Infantry Regiment, in the assault on the German battery at Brecourt Manor, eliminating guns that could fire toward the Utah Beach exits.

The fighting behind Utah Beach also marked the beginning of Easy Company’s combat experience in Normandy. From the scattered airborne landings and the assault at Brecourt Manor, the company’s route continued through Carentan and Bloody Gulch. The Easy Company battles in Normandy form part of a wider battlefield series following the company from D-Day through the Netherlands, Bastogne and the final advance into Germany and Austria.
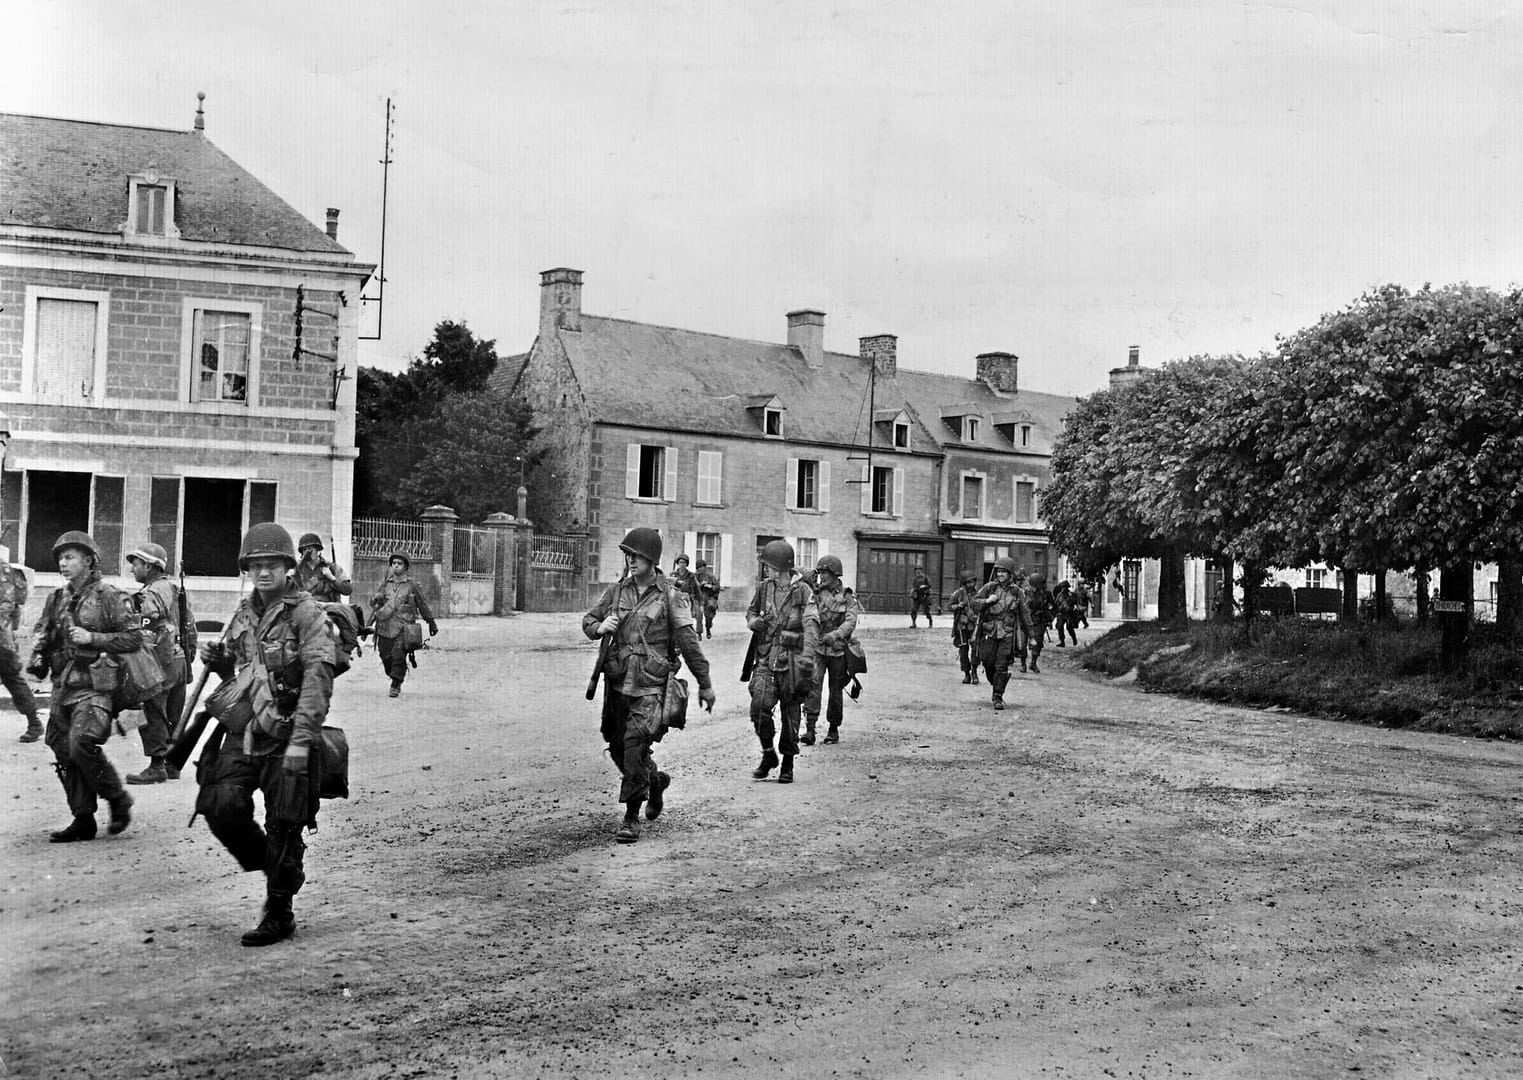
101st Airborne Division paratroopers passing through St-Marie-du-Mont, June 1944

82nd Airborne Division – Mission BOSTON

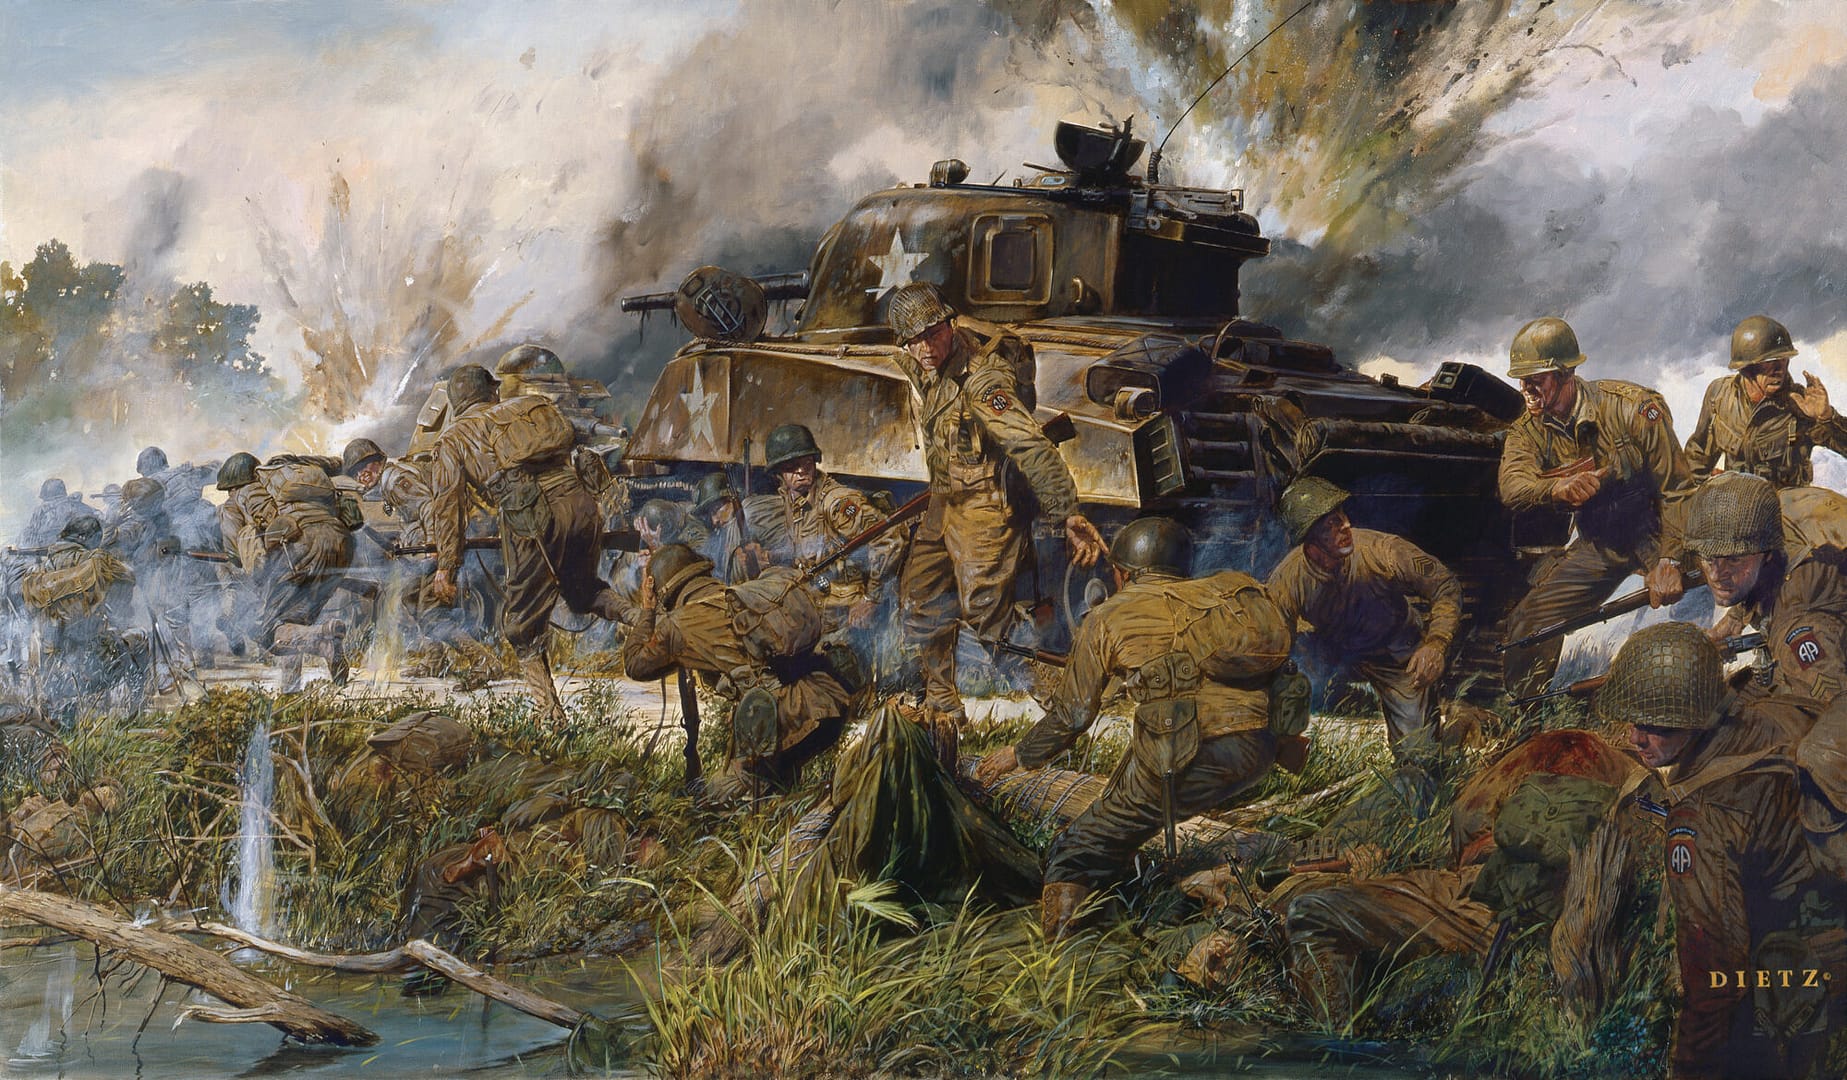
Farther north, the 82nd Airborne Division fought to secure the approaches around Sainte-Mère-Église, one of the critical road centres behind the invasion beaches. To its west, the battle for La Fière Causeway developed into a prolonged struggle for one of the few routes across the flooded Merderet valley. Here, a seemingly minor bridge and narrow raised causeway became key terrain because the surrounding inundations channelled all movement onto very few routes.

The American airborne landings were therefore inseparable from the Utah operation. By occupying road junctions, causeways and beach exits, disrupting German communications and forcing German units to fight inland, the paratroopers helped prevent a coordinated response against the troops coming ashore.
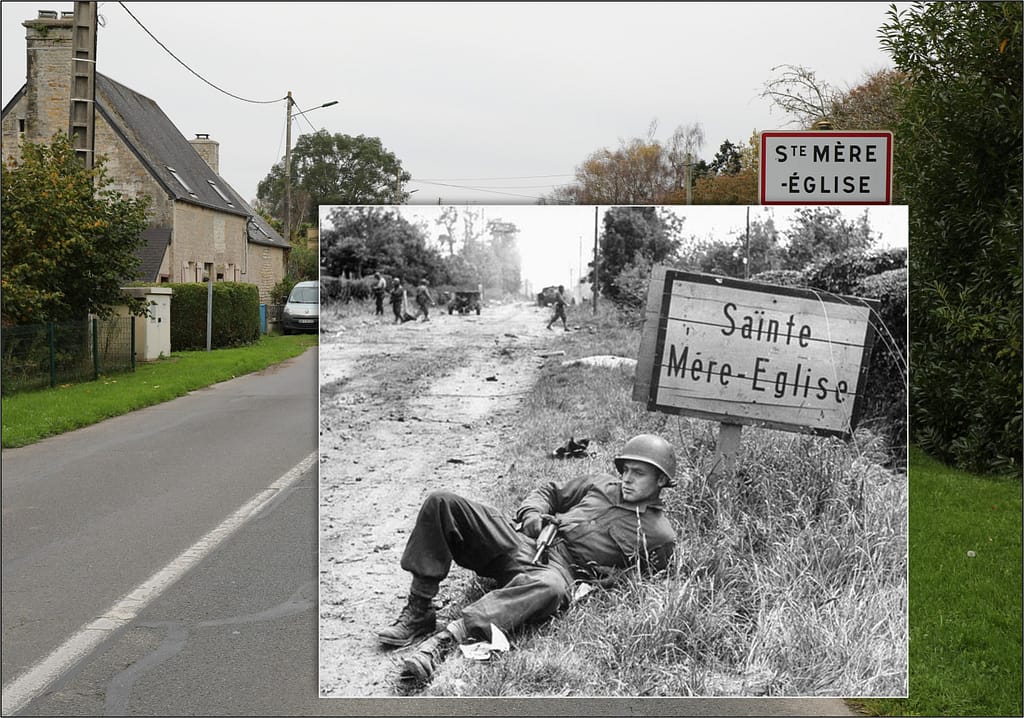
Then and now - 1944 and 2024. An American paratrooper on the southern entry into Sainte-Mere Eglise
Then and now – 1944 and 2024. An American paratrooper on the southern entry into Sainte-Mere Eglise

The success of the landings on 6 June did not immediately create a continuous Allied foothold. Utah and Omaha remained separated, and the road and rail centre of Carentan stood astride the communications connecting the two American beachheads. Capturing it became essential to consolidating the western lodgement.

Elements of the 101st Airborne Division advanced toward the town through flooded country and along exposed causeways before engaging the German defenders on its approaches and within the town itself. The Battle for Carentan continued the airborne role beyond its original D-Day missions and helped establish the physical connection between the Utah and Omaha sectors.

The German response did not end with the loss of Carentan. Counterattacking forces struck the American positions southwest of the town, producing the confused and violent Battle of Bloody Gulch. By this stage the character of the campaign was already changing. The immediate struggle to land on the Normandy coast was giving way to a battle to hold and expand the lodgement through hedgerows, sunken roads, villages and enclosed fields.
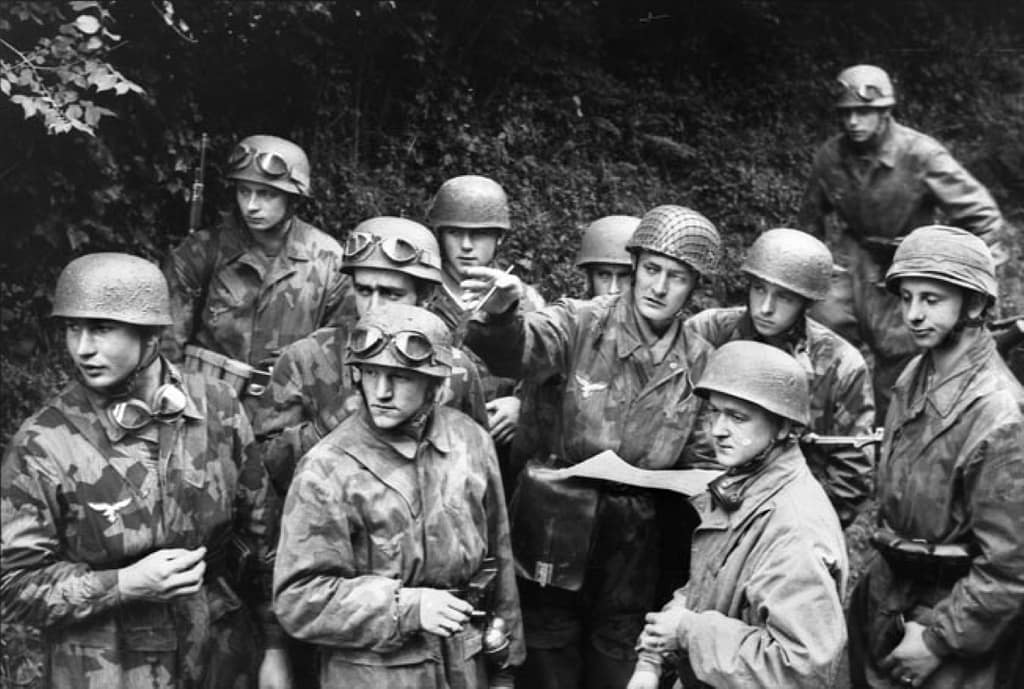
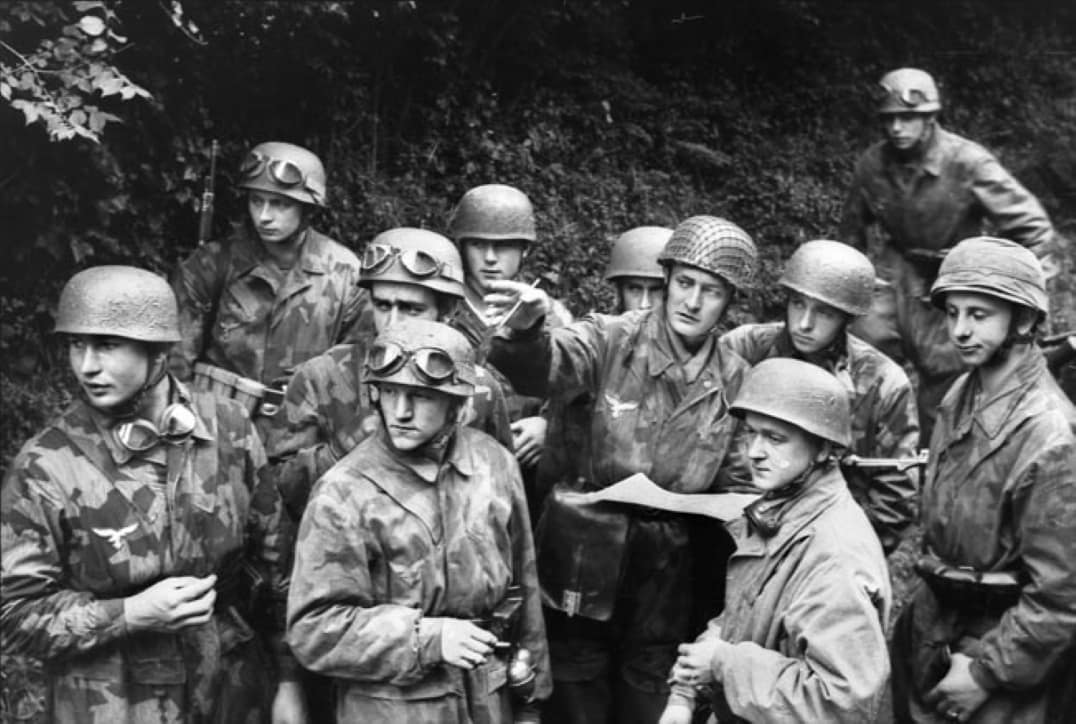
German Paratroopers from Fallschirmjäger-Regiment 6 at Carentan

Utah Beach

The westernmost amphibious landing took place on the Cotentin Peninsula. The US 4th Infantry Division came ashore at Utah Beach after currents and navigational errors carried the initial assault south of the intended landing area. The displacement proved advantageous. Resistance was lighter than at the planned landing site, and Brigadier General Theodore Roosevelt Jr famously chose to continue the operation from where the troops had landed rather than attempt to shift the assault north.

Success at Utah, however, depended on getting troops and vehicles off the coast. Flooding had transformed much of the hinterland into an obstacle, concentrating movement onto a handful of causeways. The beach landings and airborne operations therefore formed parts of a single tactical problem. As the 4th Infantry Division pushed inland, contact with elements of the 101st Airborne Division helped open the routes through the inundated ground and secure the beachhead.
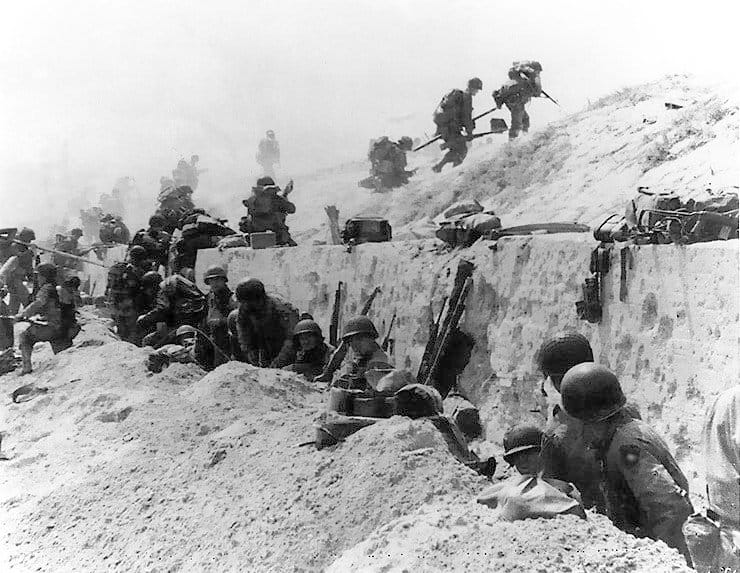
Troops of the US 4th Division move out over the seawall on Utah Beach

Pointe du Hoc

Between Utah and Omaha, cliffs dominated the coast at Pointe du Hoc. Allied intelligence identified the position as a German coastal battery capable of threatening the invasion fleet and landing beaches. Lieutenant Colonel James Rudder’s 2nd Ranger Battalion was assigned the task to neutralise the guns.

The Ranger assault on Pointe du Hoc required troops to land beneath the cliffs, scale them under fire and seize the fortified position above. The Rangers discovered that the main guns had been removed from their prepared emplacements, but patrols subsequently located and disabled them inland. Isolated on the headland, the Rangers then fought to hold their position while awaiting relief from forces advancing from Omaha.
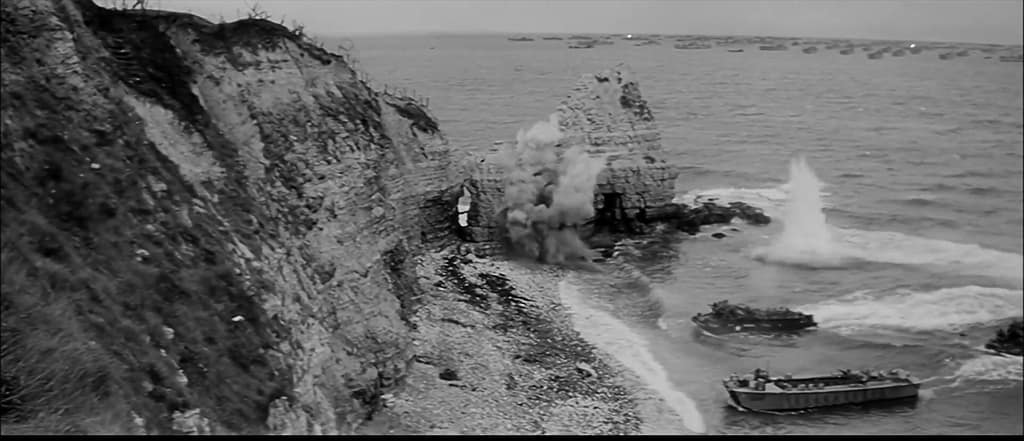
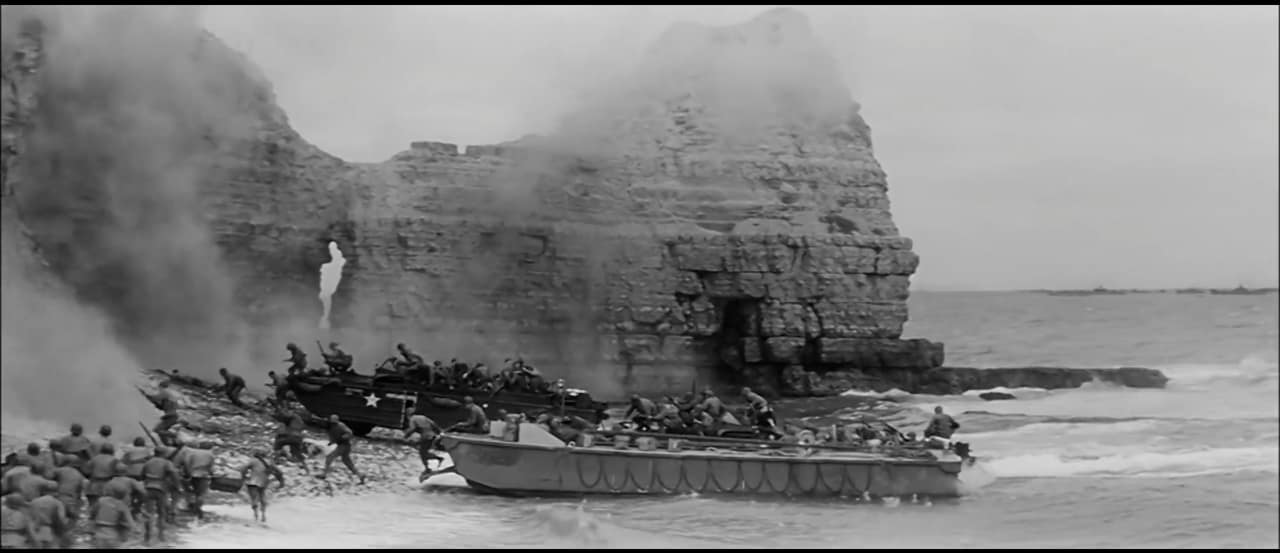
Screenshot from 'The Longest Day' shot onsite at Pointe du Hoc
Screenshot from ‘The Longest Day’ assault on Pointe du Hoc, actually shot onsite at Pointe du Hoc

Omaha Beach

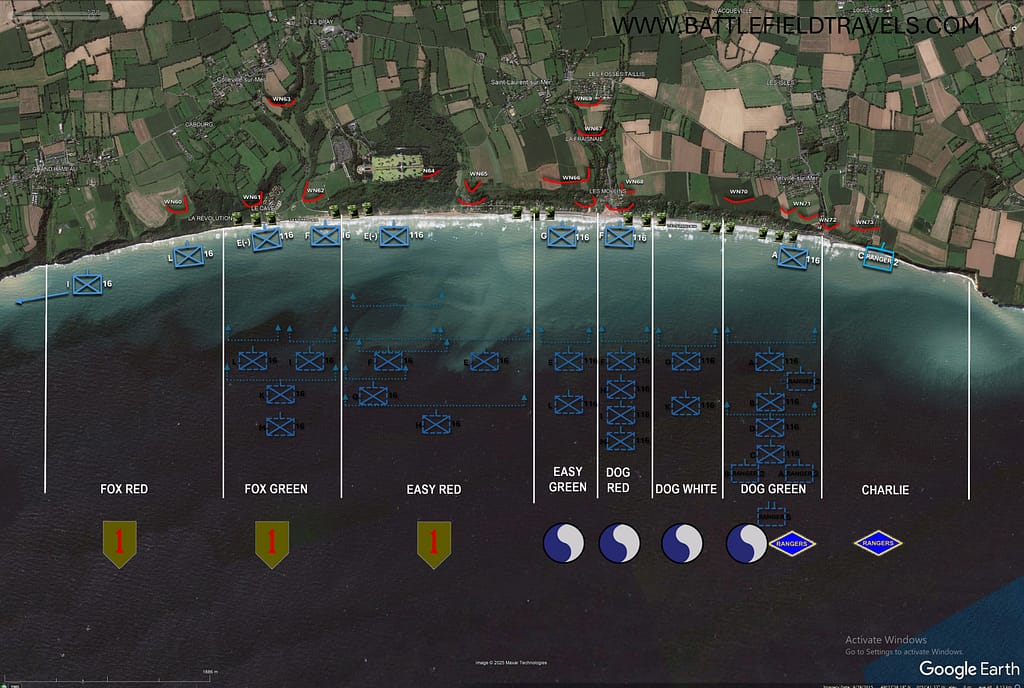
At Omaha Beach, the US 1st and 29th Infantry Divisions encountered the most formidable resistance of any of the five Allied landing beaches. The terrain magnified the problem. A broad tidal flat and exposed beach lay beneath steep bluffs, while movement inland was channelled through five beach exits covered by German strongpoints, obstacles, mines and interlocking fire.

The initial Omaha Beach landings suffered heavy casualties. Amphibious tanks were lost, units became intermixed, engineers struggled to clear beach obstacles and German fire disrupted attempts to move through the planned exits. For a time, the assault appeared dangerously close to failure.

The breakthrough came not through the smooth execution of the original plan but through local initiative. Small groups of infantry, engineers and Rangers worked their way across and above the bluffs, infiltrating between German positions and attacking strongpoints from their flanks and rear. By the end of 6 June the Omaha lodgement remained shallow and vulnerable, but American troops had broken through the coastal defences. The cost made Omaha the bloodiest of the five D-Day beaches and demonstrated how profoundly local terrain could disrupt even the most carefully prepared operational plan.

Robert F. Sargent's famous photo of Easy Company, 16th Infantry Regiment landing at FOX GREEN Sector, Omaha Beach on D-Day. Aerial shot from the same location in November 2024.
Robert F. Sargent’s famous photo of Easy Company, 16th Infantry Regiment landing at FOX GREEN Sector, Omaha Beach on D-Day. Aerial shot from the same location in November 2024.

Gold Beach

East of Omaha, the British 50th (Northumbrian) Infantry Division landed at Gold Beach. Its objectives included securing the coast between the American and Canadian sectors, capturing Arromanches and pushing inland toward Bayeux while cutting the important Caen–Bayeux road.

German strongpoints and coastal defences caused delays at several locations, but British forces penetrated inland and made substantial progress during the day. The capture of Arromanches was particularly important because the site had been selected for one of the artificial Mulberry harbours that would sustain the Allied build-up before major French ports could be secured.
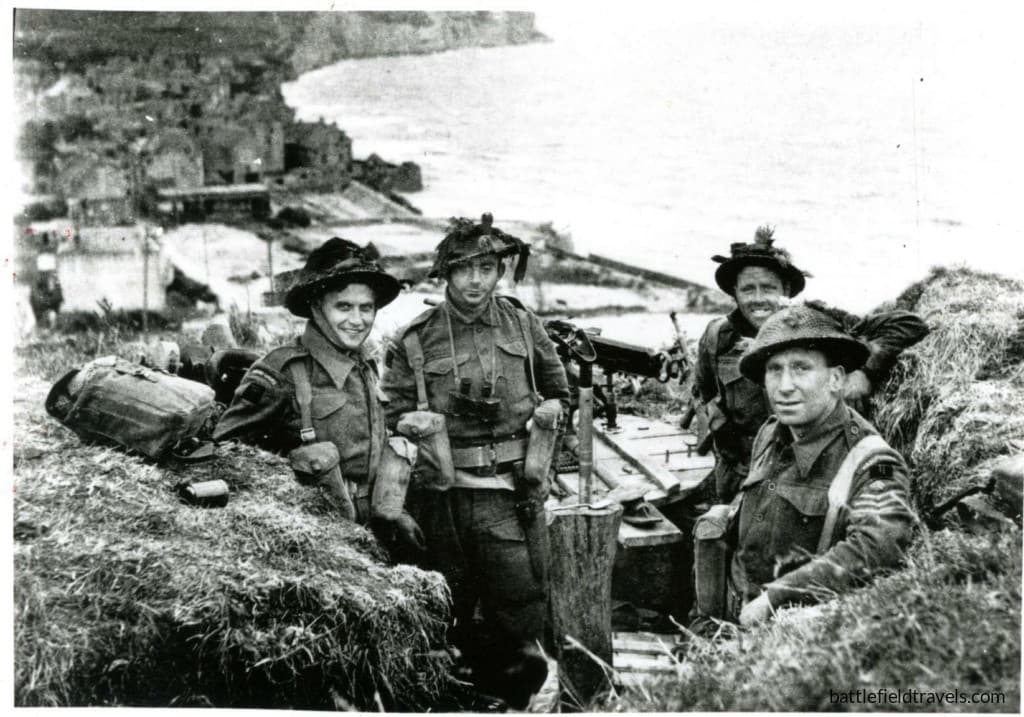
British soldiers of 1st Battalion, the Hampshire Regiment securing the high ground east of Arromanches. Arromanches visible in the background.

Juno Beach

The Canadian 3rd Infantry Division assaulted Juno Beach between the British landings at Gold and Sword. Rough seas, offshore obstacles and fortified coastal villages complicated the assault, and several Canadian units suffered heavily while breaking through the beach defences.

Once inland, however, Canadian forces advanced farther than many of the other seaborne formations on D-Day. Their objectives included securing the Caen–Bayeux road and linking the British and Canadian beachheads. Although not all planned objectives were reached and gaps remained between Allied formations, the Canadians had established a substantial lodgement by the end of the day.
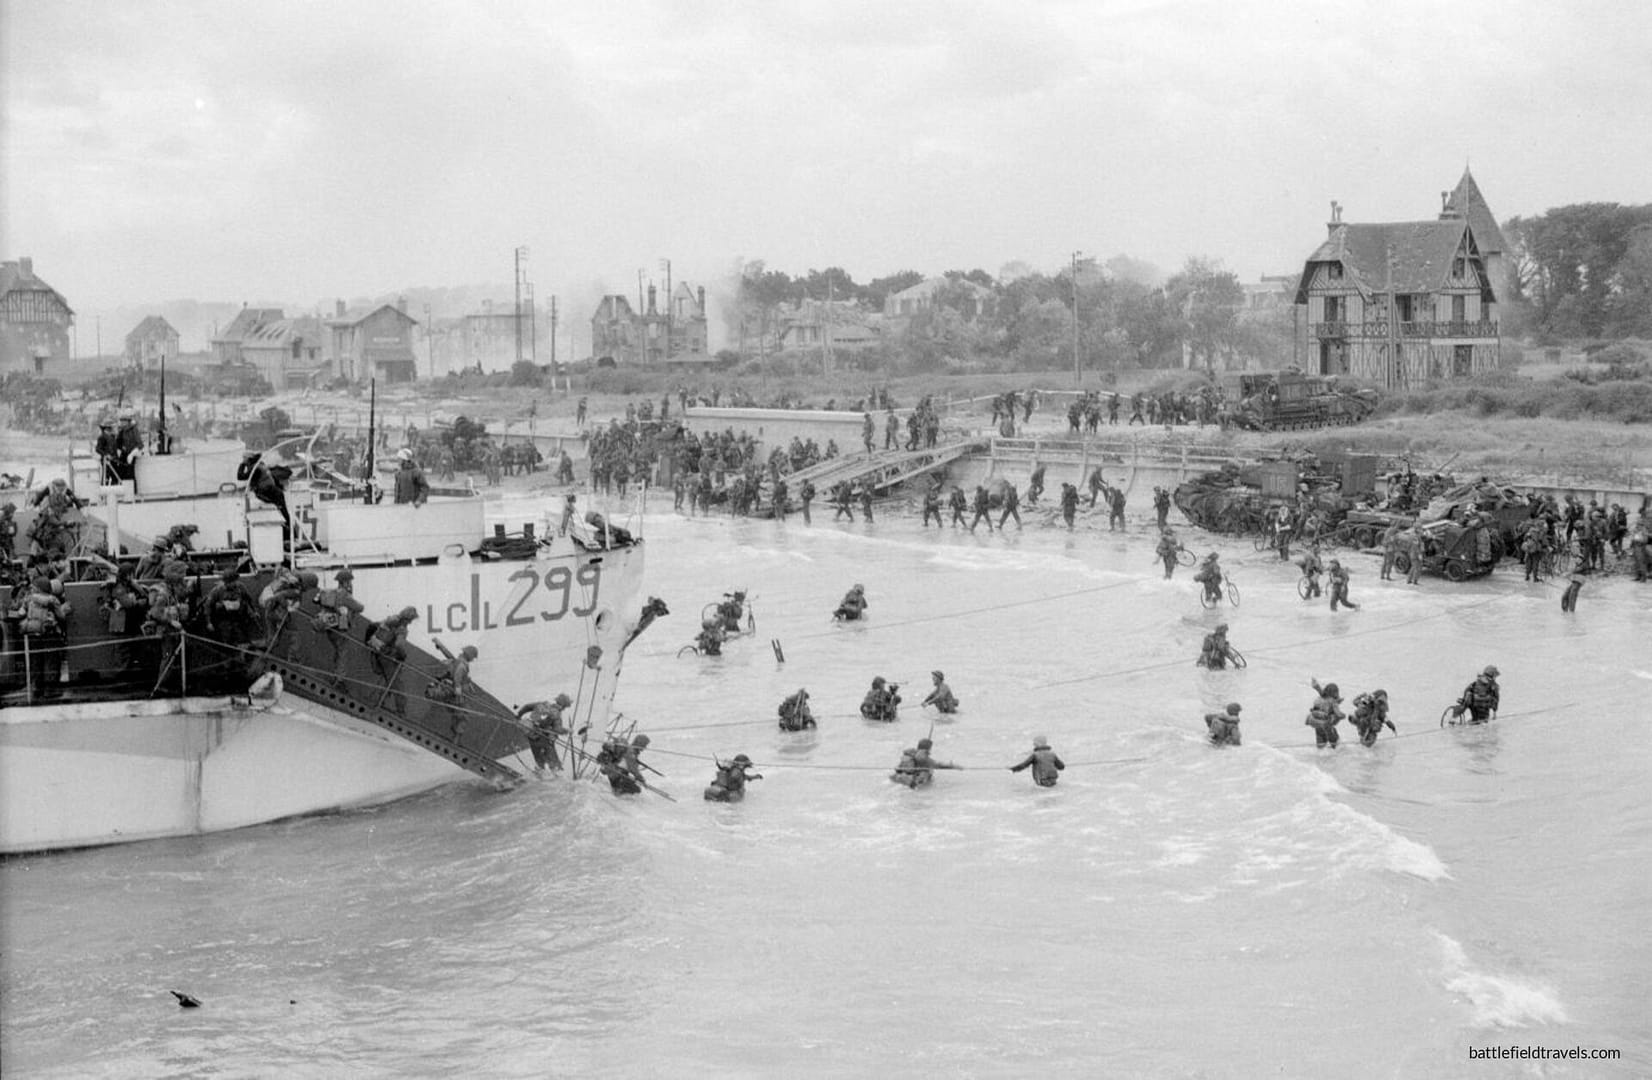
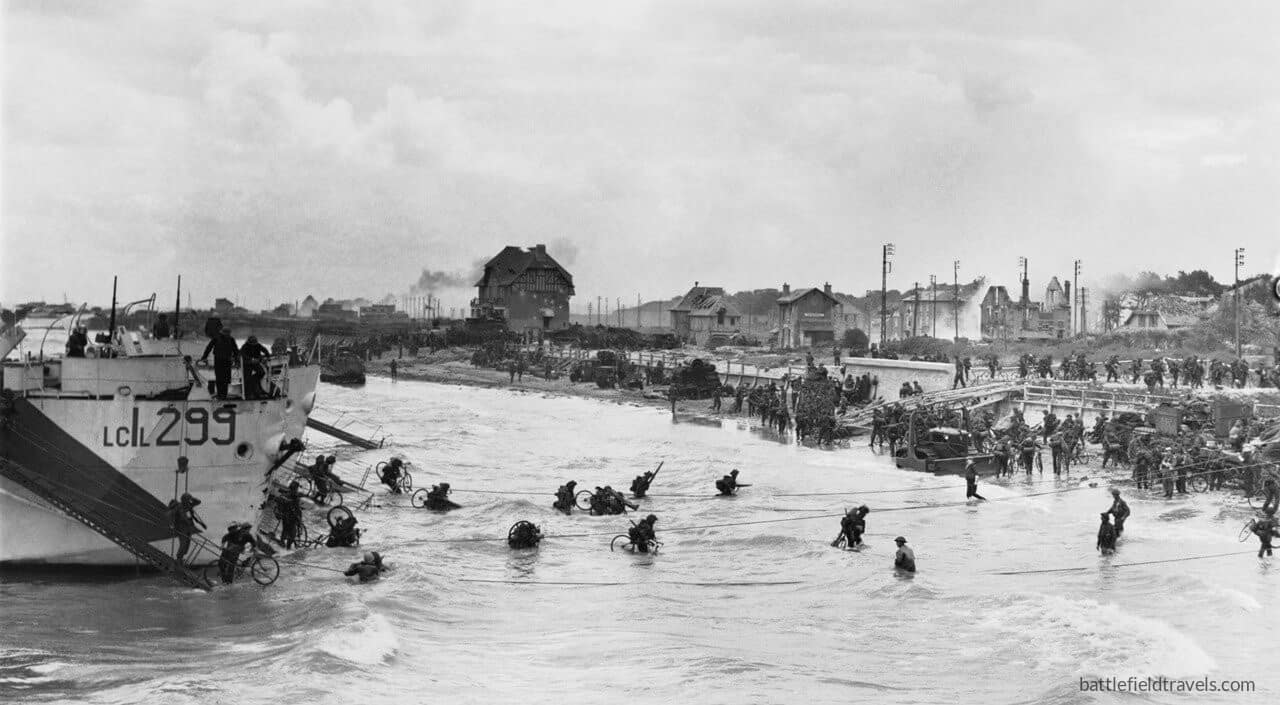
Juno Beach. Canadian 9th Brigade second wave landing at Bernieres-sur-Mer. Canada House visible in the background.

Sword Beach

At the eastern end of the amphibious assault, the British 3rd Infantry Division landed at Sword Beach. Its objectives extended well beyond clearing the immediate coastal defences. British forces were to advance toward Caen and, crucially, link with the 6th Airborne Division holding the bridges and defensive positions east of the Orne.

The link with the airborne troops was achieved, and was symbolised by the arrival of commandos under Brigadier Lord Lovat at Pegasus Bridge. Caen, however, remained in German hands. The failure to capture the city on D-Day helped shape the fighting that followed, as German armoured formations concentrated against the eastern side of the Allied lodgement.
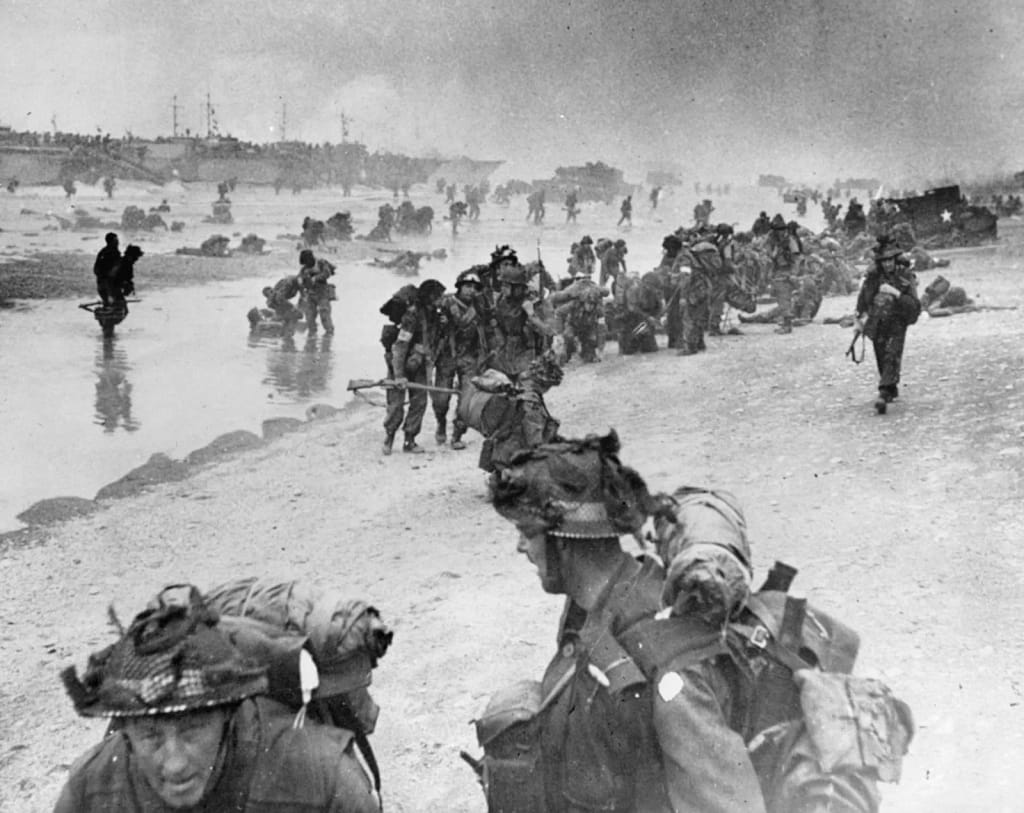
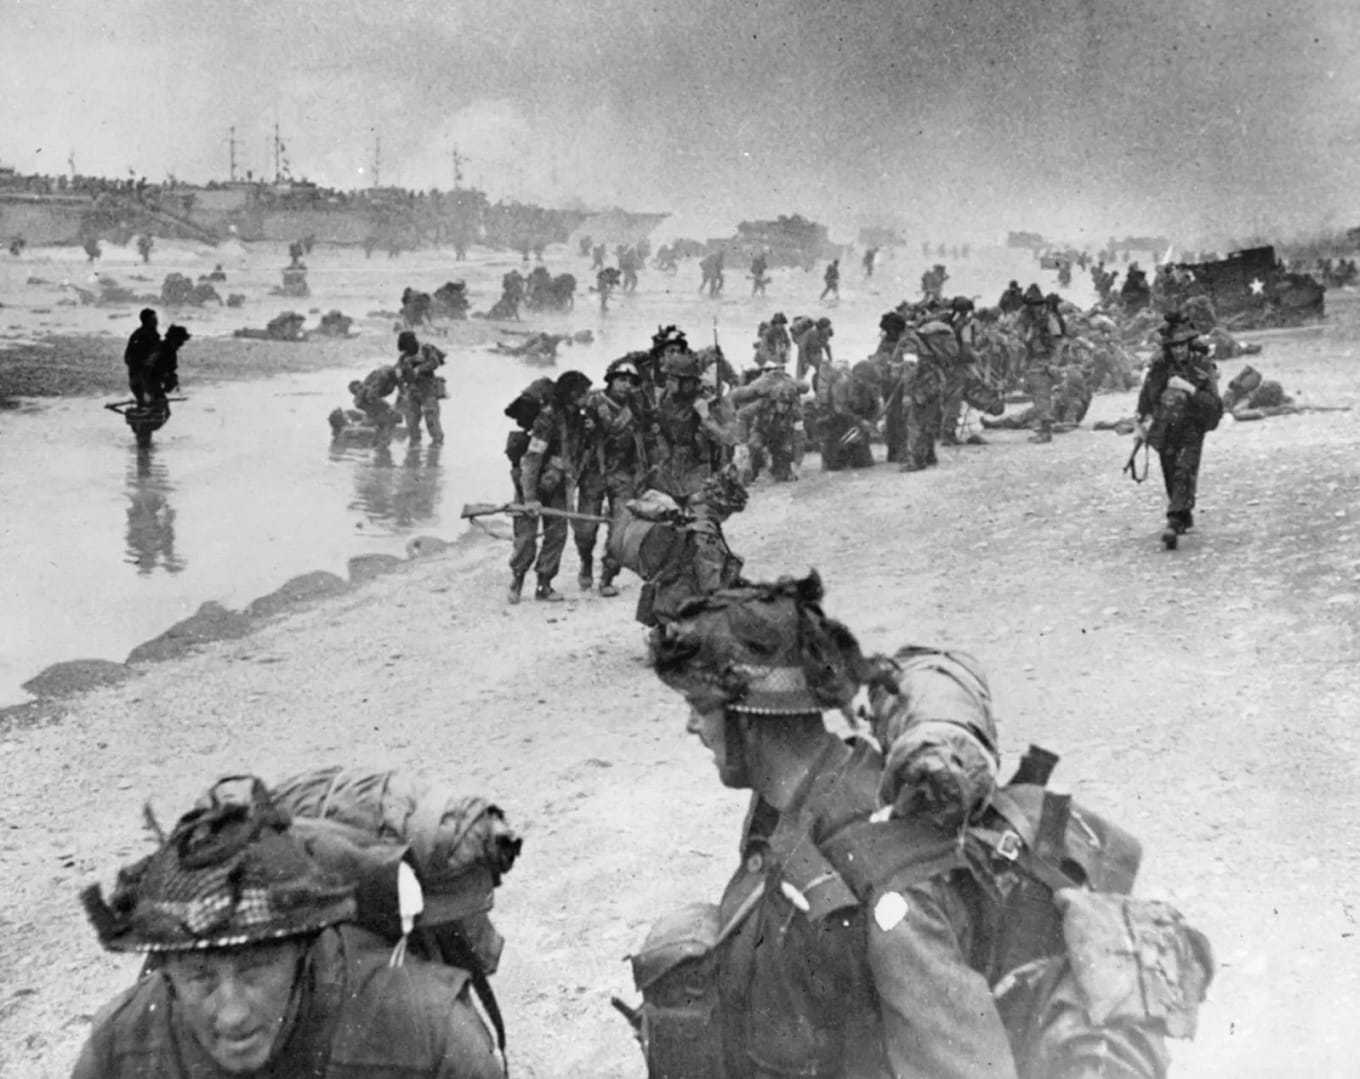
British soldiers landing on Sword Beach, D-Day, 6 June 1944

By the end of D-Day

By nightfall on 6 June, Allied forces had established themselves along the Normandy coast, but the five assault sectors had not yet become the secure, continuous lodgement envisaged in the invasion plan. The fighting around Carentan, the Cotentin Peninsula and Caen would continue, while the bocage increasingly imposed its own tactical demands. D-Day had succeeded, but the Battle of Normandy had only just begun.


🏛️Weapons & Equipment: World War Two
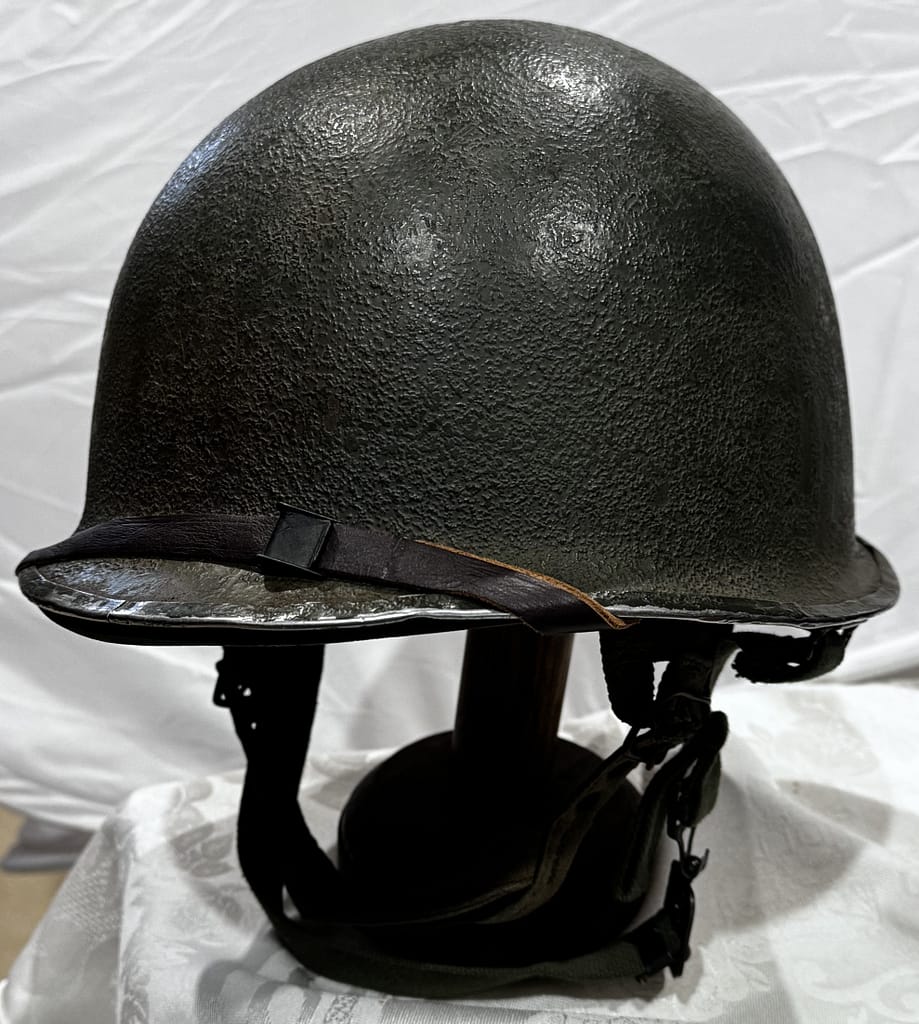
Helmet-US-MC1-front-seam-swivel-bail-06

Explore original weapons and equipment from the Second World War, drawn from my personal collection.

Uniforms, helmets, headgear, weapons, equipment from Australia, Britain, United States, Soviet Union, Germany, Japan, Italy, Romania, — personally handled, photographed and examined by me.


A curated reading list covering the Second World War across all theatres. Explore campaign histories, battlefield studies, biographies, primary accounts and contemporary military writings used in the research behind Battlefield Travels. The list will continue to grow as I publish new studies and draw upon new resources.


❓D-Day and Normandy Campaign Quiz. Test your knowledge!
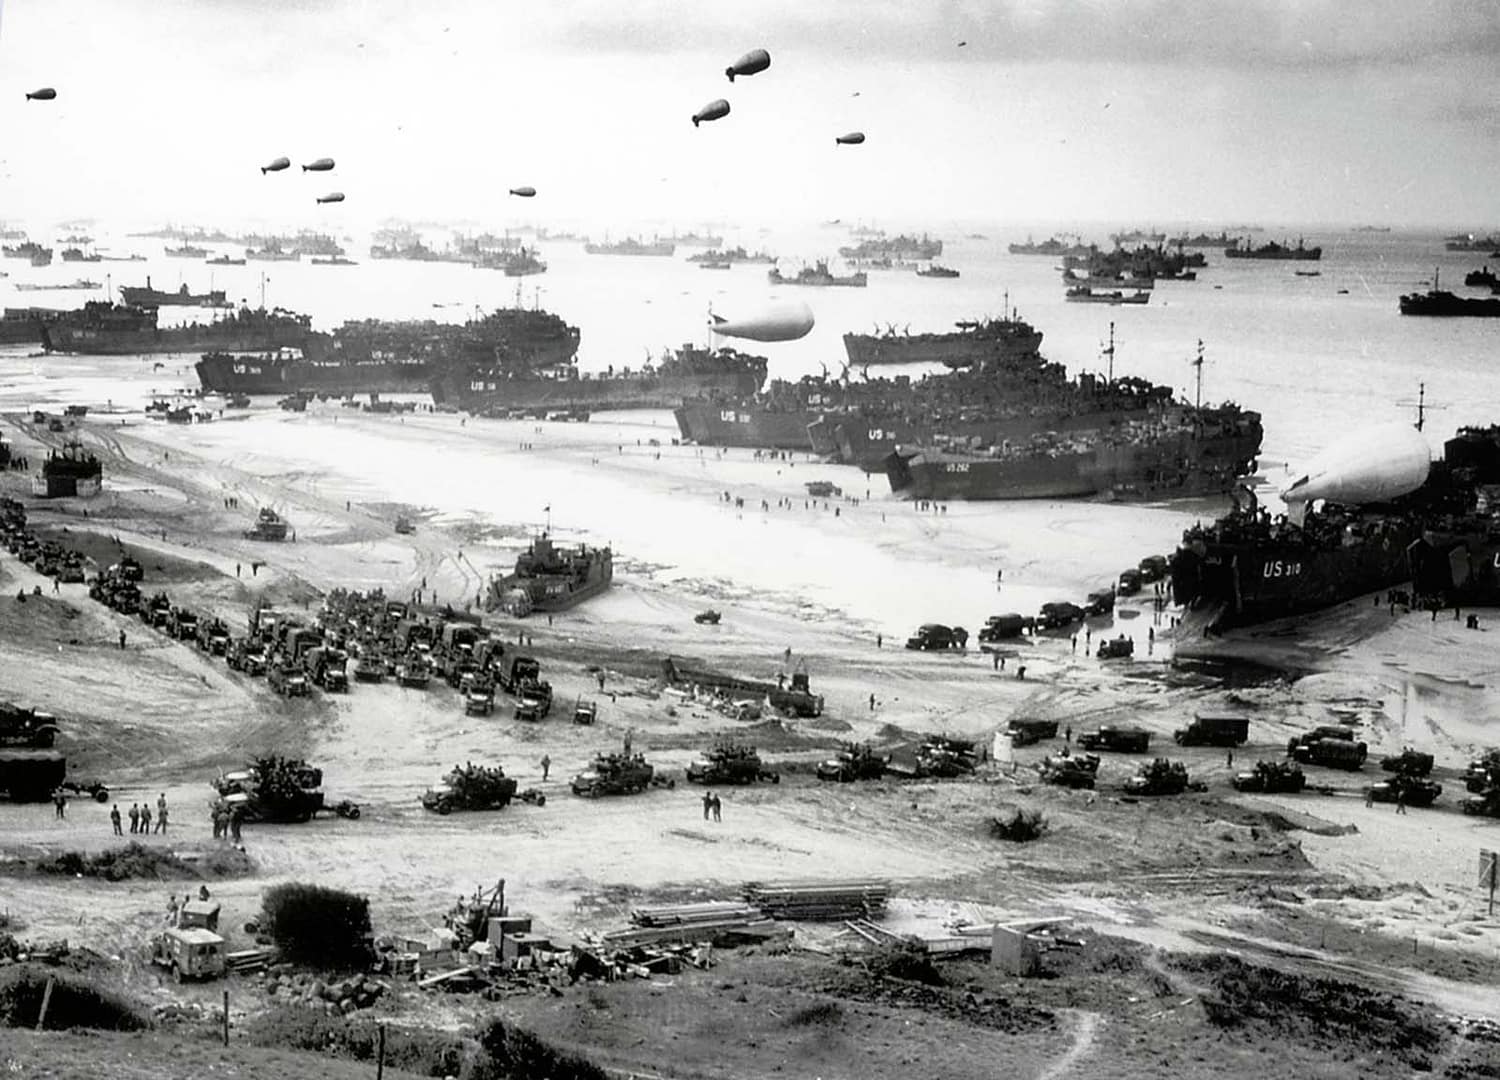
View from Fox Red colossal scale

20 questions generated out of a bank of 60. Testing your knowledge of the D-Day landings including the US and British airborne operations, and all five invasion beaches. Score 60% to pass — but expect a challenge!


D-Day and Normandy Campaign Battle Studies

In-depth battlefield analyses based on terrain, primary sources, and on-the-ground exploration.


What was D-Day and when did the Normandy landings take place?

D-Day was 6 June 1944, when Allied forces launched Operation Overlord with airborne and amphibious landings in Normandy, France. American troops landed at Utah and Omaha Beaches, British forces at Gold and Sword, and Canadians at Juno, while British and American airborne divisions landed behind the beaches to secure bridges, causeways, road junctions and other key objectives.

What were the five D-Day landing beaches?

The five Allied landing beaches were Utah, Omaha, Gold, Juno and Sword, extending along roughly 80 kilometres of the Normandy coast. American forces assaulted Utah and Omaha, British forces Gold and Sword, and Canadian forces Juno. Each beach presented different terrain, German defences and tactical problems, from the bluffs and draws overlooking Omaha to the flooded ground behind Utah.

Why was terrain so important during the Normandy landings?

Terrain influenced almost every stage of the fighting. Cliffs, beach exits, flooded fields, causeways, rivers, villages and the Norman bocage restricted movement and frequently channelled troops into predictable routes. At La Fière, for example, control of a narrow causeway across flooded ground became critical, while at Omaha the few draws leading through the coastal bluffs strongly influenced the battle to get off the beach.

Did the Battle of Normandy end on D-Day?

No. D-Day was the opening day of the Normandy campaign, not its conclusion. After establishing the beachheads, Allied forces still had to link them together, secure ports and key towns, and expand the lodgement against determined German resistance. Fighting continued through the summer, including the battles around Caen, Operation Cobra and the Falaise Pocket, before the German position in Normandy collapsed in August 1944.


Subscribe to Battlefield Travels and receive a free E-Book Battlefield Guide

Unlock expert battlefield analysis, campaign reconstructions, and historical insights drawn from firsthand exploration and primary sources.

🗺️ You’ll receive:

🎖️ Exclusive historical insights you won’t find elsewhere

📘 A free eBook: 10 Tips for Exploring Historic Battlefields

📰 New battlefield studies straight to your inbox as they are published


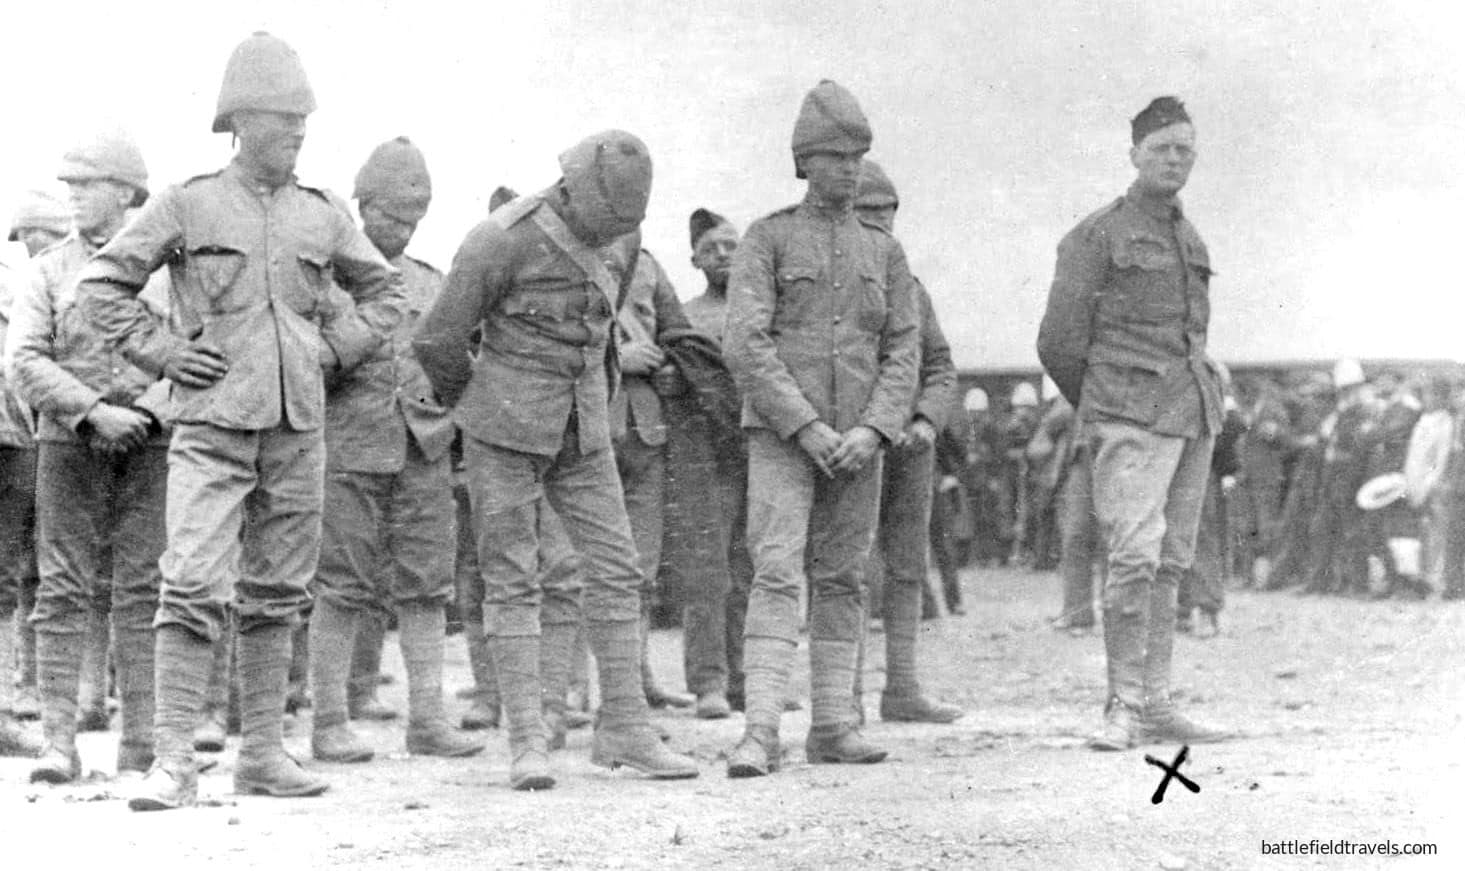
Churchill-POW

⚔️ Winston Churchill and the Armoured Train Incident: Chieveley, Natal, 15 November 1899

On 15 November 1899, just south of Chieveley Station in Natal, a Boer force lured a British armoured train patrol into a well-placed ambush. On board was 24-year-old war correspondent Winston Churchill, along with about 120 British troops under Captain Aylmer Haldane. Churchill subsequently escaped from captivity and evaded Boer security forces in an extraordinary journey of some 400 kilometres.

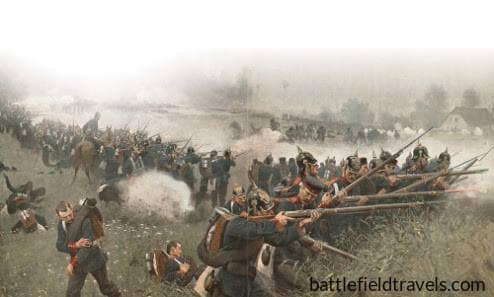
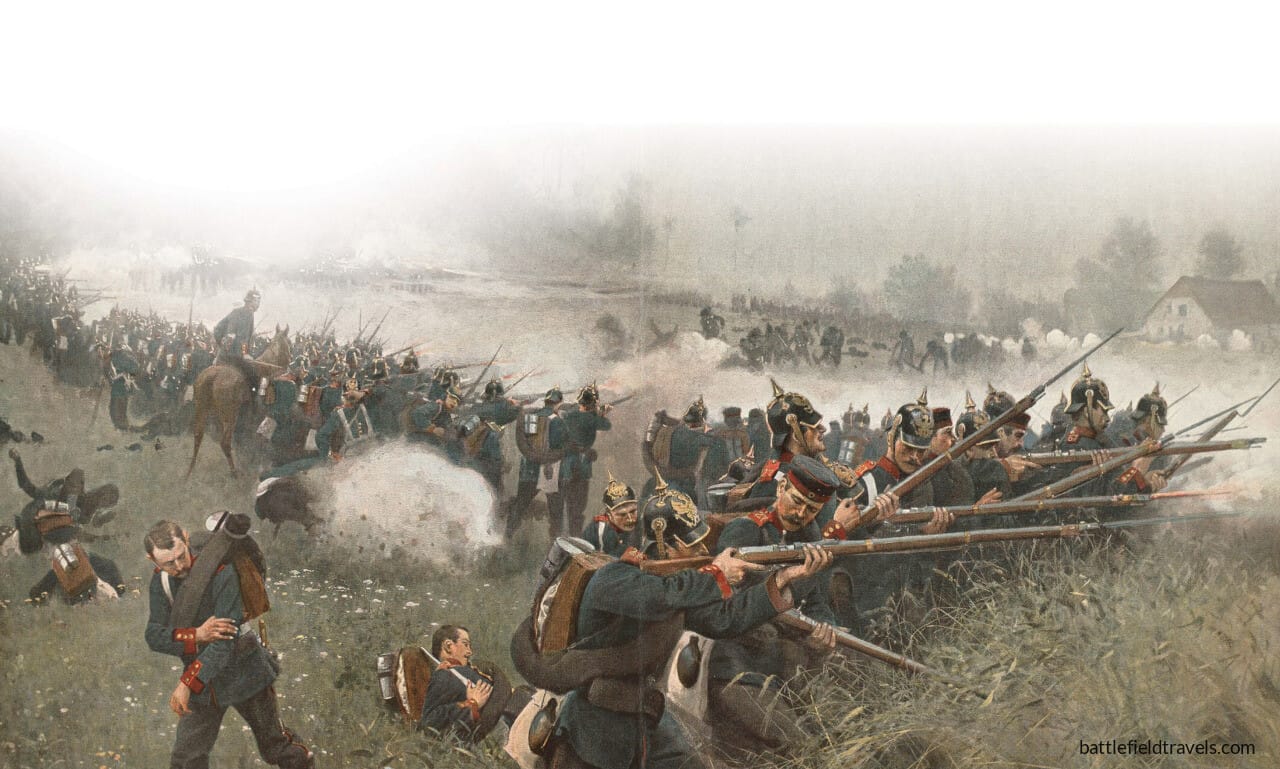
Reconstructing Austro-Prussian War battlefields through terrain analysis, primary sources and on-site research

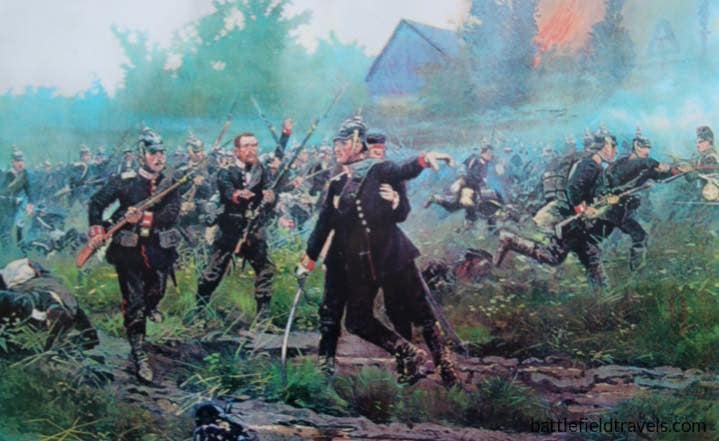
The Gordon Brigade 27th and 67th Infantry Regiments defend the Sviep wood near Cishkoves

Walking the battlefields of the Austro-Prussian War 1866

Causes of the war

The Austro-Prussian War was a short, decisive campaign that reshaped the political map of Central Europe. Fought over just six weeks, it resolved the long-standing contest between Austria and Prussia for leadership of the German states.

The war was not simply a clash of armies, but a test of competing systems. Prussia brought to the field a modern General Staff, efficient mobilisation based on railways, and a flexible command philosophy that allowed subordinate commanders to act within intent. Austria fielded a large, experienced army with strong artillery and a long military tradition, but struggled to match Prussia’s speed of concentration and coordination.

The Seven-Week War

The campaign unfolded across Bohemia, where multiple Prussian armies advanced on converging axes against Austrian forces under Field Marshal Ludwig von Benedek. Early engagements such as Trautenau and Jičín revealed both the strengths and limitations of each side. Austrian forces could fight effectively and inflict heavy losses, but found it increasingly difficult to maintain coherence against Prussian operational tempo.

The war culminated in the Battle of Königgrätz (3 July 1866), one of the largest battles of the 19th century. Here, the Prussians combined pressure from multiple directions, using coordinated movement and flexible command and the breech-loading Dreyse needle gun to break the Austrian position. The arrival of the Prussian Second Army on the Austrian flank proved decisive, turning a contested battle into a general defeat.

The battlefields today

For the battlefield visitor, the Austro-Prussian War offers a landscape defined by scale and subtlety. Broad agricultural ground, shallow rises, villages, and wooded areas such as the Svíb Forest combine to shape movement and visibility across an enormous battlefield. These are not dramatic landscapes, but they reward close observation. The decisive features are often small, local, and easily overlooked.

The conflict also marks a transition point in warfare. Linear tactics, massed artillery, and traditional formations met emerging systems of command, mobility, and firepower. The result was not an immediate revolution, but a clear indication of the direction in which European warfare was moving.


Field Notes: Austro-Prussian War

Below are all current BattlefieldTravels studies for the Austro-Prussian War, covering key battles, campaign phases and associated sites. New studies are added as further battlefields are walked and analysed.


Tactical Innovations: Austro-Prussian War

Below are all current BattlefieldTravels tactical innovations for the Austro-Prussian War, covering technology, tactics and warfighting philosophies that fundamentally changed warfare. New studies are added as further battlefields are walked and analysed.


What caused the Austro-Prussian War?

The war of 1866 was the decisive clash in the struggle for supremacy over the German states — a rivalry between Austria and Prussia that had simmered since the Frankfurt Parliament of 1848. The immediate trigger was a dispute over the administration of Schleswig-Holstein, seized jointly from Denmark in 1864, but the deeper cause was Bismarck’s calculated determination to exclude Austria from German affairs and establish Prussian dominance over a unified German state.

How did terrain shape the major battles of the Austro-Prussian War?

The campaign unfolded across the rolling farmland, river crossings, and wooded ridgelines of Bohemia — modern Czech Republic. The Prussian ability to concentrate three armies rapidly through mountain passes and converge on the Austrian position before it could be reinforced made terrain management a decisive factor. At Königgrätz the Bistritz stream and the Svib Forest anchored the Austrian left and centre, while the Prussian Guard’s advance through the Maslowed forest on the Austrian right flank proved catastrophic for Austrian fortunes.

Why were Prussian forces so effective?

Prussian success in 1866 rested on three decisive advantages — the needle gun, staff work, and command philosophy. The Dreyse needle gun allowed Prussian infantry to fire prone and at a rate of fire Austrian muzzle-loaders could not match. Moltke’s staff system enabled three separate armies to converge on a single point with unprecedented coordination. And a command culture that encouraged initiative at every level — Auftragstaktik in its early form — allowed Prussian commanders to exploit opportunities faster than Austrian headquarters could respond.

What was the significance of the Battle of Königgrätz?

Königgrätz — fought on 3 July 1866 — was one of the most consequential battles of the nineteenth century. The destruction of the Austrian Army of the North in a single day ended Austrian influence over German affairs, paved the way for the North German Confederation, and set the conditions for the Franco-Prussian War four years later. It demonstrated that modern staff work, rapid concentration, and superior infantry firepower could defeat a numerically comparable enemy in a single decisive engagement.

Was the war really decided in just seven weeks?

Yes — which is why it is sometimes called the Seven Weeks War. From the Prussian invasion of Bohemia on 15 June 1866 to the armistice of 22 July, the campaign lasted 38 days of active operations. The speed of Prussian mobilisation, concentration, and decisive battle left Austria no time to recover or bring its full resources to bear. The brevity of the campaign shocked European observers and fundamentally changed how continental armies thought about war.

What happened to Austria after the war?

The Peace of Prague excluded Austria from the new German political order and ceded Venetia to Italy. Internally, defeat accelerated the constitutional crisis that produced the Ausgleich of 1867 — the compromise that transformed the Austrian Empire into the Austro-Hungarian dual monarchy. Austria turned away from German affairs and towards the Balkans, setting in motion the geopolitical shifts that eventually led to 1914.

Will more Austro-Prussian War battlefield studies be added?

Yes. Field research has covered the major engagements of the Bohemian campaign including Königgrätz, Jičín, Trautenau, and Nachod. Additional studies covering the Italian theatre and the secondary German campaign — where Prussian allies fought Austrian-aligned states including Bavaria, Hanover, and Saxony — will be added as research progresses.


Subscribe to Battlefield Travels and receive a free E-Book Battlefield Guide

Unlock expert battlefield analysis, campaign reconstructions, and historical insights drawn from firsthand exploration and primary sources.

🗺️ You’ll receive:

🎖️ Exclusive historical insights you won’t find elsewhere

📘 A free eBook: 10 Tips for Exploring Historic Battlefields

📰 New battlefield studies straight to your inbox as they are published


Reconstructing the War of the Spanish Succession battlefields through terrain analysis, primary sources and on-site research

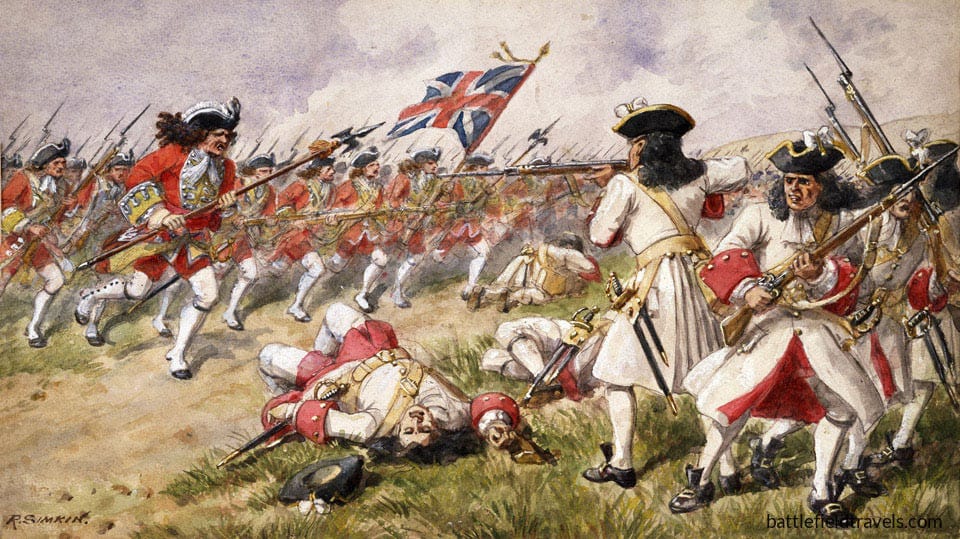
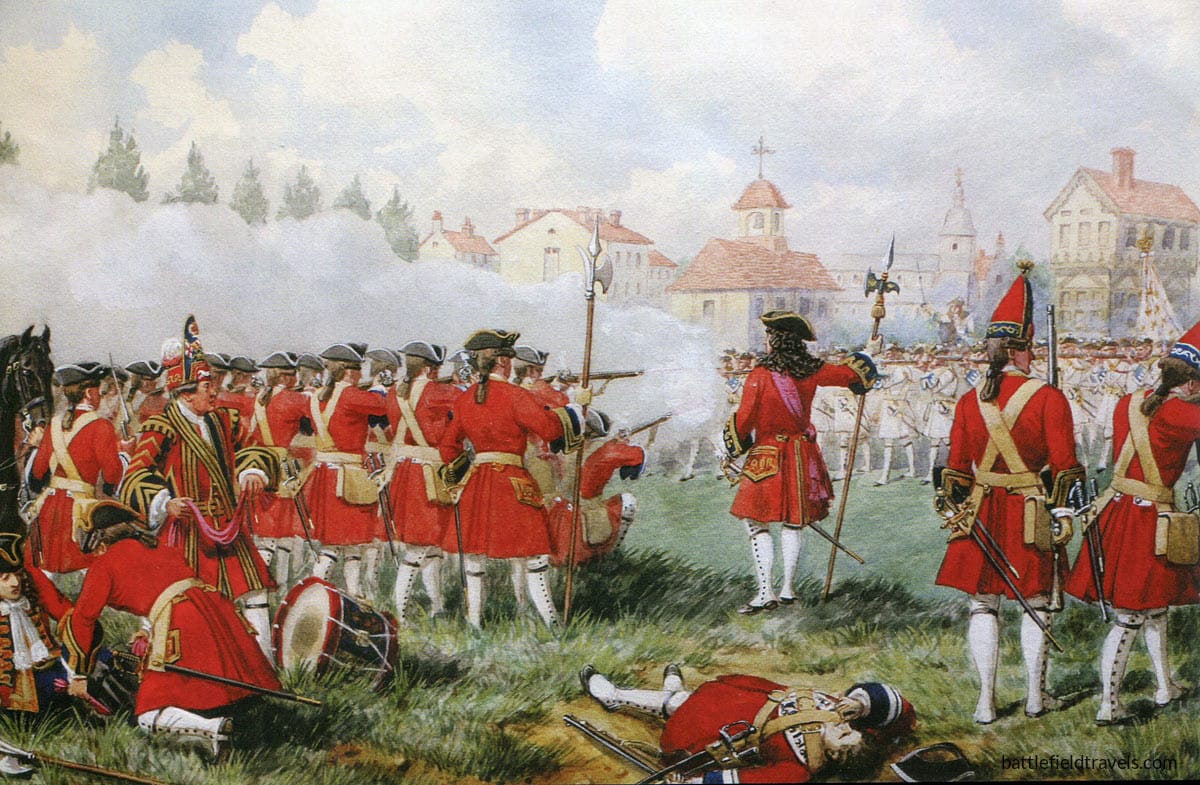
16th-Foot-at-the-Battle-of-Ramillies-by-Richard-Simkin
16th Foot at the Battle of Ramillies (1706) by Richard Simkin

Walking the battlefields of the War of the Spanish Succession, 1701–1714

Origins: Dynastic crisis and the balance of power

The War of the Spanish Succession emerged from one of the most consequential succession crises in European history. The death of the childless Spanish king Charles II in 1700 triggered a struggle over the inheritance of the vast Spanish Empire, which extended across Europe and the Americas.

At stake was not simply who would wear the Spanish crown, but whether the Bourbon monarchy of France could unite the resources of both kingdoms under a single dynasty. Such an outcome threatened to overturn the European balance of power.

In response, a Grand Alliance formed—led by Britain, the Dutch Republic, and the Holy Roman Empire—to resist French expansion and prevent strategic domination of Western Europe.

Western Europe: The Decisive Theatre

The war’s decisive campaigning unfolded in the Low Countries, where French forces confronted Allied armies under commanders such as the Duke of Marlborough and Prince Eugene of Savoy.

At Ramillies, Marlborough exploited terrain and timing to unhinge the French line. At Oudenaarde, rapid manoeuvre and aggressive engagement disrupted French deployment before it could stabilise. Malplaquet, by contrast, demonstrated the deadly resilience of prepared defensive positions, where Allied victory came at enormous cost.

Coalition Warfare

Allied armies combined British, Dutch, Austrian, and German contingents, each with differing priorities, command structures, and operational constraints. The ability of commanders such as Marlborough to coordinate these forces, to align movement, timing, and intent, was as decisive as battlefield execution.

French command, by contrast, often struggled with rigidity, slower decision cycles, and an inability to adapt once engaged.

A Global War

Although the principal campaigns took place in Europe, the conflict extended far beyond it. Fighting spread to Spain and the Mediterranean, the German states, Italy, and North America, where it formed part of Queen Anne’s War. This wider struggle reflected the increasingly global nature of European power competition in the early 18th Century.


War of the Spanish Succession – Field Notes

Short-form observations, terrain insights, and working interpretations from the field. Some posts require access.


  • 📝🔒 Field Note: Battle of Ramillies, Belgium, 23 May 1706

    📝🔒 Field Note: Battle of Ramillies, Belgium, 23 May 1706

    November 2025, Ramillies, Belgium. I am exploring the battlefield of Ramillies. Here on 23 May 1706, an Allied Army under John Churchill, the Duke of Marlborough, defeated a French army under Marshall Villeroi. The ground here is open, gently rolling country, cut by small streams and defined by long field boundaries—terrain that enables movement and…

    Read the full Field Note…..


FAQ – War of the Spanish Succession

What was the War of the Spanish Succession?

The War of the Spanish Succession (1701–1714) was a major European conflict triggered by a dispute over who would inherit the Spanish Empire after the death of Charles II. It became a wider struggle over the balance of power, with France supporting a Bourbon claimant and a Grand Alliance of Britain, the Dutch Republic, and the Holy Roman Empire opposing French expansion.

Why was the War of the Spanish Succession important?

The war reshaped the balance of power in Europe and prevented the unification of the French and Spanish crowns. It also marked the rise of Britain as a major military and financial power, and demonstrated the growing importance of coalition warfare, operational coordination, and battlefield decision-making.

Which battles defined the War of the Spanish Succession?

Key battles include Ramillies (1706), Oudenaarde (1708), and Malplaquet (1709), fought primarily in the Low Countries. These engagements highlight the interaction between terrain, timing, and command decisions, and are among the most studied battles of early 18th-century warfare.

Who were the main commanders in the war?

The most prominent Allied commanders were the Duke of Marlborough and Prince Eugene of Savoy, who coordinated multinational forces across multiple campaigns. French armies were led by commanders such as Marshal Villars and the Duke of Vendôme, whose performance varied depending on terrain, timing, and strategic context.

Where were the main campaigns fought?

The principal theatre was the Low Countries (modern Belgium), but fighting also took place in Spain, Italy, the German states, and overseas. In North America, the conflict formed part of Queen Anne’s War, reflecting the global nature of early 18th-century rivalry.


Subscribe to Battlefield Travels and receive a free E-Book Battlefield Guide

Unlock expert battlefield analysis, campaign reconstructions, and historical insights drawn from firsthand exploration and primary sources.

🗺️ You’ll receive:

🎖️ Exclusive historical insights you won’t find elsewhere

📘 A free eBook: 10 Tips for Exploring Historic Battlefields

📰 New battlefield studies straight to your inbox as they are published


Reconstructing War of the Austrian Succession battlefields through terrain analysis, primary sources and on-site research

Prussian grenadiers advance during the Battle of Hohenfriedburg. 4th June 1745, War of the Austrian Succession

Walking the battlefields of the War of the Austrian Succession 1740-1748

Origins: The Pragmatic Sanction of 1713

The War of the Austrian Succession was a major European conflict triggered by the death of Emperor Charles VI in 1740 and the contested inheritance of the Habsburg monarchy. At its heart lay the Pragmatic Sanction of 1713, a legal settlement intended to guarantee the succession of Charles’s daughter, Maria Theresa, and preserve the unity of the Habsburg lands. Although widely recognised in principle, the Pragmatic Sanction collapsed in practice once Austria appeared diplomatically isolated and militarily vulnerable.

What followed was not simply a dynastic dispute but a struggle over territory, influence, and the balance of power in Europe. France, Bavaria, Spain, and Prussia challenged Habsburg authority, while Britain and the Dutch Republic intervened to prevent French dominance. Fighting spread rapidly across Central Europe, the Low Countries, Italy, and beyond, drawing in nearly every major European power.

Central Europe: The First Silesian War

The most consequential early intervention came from Prussia, led by its young king, Frederick II. In late 1740, Frederick invaded Silesia, exploiting Austria’s weakness and initiating the First Silesian War. Battles such as Mollwitz (1741) revealed both the strengths and limitations of the Prussian army: highly disciplined infantry and effective firepower, but fragile cavalry and inexperienced command. At Chotusitz (1742), Frederick again defeated Austrian forces, forcing Maria Theresa to concede Silesia in order to fight on other fronts.

These campaigns marked Prussia’s emergence as a great power. During the Second Silesian War, Frederick refined his methods, achieving a decisive victory at Hohenfriedberg (1745) that secured Prussia’s hold over Silesia and demonstrated the growing effectiveness of Prussian operational tempo, fire discipline, and battlefield coordination.

Western Europe: battle for the Austrian Netherlands

While Austria fought for survival in Central Europe, the war’s western theatre developed into a major struggle in the Austrian Netherlands. Here, French armies confronted an Anglo-Allied coalition of British, Dutch, Austrian, and Hanoverian troops. The Battle of Fontenoy (1745) became the conflict’s most famous engagement. Despite a formidable Allied infantry advance, French forces—well-positioned and reinforced at the critical moment—halted and broke the attack. Fontenoy illustrated both the power and the limits of linear infantry tactics, and remains one of the defining battles of 18th-century warfare.

North America and India: War of Jenkins’ Ear

The conflict also formed part of a wider imperial struggle. From 1739, Britain and Spain were already fighting the War of Jenkins’ Ear, a maritime and colonial war driven by trade disputes and imperial rivalry in the Americas. When Britain and France entered the Austrian Succession conflict, these colonial hostilities merged into a broader global war, extending fighting to the Caribbean, North America, and India


War of the Austrian Succession – battle studies

Below are all current BattlefieldTravels studies for the Seven Years War, covering key battles, campaign phases and associated sites. New studies are added as further battlefields are walked and analysed.

  • ⚔️🔒Battle of Chotusitz, Bohemia,
    17 May 1742

    ⚔️🔒Battle of Chotusitz, Bohemia, 17 May 1742

    The Battle of Chotusitz (17 May 1742) was Frederick the Great’s hardest-won early victory — a chaotic, bloody battle that secured Silesia but exposed deep weaknesses in Prussian command and coordination. Frederick’s maintenance of a fresh reserve to be committed at the decisive moment was a lesson that stayed with him as a commander.

    Read the full battle study


  • ⚔️ Battle of Fontenoy, Belgium,
    11 May 1745

    ⚔️ Battle of Fontenoy, Belgium, 11 May 1745

    The Battle of Fontenoy, fought on 11 May 1745, was a major battle during the War of the Austrian Succession. A French army of ~50,000 under Marshal Maurice de Saxe against a coalition force of ~50,000 British, Dutch, Hanoverian, and Austrian troops led by the Duke of Cumberland. The result was a decisive French victory!.

    Read the full battle study


  • ⚔️ Battle of Culloden, Scotland,
    16 April 1746

    ⚔️ Battle of Culloden, Scotland, 16 April 1746

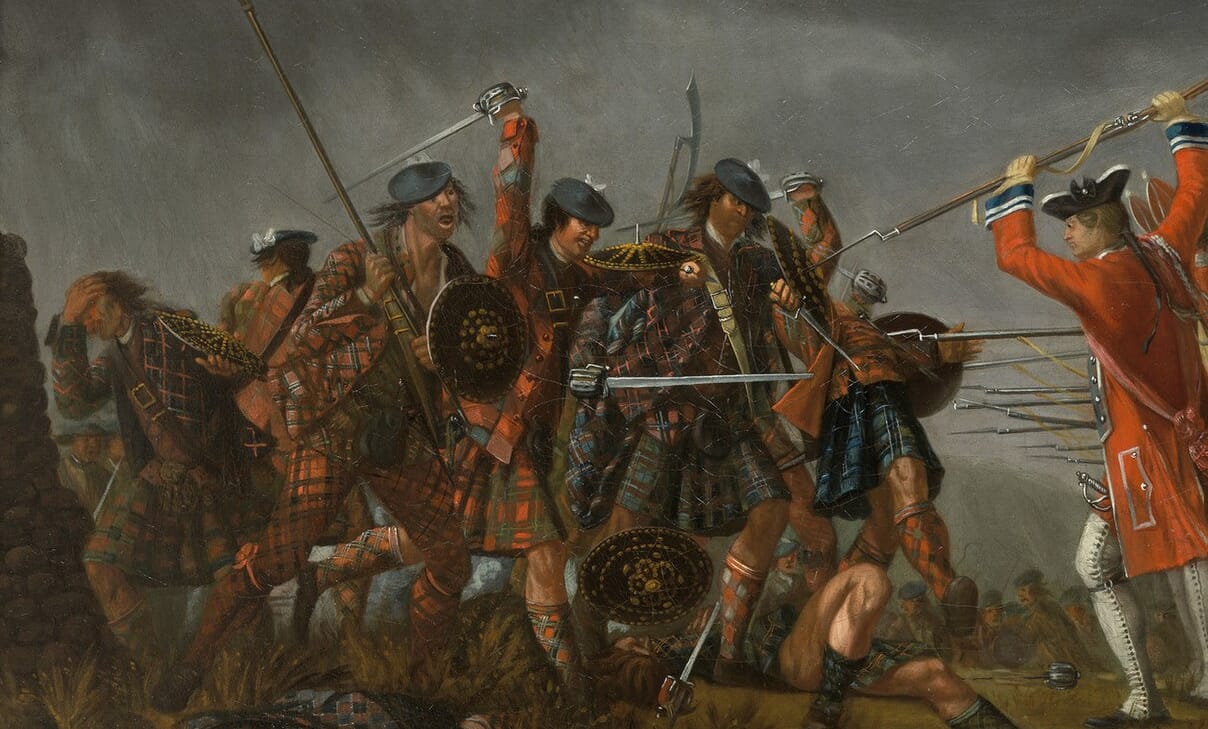
    The Battle of Culloden, fought on 16 April 1746, was the final and decisive confrontation of the Jacobite Rising of 1745. The rebellion was the last serious attempt by the Jacobites to restore the Stuart monarchy to the British throne. Led by Charles Edward Stuart ‘Bonnie Prince Charlie’, the Jacobite forces aimed to overthrow the…

    Read the full battle study


  • ⚔️ Battle of Prestonpans, Scotland,
    21 September 1745

    ⚔️ Battle of Prestonpans, Scotland, 21 September 1745

    Bonnie Prince Charlie landed at Glenfinnan, Scotland in July 1745, aiming to reclaim the British throne for his father, James Francis Edward Stuart. Gathering support from the Highland clans, he advanced towards Edinburgh, capturing the city on 17 September. British General Sir John Cope, who had been gathering government forces in response to the Jacobite…

    Read the full battle study


Tactical Innovations

Over thousands of years of warfare, armies have sought ways to gain advantage on the battlefield. Sometimes the solution was a new weapon. Sometimes it was a radical new method. Often it was a combination of both. From the disciplined ranks of the Greek phalanx to pike-and-shot warfare to the interlocking machine-gun fire plans of the twentieth century, tactical innovations have repeatedly reshaped how battles are fought.


What caused the War of the Austrian Succession?

The war was triggered by the death of Emperor Charles VI in 1740 and the challenge to his daughter Maria Theresa’s right to inherit the Habsburg lands under the Pragmatic Sanction. Several European powers accepted the settlement in theory but rejected it in practice once Austria appeared weak.

What was the Pragmatic Sanction and why did it fail?

The Pragmatic Sanction of 1713 was a legal agreement intended to ensure the indivisibility of the Habsburg territories and allow female succession. It failed because rival powers prioritised territorial gain and strategic advantage over diplomatic commitments when the opportunity arose.

Why was Frederick the Great so important in this war?

Frederick II of Prussia exploited Austria’s vulnerability by invading Silesia in 1740, triggering the Silesian Wars within the wider conflict. His victories at battles such as Mollwitz, Chotusitz, and Hohenfriedberg secured Silesia and established Prussia as a major European power.

Why is the Battle of Fontenoy so significant?

Fontenoy (1745) was the most famous battle of the war’s western theatre, where a French army defeated a powerful Anglo-Allied force in the Austrian Netherlands. It demonstrated the strengths and limits of linear infantry tactics and highlighted the decisive role of reserves, terrain, and artillery.

How is the War of the Austrian Succession connected to the War of Jenkins’ Ear?

The War of Jenkins’ Ear (1739–1748) began as a colonial and maritime conflict between Britain and Spain. When Britain and France entered the War of the Austrian Succession, these struggles merged, turning a European dynastic war into a broader global conflict.


Subscribe to Battlefield Travels and receive a free E-Book Battlefield Guide

Unlock expert battlefield analysis, campaign reconstructions, and historical insights drawn from firsthand exploration and primary sources.

🗺️ You’ll receive:

🎖️ Exclusive historical insights you won’t find elsewhere

📘 A free eBook: 10 Tips for Exploring Historic Battlefields

📰 New battlefield studies straight to your inbox as they are published


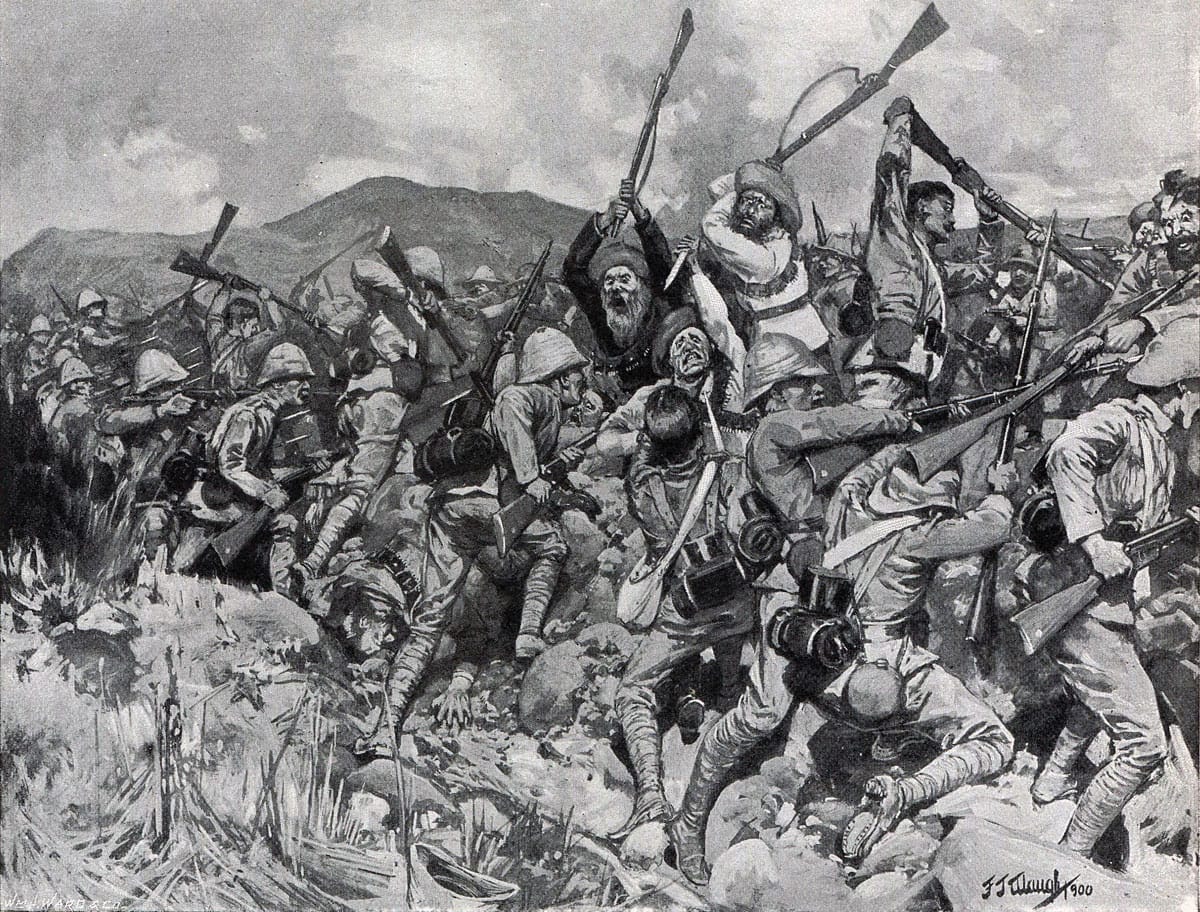
British troops repelling a Boer Assault during the Battle of Spion Kop, 24th January 1900. Art by F.J. Waugh

⚔️🔒Battle of Spion Kop, Natal,
23-24 January 1900

A bold plan and a day of disaster on the Tugela Heights! At the Battle of Spion Kop, 23-24 January 1900, a bold British night attack seized a key Boer position overlooking the Tugela River. By dawn, the British realised they had halted short of the crest and were exposed to converging Boer fire from […]

Reconstructing Anglo-Boer War battlefields through terrain analysis, primary sources and on-site research

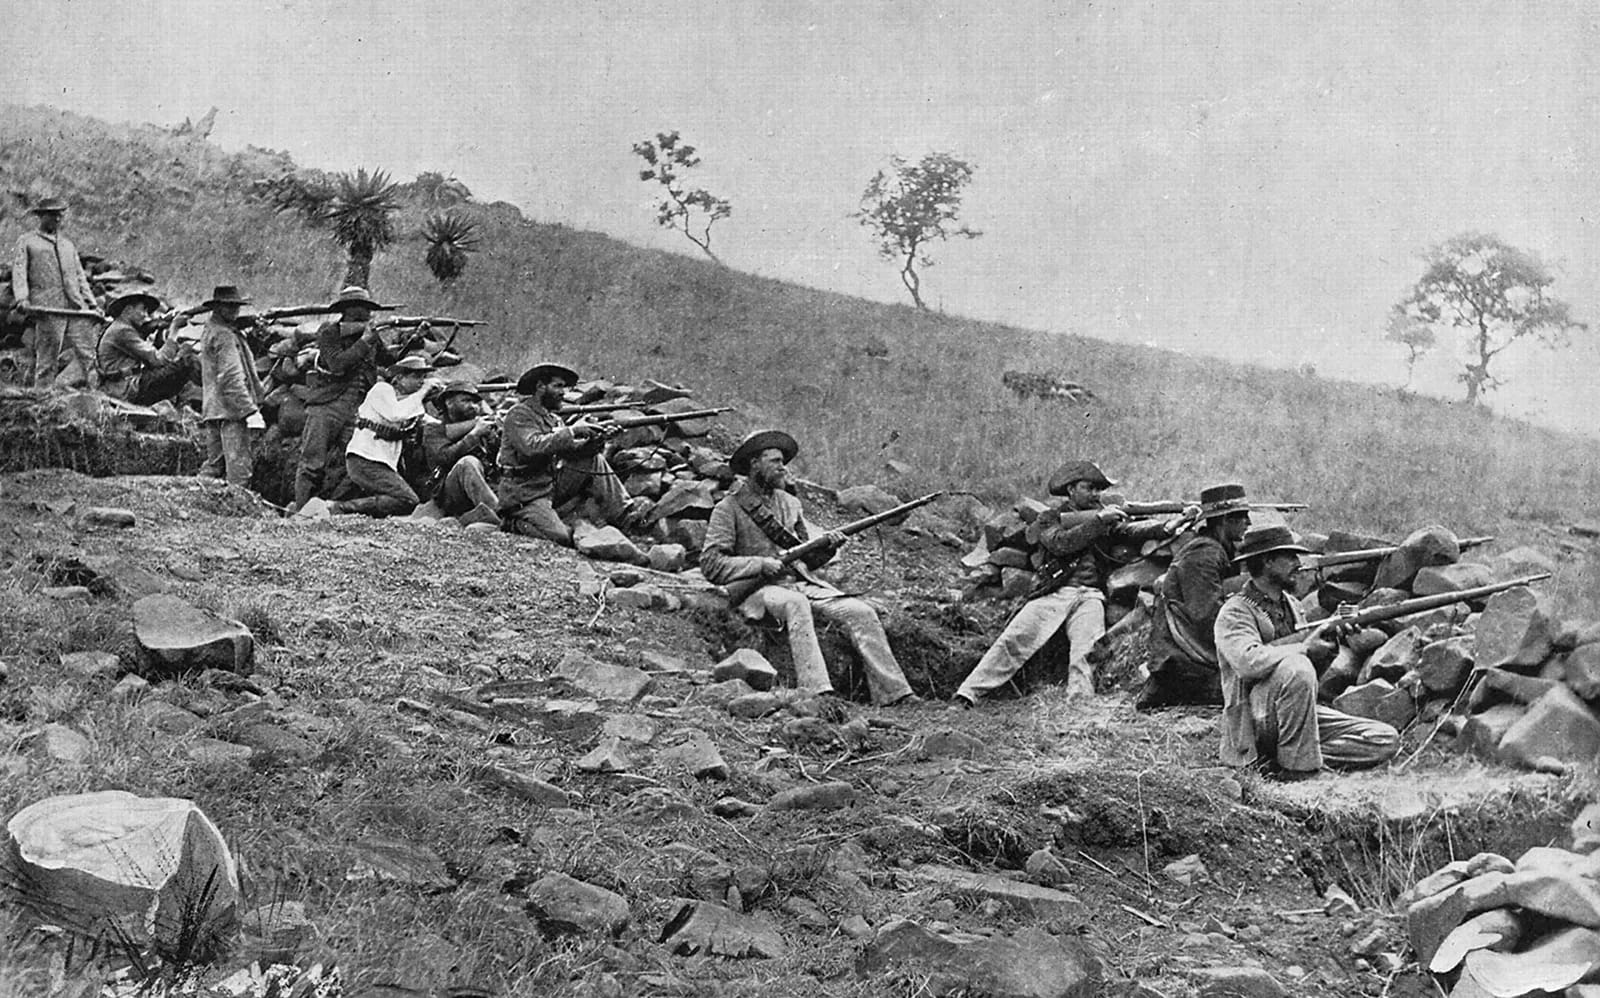
Boer defensive position, Transvaal, c1900. The Boers were tough, resourceful fighters, with a command-and-control system based on merit, trust, and mutual agreement.

Walking the battlefields of the 2nd Anglo-Boer War, 1899-1902

Origins of the conflict

The Second Boer War erupted in October 1899 after years of tension between the British Empire and the Boer republics of the Transvaal and Orange Free State. Disputes over political rights, imperial influence, and control of the region’s gold resources spiralled into a conflict fought across some of the world’s most distinctive military terrain. Over nearly three years, armies manoeuvred through the high veldt, basalt-topped kopjes, deeply cut river lines, and dominating ridgelines that shaped every operational choice and tactical fight.

How the war unfolded

The war progressed in three broad phases. In the opening months, Boer forces seized the initiative by invading the adjacent British colonies of Natal and the Cape. Boer commandos advanced on the major garrison at Ladysmith, as well as the smaller British-held towns of Mafeking and Kimberley. By mid-October 1899, all three were under siege. A series of smaller clashes characterised the early war, including the British vitory at Elandslaagte, and a Boer ambush of a British armoured train near Chieveley that resulted in the capture of young Winston Churchill. Early British attempts to break these sieges met with costly reverses at Stormberg, Magersfontein, Colenso and Spion Kop — defeats defined by the Boers’ well-sited trenches, smokeless Mauser rifle fire, and exceptional use of dead ground and concealment. With the arrival of major reinforcements and a new commander, the British launched a counter-offensive in early 1900: relieving Ladysmith, Kimberley and Mafeking, and advancing into the Boer republics. The final phase, from late 1900 to 1902, saw the war evolve into a wide-ranging guerrilla struggle, answered by British blockhouse lines, mobile columns, and scorched-earth measures that reshaped both strategy and landscape.

Studying the Boer War battlefields

For the battlefield historian, this is a war where the terrain still speaks with remarkable clarity. The Tugela River crossings preserve the obstacles that constrained British manoeuvre; the summit of Spion Kop offers an unbroken panoramic view of the fight; the Ladysmith approaches retain their tight defiles and dominating high ground; and the open veldt around Elandslaagte and Colenso still conveys the depth and exposure that shaped Boer mobility and British deployments. Each study in this collection draws on period maps, British and Boer primary accounts, contemporary photographs, modern GIS terrain analysis, and firsthand fieldwork to reconstruct how ground, firepower, and command interacted to define each engagement.

These battles mark a watershed between Victorian colonial methods and the small-unit, fire-and-movement tactics that would define the 20th century. The insights gained from walking these fields — at Colenso, Ladysmith, Spion Kop, Elandslaagte, Chieveley and beyond — help illuminate that transition. This collection aims to provide a clear, terrain-focused understanding of how the war was fought, why decisions succeeded or failed, and what the ground still reveals today.


Anglo-Boer War Battlefield Studies

In-depth battlefield analyses based on terrain, primary sources, and on-the-ground exploration.


Anglo-Boer War Field Notes

Short-form observations, terrain insights, and working interpretations from the field. Some posts require access.


Frequently asked questions

What caused the Second Boer War?

The war arose from long-standing tensions between the British Empire and the Boer republics of the Transvaal and Orange Free State. Disputes over political rights for foreign settlers, imperial influence in southern Africa, and control of gold-rich territories escalated into open conflict in 1899.

Why did the British suffer early defeats?

Early British operations underestimated the mobility, marksmanship, and defensive skill of Boer commandos. Well-sited trenches, smokeless Mauser rifles, and clever use of dead ground allowed the Boers to dominate key battles such as Stormberg, Magersfontein, Colenso and Spion Kop.

How did the war change after 1900?

Following major reinforcements and new leadership, the British relieved the besieged towns and advanced into the Boer republics. From late 1900, however, the war shifted into a guerrilla phase, prompting the British to build blockhouse lines, form mobile columns and adopt scorched-earth tactics.

What makes Boer War battlefields valuable for study today?

Many Boer War battlefields remain remarkably intact. Features such as the Tugela River crossings, the summit of Spion Kop, and the Ladysmith approaches still display the ground constraints, fields of fire, and dominant ridgelines that shaped historical decisions.

Which Boer War battlefields have been studied on Battlefield Travels?

I have personally explored the battlefields of Colenso, Ladysmith, Spion Kop, Elandslaagte, and Chieveley, with additional sites to be added as further fieldwork is undertaken.


Subscribe to Battlefield Travels and receive a free E-Book Battlefield Guide

Unlock expert battlefield analysis, campaign reconstructions, and historical insights drawn from firsthand exploration and primary sources.

🗺️ You’ll receive:

🎖️ Exclusive historical insights you won’t find elsewhere

📘 A free eBook: 10 Tips for Exploring Historic Battlefields

📰 New battlefield studies straight to your inbox as they are published


Reconstructing War of the League of Cambrai battlefields through terrain analysis, primary sources and on-site research

War of the League of Cambrai 1508-1516. Aftermath of the Battle of Marignano. Drawing by Urs Graf 1521

Walking the battlefields of the War of the League of Cambrai (1508-1616)

The War of the League of Cambrai was a major early 16th-century conflict shaped by shifting alliances among Europe’s great powers. The main participants in the war were France, the Holy Roman Empire, the Papal States, and the Republic of Venice; they were joined at various times by nearly every significant power in Western Europe, including Spain, England, the Duchy of Milan, the Republic of Florence, the Duchy of Ferrara, and the Swiss. As alliances fractured and reformed, the war expanded into a broader struggle for influence across Italy, France, the Alps and the Scottish borderlands.

This turbulent period forms the backdrop for battles such as Flodden Field (1513) — the anchor study in this collection. Although fought on the Anglo–Scottish frontier, Flodden was deeply connected to the diplomatic and military currents of the League of Cambrai and the wider Italian Wars. Henry VIII’s campaigns in France and the shifting loyalties of Scotland drew northern Britain into the storm of continental politics.

The terrain at Flodden exemplifies many of the tactical challenges of the period: steep ridges, boggy ground, limited visibility and uneven approaches that hampered the inflexible Scottish pike formations and shaped the English counterattack. Across Europe, battles of the Italian Wars similarly centred on fortified towns, river crossings, and the dynamic interplay between evolving artillery, infantry pike blocks and early gunpowder weapons.

This landing page explores these conflicts through a terrain-focused lens, showing how geography and military innovation interacted during a pivotal era in European warfare.


Battle Studies in the War of the League of Cambrai

Below are all current BattlefieldTravels studies for the Thirty Years War, covering key battles, campaign phases and associated sites. New studies are added as further battlefields are walked and analysed.

  • ⚔️ Battle of Flodden Field, Scotland,
    9 September 1513

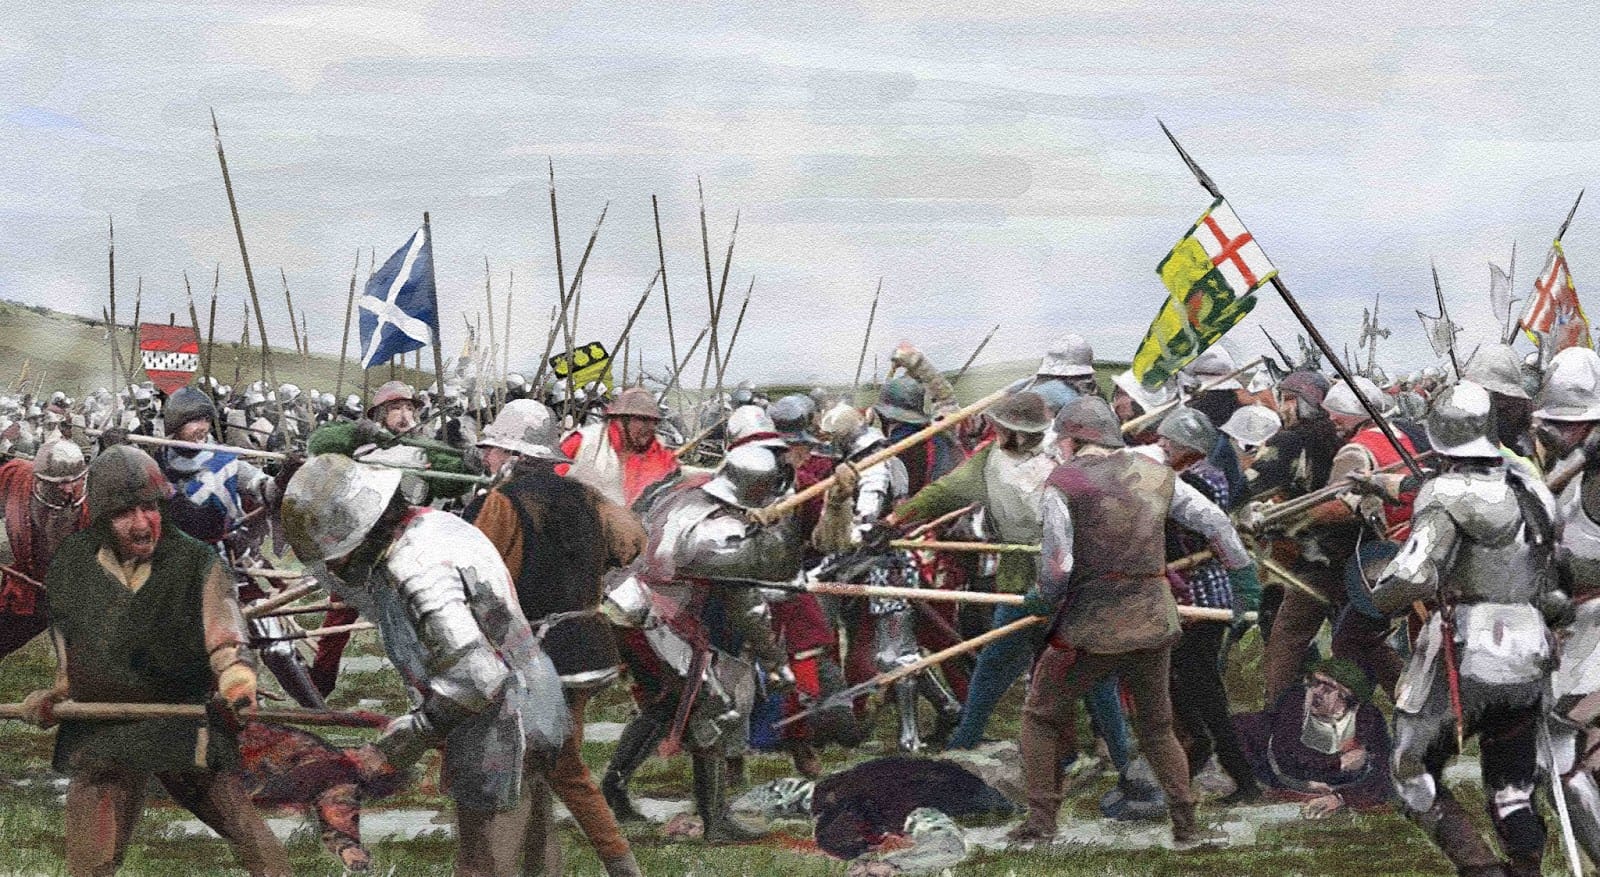
    ⚔️ Battle of Flodden Field, Scotland, 9 September 1513

    The Battle of Flodden Field, fought on 9 September 1513, was a major engagement between the Kingdom of England and the Kingdom of Scotland, and one of the bloodiest battles in British history. The engagement was part of the larger War of the League of Cambrai, which involved several European powers, including France, England, and…

    Read the full battle study


Tactical Innovations

Over thousands of years of warfare, armies have sought ways to gain advantage on the battlefield. Sometimes the solution was a new weapon. Sometimes it was a radical new method. Often it was a combination of both. From the disciplined ranks of the Greek phalanx to pike-and-shot warfare to the interlocking machine-gun fire plans of the twentieth century, tactical innovations have repeatedly reshaped how battles are fought.


  • 💡 Tactical Innovations: Pike and Shot Warfare

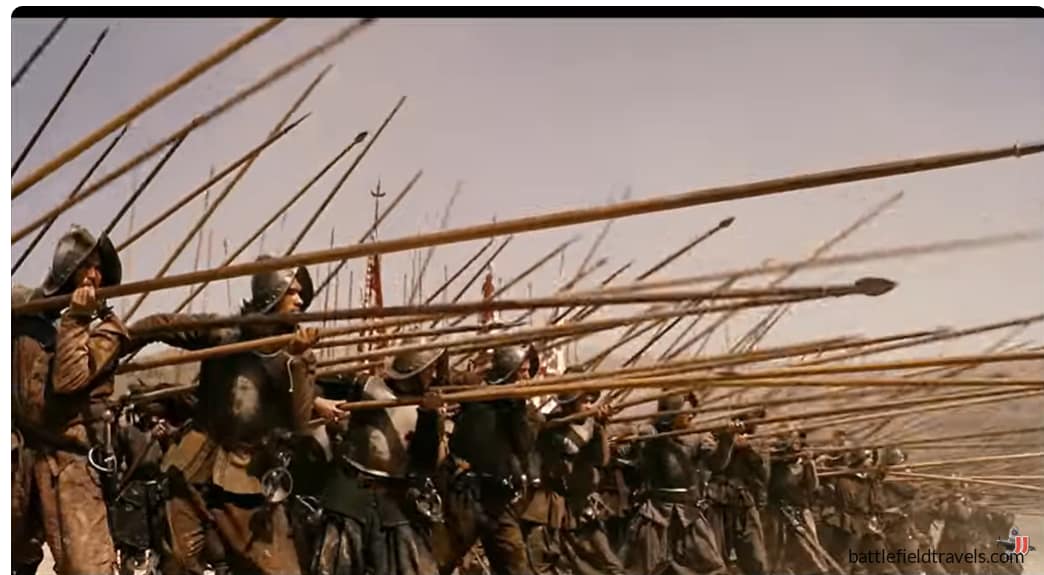
    💡 Tactical Innovations: Pike and Shot Warfare

    The widespread adoption of firearms by European armies created a new tactical dilemma. The previously invulnerable pike formations were now extremely vulnerable to gunpowder weapons, while the musketeers remained vulnerable to enemy cavalry. What was needed was a combined-arms system in which the relative advantages of the musket, pike, cavalry, and artillery could cover each…

    Read the full Field Note….


What was the League of Cambrai?

A shifting alliance originally formed to weaken Venice, involving France, the Papacy and the Holy Roman Empire, later sparking wider conflicts.

Why is Flodden Field part of this period?

The battle occurred during Henry VIII’s involvement in the Italian Wars and reflects the broader political instability of the League era.

Was the Scottish King James IV killed during this battle?

Yes, King James IV and much of the Scottish nobility were killed during the battle, leaving Scotland in turmoil for decades.

Will more early 16th-century studies be added?

Possibly. Future articles may cover Italian War battles visited on future European research trips.


Subscribe to Battlefield Travels and receive a free E-Book Battlefield Guide

Unlock expert battlefield analysis, campaign reconstructions, and historical insights drawn from firsthand exploration and primary sources.

🗺️ You’ll receive:

🎖️ Exclusive historical insights you won’t find elsewhere

📘 A free eBook: 10 Tips for Exploring Historic Battlefields

📰 New battlefield studies straight to your inbox as they are published


Reconstructing Anglo-Dutch Wars battlefields through terrain analysis, primary sources and on-site research

2nd Anglo-Dutch War. Four Days Battle, 11 to 14 June 1666, by Abraham Storck

Exploring the battlefields of the Anglo-Dutch Wars (1652-1674)

The Anglo–Dutch Wars were a series of naval and colonial conflicts fought for control of sea lanes, trade routes and maritime influence during the 17th century. These wars unfolded across the English Channel, the North Sea, the Caribbean and the global trading posts of two expanding naval powers. The landscapes (and seascapes) of these battles ranged from narrow coastal approaches to wide ocean expanses, shaping the tactical possibilities available to both fleets.

The wars were driven by commercial rivalry between England and the Dutch Republic — two nations whose economies relied on shipping, merchant fleets and global trade. Naval innovation accelerated rapidly during this period: line-of-battle tactics matured, artillery integration improved, and purpose-built warships became central instruments of national power.

The Battle of Carlisle Bay (1665) anchors this collection, representing the wider Caribbean theatre of the First Anglo–Dutch War. Colonial ports like Barbados, Antigua and Curaçao became strategic prizes in a struggle where wind, tide, anchorage depth and coastal geography played as decisive a role as gunnery or seamanship. Colonial convoys, privateers and local militias further shaped the operational picture, adding complexity to an already global conflict.

This collection examines these engagements through the lens of terrain — or in this case, maritime geography — showing how harbours, reefs, currents and prevailing winds dictated the course of naval operations. Future studies may expand to include coastal battles in Europe and other pivotal encounters across the Caribbean and Atlantic.


Battle Studies in the Anglo-Dutch Wars

Below are all current BattlefieldTravels studies for the Anglo-Dutch Wars, covering key battles, campaign phases and associated sites. New studies are added as further battlefields are walked and analysed.

  • ⚔️ Battle of Carlisle Bay, Barbados,
    30 April 1665

    ⚔️ Battle of Carlisle Bay, Barbados, 30 April 1665

    The Battle of Carlisle Bay, on 29 April 1665, was a clash between a Dutch naval fleet led by Michiel de Ruyter and the British coastal defenses around Bridgetown Barbados. The battle was one of the opening clashes of the Second Anglo-Dutch War, as these two powerful maritime states sought to dominate trade routes. Although…

    Read the full battle study


Tactical Innovations

Over thousands of years of warfare, armies have sought ways to gain advantage on the battlefield. Sometimes the solution was a new weapon. Sometimes it was a radical new method. Often it was a combination of both. From the disciplined ranks of the Greek phalanx to pike-and-shot warfare to the interlocking machine-gun fire plans of the twentieth century, tactical innovations have repeatedly reshaped how battles are fought.


  • 💡 Tactical Innovations: Pike and Shot Warfare

    💡 Tactical Innovations: Pike and Shot Warfare

    The widespread adoption of firearms by European armies created a new tactical dilemma. The previously invulnerable pike formations were now extremely vulnerable to gunpowder weapons, while the musketeers remained vulnerable to enemy cavalry. What was needed was a combined-arms system in which the relative advantages of the musket, pike, cavalry, and artillery could cover each…

    Read the full Field Note….


What caused the Anglo–Dutch Wars?

Commercial rivalry, maritime competition and competing visions of global trade dominance drove the conflicts.

Why is Carlisle Bay included?

Carlisle Bay is the only Anglo-Dutch War battlefield I have visited so far, because it was a battle between shore batteries and a Dutch fleet. It’s a representative colonial battle from the First Anglo–Dutch War and highlights the importance of harbour and coastal geography.

Will more studies be added?

Possible future studies may include North Sea or Channel actions, depending on travel and research opportunities.


Subscribe to Battlefield Travels and receive a free E-Book Battlefield Guide

Unlock expert battlefield analysis, campaign reconstructions, and historical insights drawn from firsthand exploration and primary sources.

🗺️ You’ll receive:

🎖️ Exclusive historical insights you won’t find elsewhere

📘 A free eBook: 10 Tips for Exploring Historic Battlefields

📰 New battlefield studies straight to your inbox as they are published


Reconstructing Thirty Years War battlefields through terrain analysis, primary sources and on-site research

Thirty Years War, 1618-1648. Armies on the march in Italy

Walking the battlefields of the Thirty Years War (1618-1648)

The Thirty Years War was one of the most destructive conflicts in European history, fought across the fragmented political and religious landscape of the Holy Roman Empire. From the rolling plains of Bohemia to the wooded hills of Saxony and the fortified towns of the Rhineland, each theatre imposed its own demands on the armies that marched through it. The war evolved from a local Bohemian revolt into a vast continental struggle involving Imperial, Spanish, Swedish, French, Dutch and numerous German princely armies.

Early campaigns such as the Battle of White Mountain revealed the importance of dominating high ground, road networks and approaches to fortified cities. As the conflict widened, Swedish reforms under Gustavus Adolphus brought new emphasis on mobile firepower, coordinated infantry–cavalry action and efficient battlefield deployment — innovations tested on landscapes like the fields of Breitenfeld and the fog-shrouded approaches to Lützen.

Fortified cities, river crossings and key road junctions became strategic prizes in a war where supply demands and a devastated countryside constrained movement. Armies often manoeuvred for weeks to force or avoid battle. When engagements did occur, they were shaped by hedgerows, marshes, villages and subtle contours that still remain visible on the ground today.

The Battle of Rocroi (1643) — the anchor study for this collection — marked a turning point late in the conflict. Fought at the edges of the war’s timeline, Rocroi exemplified the maturing of early modern line tactics, the resilience of tercios under pressure, and the decisive impact of disciplined cavalry action on open rolling terrain.

This battlefield collection explores how terrain, logistics, fortifications and early modern doctrine interacted across three decades of conflict — revealing how the landscape shaped some of Europe’s most consequential battles.


Battle Studies in the Thirty Years War

Below are all current BattlefieldTravels studies for the Thirty Years War, covering key battles, campaign phases and associated sites. New studies are added as further battlefields are walked and analysed.

  • ⚔️ Battle of Rocroi, France,
    19 May 1643

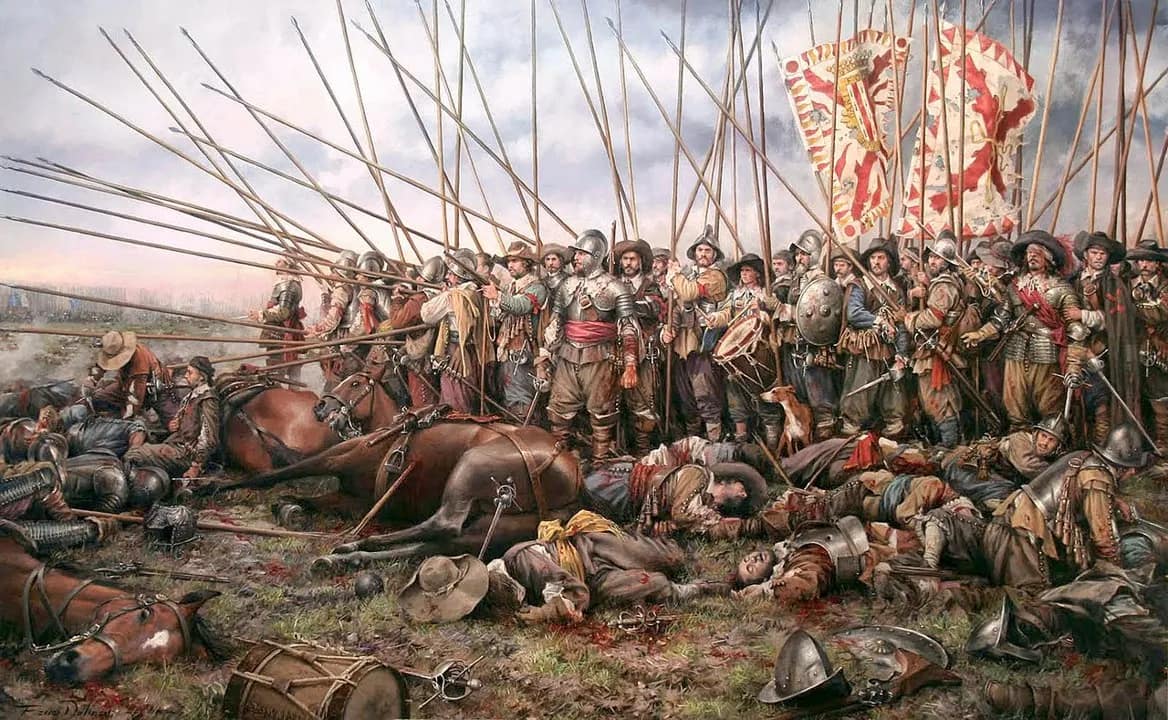
    ⚔️ Battle of Rocroi, France, 19 May 1643

    Next stop in our battlefield explorations was the incredible 16th-Century bastion fortress of Rocroi. Here, in May 1643, two of the superpowers of the 17th century – Spain and France – clashed in the plain south of the fortress. The battle marked the end of the dominance of the Spanish ‘Tercio’ tactics that had dominated…

    Read the full battle study


Tactical Innovations

Over thousands of years of warfare, armies have sought ways to gain advantage on the battlefield. Sometimes the solution was a new weapon. Sometimes it was a radical new method. Often it was a combination of both. From the disciplined ranks of the Greek phalanx to pike-and-shot warfare to the interlocking machine-gun fire plans of the twentieth century, tactical innovations have repeatedly reshaped how battles are fought.


  • 💡 Tactical Innovations: Pike and Shot Warfare

    💡 Tactical Innovations: Pike and Shot Warfare

    The widespread adoption of firearms by European armies created a new tactical dilemma. The previously invulnerable pike formations were now extremely vulnerable to gunpowder weapons, while the musketeers remained vulnerable to enemy cavalry. What was needed was a combined-arms system in which the relative advantages of the musket, pike, cavalry, and artillery could cover each…

    Read the full Field Note….


Why was terrain so important in the Thirty Years War?

Armies were limited by supply lines and road networks, and battles often hinged on control of villages, hills, marshes and river crossings.

Why begin with Rocroi?

Rocroi is a major battle from the war’s final phase and demonstrates mature early modern tactics and terrain-driven manoeuvre.

Will more Thirty Years War studies be added?

Yes. Future studies may include Lützen, Breitenfeld, Nördlingen and White Mountain.


Subscribe to Battlefield Travels and receive a free E-Book Battlefield Guide

Unlock expert battlefield analysis, campaign reconstructions, and historical insights drawn from firsthand exploration and primary sources.

🗺️ You’ll receive:

🎖️ Exclusive historical insights you won’t find elsewhere

📘 A free eBook: 10 Tips for Exploring Historic Battlefields

📰 New battlefield studies straight to your inbox as they are published