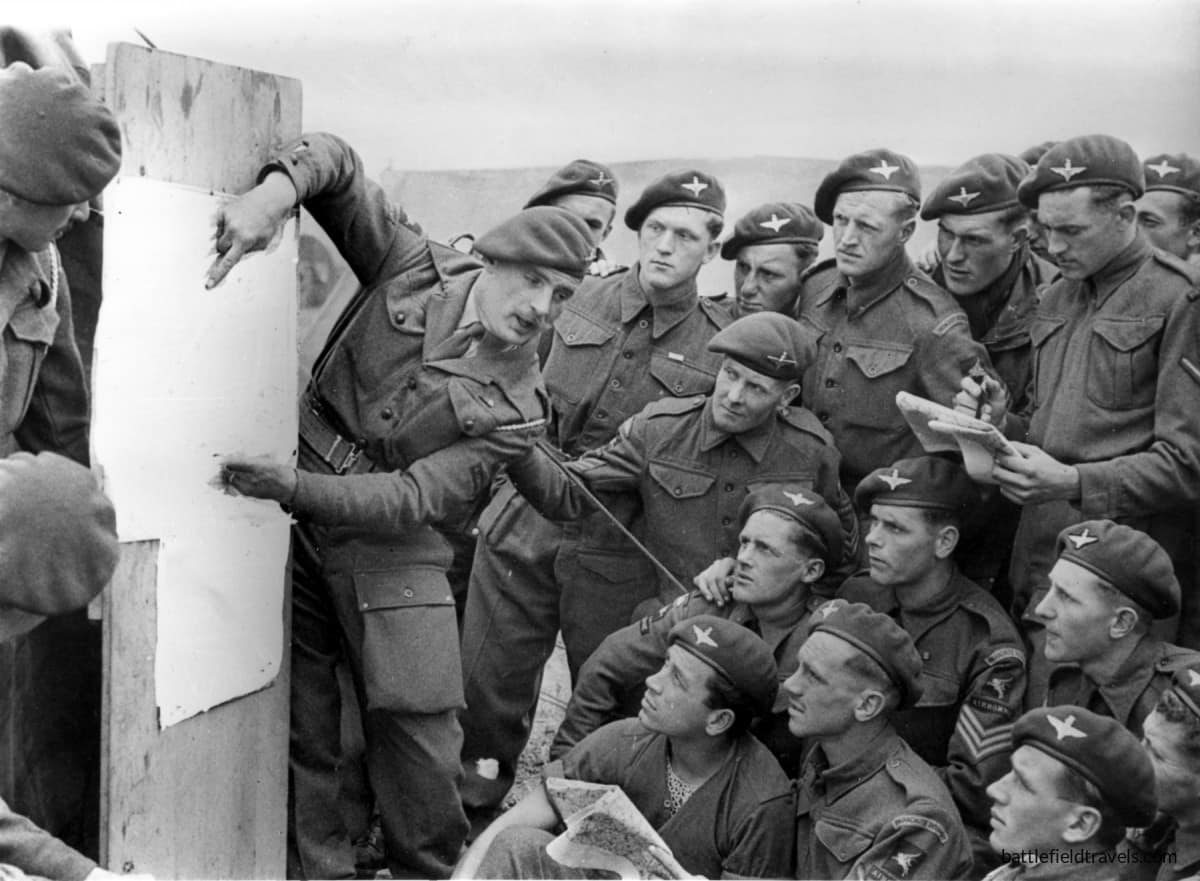
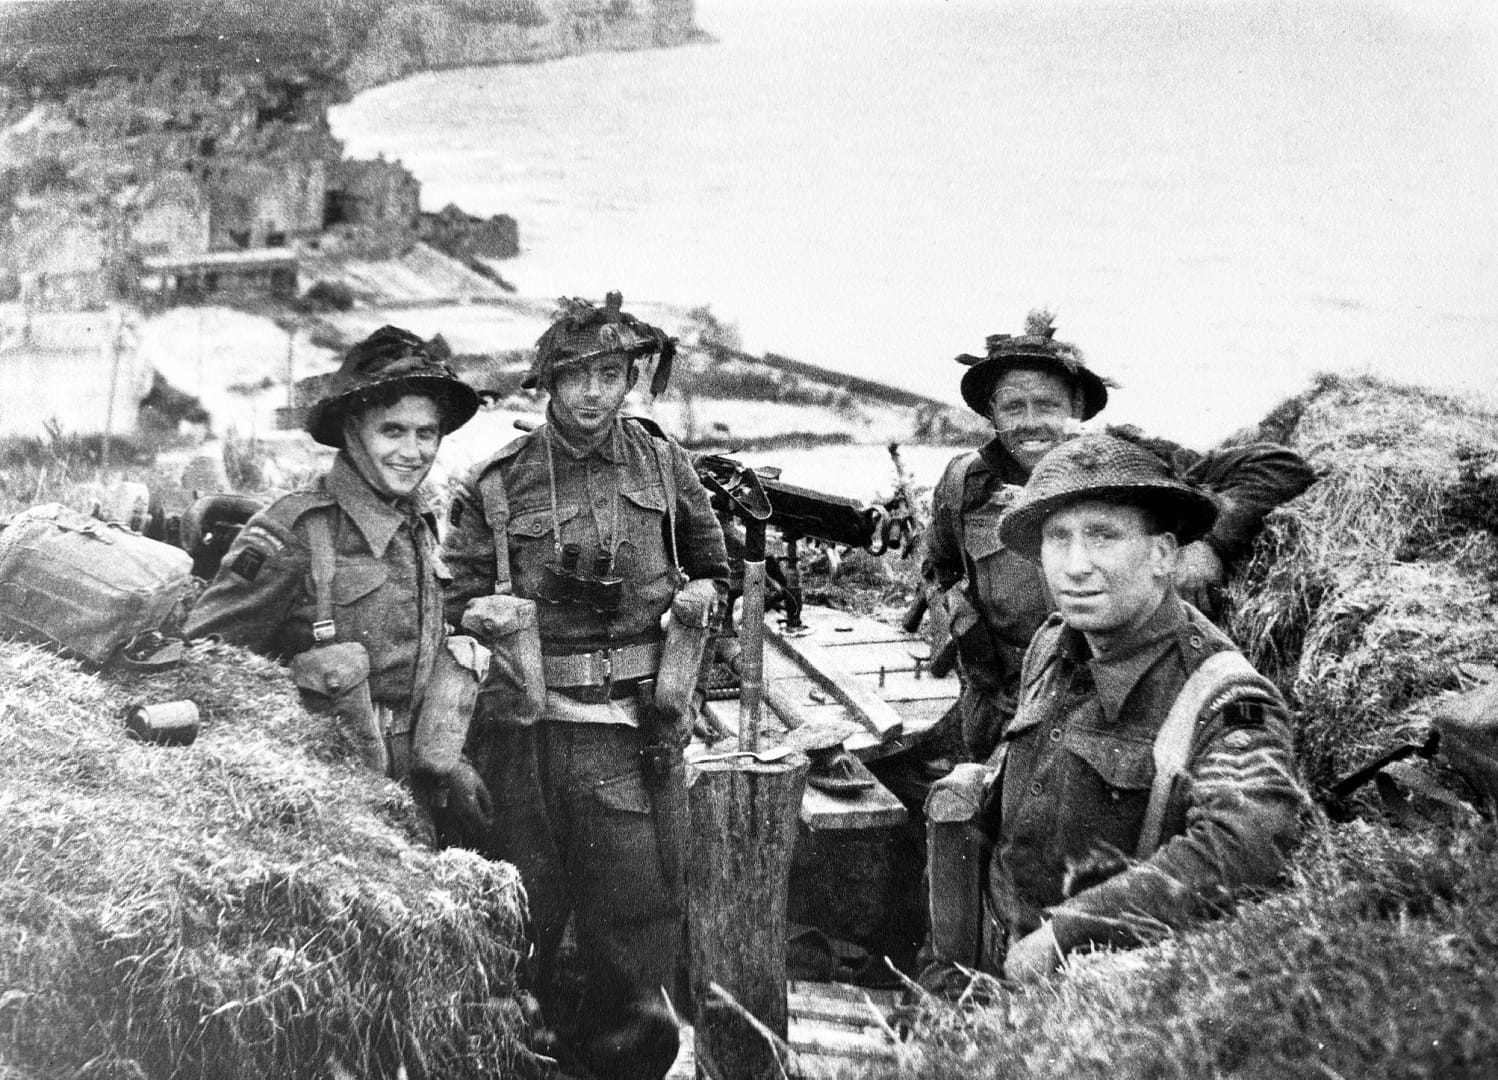
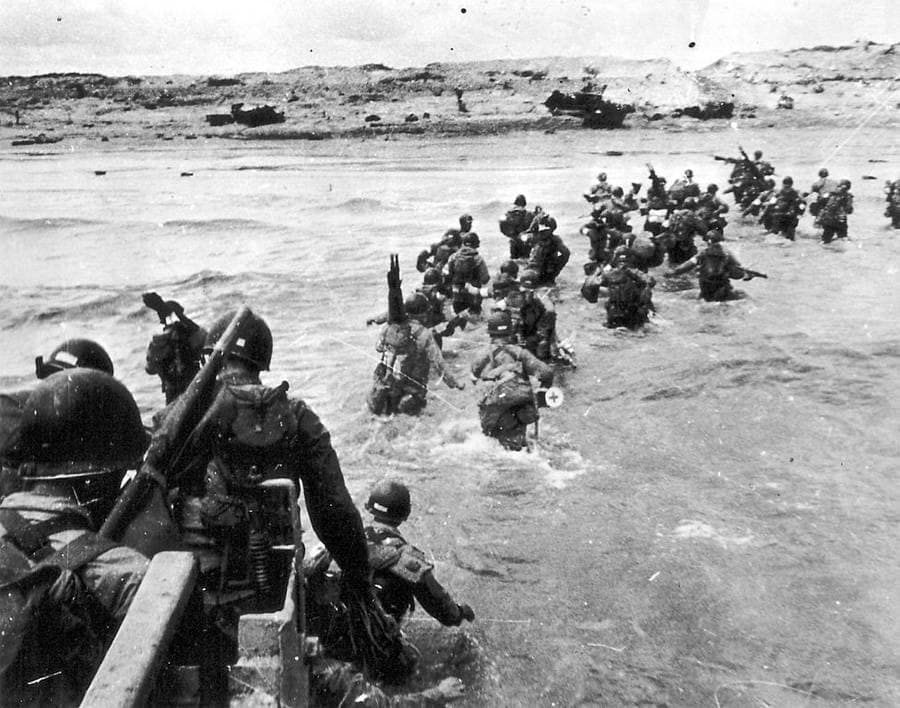
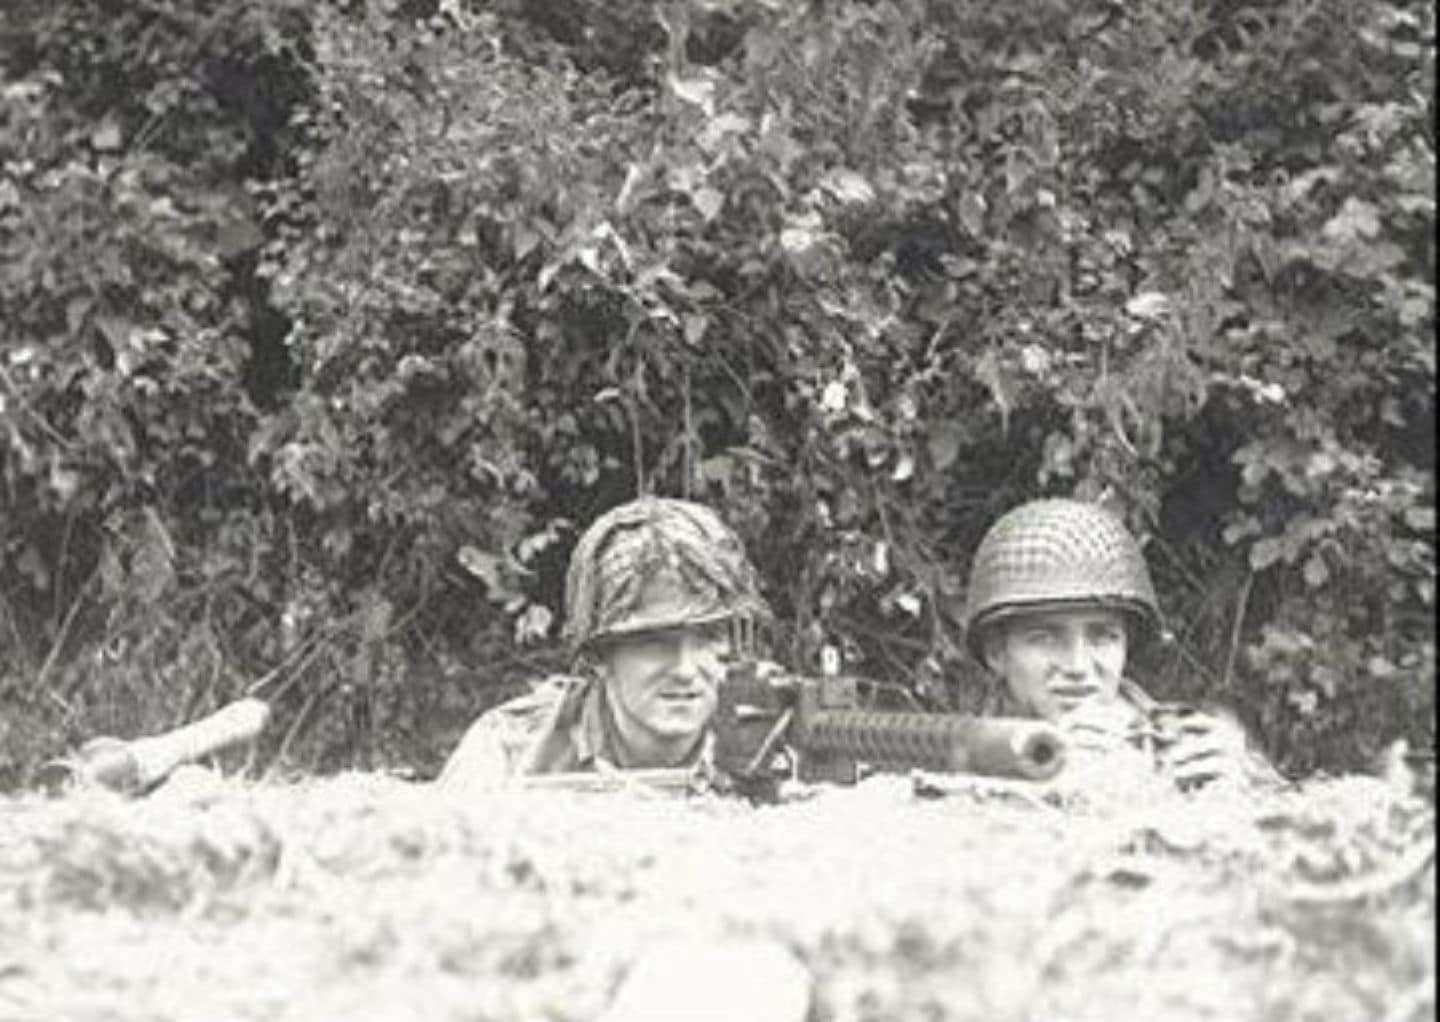
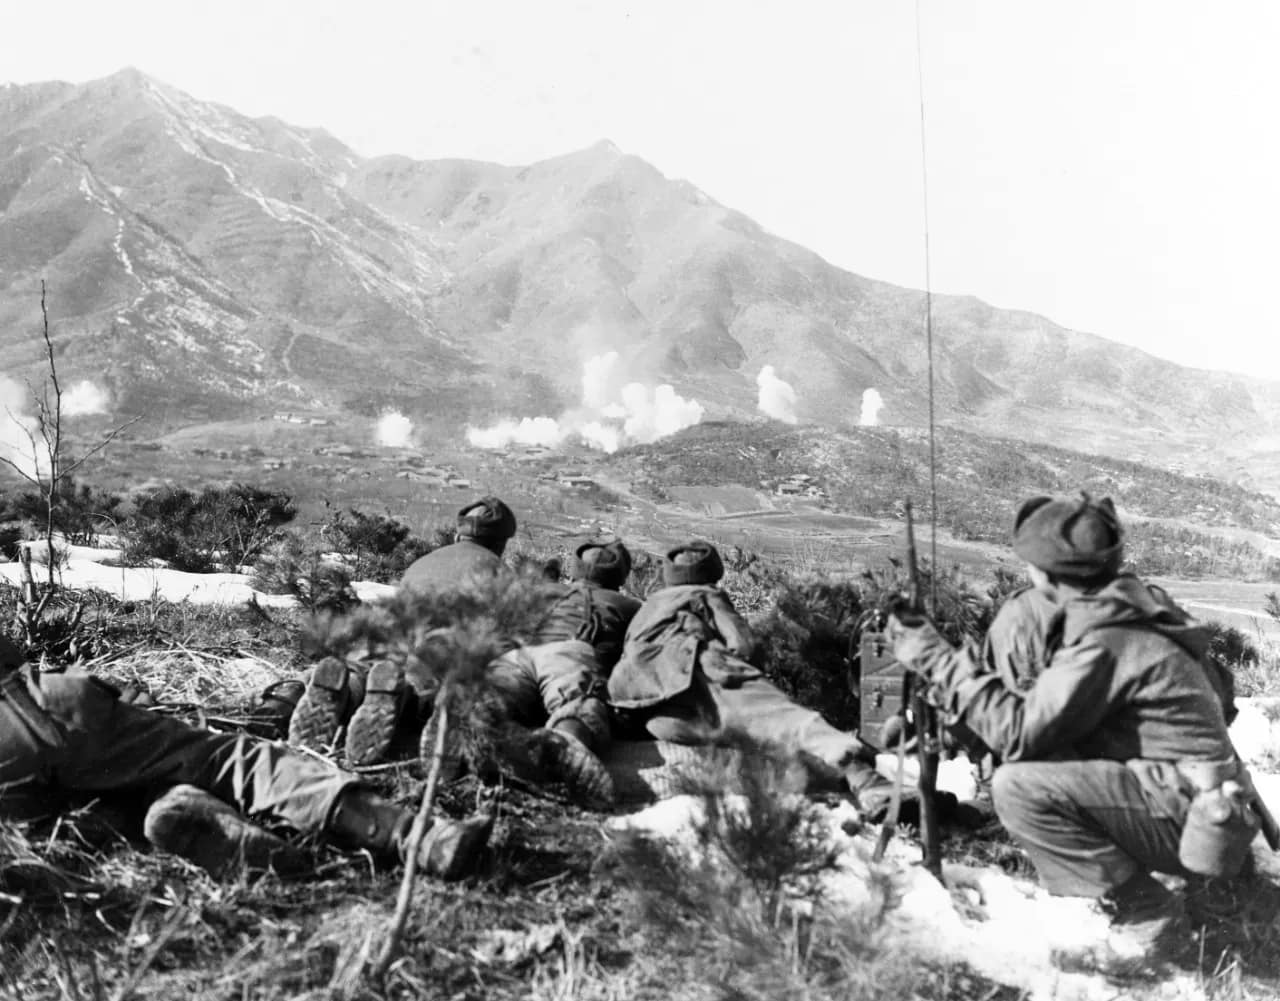
This tag brings together battles and campaigns involving the Canadian Army, showcasing its role in major 20th-century conflicts and its distinctive strengths in infantry, mountain, and coalition warfare.
Reconstructing the D-Day landings and subsequent Normandy Campaign through terrain analysis, primary sources and on-site fieldwork
🗺️ D-Day & the Normandy Landings, 6 June 1944 ⚔️ Conflict:World War Two – Western Front 🪖 Major Allied forces:US First Army; British Second Army; US 82nd and 101st Airborne Divisions; British 6th Airborne Division 🪖 Major German forces:German Seventh Army; 84th Army Corps; 716th Infantry Division, 352nd Infantry Division and 21st Panzer Division ⭐ Principal Allied commanders:Dwight D. Eisenhower; Bernard Montgomery; Omar Bradley; Miles Dempsey ⭐ Principal German commanders:Gerd von Rundstedt; Erwin Rommel; Friedrich Dollmann 🎯 Strategic objective:Establish an Allied lodgement in Normandy for the liberation of north-west Europe 📌 Outcome:Allied victory; five beachheads established and airborne flanks secured, opening the Battle of Normandy.
🧭🥾 Walking the D-Day battlefields
Some aspects of the Normandy battlefields only become apparent when you walk the ground. The enormous distance across the exposed beaches at low tide, the surprisingly shallow folds and depressions that offered troops a way off Omaha Beach, and the importance of slightly raised roads across the flooded ground behind Utah are difficult to appreciate from maps and photographs alone.
I have spent many days exploring these battlefields: walking the beaches and exits, following the flooded lowlands and causeways, tracing airborne drop zones and glider landing grounds, climbing the bluffs above Omaha, and following the hedgerows, sunken lanes and narrow roads through which troops had to move inland. I have also stood where photographers stood on D-Day and in its immediate aftermath, capturing hundreds of ‘Then and Now’ images that help relate the surviving landscape to the events of 1944.
The invasion is often presented as five beaches and two airborne landings, but on the ground these were interconnected terrain problems. Beach exits determined where troops and vehicles could move inland; bridges and causeways became key terrain; villages controlled road networks; and apparently minor fields, hedgerows and folds in the ground shaped individual actions. At Pegasus Bridge, La Fière, Brecourt Manor and Omaha Beach, small pieces of terrain assumed importance far beyond their physical size.
This campaign study brings those pieces together. It follows the landings from the first gliders at Pegasus Bridge through the airborne operations, the five assault beaches and the fighting to consolidate the lodgement, linking the wider invasion plan to the individual battlefields I have explored on the ground.
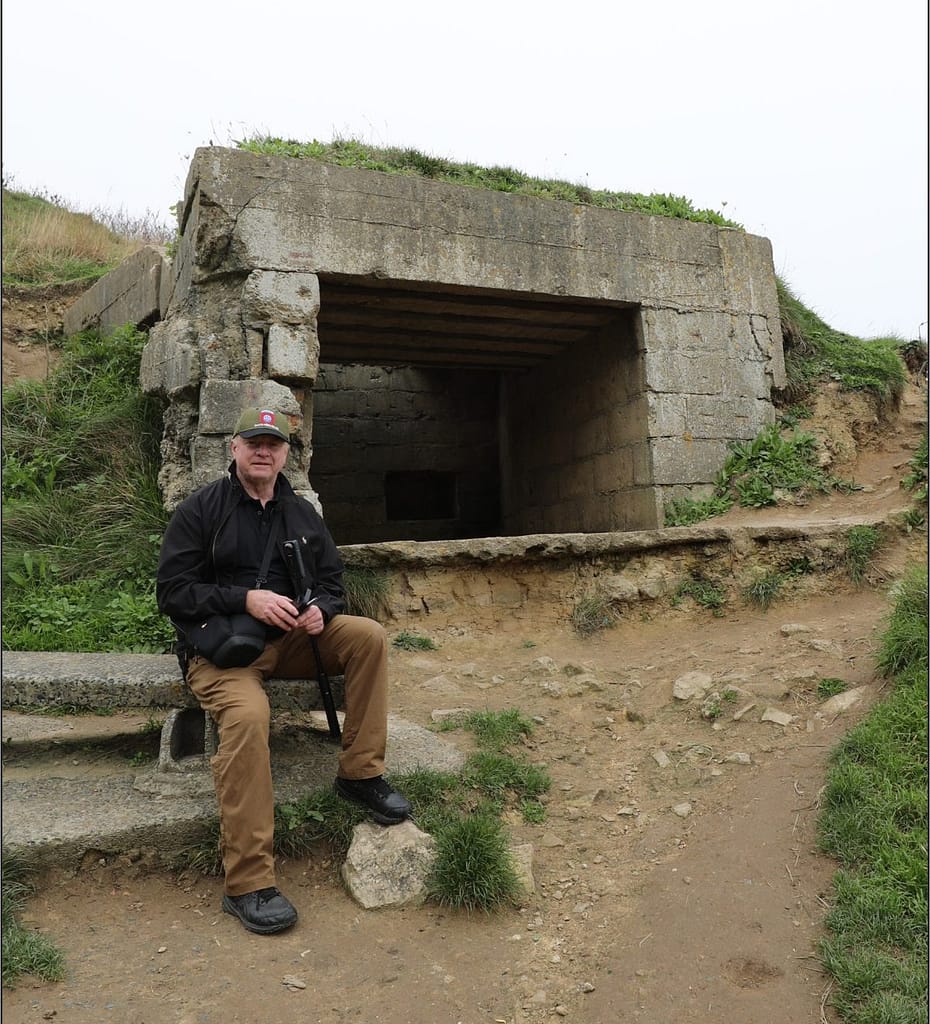
Bunker WN73, Vierville Draw, Omaha Beach
Normandy, 1944: Campaign Overview
Strategic Context: Operation Overlord
By the spring of 1944, the Western Allies had assembled the forces required to return to northwest Europe. Operation Overlord was intended to establish a secure lodgement in Normandy from which Allied armies could build up their strength, capture the ports and communications needed to sustain the campaign, and ultimately advance into Germany. Normandy offered suitable landing beaches within range of Allied air power and was less heavily defended than the Pas-de-Calais. An elaborate deception plan reinforced German expectations that the main invasion would fall farther north.
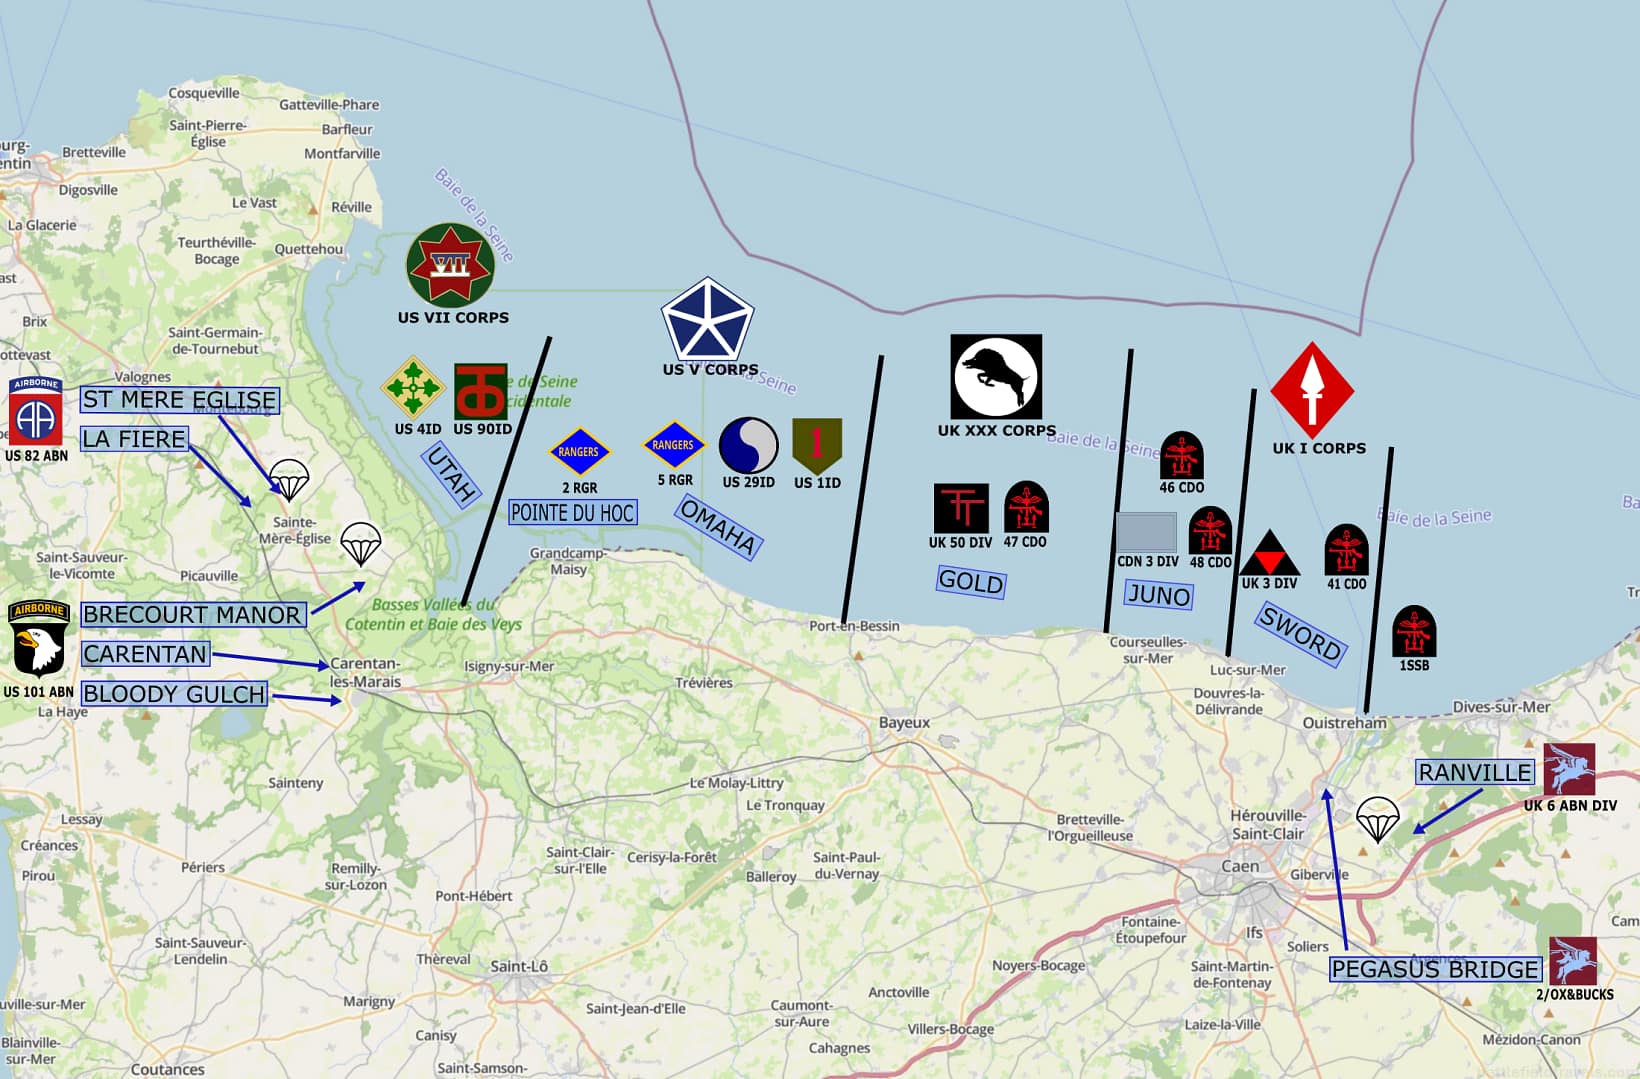
The invasion plan combined five amphibious assault beaches with airborne landings on both flanks. American forces would land at Utah Beach and Omaha Beach in the west, with the US 82nd and 101st Airborne Divisions securing the Cotentin approaches behind Utah. British and Canadian forces would land at Gold, Juno and Sword Beaches, while the British 6th Airborne Division protected the eastern flank beyond the Orne River. Naval gunfire, tactical air power and airborne operations were intended to isolate the battlefield and prevent German forces from destroying the lodgement before Allied strength could be built ashore.
Terrain was fundamental to the plan. Flooded lowlands restricted movement behind Utah; steep bluffs dominated Omaha; fortified coastal positions covered the beach exits. Rivers, canals, villages, ridgelines and the dense Norman bocage channelled movement inland. Beyond the enormous challenges of getting tens of thousands of troops and their equipment ashore, the Allies had to seize the terrain that would allow the five beachheads to survive and eventually become a single lodgement.
Normandy series of battlefield studies
This article is part of a series exploring the D-Day airborne and amphibious battlefields on 6 June 1944 and the immediate aftermath. Click on the hotlinks to open the battlefield study.
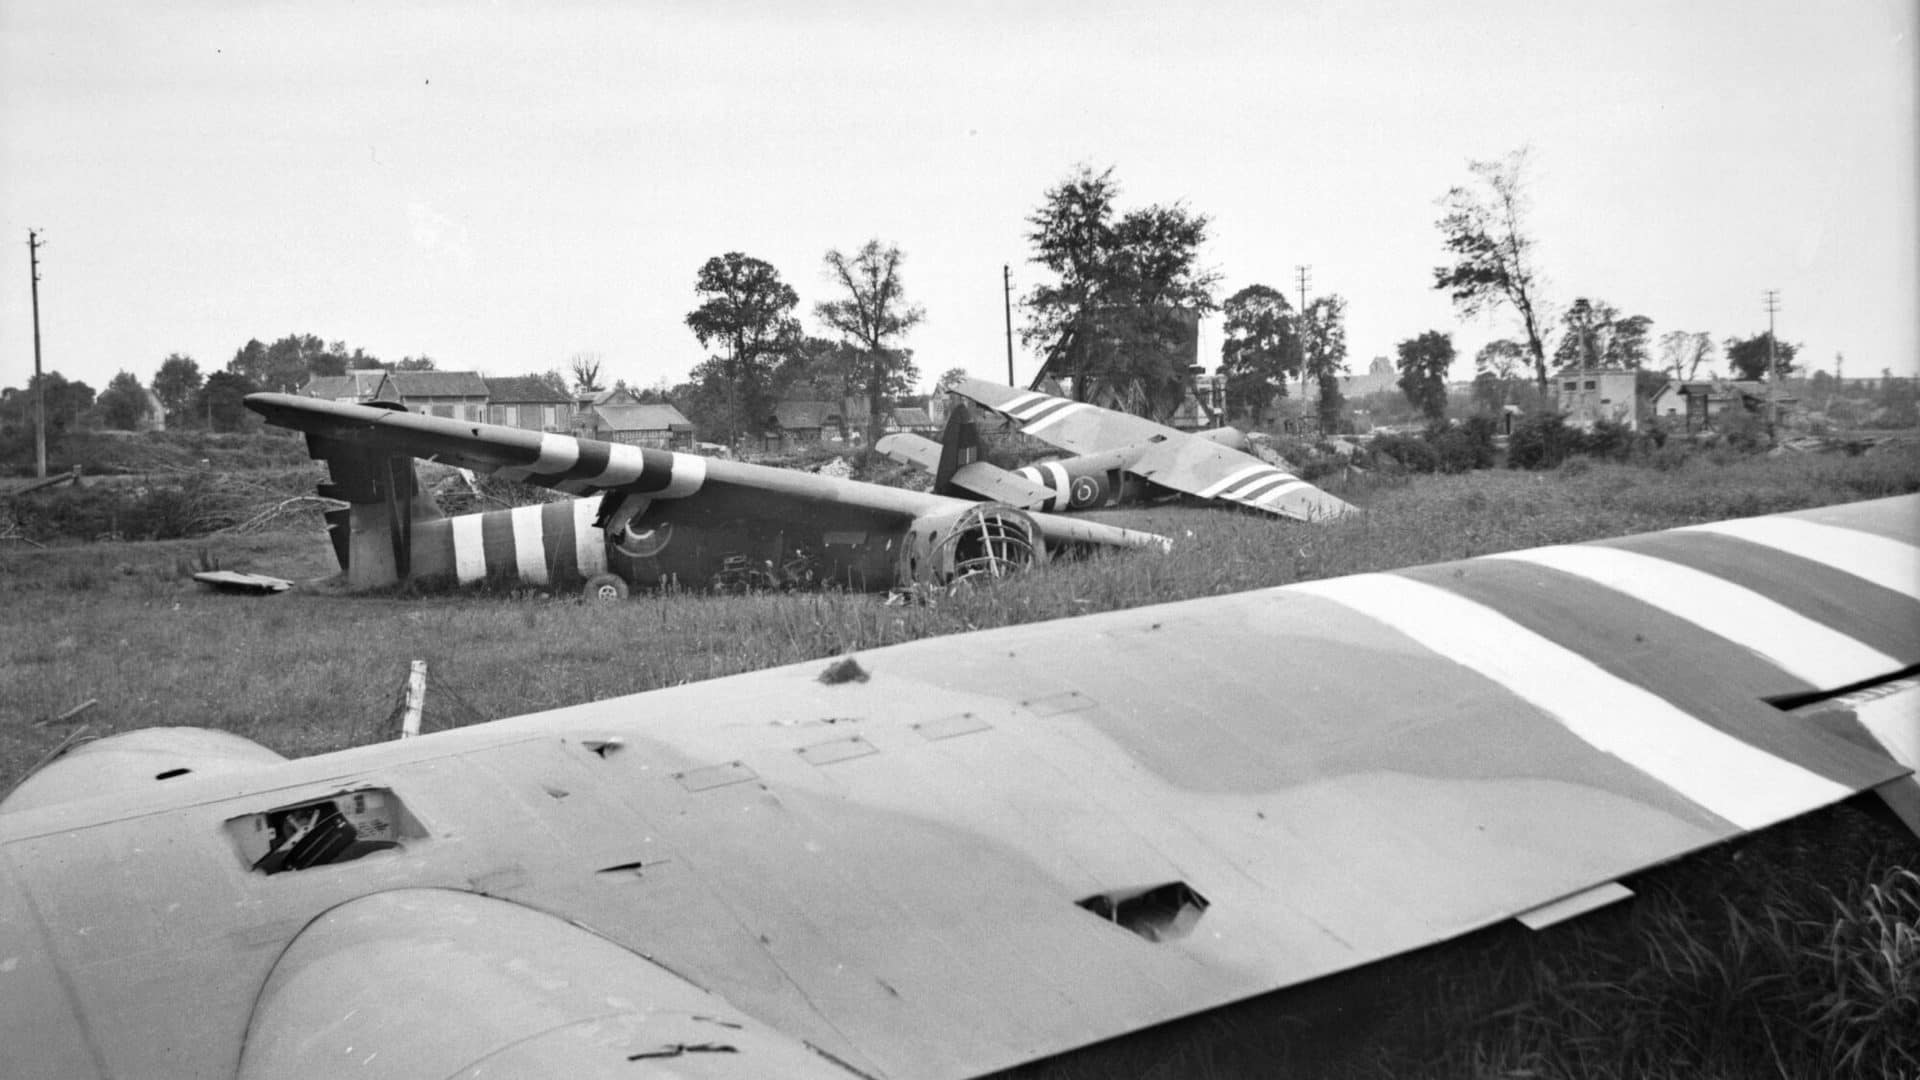
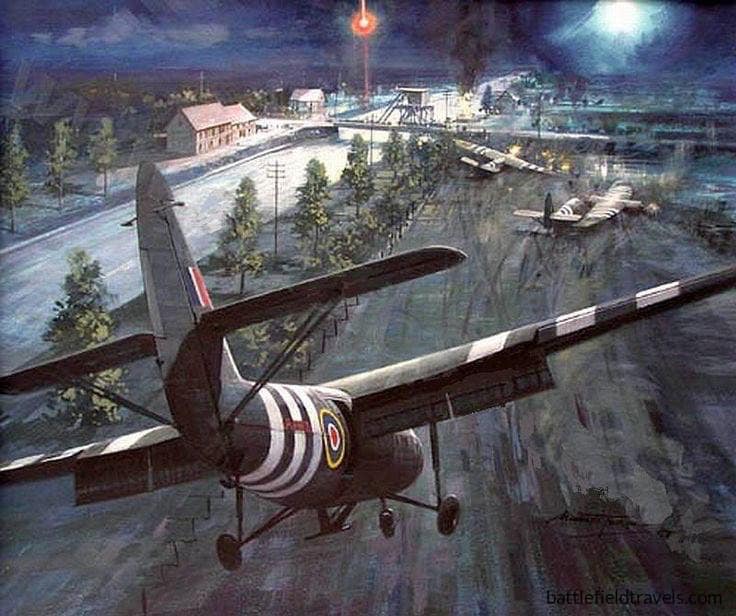
Ground combat began shortly after midnight on 6 June. At the eastern extremity of the invasion beaches, six Horsa gliders carried Major John Howard’s coup-de-main force on a silent approach to seize the two bridges spanning the Caen Canal and Orne River. Both crossings had to be captured intact. Their destruction would impede the advance from Sword Beach, while losing them to a German counterattack could expose the invasion’s eastern flank.
The Pegasus Bridge coup de main achieved extraordinary tactical surprise. Howard’s leading gliders landed within metres of the Caen Canal bridge, allowing the airborne troops to overwhelm the defenders before they could fire their demolition charges. The Orne River bridge was also secured. The problem then shifted from seizure. Howard’s small force had to hold the crossings until reinforced by the remainder of 6th Airborne Division and, eventually, heavier forces advancing inland from Sword Beach.
Pegasus Bridge, view over all Glider No. 2, Glider No. 1 and the Benouville Bridge visible in the background.
Ranville and Merville: Securing the eastern flank
East of the Orne, the remainder of the British 6th Airborne Division landed by parachute and glider across a scattered series of drop and landing zones. Its tasks included destroying bridges over the River Dives, securing the high ground around Ranville and preventing German forces east of the Orne from interfering with the invasion beaches.
One of the most difficult objectives was neutralising the German coastal battery at Merville, whose guns were believed capable of firing on Sword Beach. Lieutenant Colonel Terence Otway’s 9th Parachute Battalion attacked despite severe dispersal during the airborne drop and the loss of much of its specialist equipment. The wider 6th Airborne Division operations at Ranville and Merville established a defensive bridgehead east of the Orne that would become the Allied invasion’s exposed eastern flank.
The British airborne operation therefore accomplished more than the spectacular seizure of Pegasus Bridge. It created a barrier between the invasion beaches and German forces approaching from the east, while preserving the crossings through which the airborne bridgehead could be reinforced.
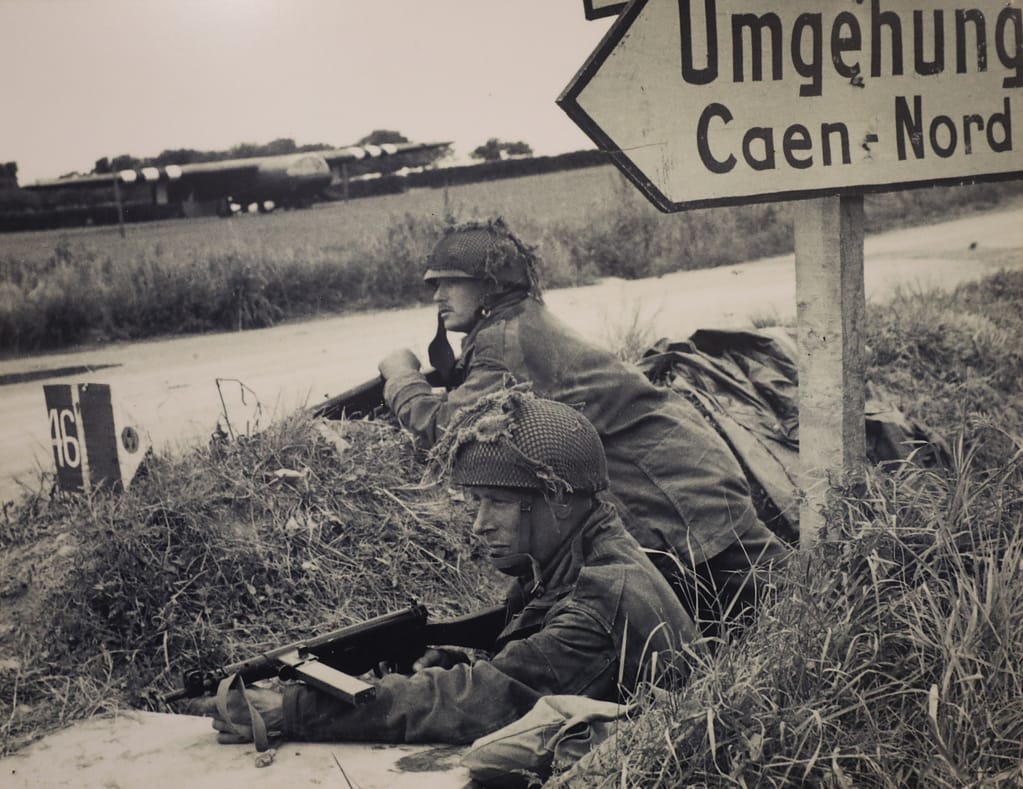
6th Airborne Division troops defending Ranville
The American airborne operations: Securing the western flank
101st Airborne Division – Mission ALBANY
At the western end of the invasion area, the US 82nd and 101st Airborne Divisions descended into a very different landscape. German forces had deliberately flooded large areas behind Utah Beach, which meant villages and a small number of raised roads and causeways acquired disproportionate tactical importance. Scattered drops fragmented many airborne units, but also placed American paratroopers across the German rear areas.
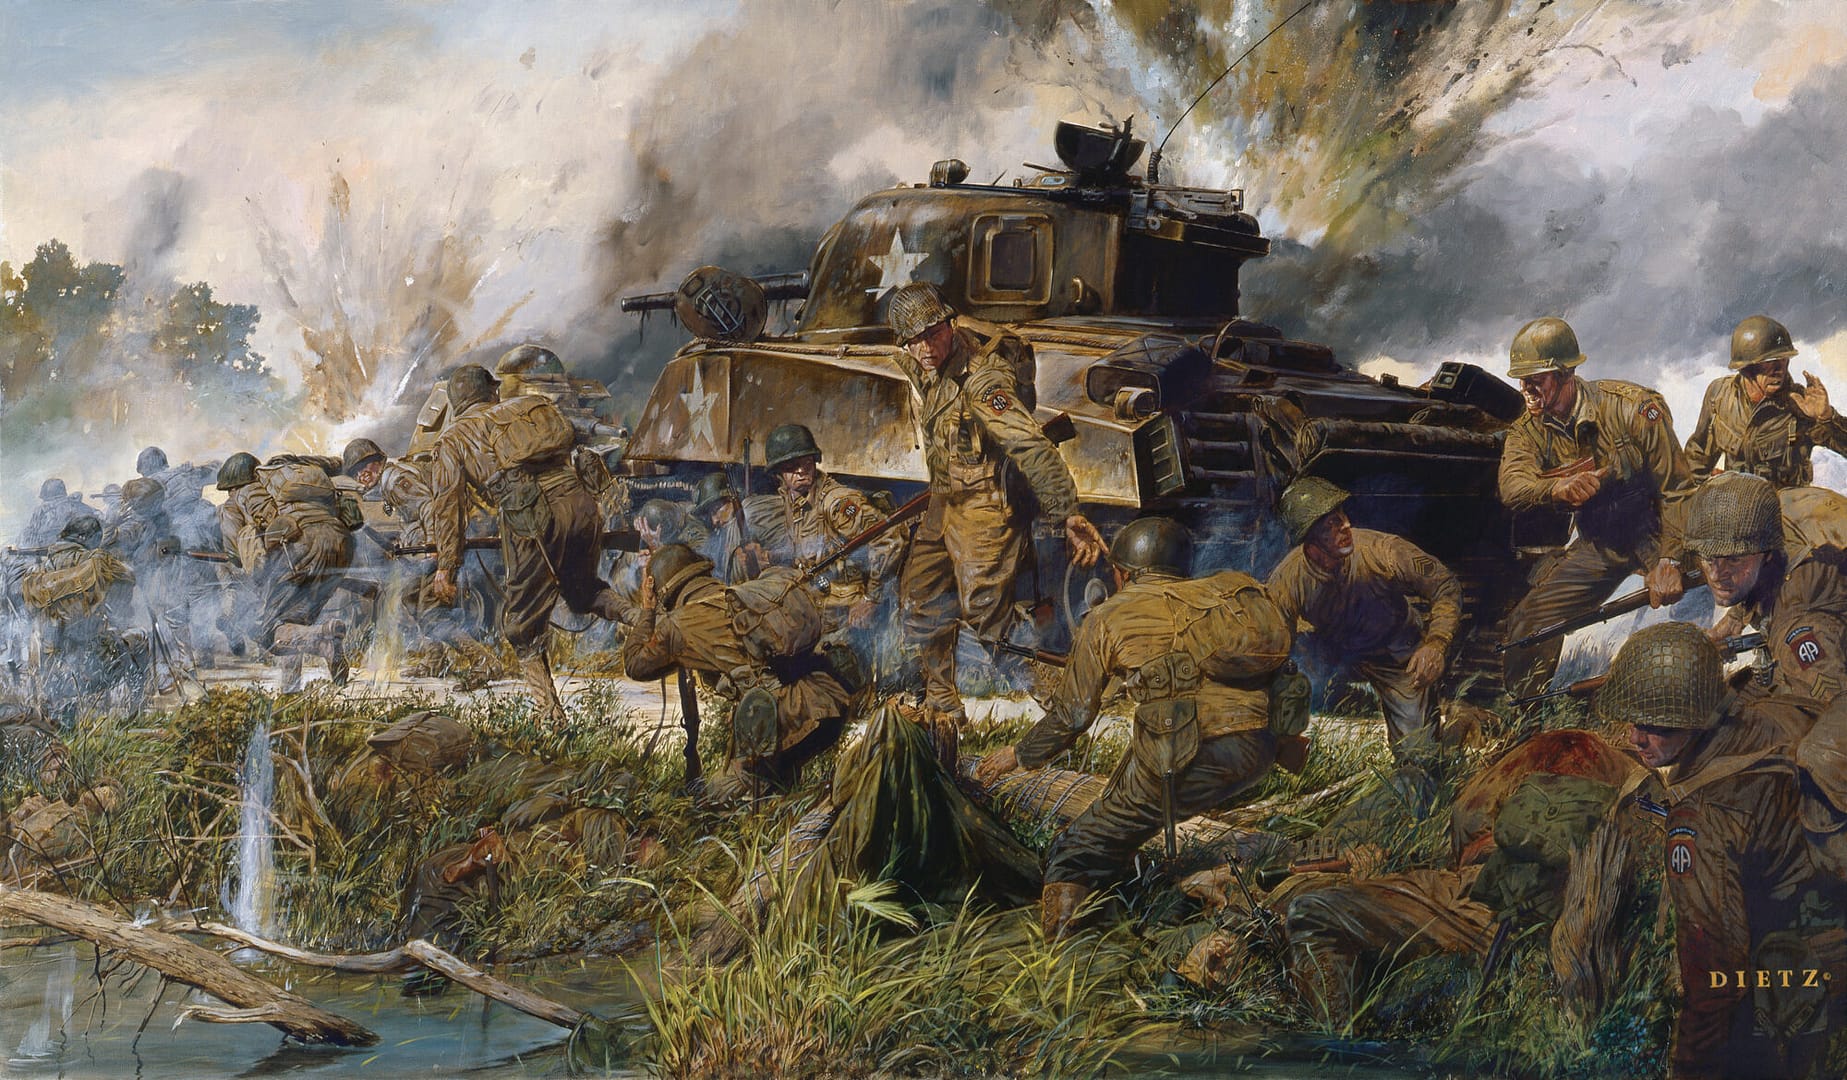
The 101st Airborne Division was tasked principally with securing the four western exits from Utah Beach and disrupting German movement toward the invasion area. Paratroopers rallied in improvised groups and fought through the villages and hedgerows behind the coast. Near Sainte-Marie-du-Mont, Lieutenant Richard Winters led a small force from Easy Company, 506th Parachute Infantry Regiment, in the assault on the German battery at Brecourt Manor, eliminating guns that could fire toward the Utah Beach exits.
The fighting behind Utah Beach also marked the beginning of Easy Company’s combat experience in Normandy. From the scattered airborne landings and the assault at Brecourt Manor, the company’s route continued through Carentan and Bloody Gulch. The Easy Company battles in Normandyform part of a wider battlefield series following the company from D-Day through the Netherlands, Bastogne and the final advance into Germany and Austria.
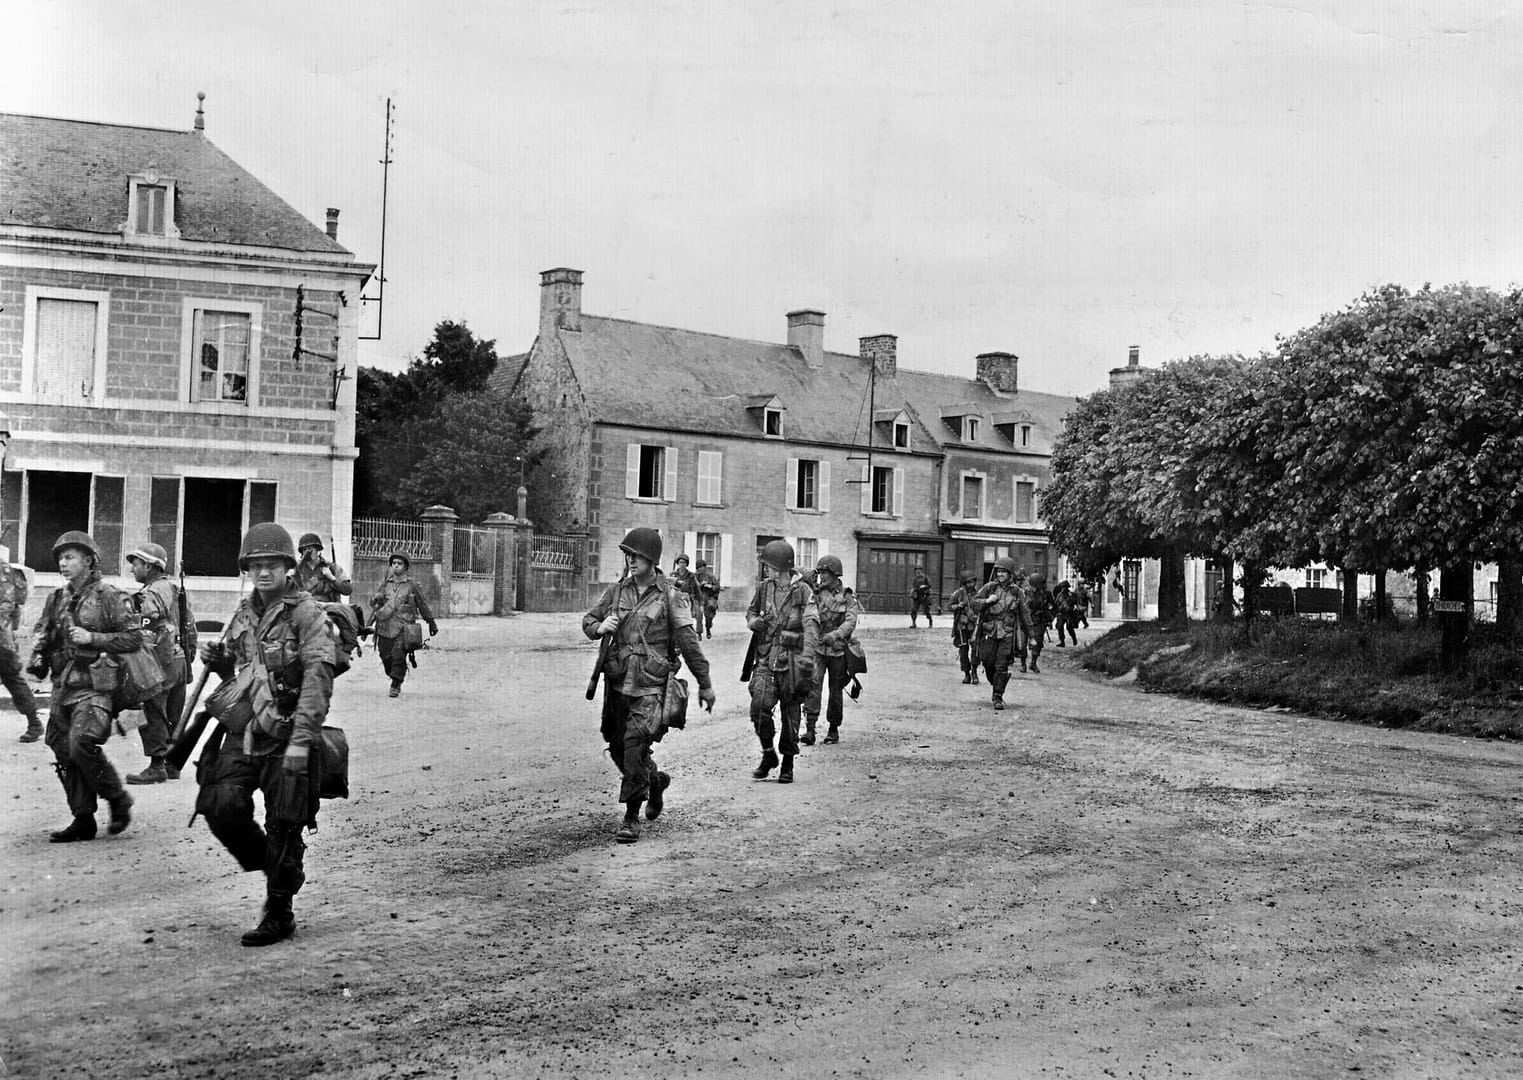
101st Airborne Division paratroopers passing through St-Marie-du-Mont, June 1944
82nd Airborne Division – Mission BOSTON
Farther north, the 82nd Airborne Division fought to secure the approaches around Sainte-Mère-Église, one of the critical road centres behind the invasion beaches. To its west, the battle for La Fière Causeway developed into a prolonged struggle for one of the few routes across the flooded Merderet valley. Here, a seemingly minor bridge and narrow raised causeway became key terrain because the surrounding inundations channelled all movement onto very few routes.
The American airborne landings were therefore inseparable from the Utah operation. By occupying road junctions, causeways and beach exits, disrupting German communications and forcing German units to fight inland, the paratroopers helped prevent a coordinated response against the troops coming ashore.
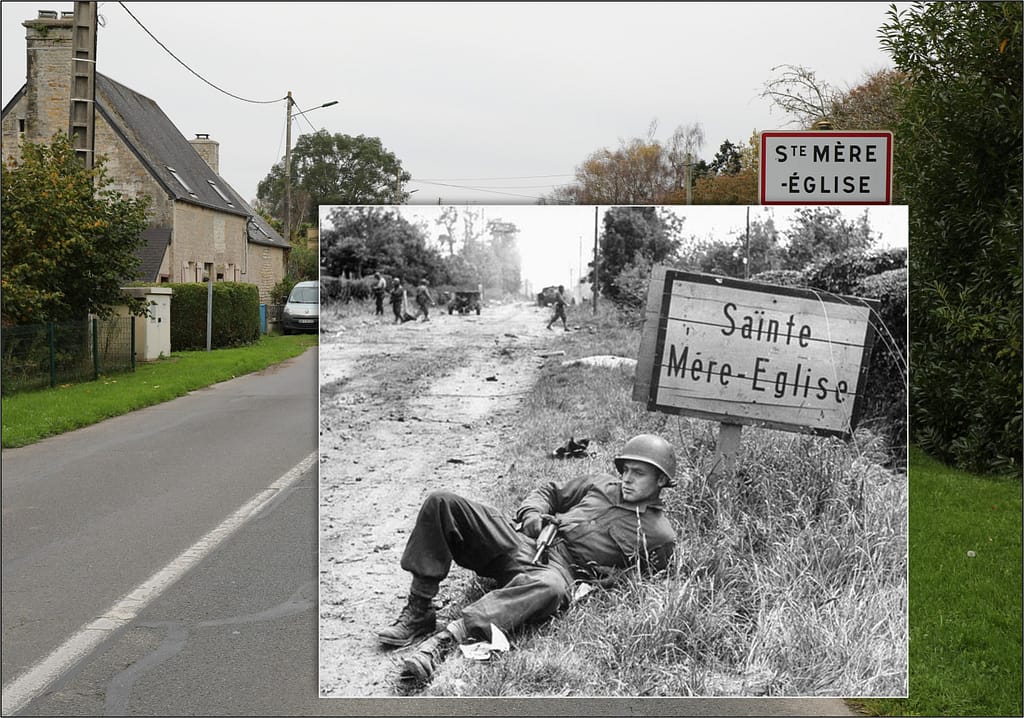
Then and now – 1944 and 2024. An American paratrooper on the southern entry into Sainte-Mere Eglise
Beyond D-Day: Carentan and the western link-up
The success of the landings on 6 June did not immediately create a continuous Allied foothold. Utah and Omaha remained separated, and the road and rail centre of Carentan stood astride the communications connecting the two American beachheads. Capturing it became essential to consolidating the western lodgement.
Elements of the 101st Airborne Division advanced toward the town through flooded country and along exposed causeways before engaging the German defenders on its approaches and within the town itself. The Battle for Carentan continued the airborne role beyond its original D-Day missions and helped establish the physical connection between the Utah and Omaha sectors.
The German response did not end with the loss of Carentan. Counterattacking forces struck the American positions southwest of the town, producing the confused and violent Battle of Bloody Gulch. By this stage the character of the campaign was already changing. The immediate struggle to land on the Normandy coast was giving way to a battle to hold and expand the lodgement through hedgerows, sunken roads, villages and enclosed fields.
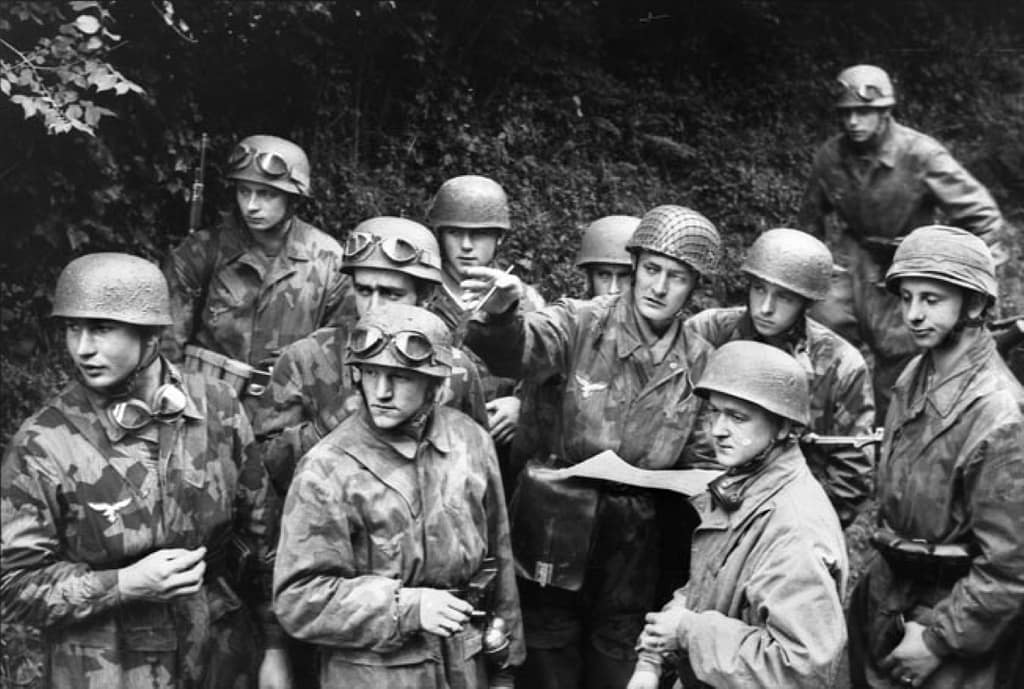
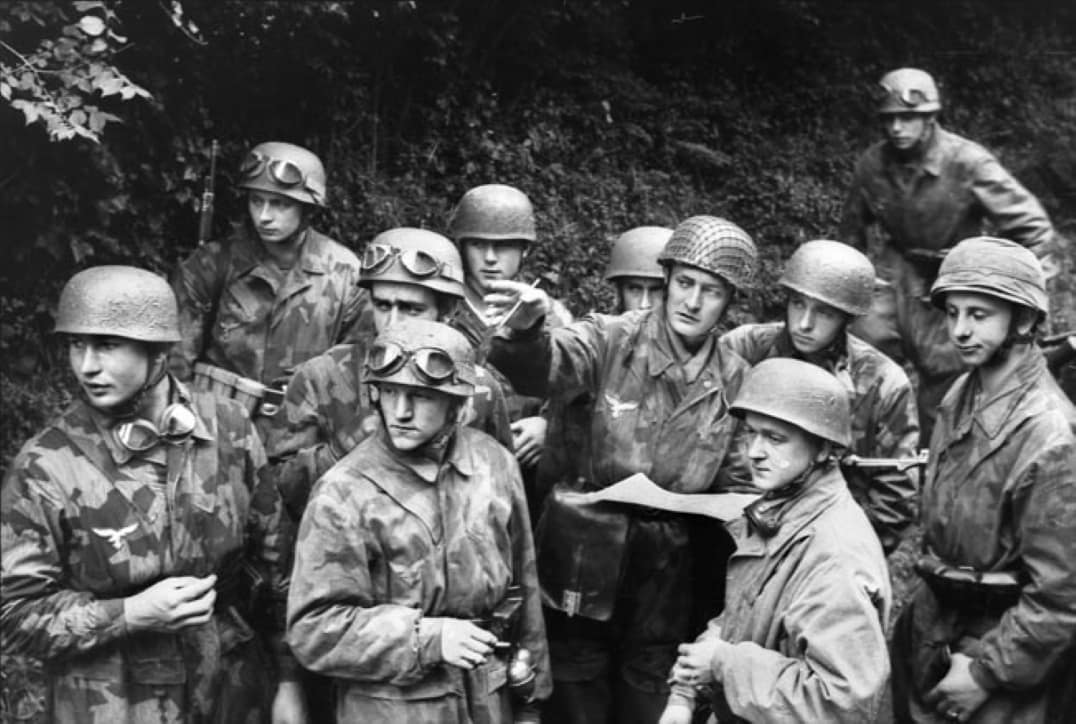
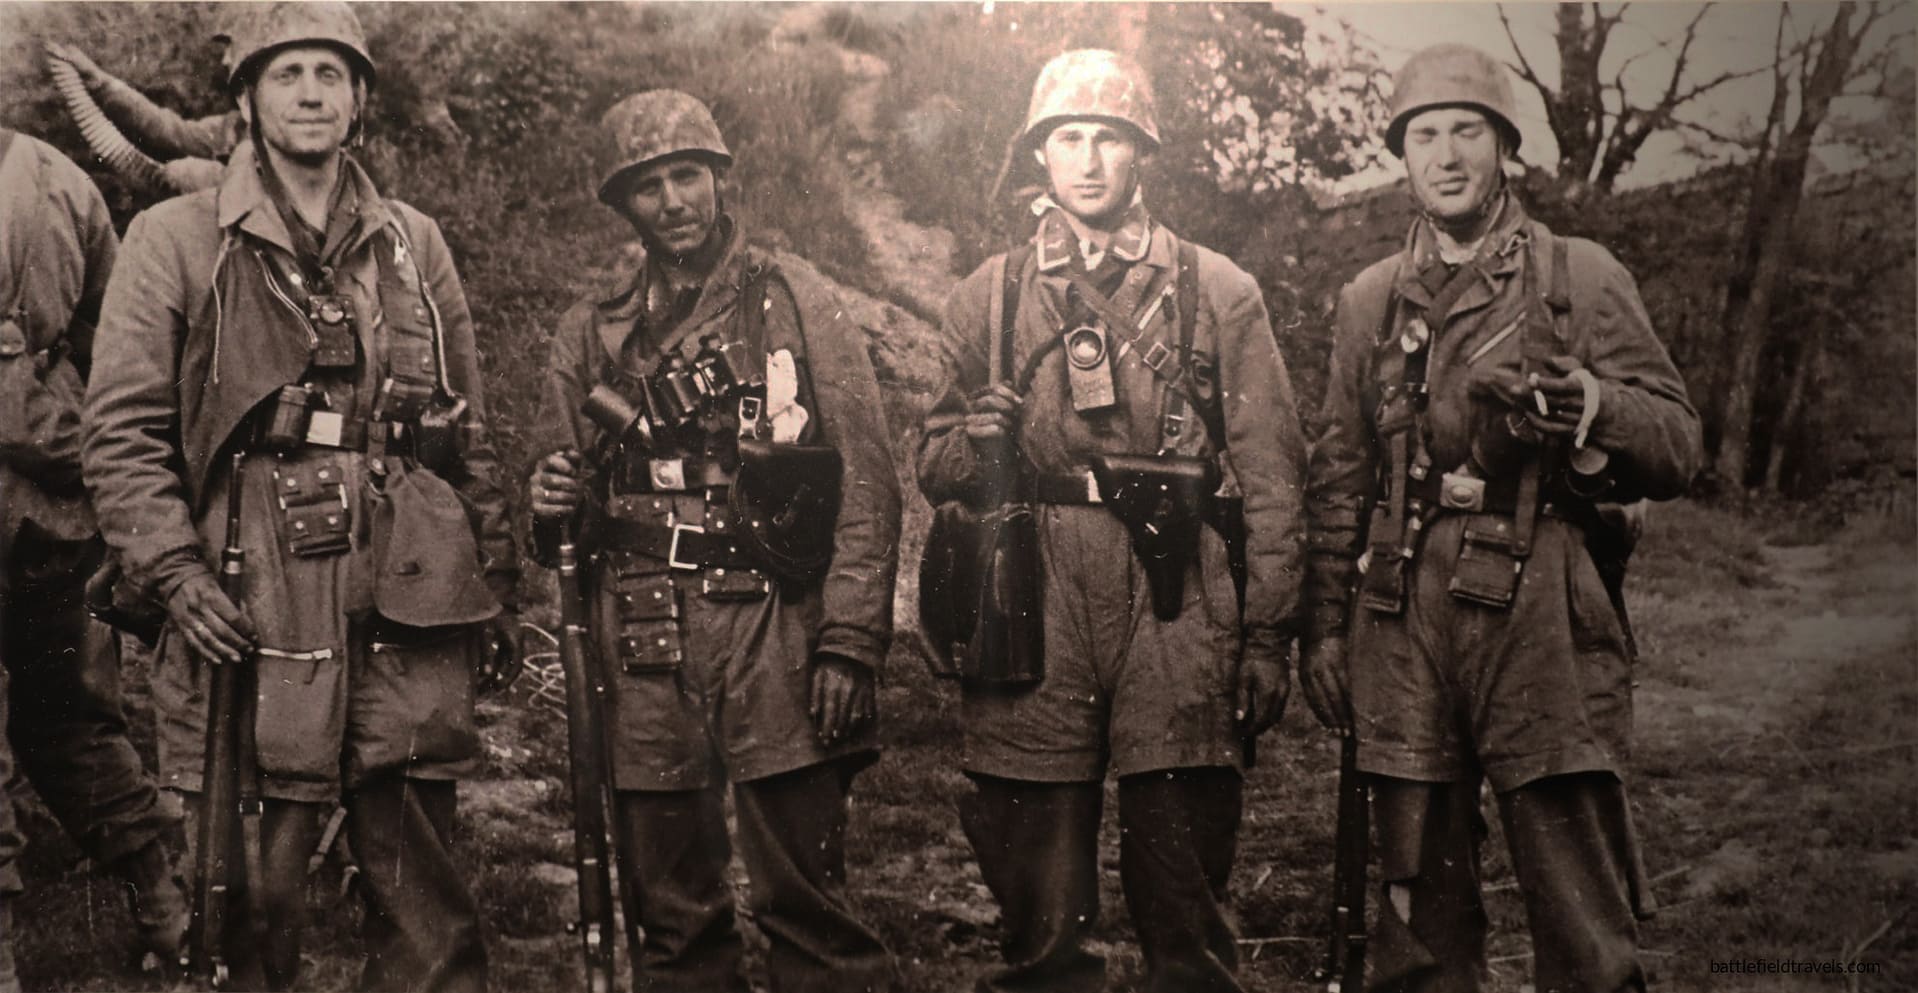
German Paratroopers from Fallschirmjäger-Regiment 6 at Carentan
Utah Beach
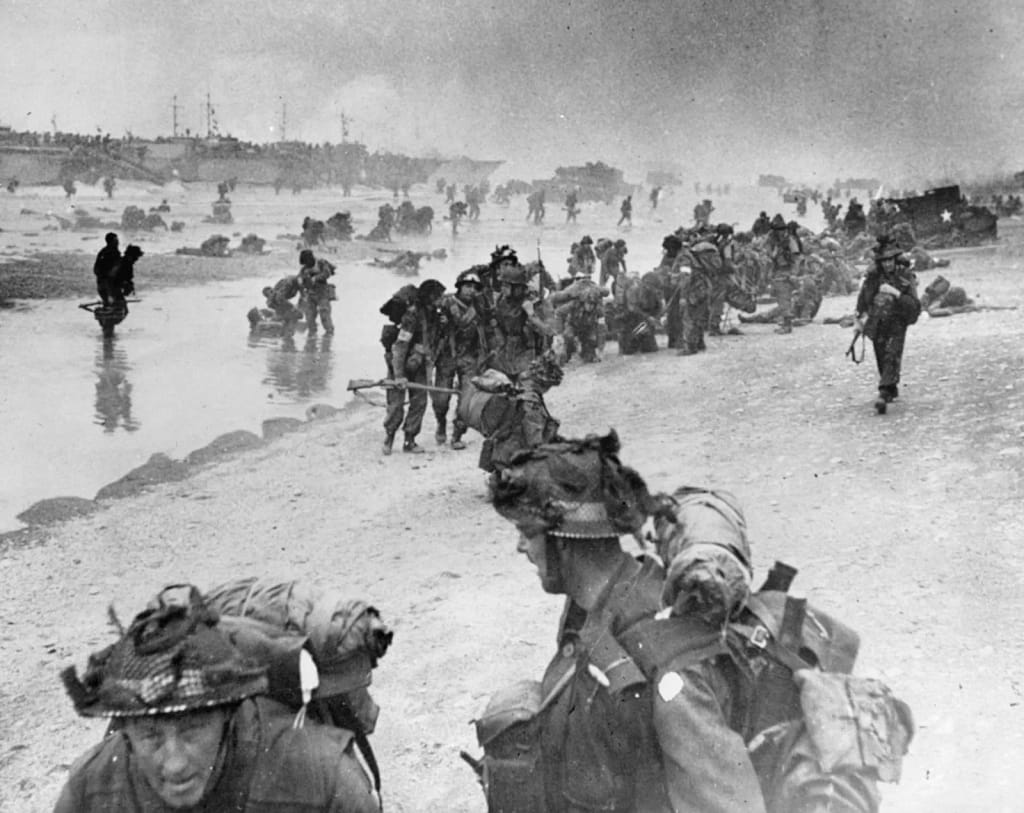
The westernmost amphibious landing took place on the Cotentin Peninsula. The US 4th Infantry Division came ashore at Utah Beach after currents and navigational errors carried the initial assault south of the intended landing area. The displacement proved advantageous. Resistance was lighter than at the planned landing site, and Brigadier General Theodore Roosevelt Jr famously chose to continue the operation from where the troops had landed rather than attempt to shift the assault north.
Success at Utah, however, depended on getting troops and vehicles off the coast. Flooding had transformed much of the hinterland into an obstacle, concentrating movement onto a handful of causeways. The beach landings and airborne operations therefore formed parts of a single tactical problem. As the 4th Infantry Division pushed inland, contact with elements of the 101st Airborne Division helped open the routes through the inundated ground and secure the beachhead.
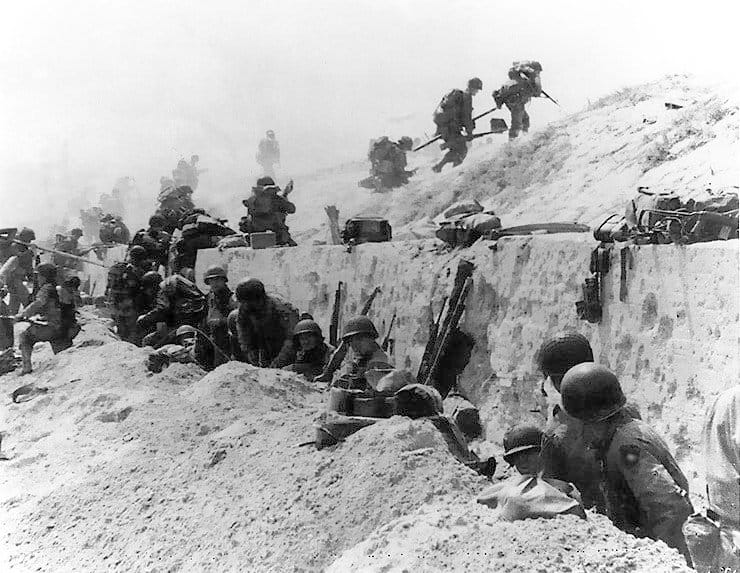
Troops of the US 4th Division move out over the seawall on Utah Beach
Pointe du Hoc
Between Utah and Omaha, cliffs dominated the coast at Pointe du Hoc. Allied intelligence identified the position as a German coastal battery capable of threatening the invasion fleet and landing beaches. Lieutenant Colonel James Rudder’s 2nd Ranger Battalion was assigned the task to neutralise the guns.
The Ranger assault on Pointe du Hoc required troops to land beneath the cliffs, scale them under fire and seize the fortified position above. The Rangers discovered that the main guns had been removed from their prepared emplacements, but patrols subsequently located and disabled them inland. Isolated on the headland, the Rangers then fought to hold their position while awaiting relief from forces advancing from Omaha.
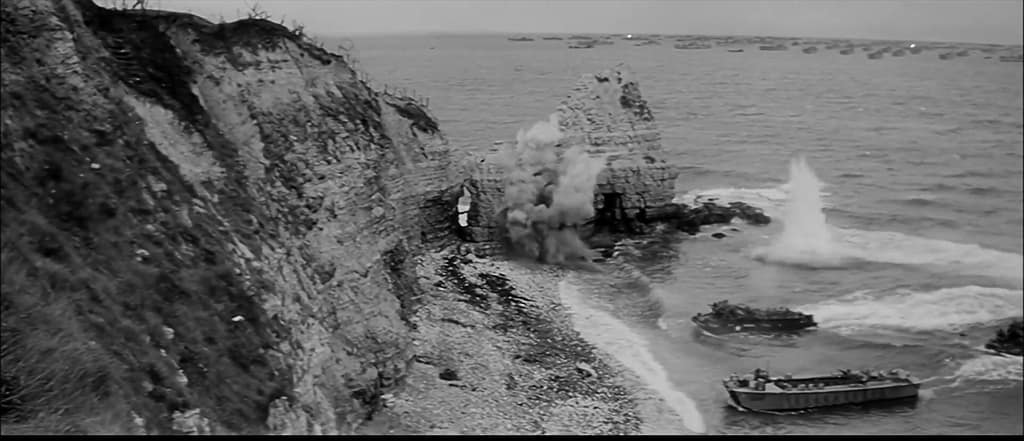
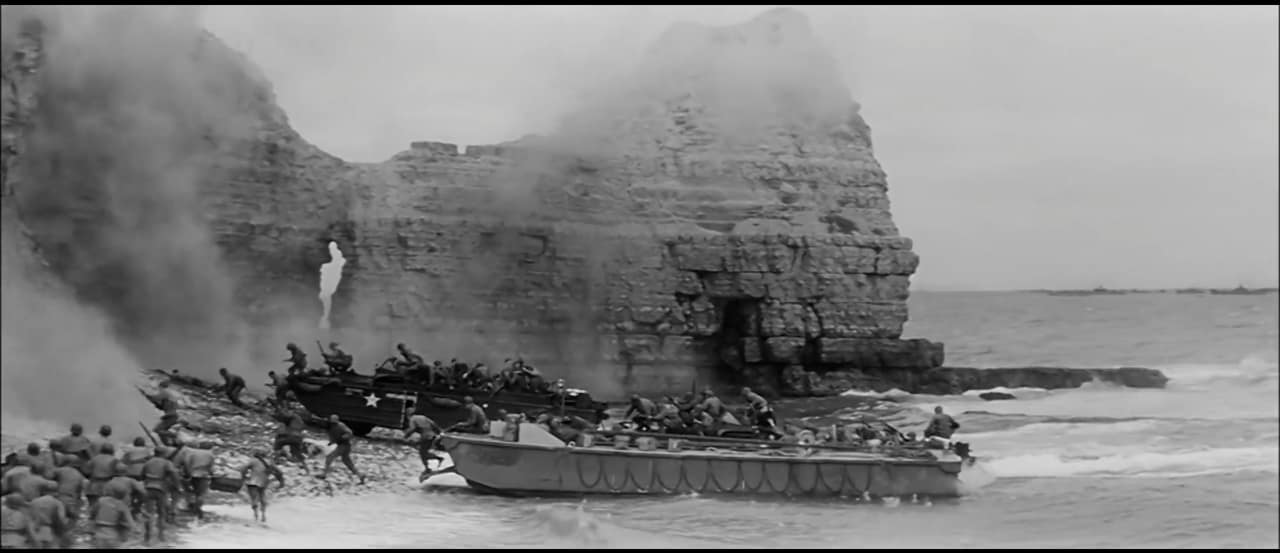
Screenshot from ‘The Longest Day’ assault on Pointe du Hoc, actually shot onsite at Pointe du Hoc
Omaha Beach
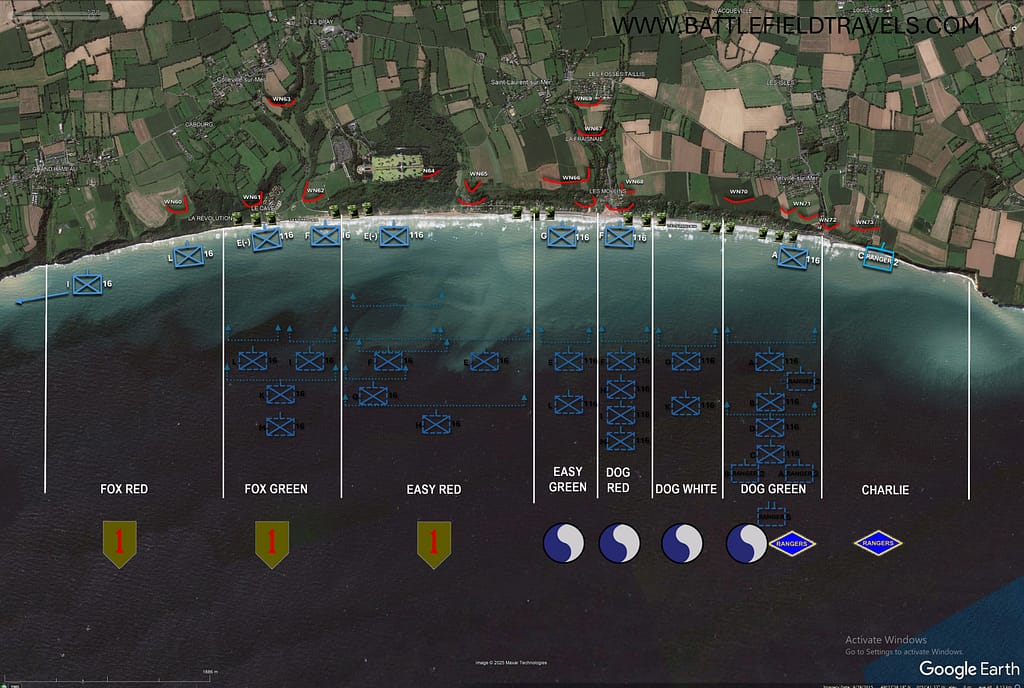
At Omaha Beach, the US 1st and 29th Infantry Divisions encountered the most formidable resistance of any of the five Allied landing beaches. The terrain magnified the problem. A broad tidal flat and exposed beach lay beneath steep bluffs, while movement inland was channelled through five beach exits covered by German strongpoints, obstacles, mines and interlocking fire.
The initial Omaha Beach landings suffered heavy casualties. Amphibious tanks were lost, units became intermixed, engineers struggled to clear beach obstacles and German fire disrupted attempts to move through the planned exits. For a time, the assault appeared dangerously close to failure.
The breakthrough came not through the smooth execution of the original plan but through local initiative. Small groups of infantry, engineers and Rangers worked their way across and above the bluffs, infiltrating between German positions and attacking strongpoints from their flanks and rear. By the end of 6 June the Omaha lodgement remained shallow and vulnerable, but American troops had broken through the coastal defences. The cost made Omaha the bloodiest of the five D-Day beaches and demonstrated how profoundly local terrain could disrupt even the most carefully prepared operational plan.
Robert F. Sargent’s famous photo of Easy Company, 16th Infantry Regiment landing at FOX GREEN Sector, Omaha Beach on D-Day. Aerial shot from the same location in November 2024.
Gold Beach
East of Omaha, the British 50th (Northumbrian) Infantry Division landed at Gold Beach. Its objectives included securing the coast between the American and Canadian sectors, capturing Arromanches and pushing inland toward Bayeux while cutting the important Caen–Bayeux road.
German strongpoints and coastal defences caused delays at several locations, but British forces penetrated inland and made substantial progress during the day. The capture of Arromanches was particularly important because the site had been selected for one of the artificial Mulberry harbours that would sustain the Allied build-up before major French ports could be secured.
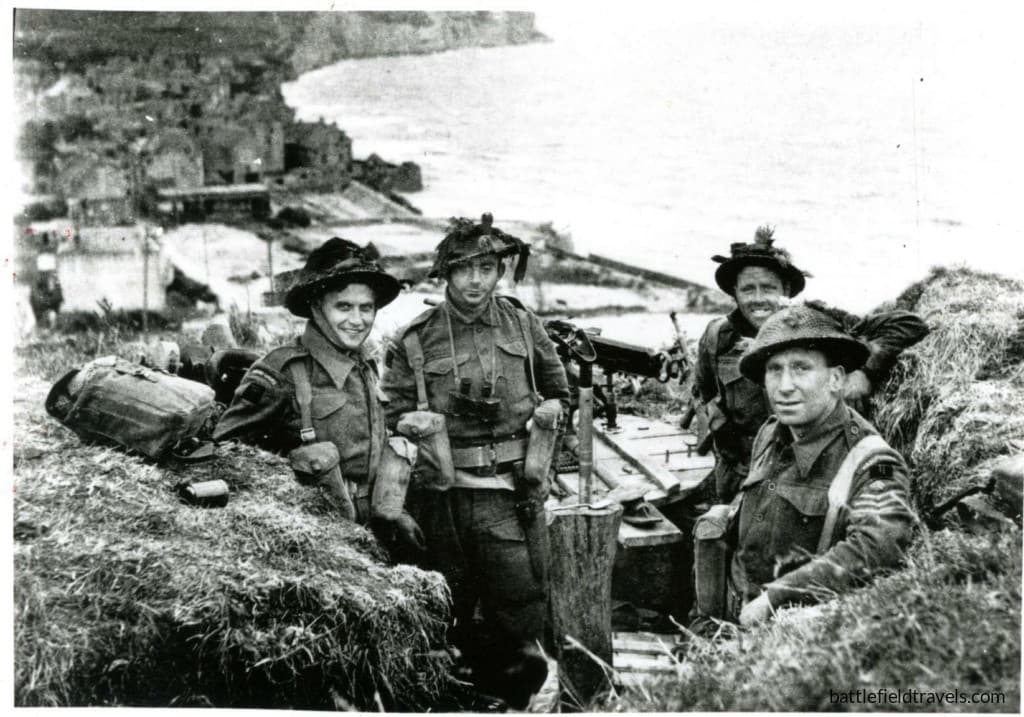
British soldiers of 1st Battalion, the Hampshire Regiment securing the high ground east of Arromanches. Arromanches visible in the background.
Juno Beach
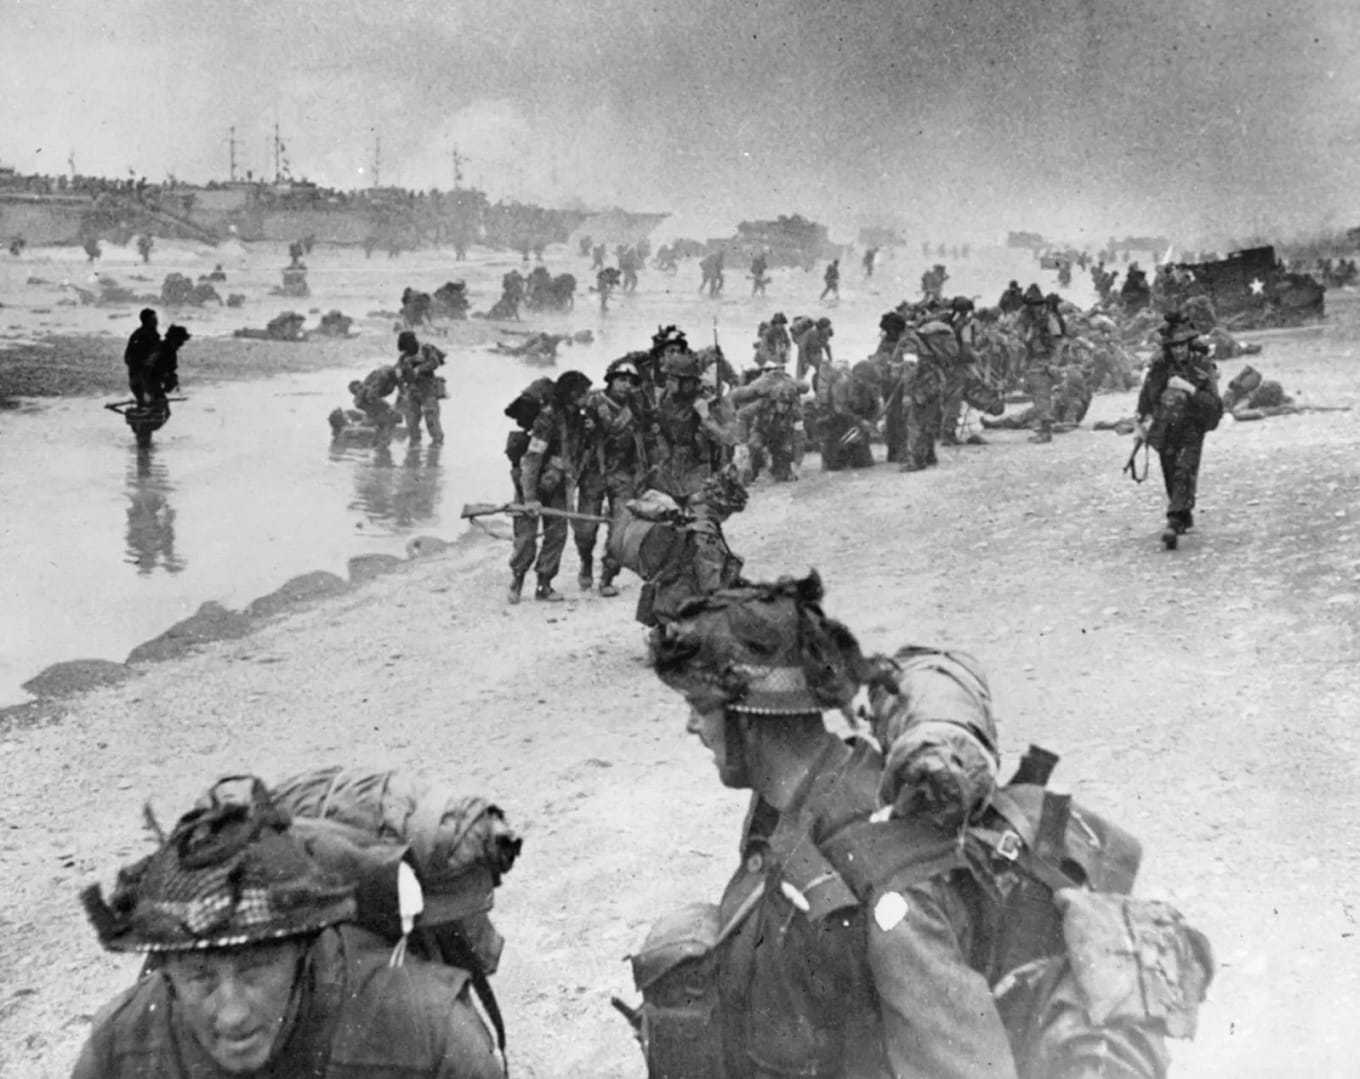
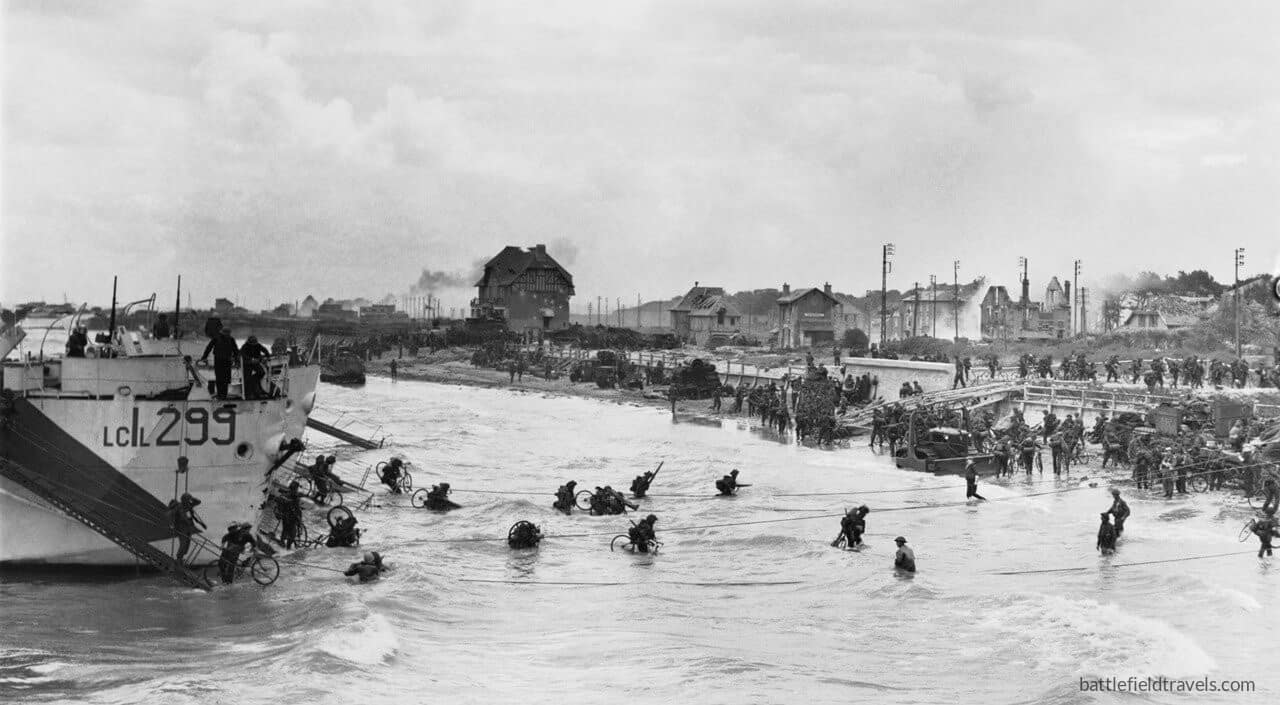
The Canadian 3rd Infantry Division assaulted Juno Beach between the British landings at Gold and Sword. Rough seas, offshore obstacles and fortified coastal villages complicated the assault, and several Canadian units suffered heavily while breaking through the beach defences.
Once inland, however, Canadian forces advanced farther than many of the other seaborne formations on D-Day. Their objectives included securing the Caen–Bayeux road and linking the British and Canadian beachheads. Although not all planned objectives were reached and gaps remained between Allied formations, the Canadians had established a substantial lodgement by the end of the day.
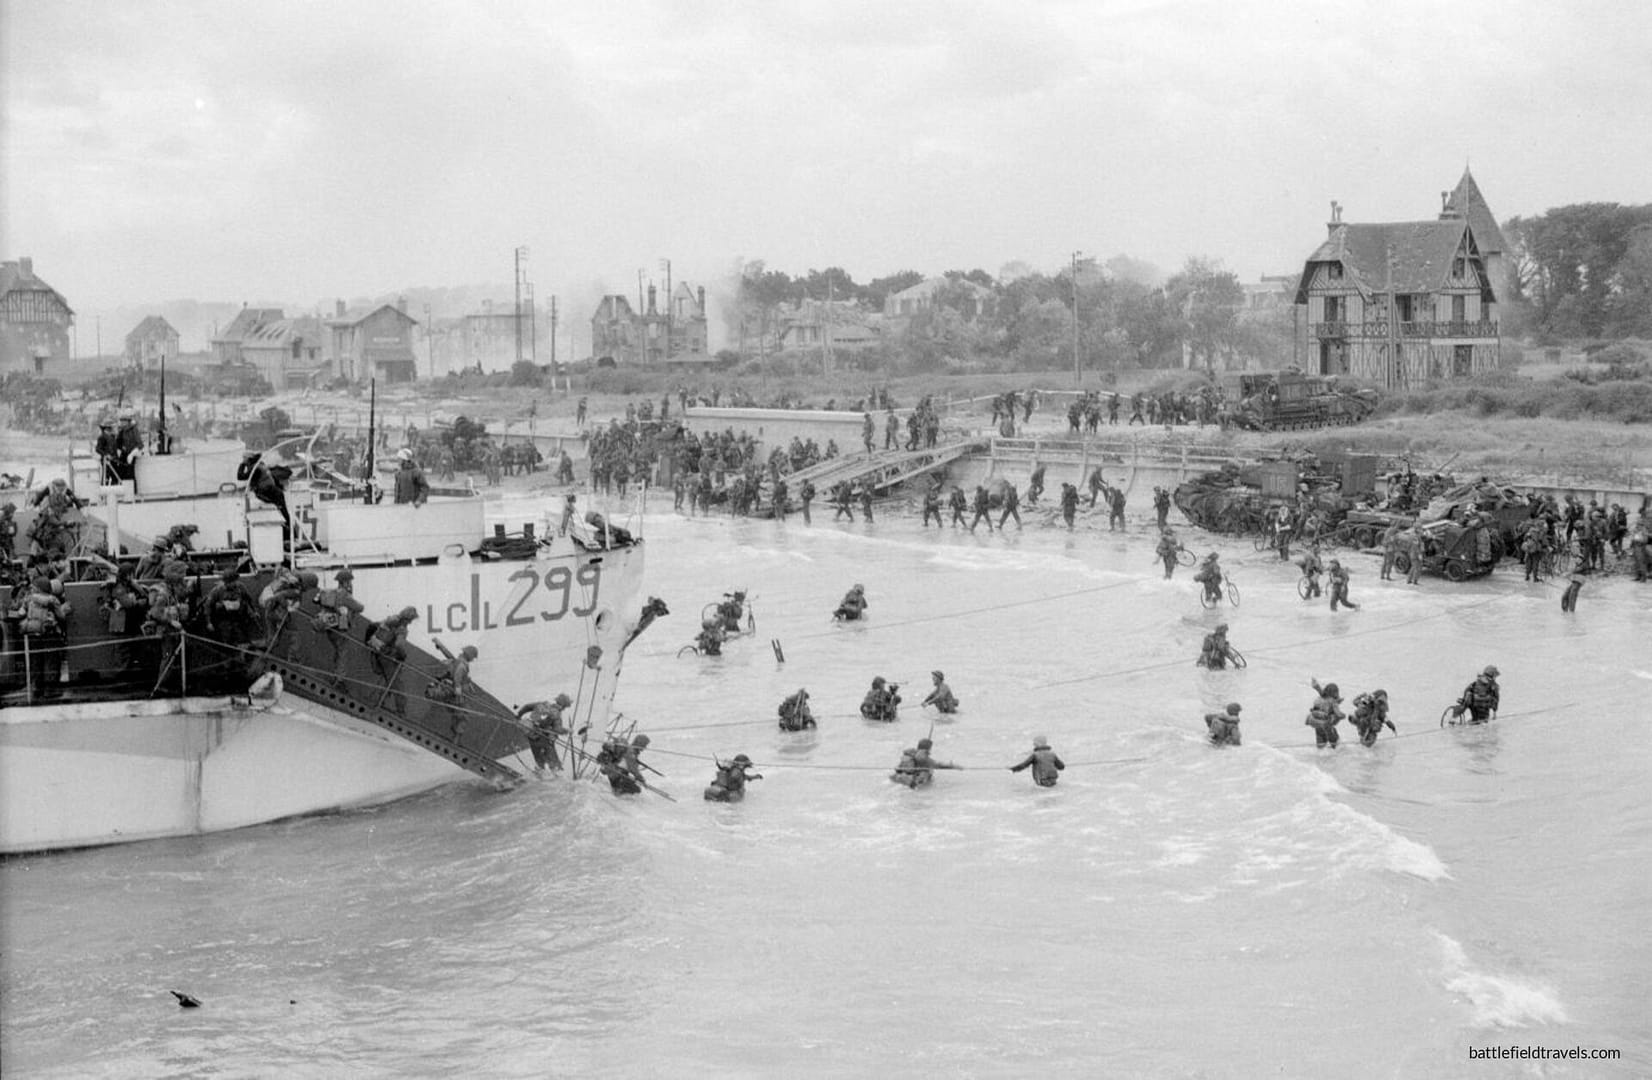
Juno Beach. Canadian 9th Brigade second wave landing at Bernieres-sur-Mer. Canada House visible in the background.
Sword Beach
At the eastern end of the amphibious assault, the British 3rd Infantry Division landed at Sword Beach. Its objectives extended well beyond clearing the immediate coastal defences. British forces were to advance toward Caen and, crucially, link with the 6th Airborne Division holding the bridges and defensive positions east of the Orne.
The link with the airborne troops was achieved, and was symbolised by the arrival of commandos under Brigadier Lord Lovat at Pegasus Bridge. Caen, however, remained in German hands. The failure to capture the city on D-Day helped shape the fighting that followed, as German armoured formations concentrated against the eastern side of the Allied lodgement.
British soldiers landing on Sword Beach, D-Day, 6 June 1944
By the end of D-Day
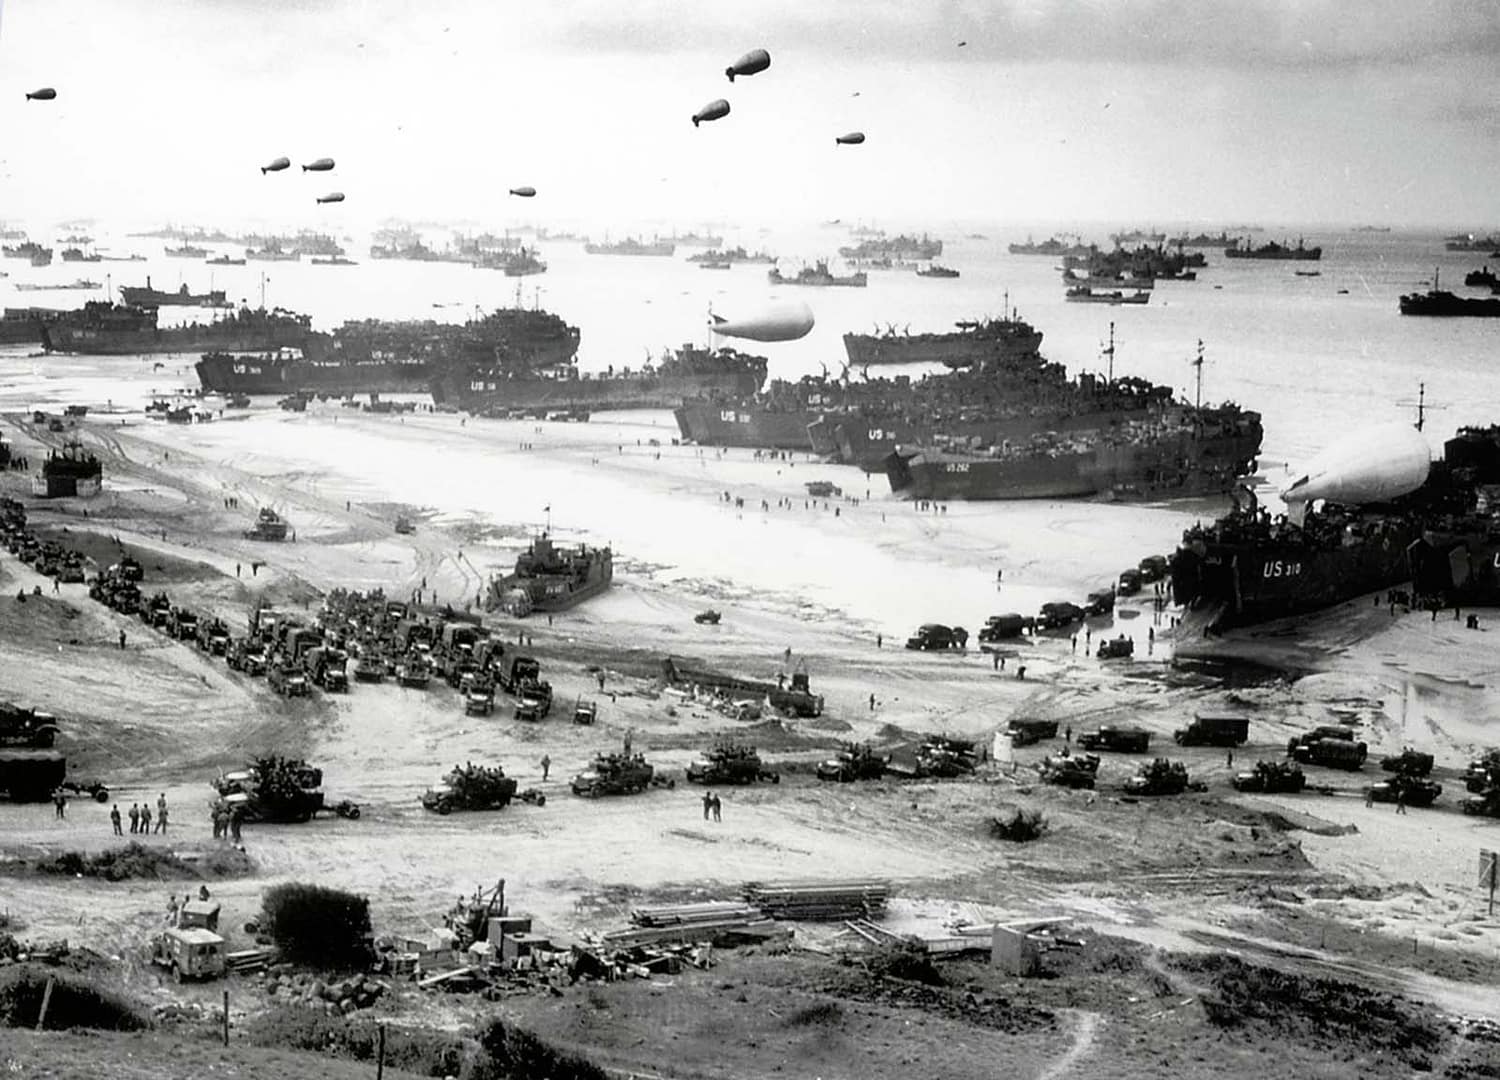
By nightfall on 6 June, Allied forces had established themselves along the Normandy coast, but the five assault sectors had not yet become the secure, continuous lodgement envisaged in the invasion plan. The fighting around Carentan, the Cotentin Peninsula and Caen would continue, while the bocage increasingly imposed its own tactical demands. D-Day had succeeded, but the Battle of Normandy had only just begun.
🏛️Weapons & Equipment: World War Two
Explore original weapons and equipment from the Second World War, drawn from my personal collection.
Uniforms, helmets, headgear, weapons, equipment from Australia, Britain, United States, Soviet Union, Germany, Japan, Italy, Romania, — personally handled, photographed and examined by me.
A curated reading list covering the Second World War across all theatres. Explore campaign histories, battlefield studies, biographies, primary accounts and contemporary military writings used in the research behind Battlefield Travels. The list will continue to grow as I publish new studies and draw upon new resources.
❓D-Day and Normandy Campaign Quiz. Test your knowledge!
20 questions generated out of a bank of 60. Testing your knowledge of the D-Day landings including the US and British airborne operations, and all five invasion beaches. Score 60% to pass — but expect a challenge!
British 6th Airborne Division’s role on D-Day was multi-faceted. In the opening minutes, glider-borne troops would seize the bridges over the Caen Canal and the River Orne. Soon afterwards, paratroopers would neutralise Merville Battery. Others would destroy key bridges over the Dives and prepare for German counterattacks. The mission was audacious, high risk, and critical…
In the opening minutes of D-Day, British airborne troops conducted a glider-borne coup-de-main assault to seize the bridges over the Caen Canal and River Orne. Their mission was simple but dangerous: capture the bridges intact and hold them against German counterattacks, thereby securing the eastern flank of the Normandy landings.
On 6 June 1944, the British 3rd Division, supported by the 1st Special Service Brigade and 79th Armoured Brigade, stormed Sword Beach, the easternmost Allied landing sector in Normandy. Their success secured the D-Day landing Allied left flank, linked with the airborne lodgement at the Orne, and set the stage for the long struggle for…
On 6 June 1944, the 3rd Canadian Infantry Division stormed ashore at Juno Beach, facing some of the strongest German defences in Normandy. Their task was to force a landing on the narrow strip of beach between Courseulles, Bernières, and Saint-Aubin, and then drive inland to cut the Caen–Bayeux road before linking up with the…
On 6 June 1944, the British 50th (Northumbrian) Infantry Division landed at Gold Beach, facing fortified villages and determined German resistance. By nightfall, they had secured a foothold, linked with Canadian forces at Juno, and pushed inland toward Bayeux. Within days, the artificial Mulberry harbour was providing vital sustainment to the Normandy campaign.
Omaha Beach makes a powerful impression. When you visit the beach, you know that this is where Robert Capa took those famous photos of American soldiers assaulting through the obstacle belt, and where the dramatic first 20 minutes of Saving Private Ryan was set. It also becomes clear how important the five beach exits were…
Pointe du Hoc, a prominent headland between Utah and Omaha Beaches, was a critical objective on D-Day. The German position was equipped with a battery of 155mm howitzers capable of targeting the American landing beaches. The mission to assault Pointe du Hoc was assigned to the 2nd and 5th Ranger Battalions. The Rangers would scale…
In the early hours of D-Day, 6 June 1944, 13,200 paratroopers of the 82nd and 101st Airborne Divisions landed behind Utah Beach to secure the beach landing sites and prevent German interference. A few hours later, the US 4th Infantry Division stormed ashore on Utah Beach. The amphibious forces landed about 2,000 yards south of…
Here on 6 June 1944, Lieutenant Richard ‘Dick’ Winters, acting company commander for Easy Company, 506th Parachute Infantry Regiment, 101st Airborne Division, led a force of 23 paratroopers in a successful assault on a German force that outnumbered them more than 5 to 1. Easy Company’s action that day was depicted in the Steven Spielberg/Tom…
The Battle of Bloody Gulch was fought on 13 June 1944, just west of Carentan, Normandy. The battle followed immediately after 101st Airborne Division’s capture of Carentan on 12 June. Lightly armed American paratroopers from 506th (PIR) Parachute Infantry Regiment and 501st PIR faced a major armoured counterattack by the 17th SS Panzergrenadier Division and…
After the successful D-Day landings on June 6, the Allies needed to link the Utah and Omaha beachheads, build forces to cut off the Cotentin Peninsula, and be prepared for the expected German counterattack that they knew was coming. The key to all of that was the town of Carentan on the Cotentin – a…
As a former 82nd Airborne Division paratrooper, the town of Sainte-Mere Eglise in the Cotentin Peninsula of Normandy holds a special place for me. In the early hours of 6 June 1944, ahead of the Normandy Beach landings, the US 82nd and 101st Airborne Divisions parachuted into this area. The 82nd was to seize the…
The final act of Steven Spielberg’s 1998 movie ‘Saving Private Ryan’ is set in the fictional French town of Ramelles, as a mixed group of paratroopers defends a bridge over the Merderet River against German armoured counter-attacks. That scene is based on real events that happened right here at La Fiere Bridge. I was a…
Authored by Mick Prictor, a retired military officer with 40 years’ service, and a military historian specialising in terrain-focused analysis of tactics, doctrine, and command decision-making in land warfare. His work draws on extensive battlefield fieldwork—more than 280 sites worldwide—and one of the world’s largest private collections of historic military arms, uniforms, and equipment. About me
⚔️ Go deeper — Members get exclusive access to the Deep Research Collection, Field Notes, and monthly Research Dispatches. Try membership free for 7 days, cancel anytime. From $9/month.
What was D-Day and when did the Normandy landings take place?
D-Day was 6 June 1944, when Allied forces launched Operation Overlord with airborne and amphibious landings in Normandy, France. American troops landed at Utah and Omaha Beaches, British forces at Gold and Sword, and Canadians at Juno, while British and American airborne divisions landed behind the beaches to secure bridges, causeways, road junctions and other key objectives.
What were the five D-Day landing beaches?
The five Allied landing beaches were Utah, Omaha, Gold, Juno and Sword, extending along roughly 80 kilometres of the Normandy coast. American forces assaulted Utah and Omaha, British forces Gold and Sword, and Canadian forces Juno. Each beach presented different terrain, German defences and tactical problems, from the bluffs and draws overlooking Omaha to the flooded ground behind Utah.
Why was terrain so important during the Normandy landings?
Terrain influenced almost every stage of the fighting. Cliffs, beach exits, flooded fields, causeways, rivers, villages and the Norman bocage restricted movement and frequently channelled troops into predictable routes. At La Fière, for example, control of a narrow causeway across flooded ground became critical, while at Omaha the few draws leading through the coastal bluffs strongly influenced the battle to get off the beach.
Did the Battle of Normandy end on D-Day?
No. D-Day was the opening day of the Normandy campaign, not its conclusion. After establishing the beachheads, Allied forces still had to link them together, secure ports and key towns, and expand the lodgement against determined German resistance. Fighting continued through the summer, including the battles around Caen, Operation Cobra and the Falaise Pocket, before the German position in Normandy collapsed in August 1944.
Subscribe to Battlefield Travels and receive a free E-Book Battlefield Guide
Unlock expert battlefield analysis, campaign reconstructions, and historical insights drawn from firsthand exploration and primary sources.
🗺️ You’ll receive:
🎖️ Exclusive historical insights you won’t find elsewhere
📘 A free eBook: 10 Tips for Exploring Historic Battlefields
📰 New battlefield studies straight to your inbox as they are published
Claim Your Free Battlefield Travel Guide
Get your free e-book, exclusive tips, and updates on new battlefield studies.
Thank you!
You have successfully joined our subscriber list.
⚔️ Go deeper — Members get exclusive access to the Deep Research Collection, Field Notes, and monthly Research Dispatches. Try membership free for 7 days, cancel anytime. From $9/month.
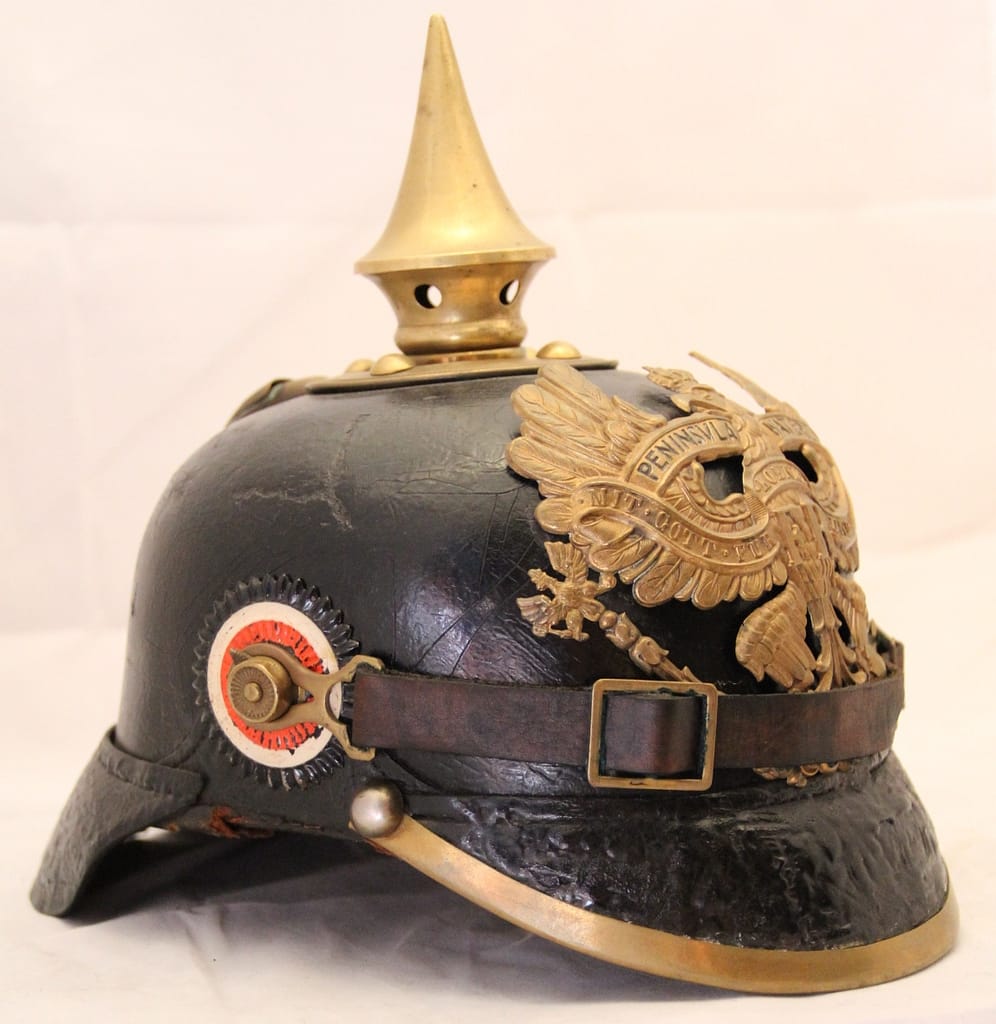
WW1 Imperial German Model 1895 Pickelhaube, 73rd Hanoverian Fusilier Regiment — the regiment in which Ernst Jünger served and about which he wrote Storm of Steel
My WW1 collection is enormous – hundreds of uniforms, headgear items, combat equipment. Here are just a few pieces.
The First World War traumatised the nations of Europe – they were never the same again. The armies of 1918 looked very different from those that mobilised in 1914. Brightly coloured uniform items like the French madder red trousers and the Austro-Hungarian pike-grey uniforms gave way to drab greys, khakis and greens that provided at least some camouflage on the deadly battlefield. Napoleonic holdovers like the French curaissier uniforms of 1914 were gone. The soft and often decorative forms headgear that all armies used in 1914 was replaced by protective steel helmets, starting the French Adrian helmet in 1915, and culminating in the silica-nickel-steel German Model 1916/17/18 helmets.
While the basic infantry rifle that most countries remained unchanged throughout the war, the crew-served and heavy weapons saw significant advancement and vastly expanded scale of issue. The Lewis Gun, Browning Automatic Rifle, Madsen Light Machine Gun, and MG08/15 all provided the infantry with mobile firepower that could move with them in the advance. Grenades became a dominant weapon system in trench fighting and bifurcated into ‘defensive’ grenades (large shrapnel with wide lethal zone) and ‘offensive’ grenades (mode explosive and lighter shrapnel). Gas warfare developed rapidly from 1915 onwards, and so did the individual gasmask that every soldier carried.
Trench warfare created new demands for equipment such as lightweight entrenching tools, trench fighting knives and improvised maces . The trench periscope allowed soldiers to view across no-mans land without exposing themselves to enemy fire, and the next logical development was periscope rifle mounts for firing from below cover.
The enormous wartime production of weapons and equipment ensured that First World War matériel remained in widespread service during the Russian Civil War and in numerous inter-war conflicts worldwide.
This selection of WW1 uniforms, weapons and equipment showcases original items from my personal collection.
Related Battle Studies, Museum Pieces & Reading Resources
Weapons and equipment of the Central Powers. All from my personal collection.
IMPERIAL GERMAN
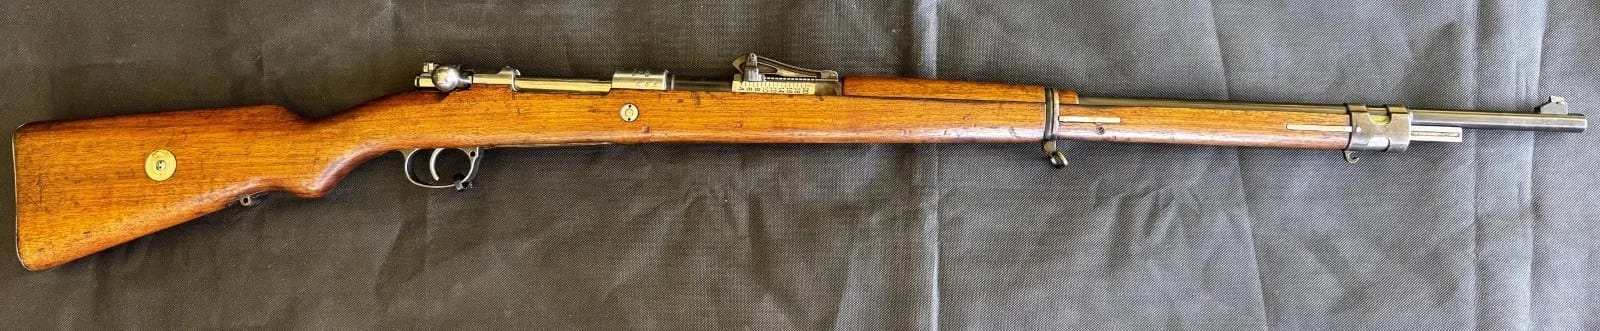
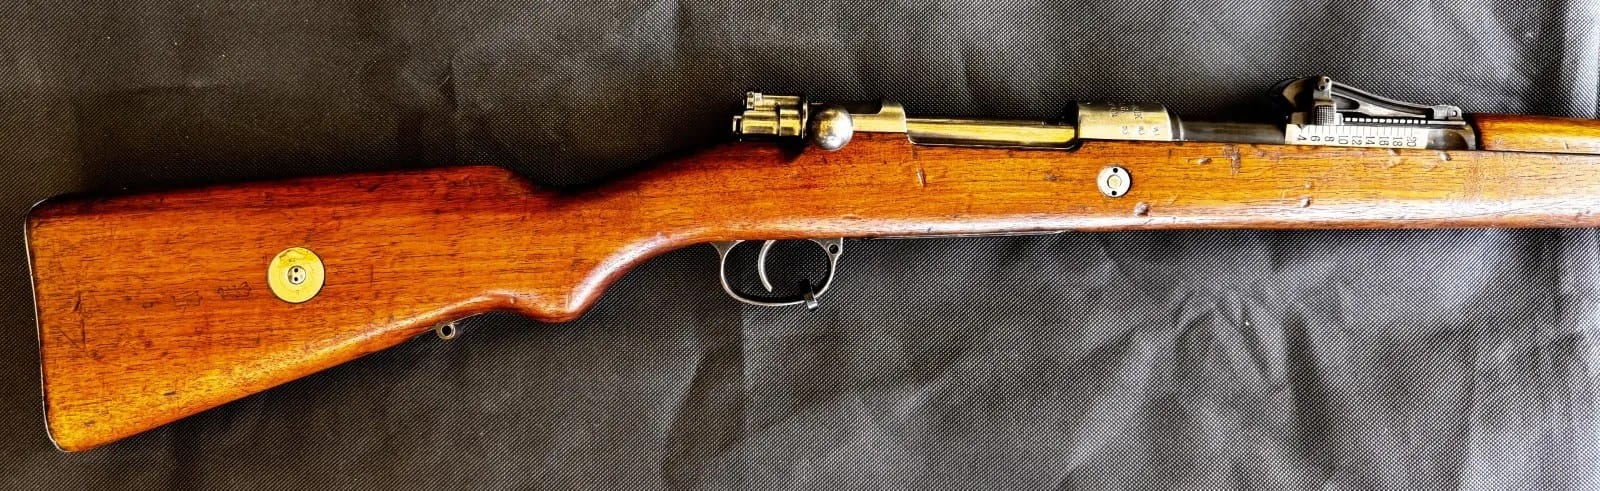
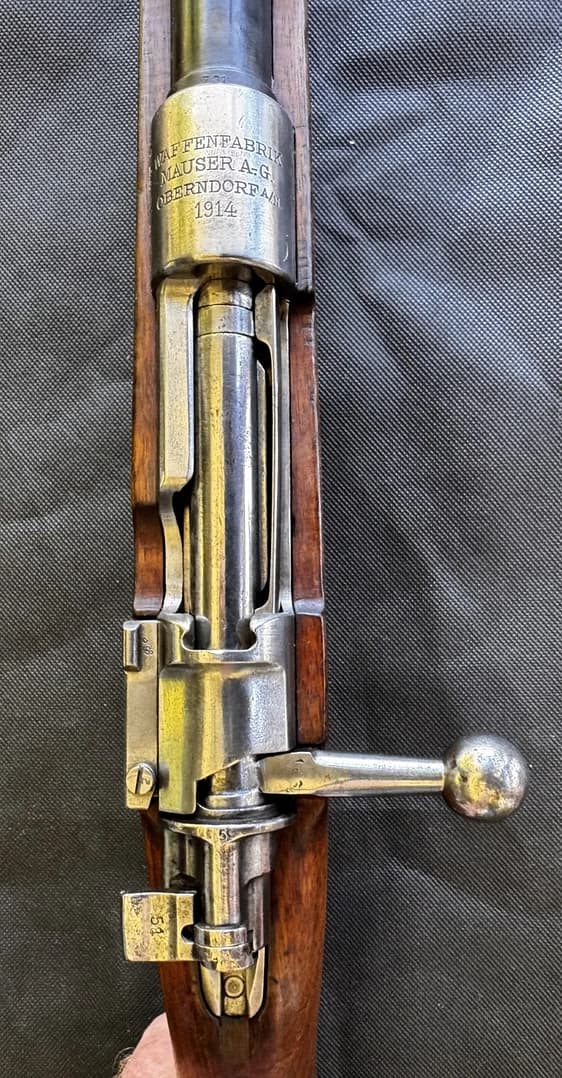
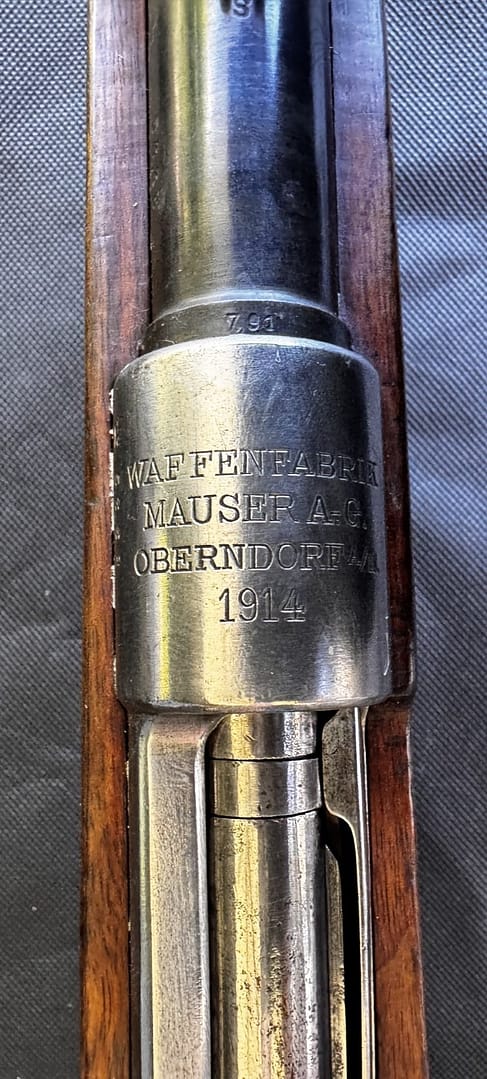
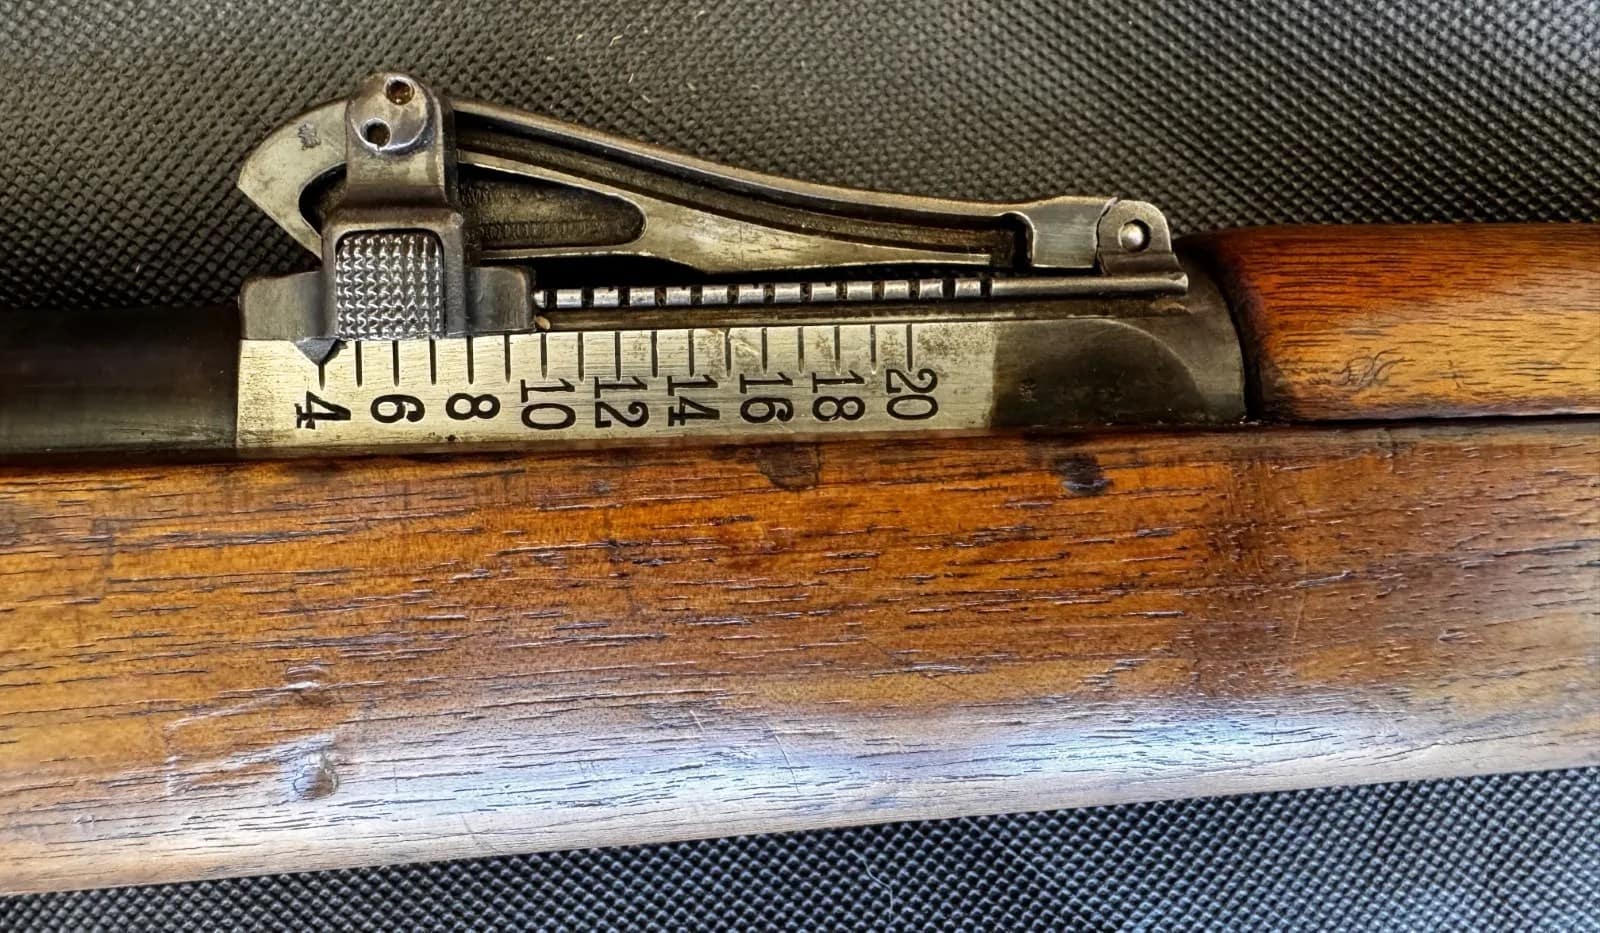
WW1 German Gewehr 98 Rifle. Mauser, Oberndorf 1914
The Mauser Gewehr 98 was the standard service rifle of the Imperial German Army during the First World War, produced by Mauser at Oberndorf and other arsenals. Chambered in 7.92×57mm, it featured a strong bolt action, long barrel, and excellent accuracy, reflecting German emphasis on marksmanship.
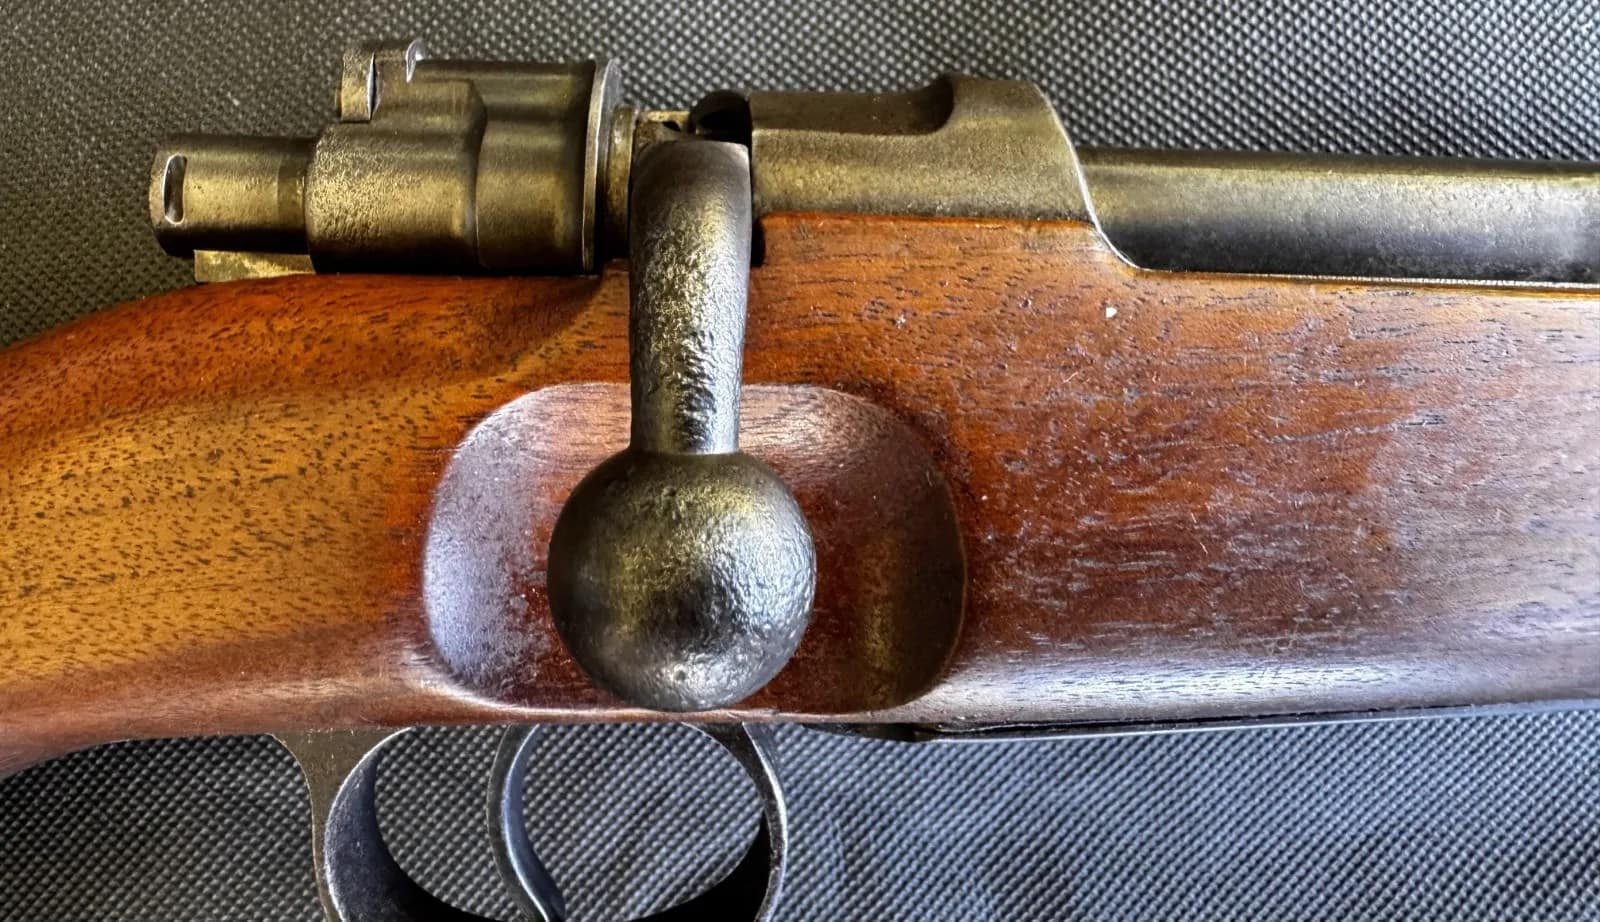
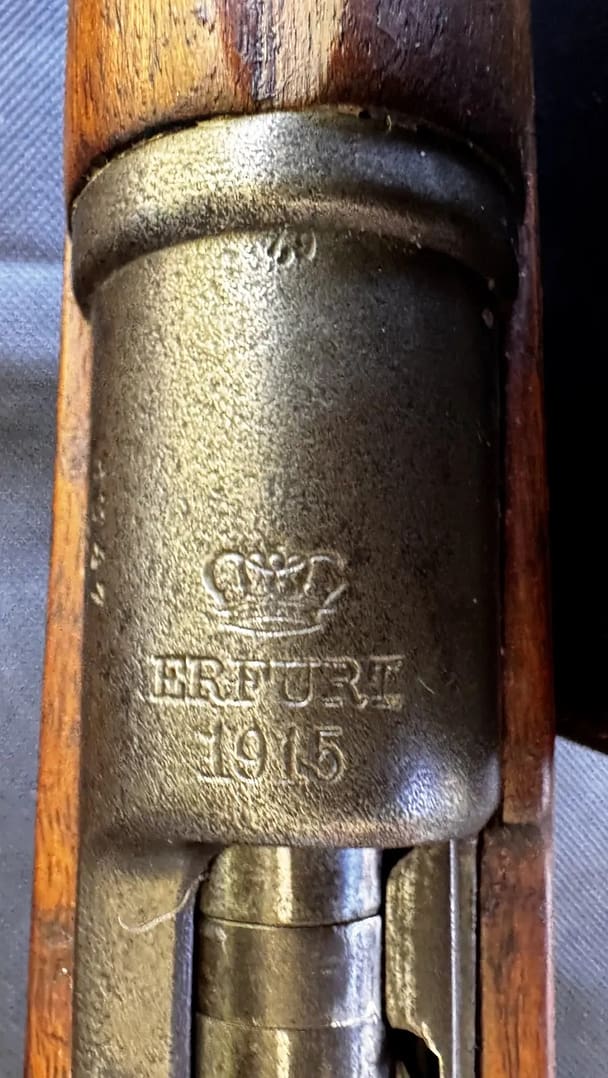
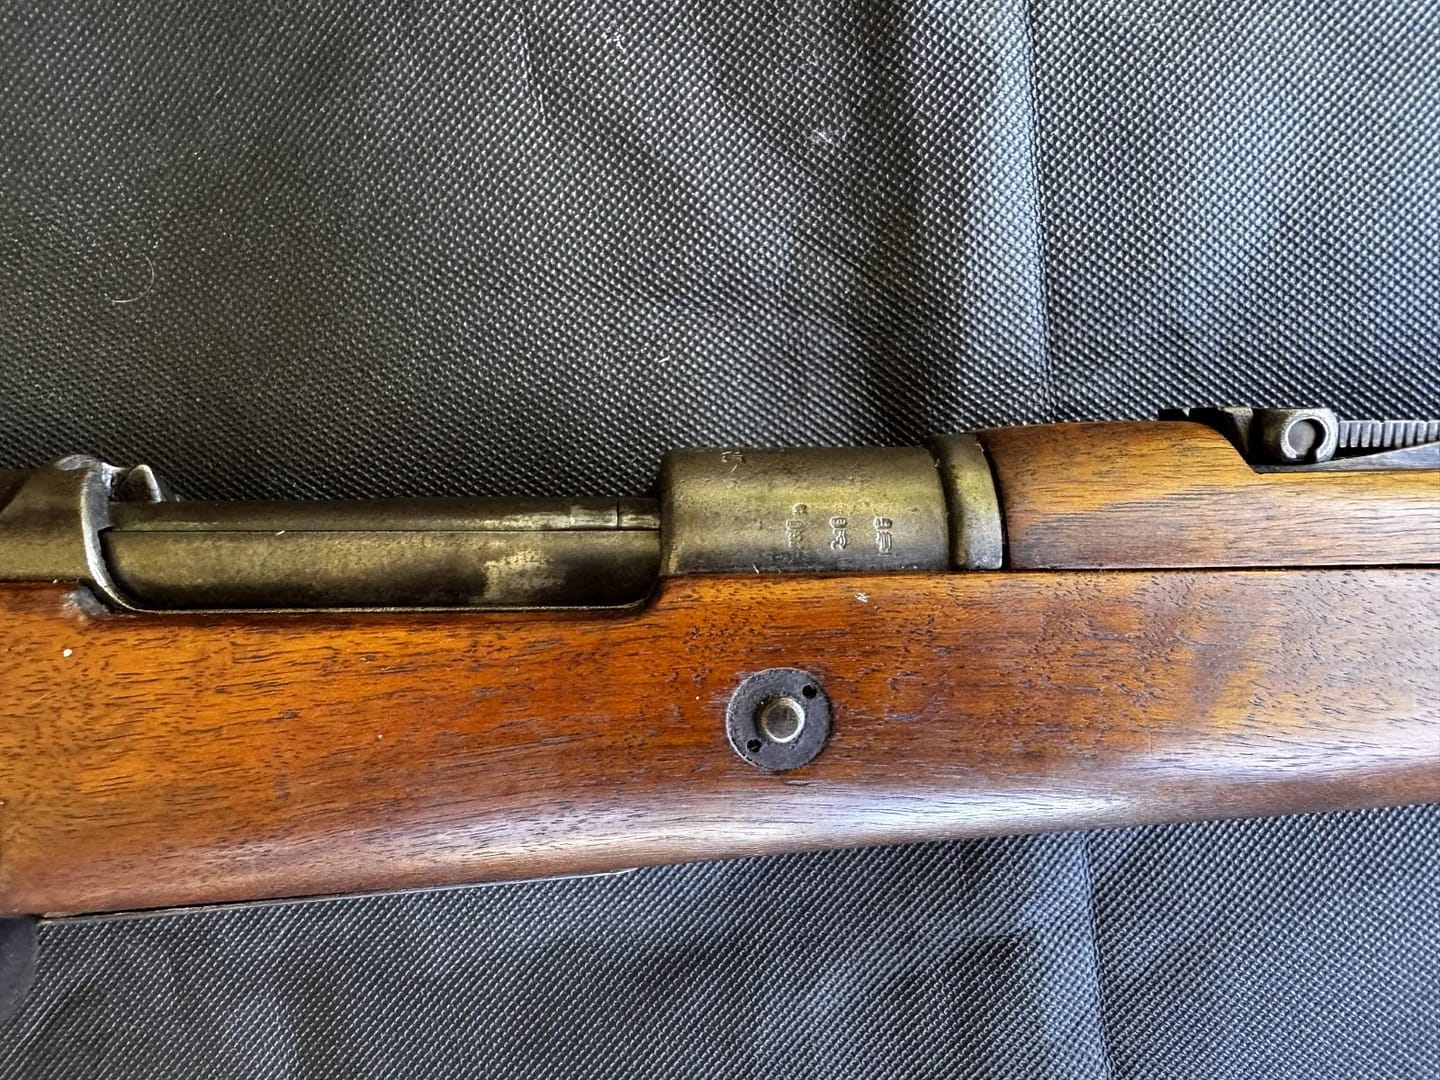
WW1 German Karabiner 98AZ (Kar AZ), Erfurt 1915
The Karabiner 98AZ was a shortened Mauser carbine issued to German cavalry, artillery, engineers, and other specialist troops during the First World War. Chambered in 7.92×57mm, it featured a turned-down bolt handle, stacking hook, and side-mounted sling arrangement suited to mounted and mobile troops. Introduced before the war and widely issued from 1914 onward, the Kar 98AZ balanced compact handling with the reliability of the Mauser bolt-action system.
WW1 German Grabenpanzer (Trench armour) + Stirnpanzer (Helmet front plate). From my personal collection.
This rare example of German personal armour illustrates attempts to provide additional protection for soldiers exposed to intense small-arms and shrapnel fire on the Western Front. The Grabenpanzer, a steel breastplate issued in limited numbers from 1916, was intended primarily for sentries, machine-gun crews, and troops operating in exposed trench positions. The Stirnpanzer, a detachable steel brow plate worn on the Stahlhelm, offered additional frontal protection but was heavy and unpopular for prolonged wear. Together, these items reflect the defensive character of trench warfare and the constant search for practical solutions to battlefield lethality.
WW1 uniform of the Kaiserliche Schutztruppe für Deutsch-Südwestafrika
This First World War uniform of the Kaiserliche Schutztruppe für Deutsch-Südwestafrika includes a distinctive slouch hat and leather equipment set worn by German colonial forces in present-day Namibia. The Schutztruppe combined European military traditions with adaptations for service in harsh colonial environments, reflecting the unique character of Germany’s overseas forces. Such uniforms illustrate the global reach of the First World War and the role of colonial troops in campaigns fought far beyond Europe.
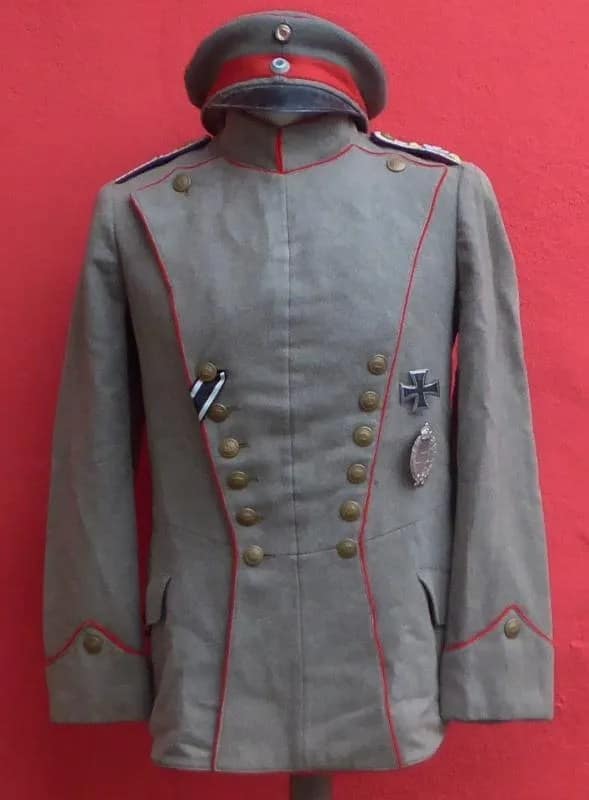
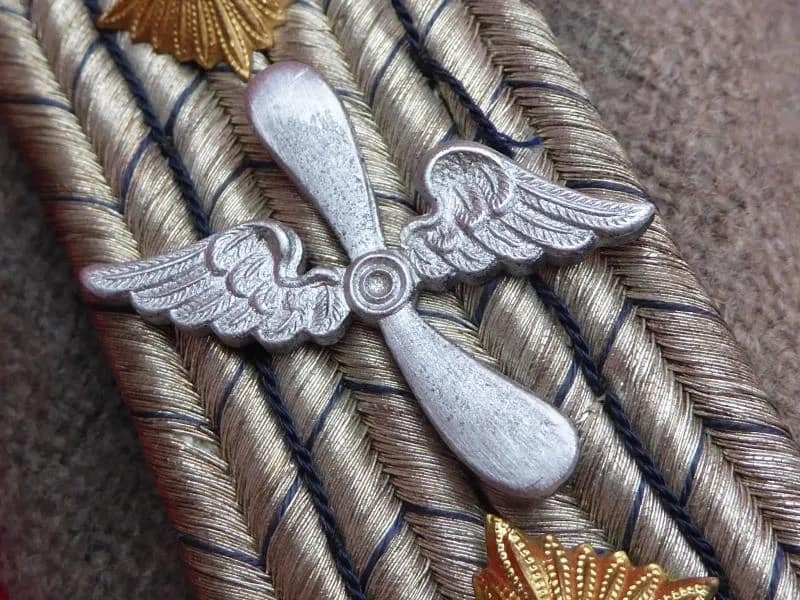
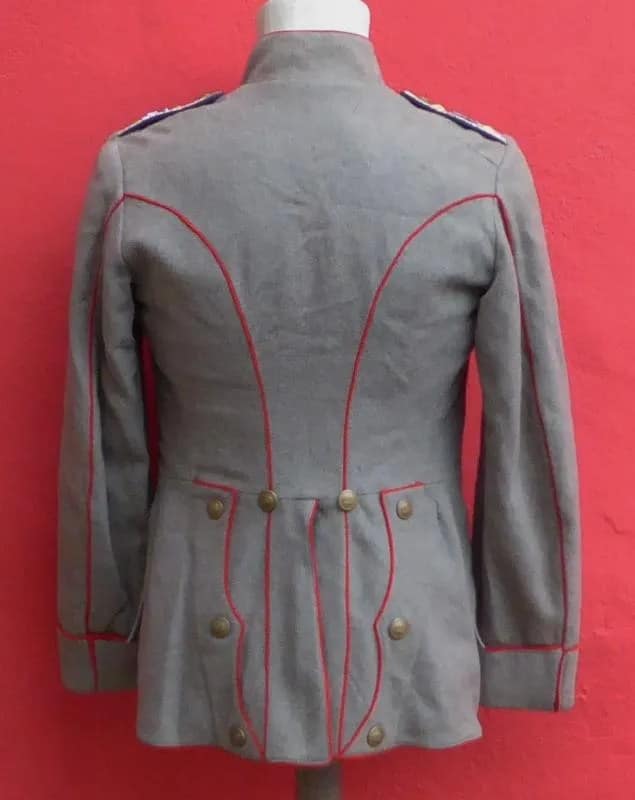
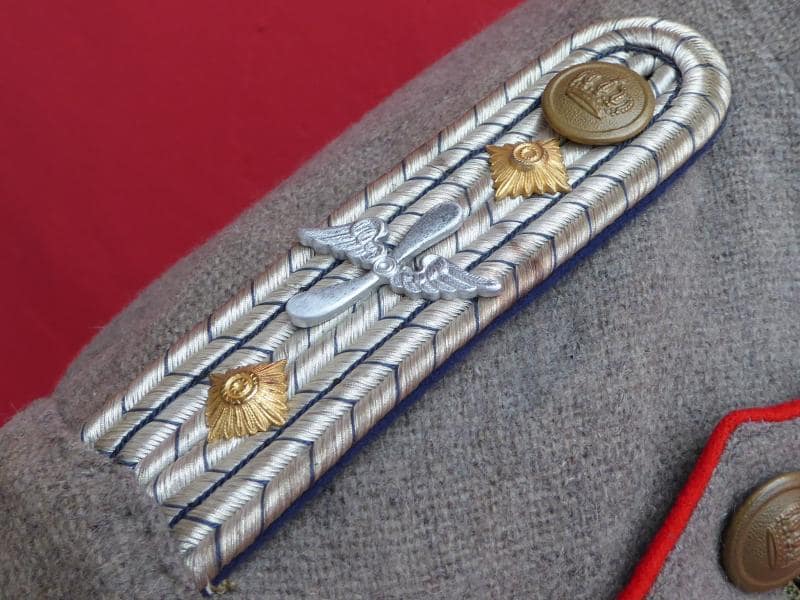
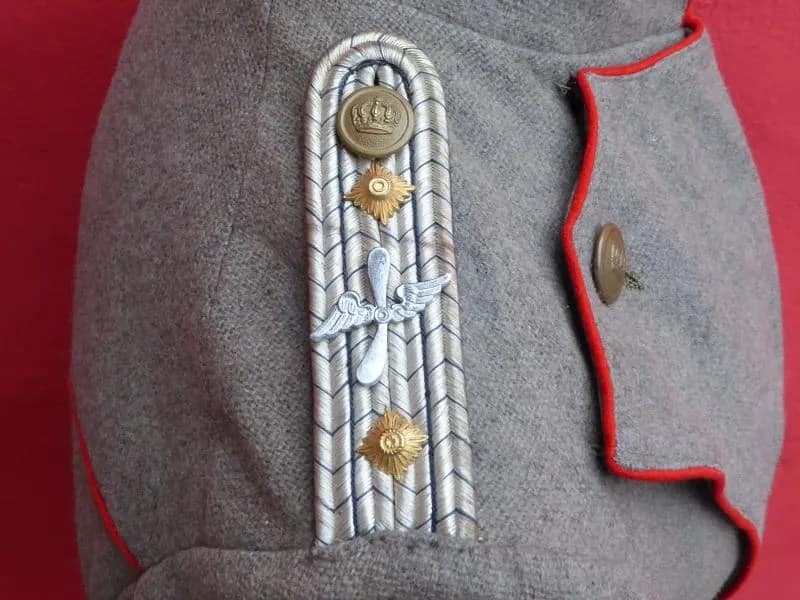
WW1 Imperial German Model Fliegerbluse (Pilot tunic), Uhlan pattern tunic (Uhlanka)
This Imperial German Fliegerbluse is a privately purchased pilot’s uniform. The owner was almost certanly a former cavalryman who continued to wear his stylish Uhlanka when he transferred to the Imperial German Air Service.
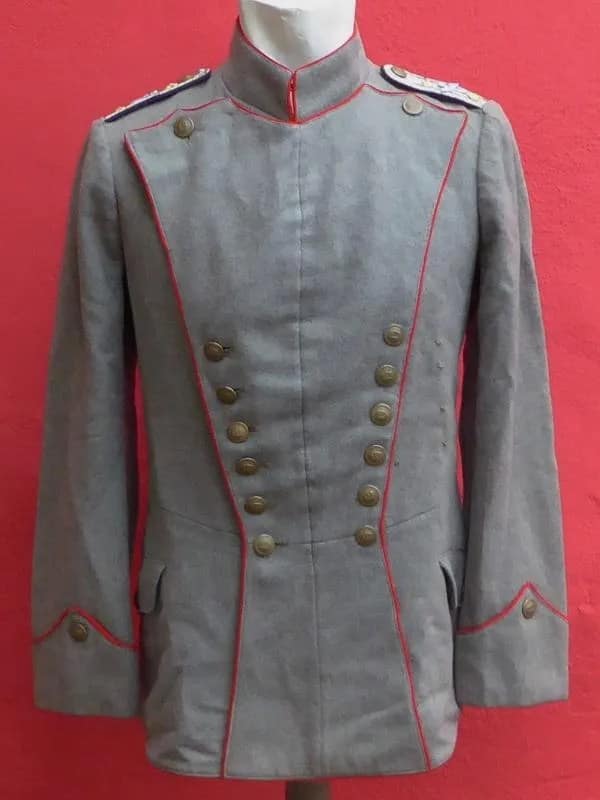
WW1 Imperial German Model 1907/10 tunic for an Offizierstellerverter, Infantry Regiment 141. From my personal collection.
This Imperial German Model 1907/10 tunic is attributed to an Offizierstellvertreter of Infantry Regiment 141, a senior non-commissioned rank roughly equivalent to a Warrant Officer Class One in Commonwealth armies. The tunic reflects the feldgrau field dress adopted by the German Army before the First World War, emphasising practicality and concealment. Rank insignia and regimental distinctions illustrate the structure and professional cadre that underpinned the Imperial German Army during the conflict.
WW1 Imperial German Model 1915 Feldbluse, 18th Foot Artillery Regiment. From my personal collection.
This Imperial German Model 1915 feldbluse is attributed to the 18th Foot Artillery Regiment and represents the simplified field tunic introduced during the First World War. Designed to reduce production time and material use, the feldbluse reflects the shift toward more practical wartime uniforms. The feldgrau colour and streamlined features illustrate Germany’s adaptation to the demands of industrialised warfare and prolonged conflict.
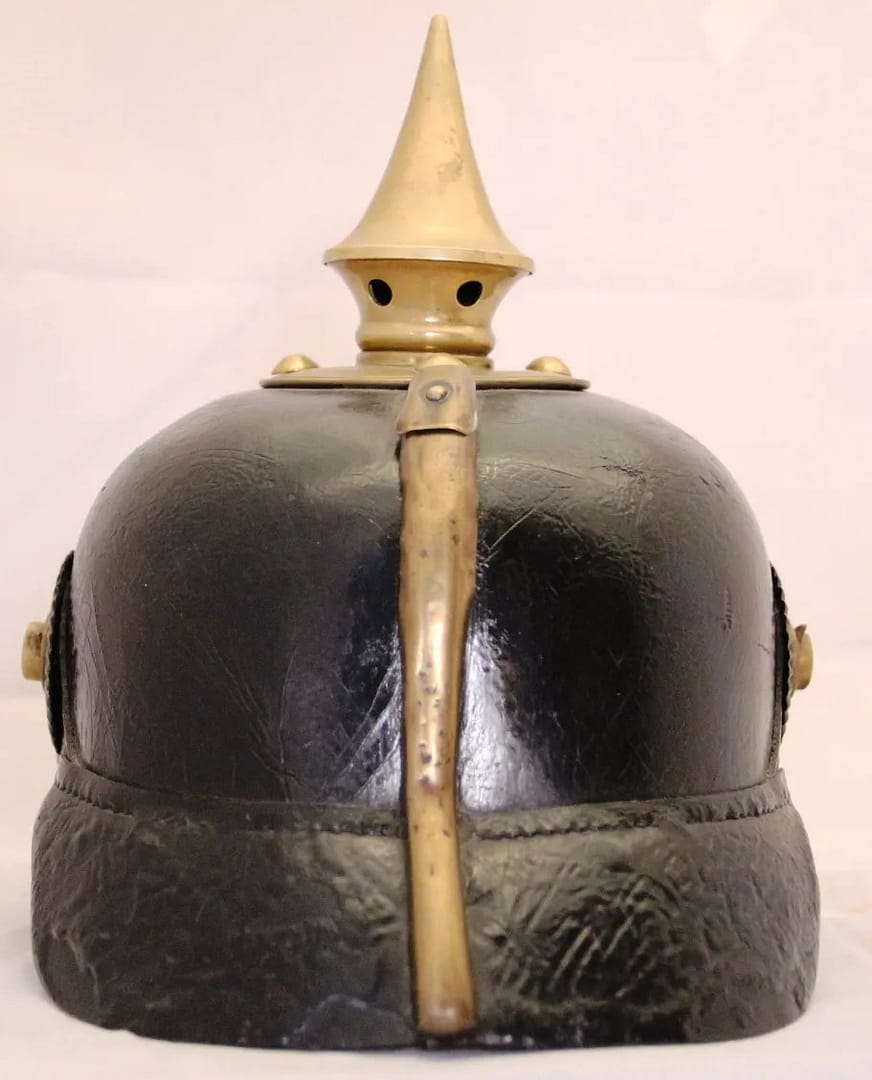
WW1 Imperial German Model 1895 pickelhaube. Fusilier Regiment 73, with PENINSULA WATERLOO bandeau. From my personal collection.
Model 1895 pickelhaube . Fusilier Regiment 73, with PENINSULA WATERLOO bandeau, original chinstrap. Ernst Junger Regiment
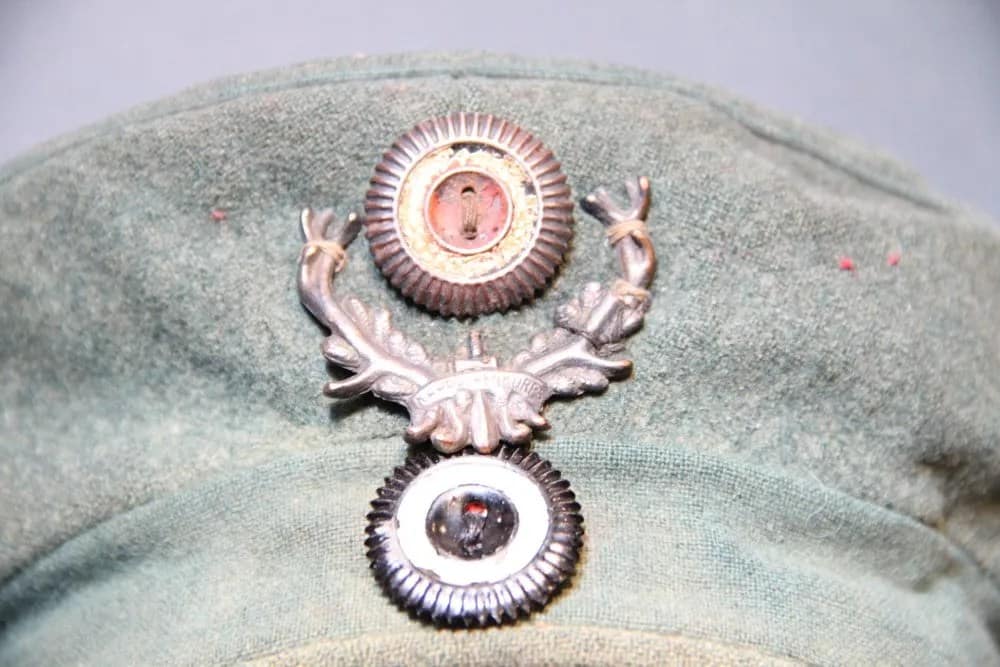
Extremely rare – WW1 Imperial German Model 1907/10 Kager Kratzchen Karpathenkorps. From my personal collection.
This exceptionally rare Model 1907/10 Krätzchen field cap is fitted with the distinctive antler badge of the German IV Reserve Corps, known as the Karpathenkorps, a formation created in 1915 for operations in the harsh mountain terrain of the Carpathians. The Krätzchen was widely worn by German troops in the early years of the war, valued for its practicality and comfort in field conditions. The antler emblem symbolised the corps’ mountain identity and elite status within the Imperial German Army. Surviving examples with original insignia are scarce, reflecting both wartime wear and the demanding operational environments in which these troops served.
WW1 Imperial German Model 1913 Feldgrau Fliegerhelm (pilot helmet). Marked Flieger Bekl Doberitz 1917. From my personal collection.
Model 1913. Feldgrau Fliegerhelm Marked Flieger Bekl Doberitz 1917
🧭 From Weapons to Battlefield Use
This page shows weapons and equipment of the First World War. All items are from my personal collection.
But what images and data don’t show is how these weapons were actually used on the ground—how weapon characteristics, tactics, innovation, terrain, and movement shaped their effectiveness in battle.
#1. WW1 Imperial German Model 1916 Camouflaged Stahlhelm. From my personal collection.
Model M1916. Jagged zig zag camo, vivid yellow ochre front, full M16 liner, three pads, dark sweatstained, no pull throughs, three pillows, original chinstrap,
#2. WW1 Imperial German Model 1917 Camouflaged Stahlhelm. From my personal collection.
M1917. zig zag camouflage, faded and worn colours, M17 liner ring, white pads, dark sweatstained, no pullthroughs, three pillows, remnant of drawstring, M1915 chinstrap chinstrap, BF64
#3. WW1 Imperial German Model 1916 Camouflaged Stahlhelm. From my personal collection.
M1916. Rectangular block camo, deep rich colours, very well preserved, three pads, one pad has both tongues broken off, no pillows, M91 chinstrap mounts, G62
#4. WW1 Imperial German Model 1916 Camouflaged Stahlhelm. From my personal collection.
Model 1916. Linear camo, M16 liner band, three brown pads, one pad has slightly cracked away and has old stitched string repair, no pillows, original M1895 chinstrap, BF62. evidence of mail home labels on front and on top
#5. WW1 Imperial German Model 1916 Camouflaged Stahlhelm. From my personal collection.
Model 1916. Camouflage, dull angular camo, mottled patina, M16 liner three pads, no tear throughs, drawstring, three pillows, original chinstrap, one liner pad loose, chinstrap, SI66
#6. WW1 Imperial German Model 1918 Camouflaged Stahlhelm. From my personal collection.
Model 1918. Dull angular canouflage, oil spot staining on right rear, M18 liner ring and chinstrap attachments, no liner, no chinstrap ET64.
Note that helmet #6 and helmet #7 were almost certainly painted by the same person, or at least by teh same German unit. The camouflage patterns are almost identical. I purchased these two helmets at least 10 years apart in different parts of the world.
#7. WW1 Imperial German Model 1916 Camouflaged Stahlhelm. From my personal collection.
Model 1916. Angular camouflage, all colours faded to dark patina, excellent M1916 liner band, three pads, no tearthroughs, drawstring, three pads, no chinstrap, marked ‘GULAWA’ ??? G62
Note that helmet #6 and helmet #7 were almost certainly painted by the same person, or at least by teh same German unit. The camouflage patterns are almost identical. I purchased these two helmets at least 10 years apart in different parts of the world.
#8. WW1 Imperial German Model 1918 Camouflaged Stahlhelm. From my personal collection.
Model 1918. Rich deep block camouflage, excellent preservation, chip on front, full liner, three white pads, no pullthroughs, three pillows, fitted with M91 chinstrap rather than M1918 chinstrap original drawstring TJ66
#9. WW1 Imperial German Model 1917 Camouflaged Stahlhelm. From my personal collection.
M1917. Angular camouflage, M17 liner band, two pads – one attached still with pillow, one loose, original drawstring, one pad attached, one loose, no chinstrap, SI66
#10. WW1 Imperial German Model 1917 Camouflaged Stahlhelm. From my personal collection.
Model 1917. Block camouflage, M1917 liner band, no pads or chinstrap, one M91 chinstrap loop SI66
#11. WW1 Imperial German Model 1916 Camouflaged Stahlhelm. From my personal collection.
Model 1916. Curved camouflage, vertical split front, no liner band or chinstrap, SI66, excellent condition
#12. WW1 Imperial German Model 1917 Camouflaged Stahlhelm. From my personal collection.
Model 1917. Angular diamond camouflage, full M1917 liner, with band, three white pads, three pillows, no pullthroughs, no chinstrap, ET62, Helmet is squashed laterally, particularly dented on right side
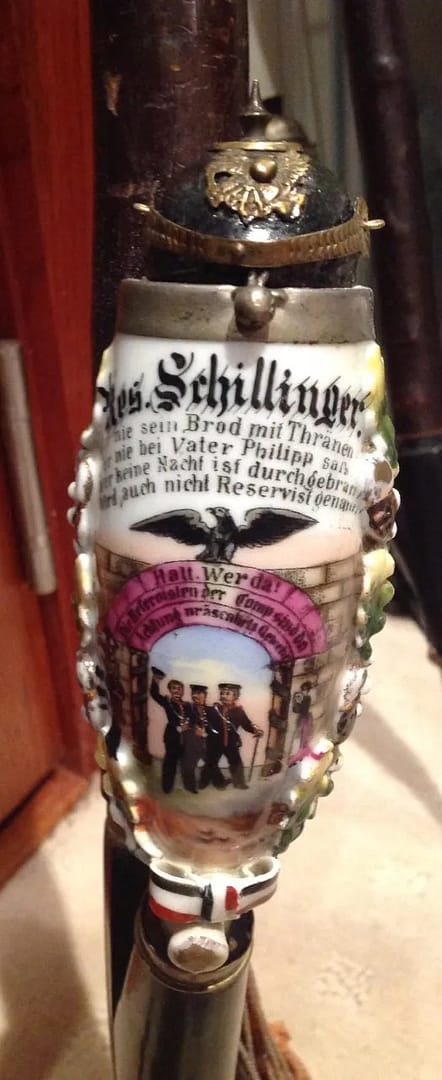
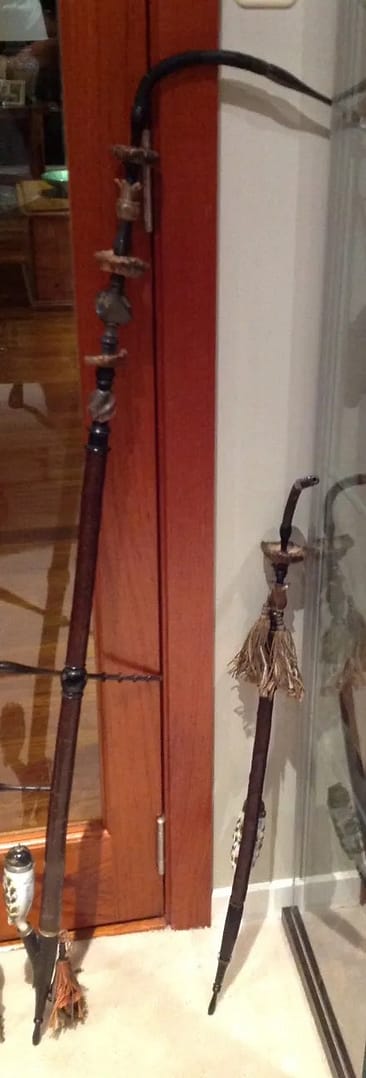
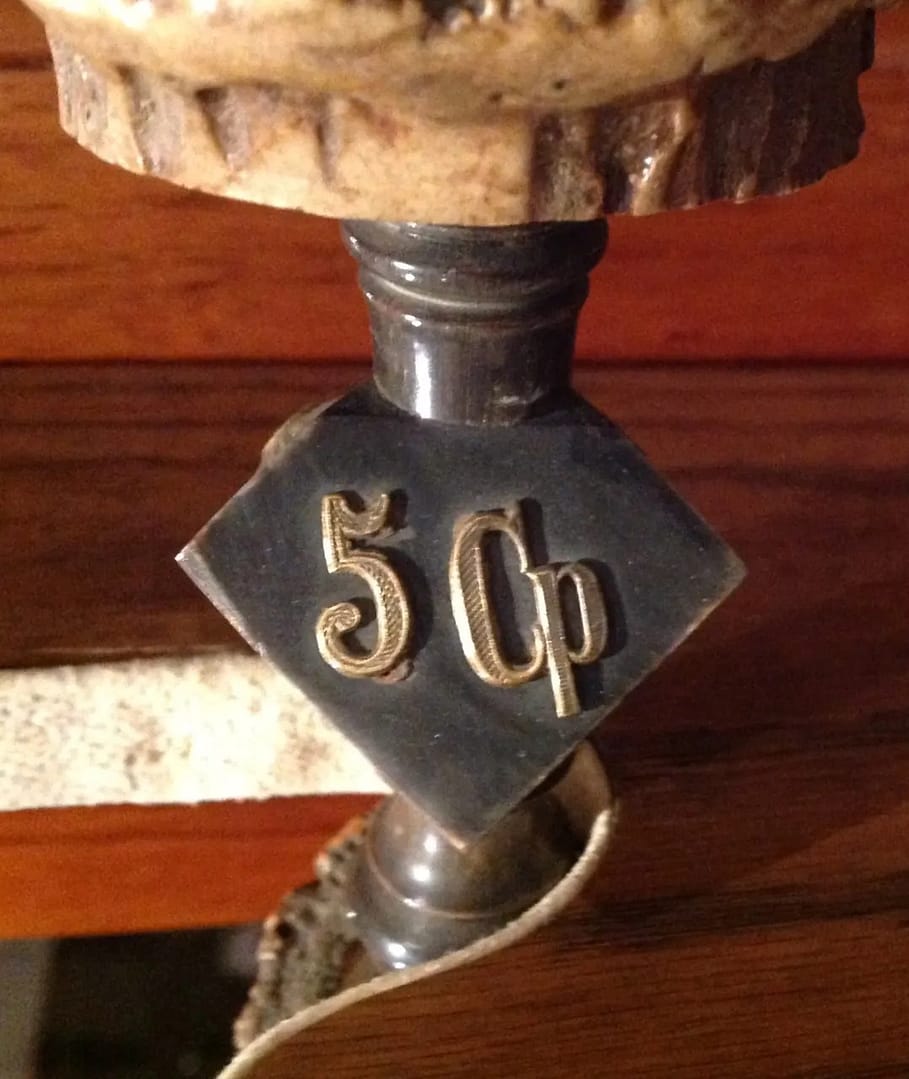
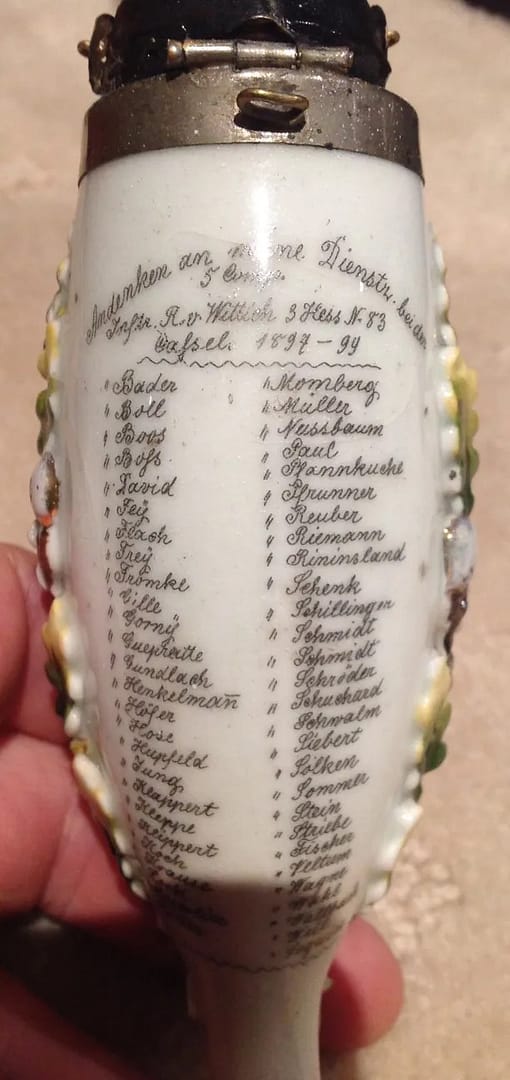
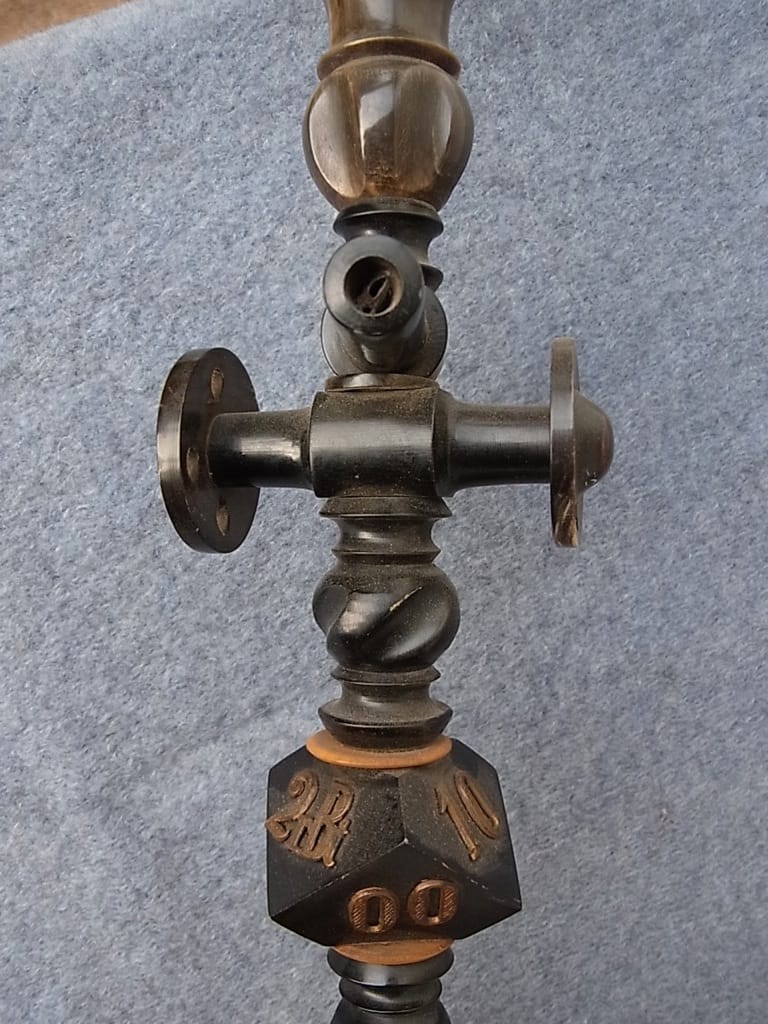
WW1 German Reservistenpfeife (Regimental pipe). Infanterie Regiment Nr 83 Hesse. Reservist Schillinger 5th Companie. From my personal collection.
German Regimental pipe provide a fabulous insight into the pre-war life of German Army reservists. German soldiers were particuafly fond of Regimental souvenirs like beer steins and elaborate tobacco pipes. These items were decorated with regimental elelents reflecting the type of unit, and bore complete details of the compaines, regiments, and names of the individuals in the companies. In this case: Reservist Schillinger of teh 5th Company , 83 Hesse Reserve Infantry Regiment.
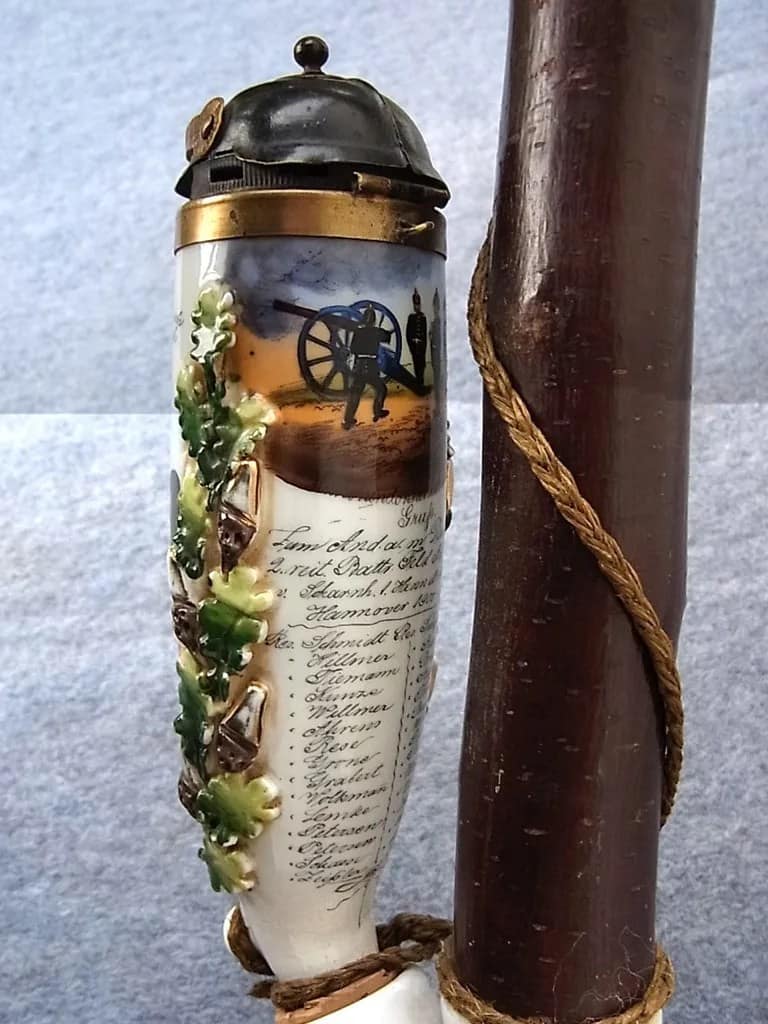
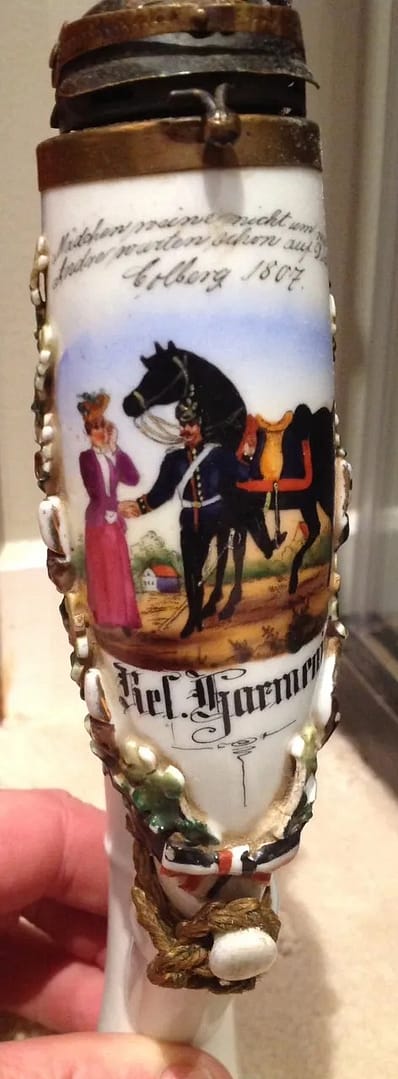
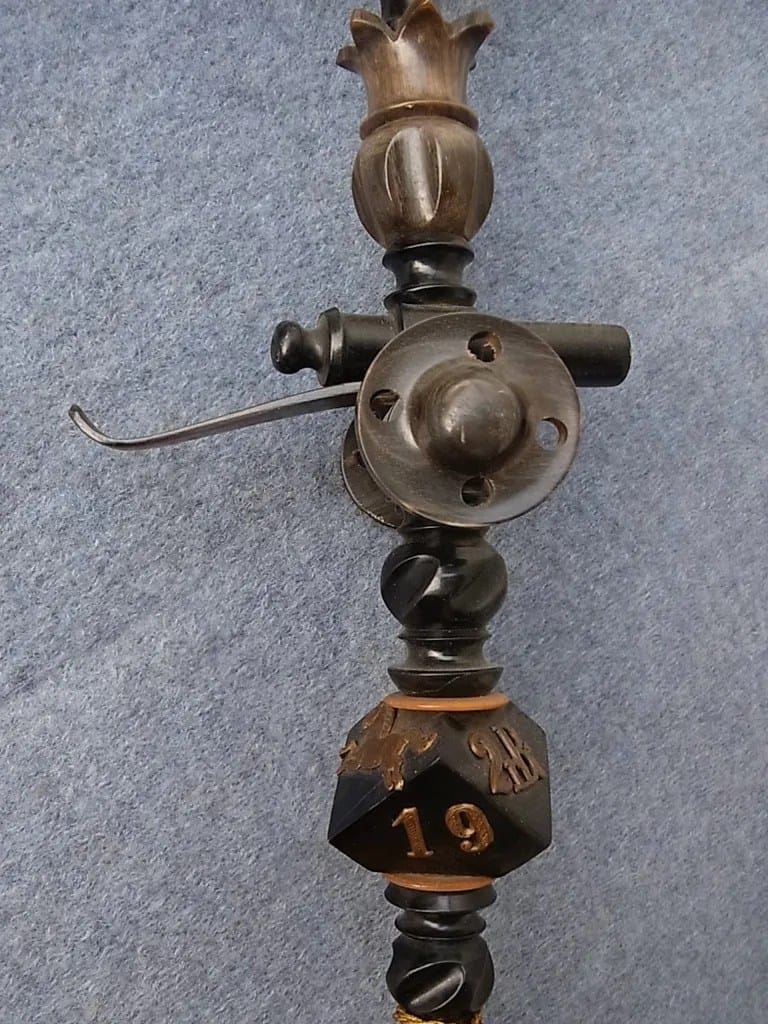
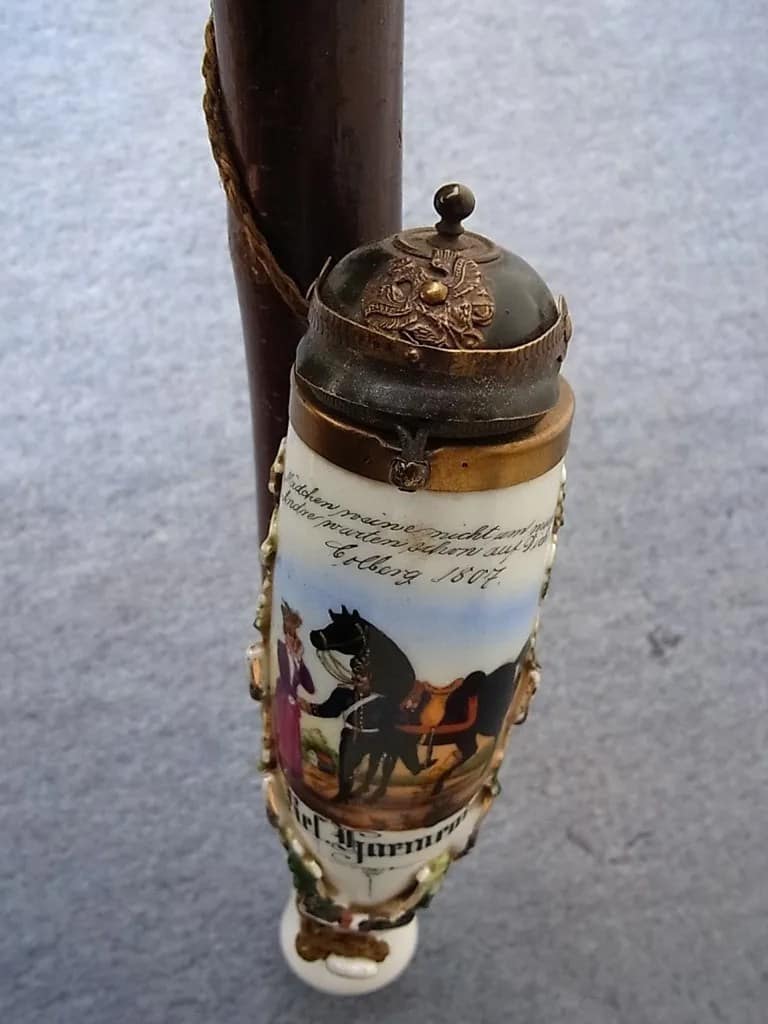
WW1 German Reservistenpfeife (Regimental pipe). 2nd Battery, Hannoverian 10th Artillery Regiment 1900-1903. From my personal collection.
German Regimental pipe provide a fabulous insight into the pre-war life of German Army reservists. German soldiers were particuafly fond of Regimental souvenirs like beer steins and elaborate tobacco pipes. These items were decorated with regimental elelents reflecting the type of unit, and bore complete details of the compaines, regiments, and names of the individuals in the companies. In this case: 2nd Battery, Hannoverian 10th Artillery Regiment 1900-1903.
AUSTRIA-HUNGARY
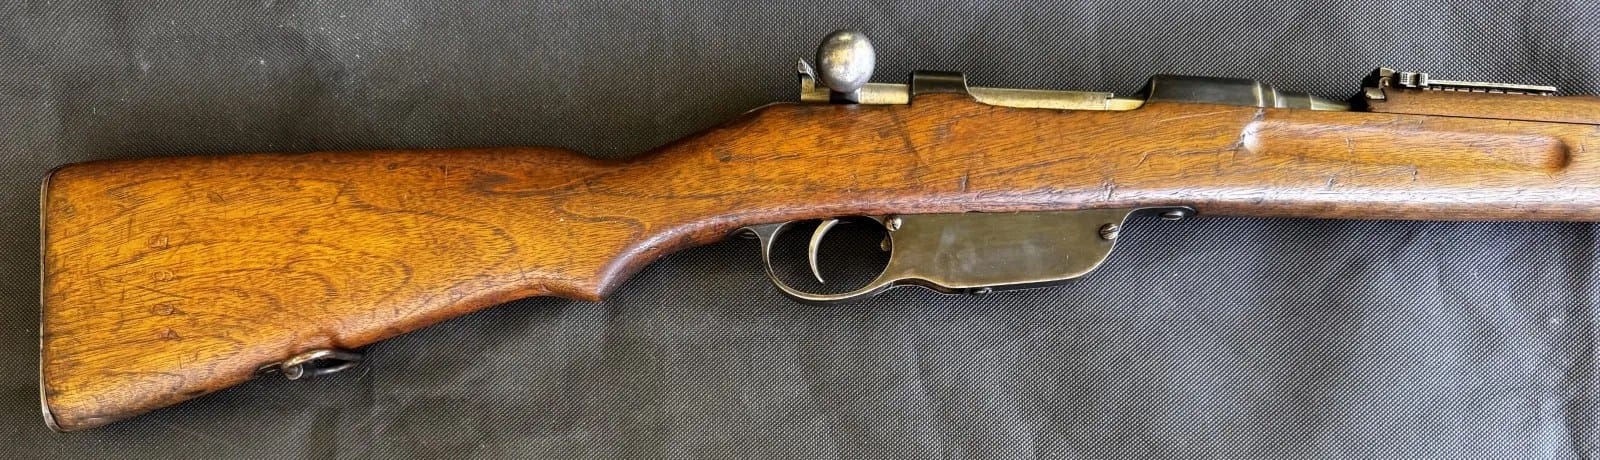
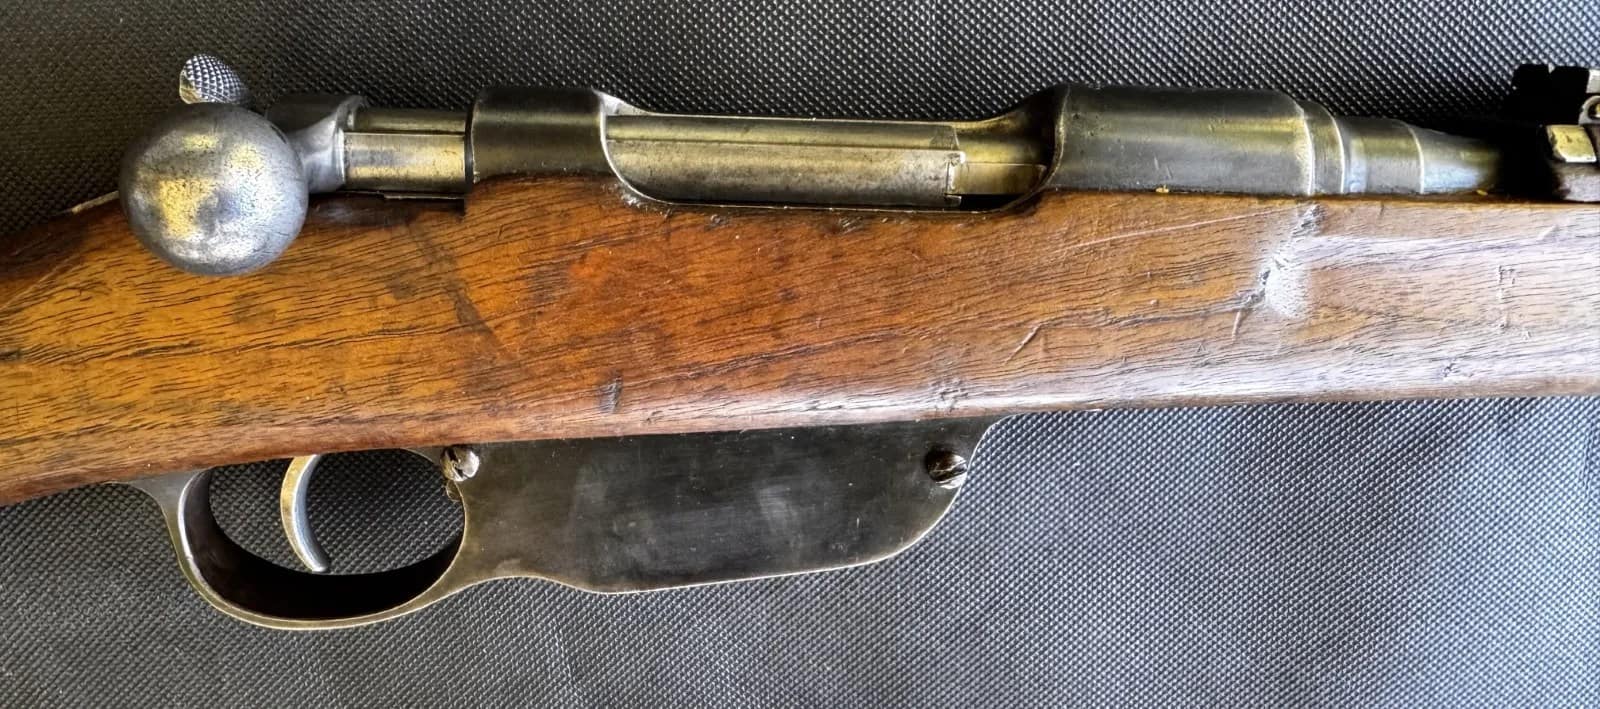
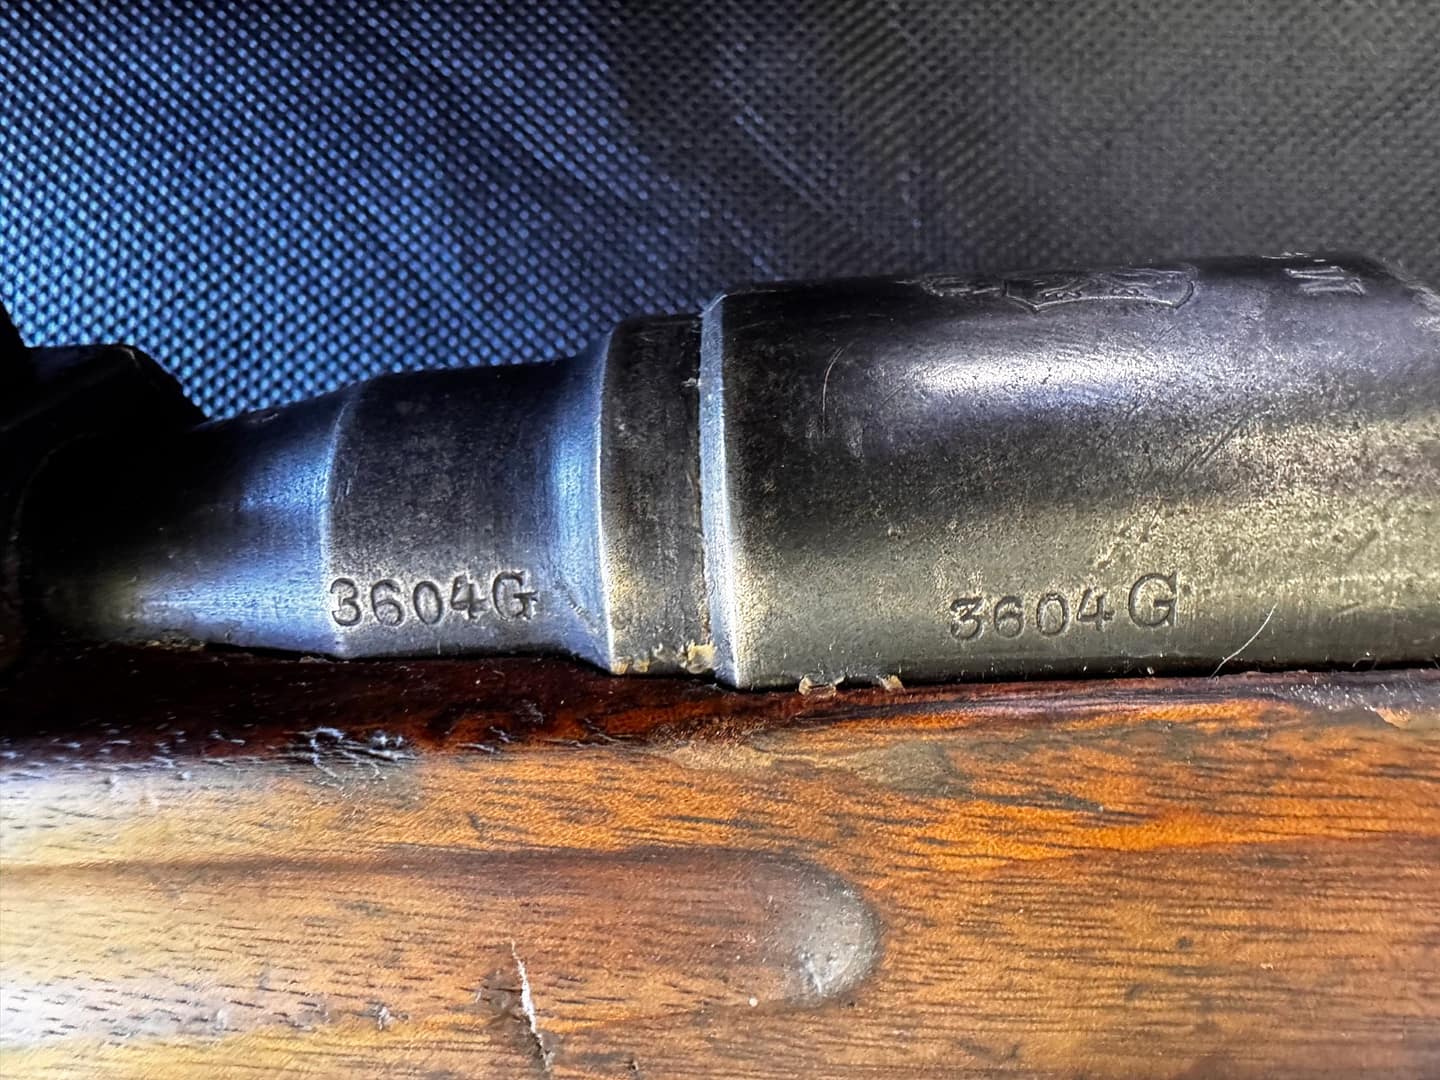
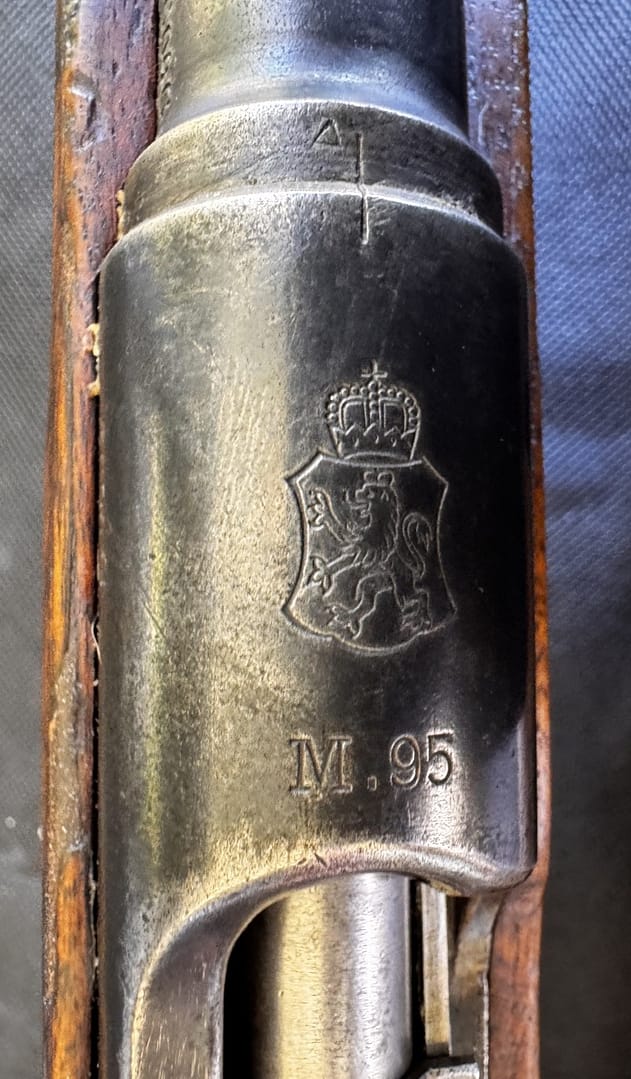
WW1 Austro-Hungarian Mannlicher Model 1895 Straight-Pull Rifle, From my personal collection
The Mannlicher Model 1895 was the standard service rifle of the Austro-Hungarian Army during the First World War. Designed by Ferdinand Mannlicher, it featured a distinctive straight-pull bolt action that allowed rapid cycling and was chambered in 8×50mmR, later updated to 8×56mmR. Widely issued to infantry and support troops, the rifle served on multiple fronts and became synonymous with Austro-Hungarian forces during the conflict.
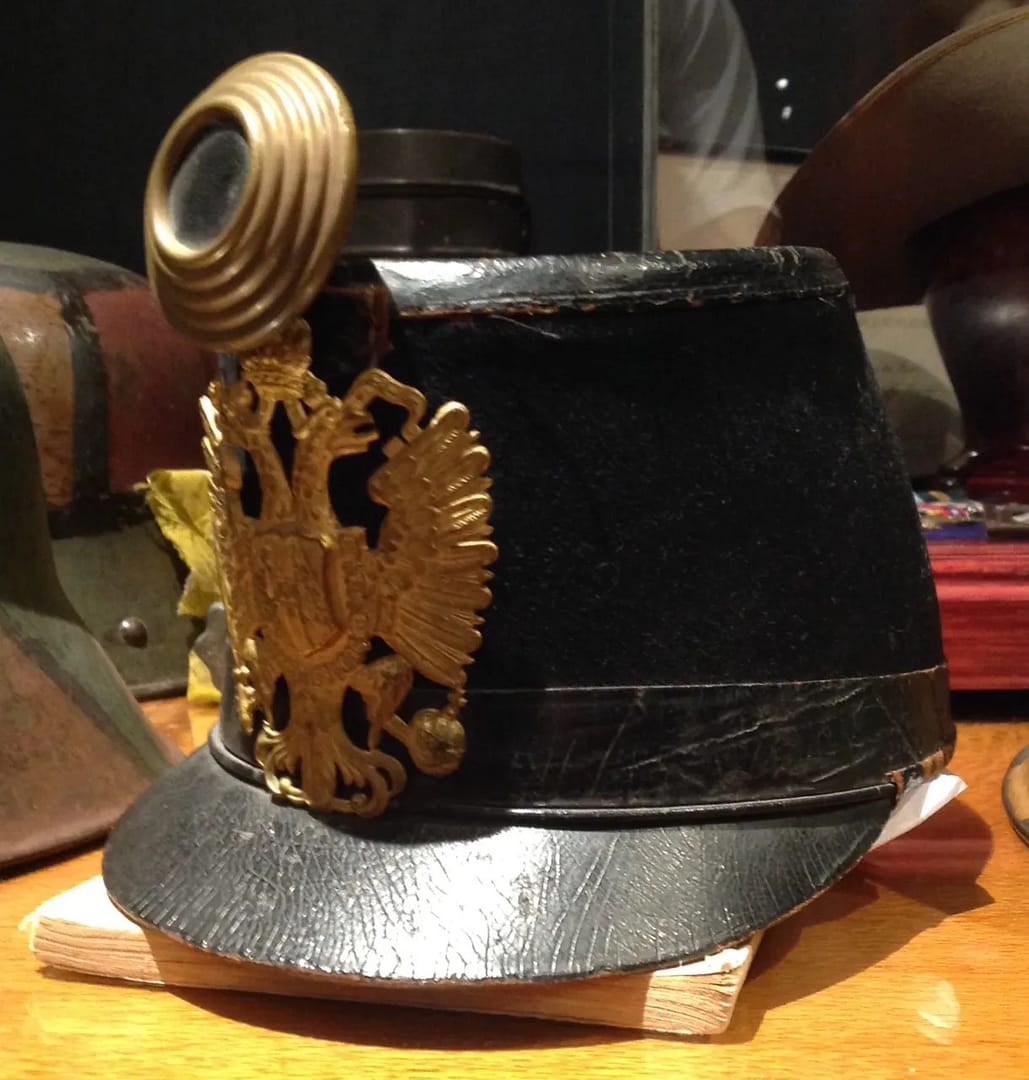
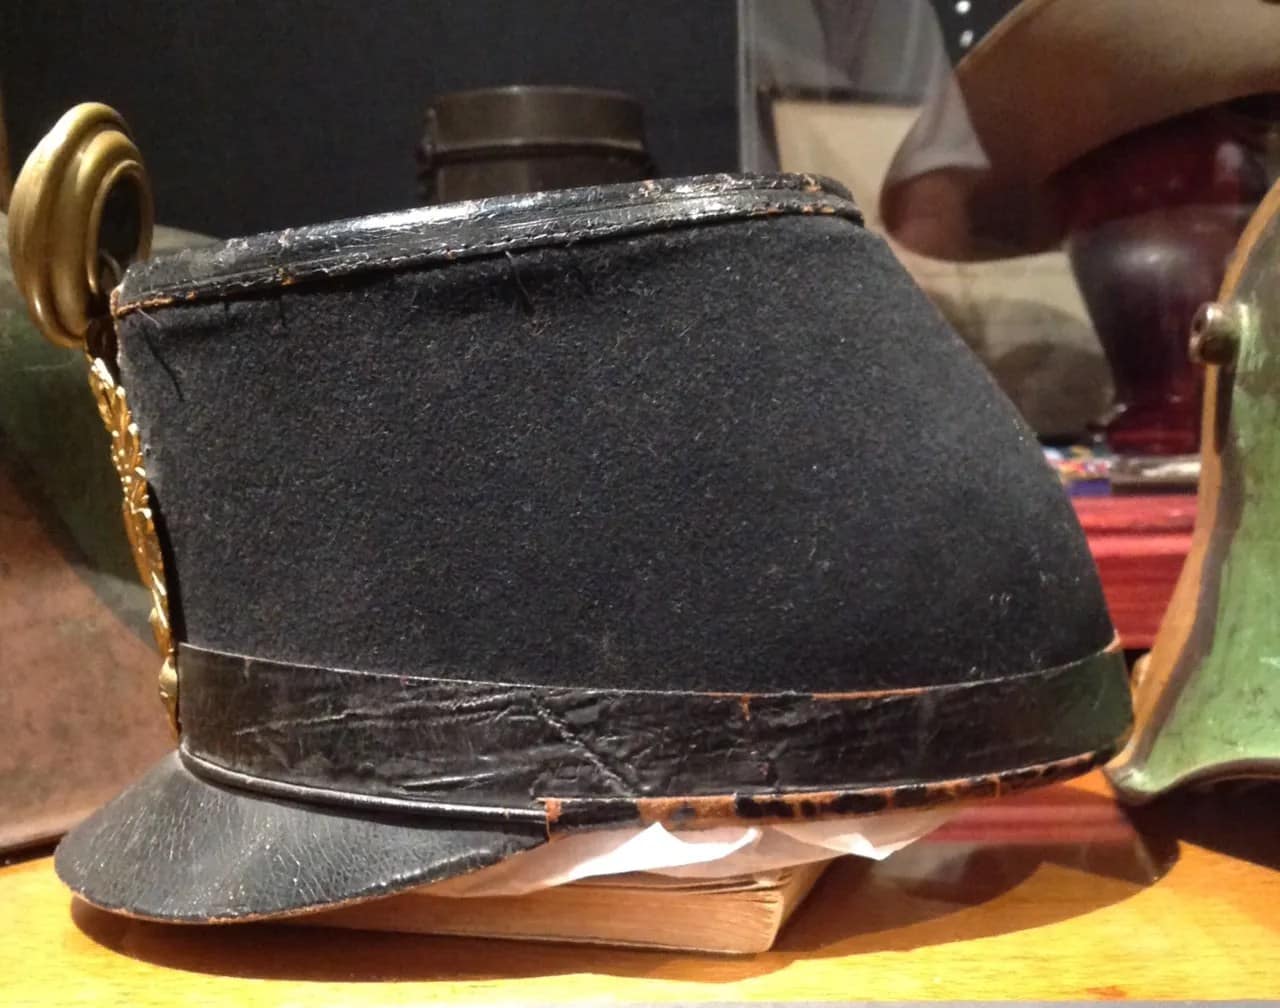
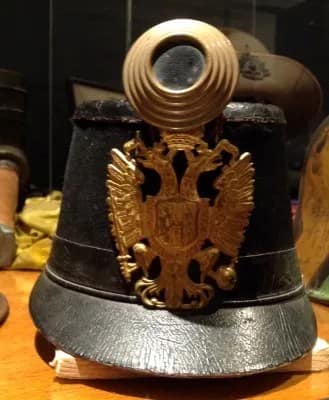
WW1 Austro-Hungarian Enlisted Mans Tschako, From my personal collection
The Austro-Hungarian enlisted man’s Tschako was a distinctive service headdress worn by infantry and other line troops in the early stages of the First World War. Derived from nineteenth-century parade and service dress, it combined traditional appearance with practical field use before widespread adoption of steel helmets. Constructed from stiffened cloth or felt with a front plate bearing imperial insignia, it identified branch and allegiance within the k.u.k. Army. As trench warfare intensified from 1915, the Tschako was increasingly replaced by the steel helmet, reflecting the shift toward modern battlefield protection requirements.
WW1 Austro-Hungarian M1917 helmet, From my personal collection
This Austro-Hungarian Model 1917 steel helmet represents the adoption of modern head protection by the Austro-Hungarian Army during the later stages of the First World War. Influenced by German helmet designs, it was introduced to protect soldiers from shell fragments and battlefield debris. The helmet reflects the broader shift toward steel protection across European armies as the realities of industrialised warfare reshaped equipment and soldier survivability.
WW1 Austro-Hungarian M1917 helmet, From my personal collection
Model 1917. Nice Austrian feldbrun, some rust staining across top, excellent liner, with pads and pillows, chinstrap stubs
WW1 Austro-Hungarian Model 1916 infantry tunic. Coarse feldgrau wool. From my personal collection.
This Austro-Hungarian Model 1916 infantry tunic, made from coarse feldgrau wool, represents the simplified field dress introduced during the later years of the First World War. Designed for practicality and mass production, the tunic reflects the material shortages and industrial pressures faced by the Austro-Hungarian Army. Its subdued colour and utilitarian construction illustrate the adaptation of uniforms to the demands of prolonged modern warfare.
WW1 Austro-Hungarian Model 1916 infantry tunic. Coarse feldgrau wool. From my personal collection.
Austro-Hungarian Model 1915 infantry tunic, EM feldgrau, 14th Infantry Regt, black collar tabs, white cellulose stars
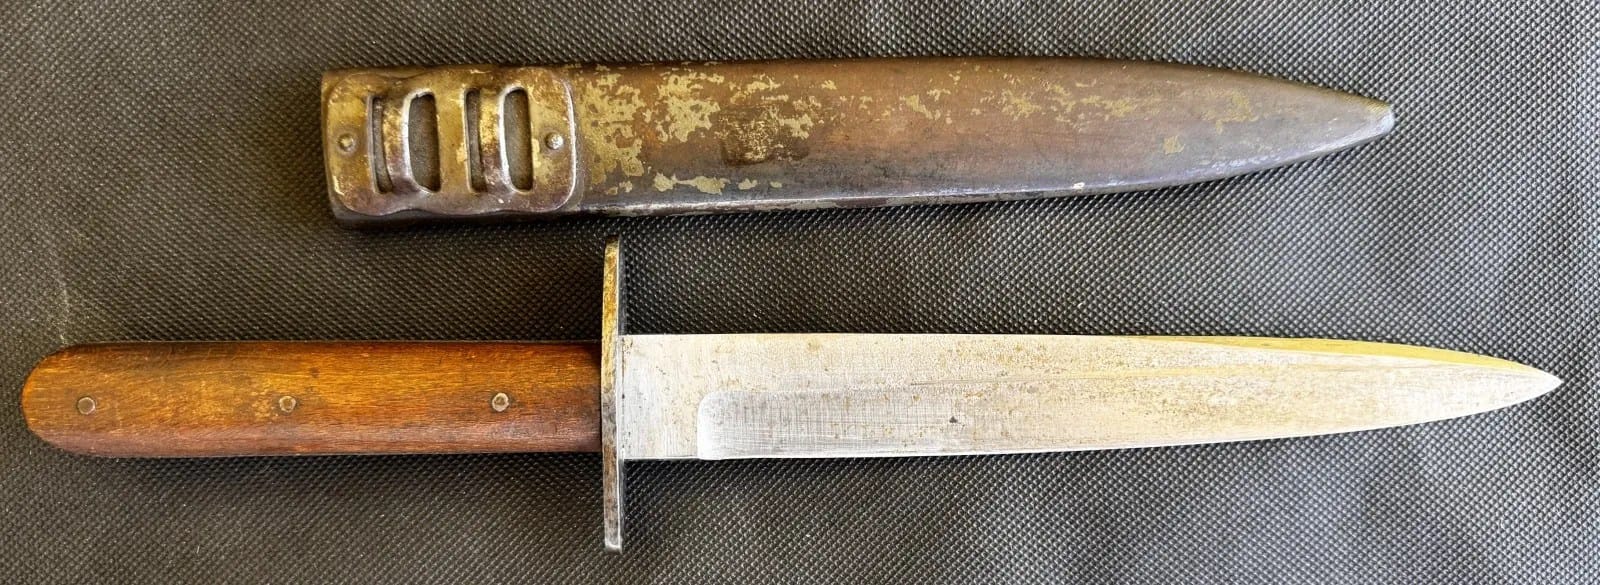
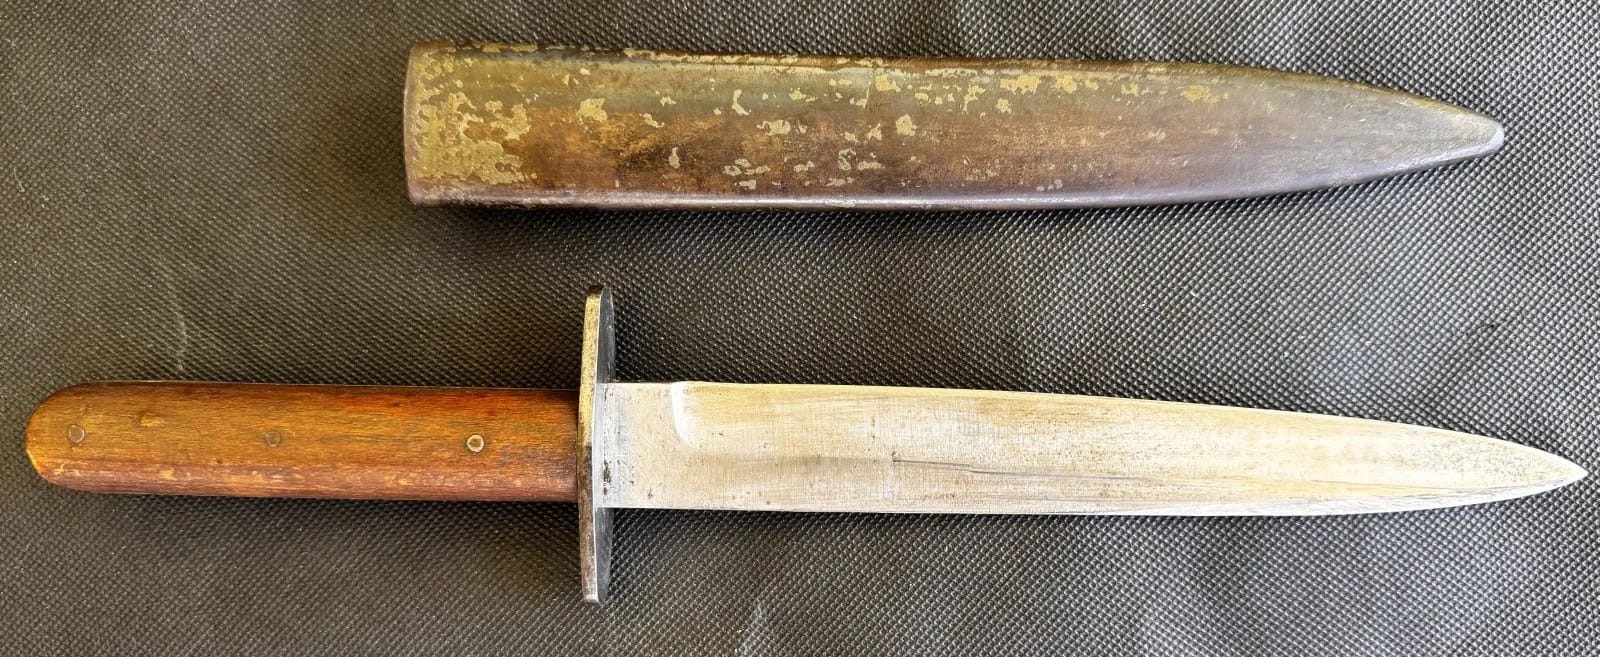
WW1 Austro-Hungarian trench dagger. From my personal collection.
This Austro-Hungarian trench fighting dagger reflects the brutal close-quarters combat that characterised much of the First World War. Designed as a compact stabbing weapon, it was intended for use in raids, patrols, and defensive fighting within trench systems. Such daggers were often privately purchased or locally produced and carried alongside standard equipment.
OTTOMAN EMPIRE
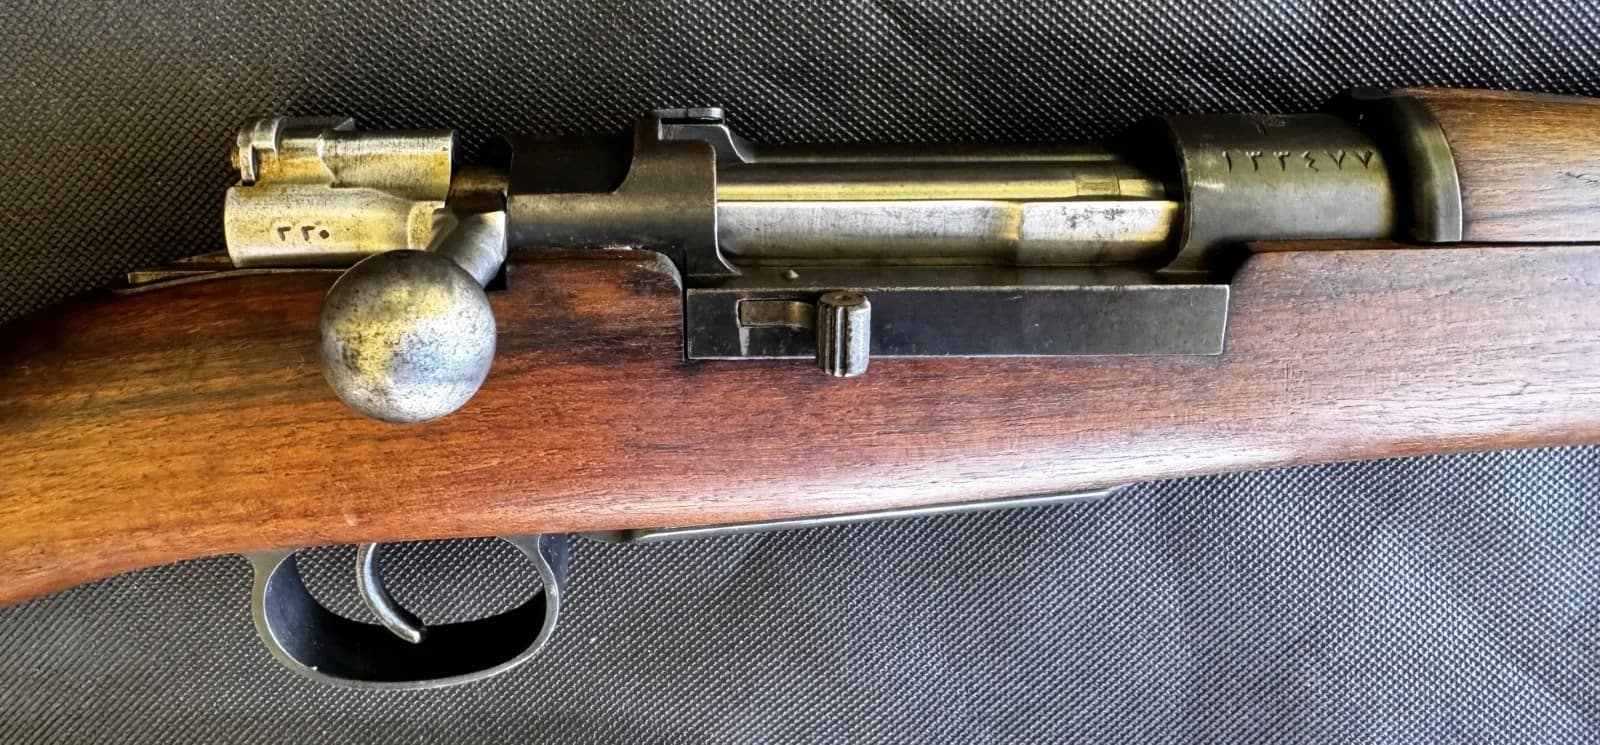
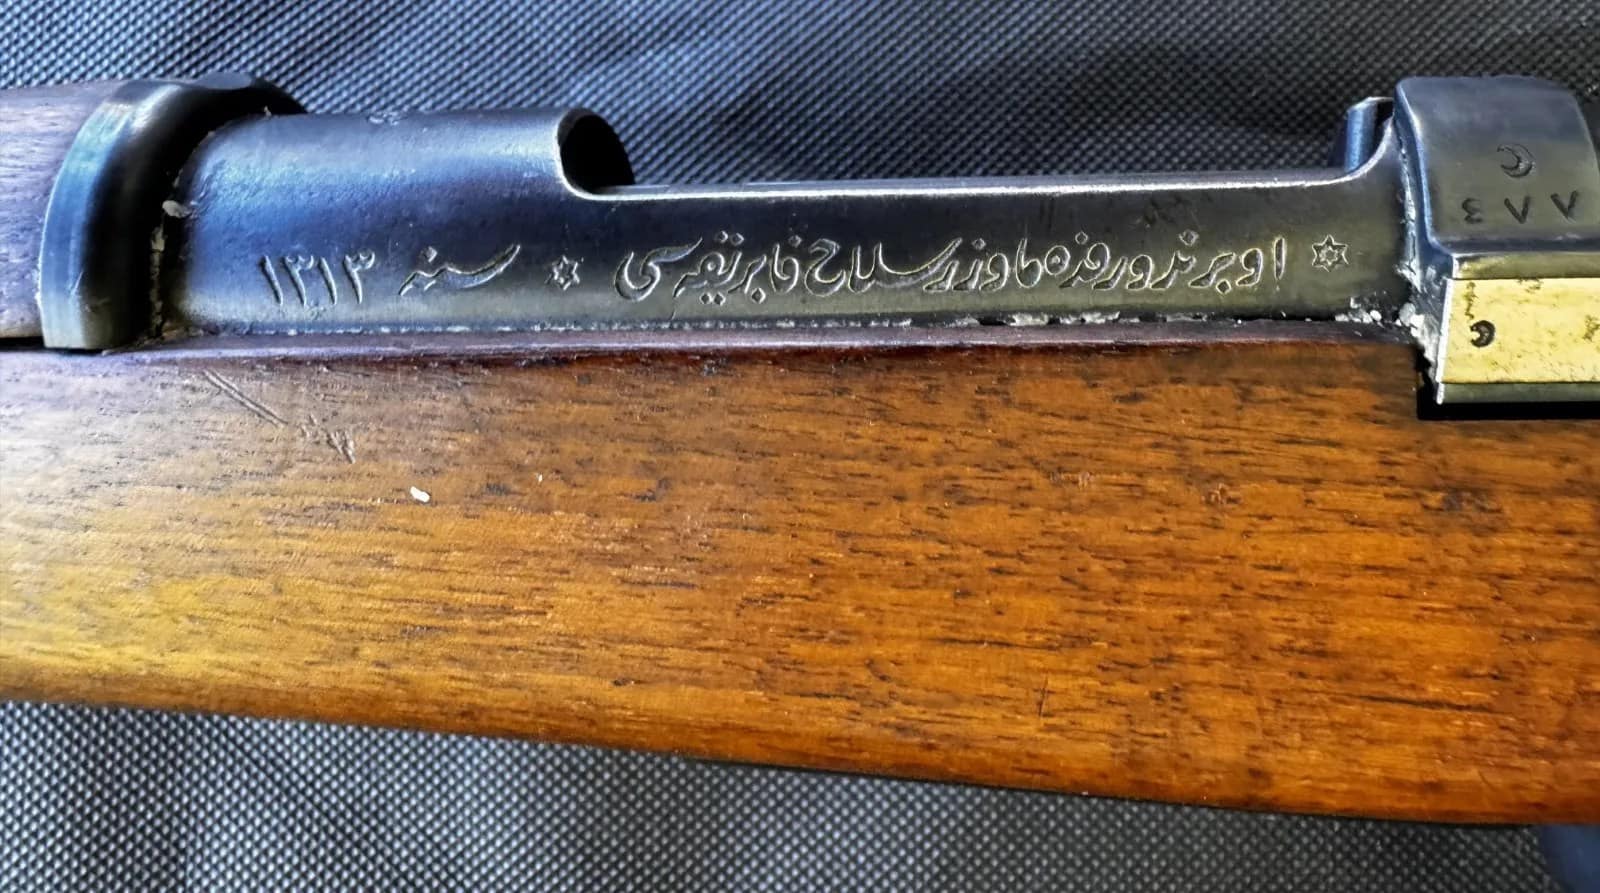
WW1 Ottoman Model 1893 Mauser Rifle.
The Ottoman Model 1893 Mauser was a bolt-action infantry rifle produced by Mauser in Germany for the Ottoman Empire, chambered in 7.65×53mm. It represented a major step in modernising Ottoman infantry armament in the late nineteenth century, featuring a strong bolt system and smokeless powder cartridge. Rifles of this type saw extensive service in the Balkan Wars and the First World War, equipping Ottoman forces across multiple fronts.
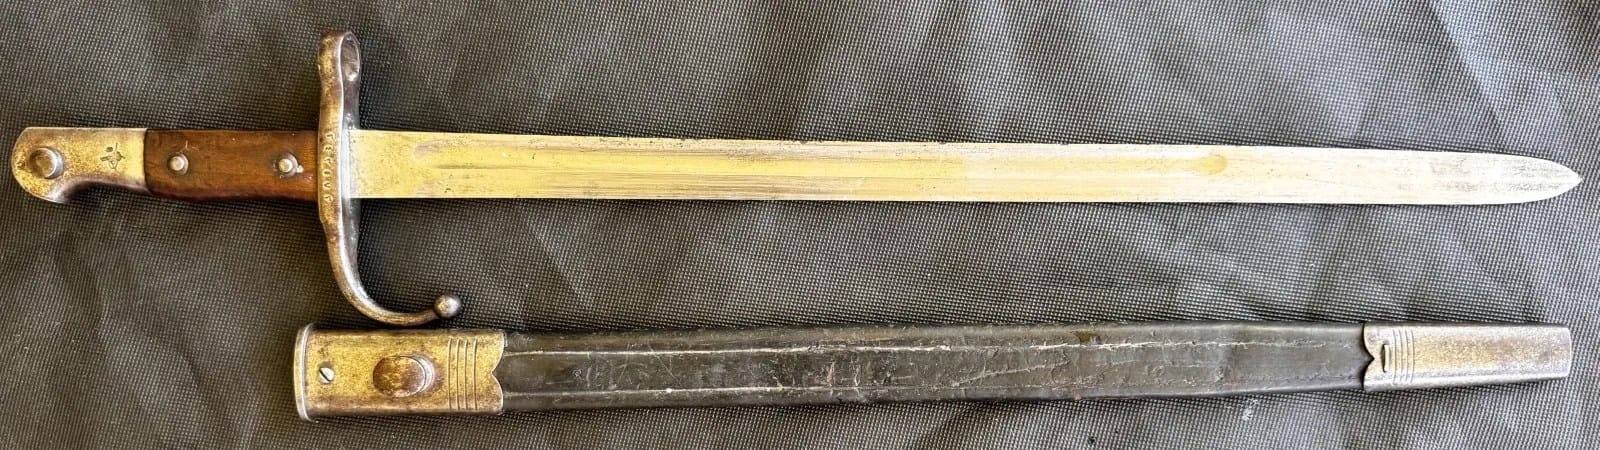
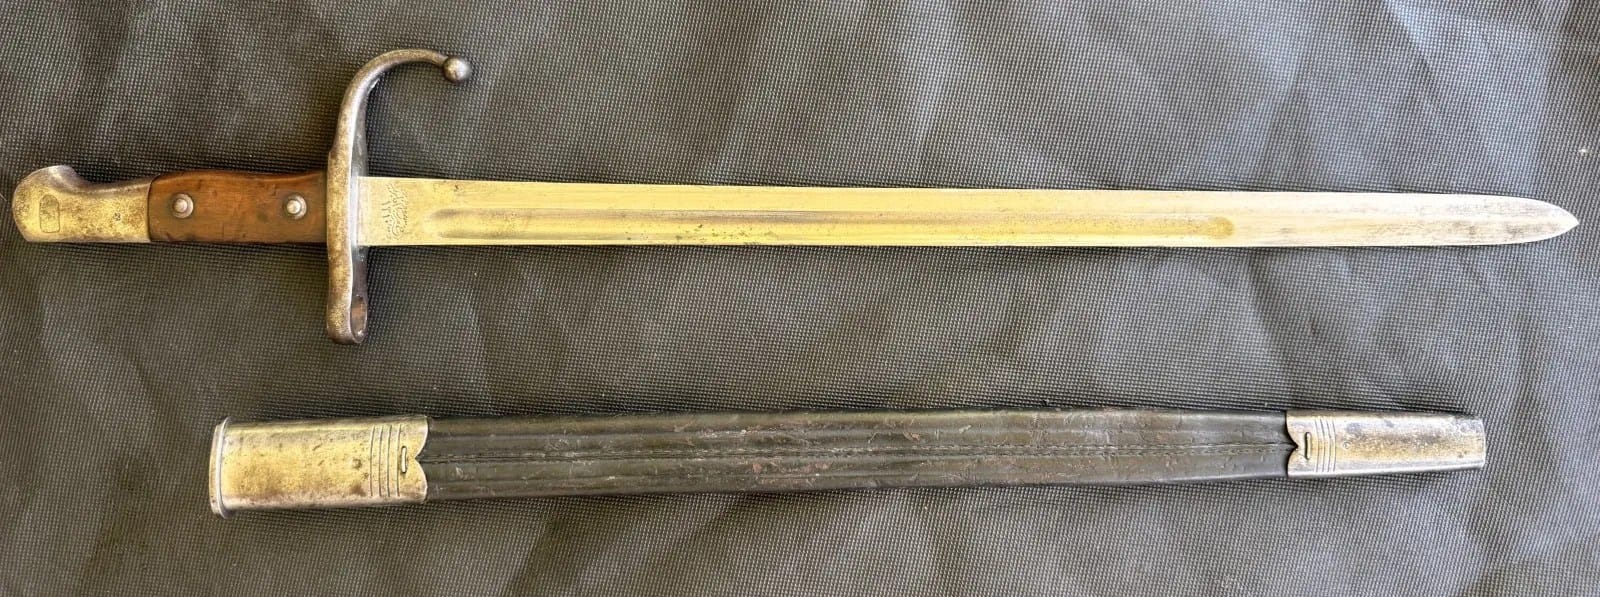
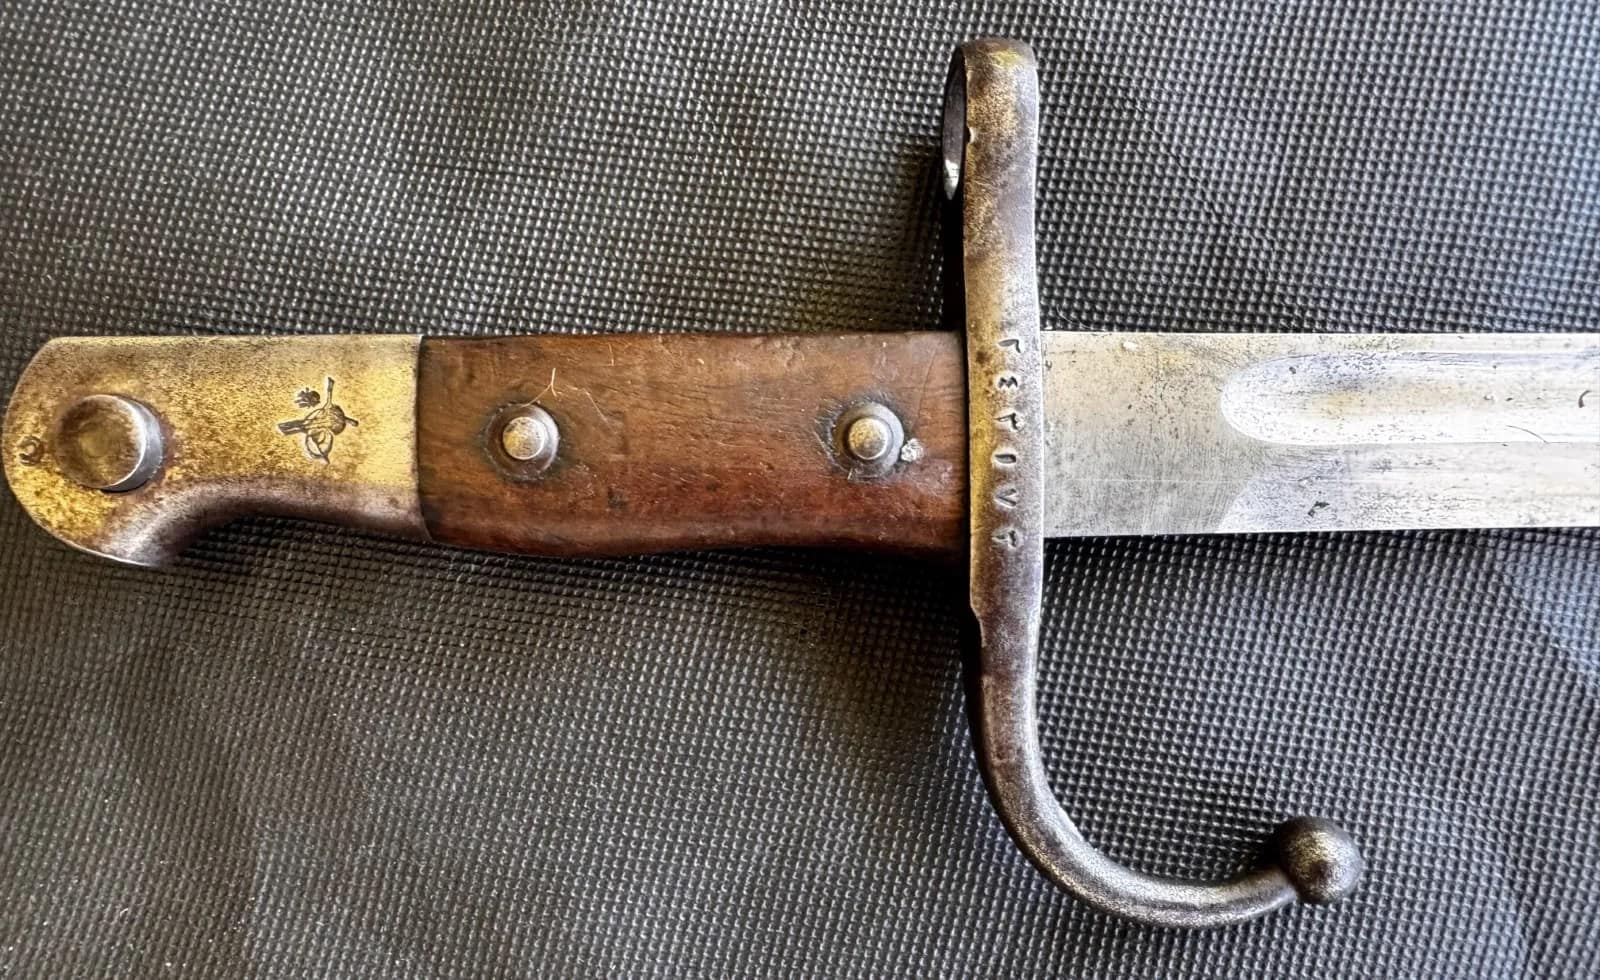
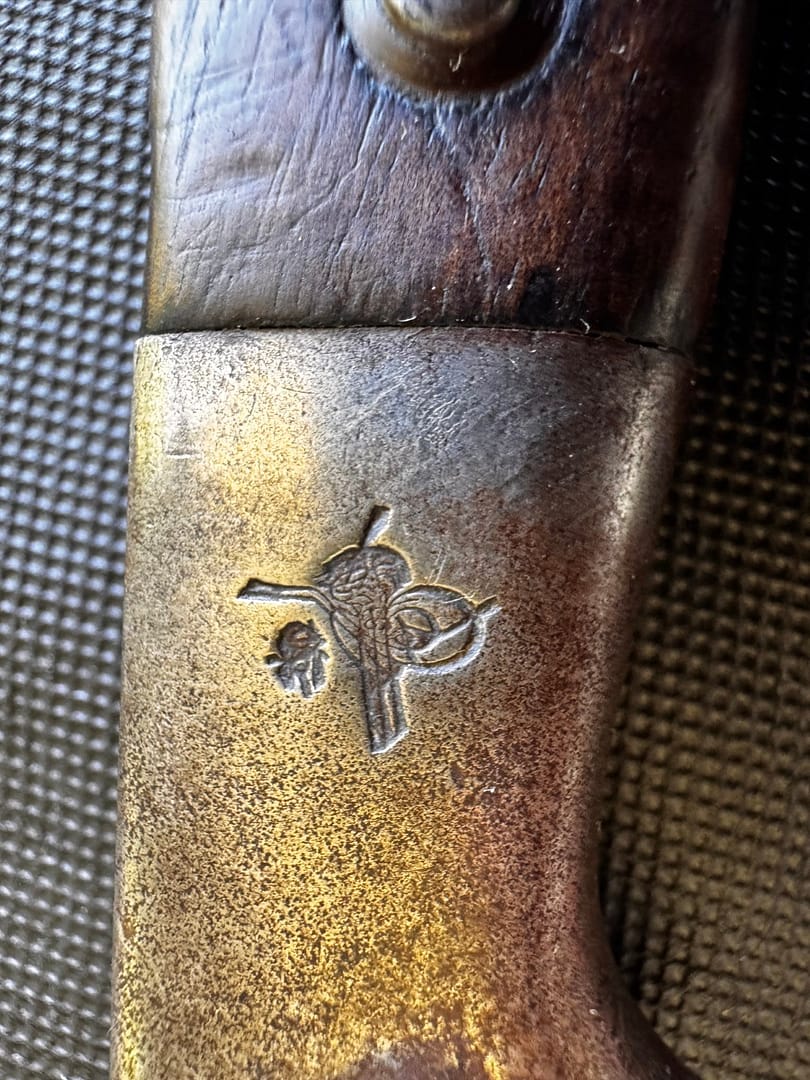
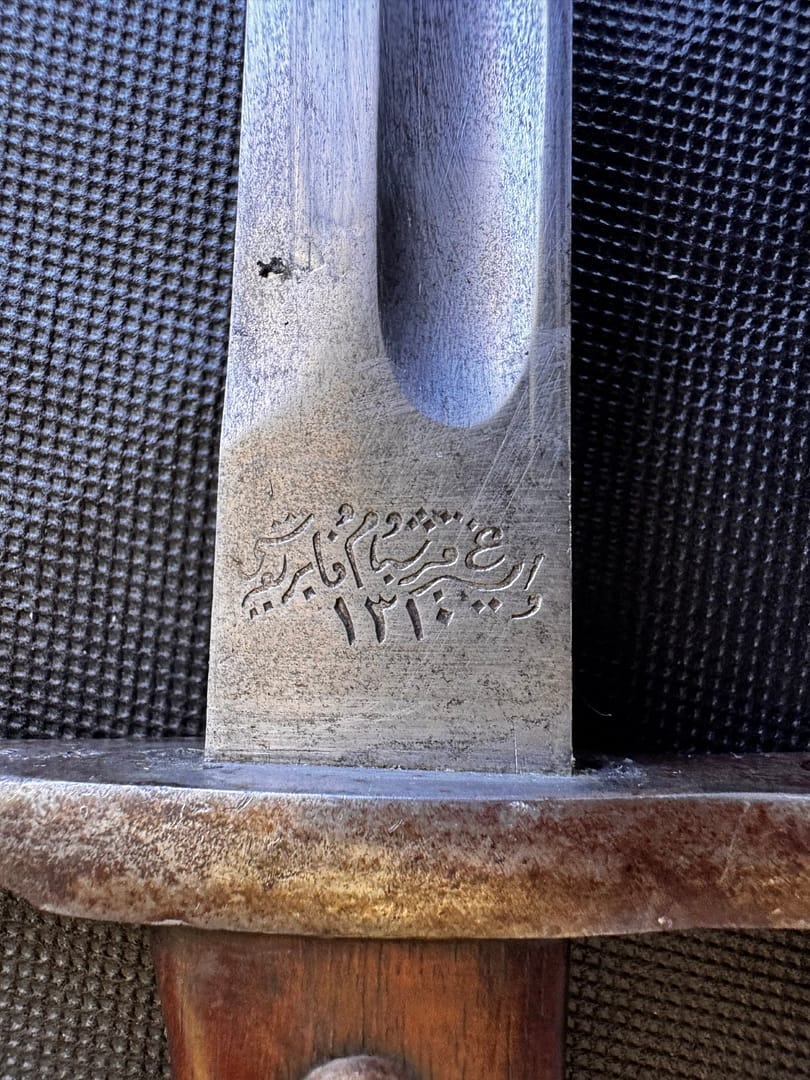
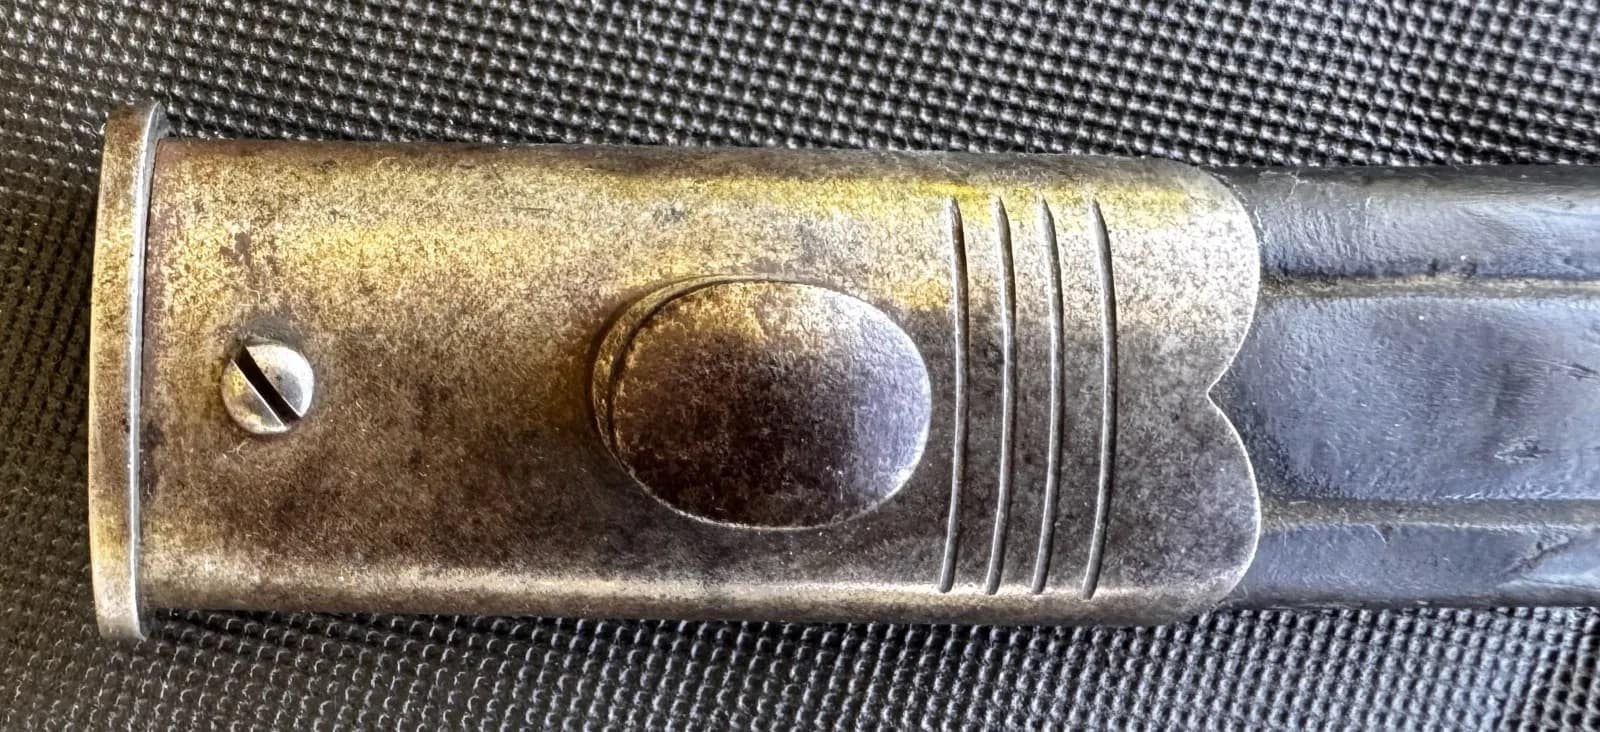
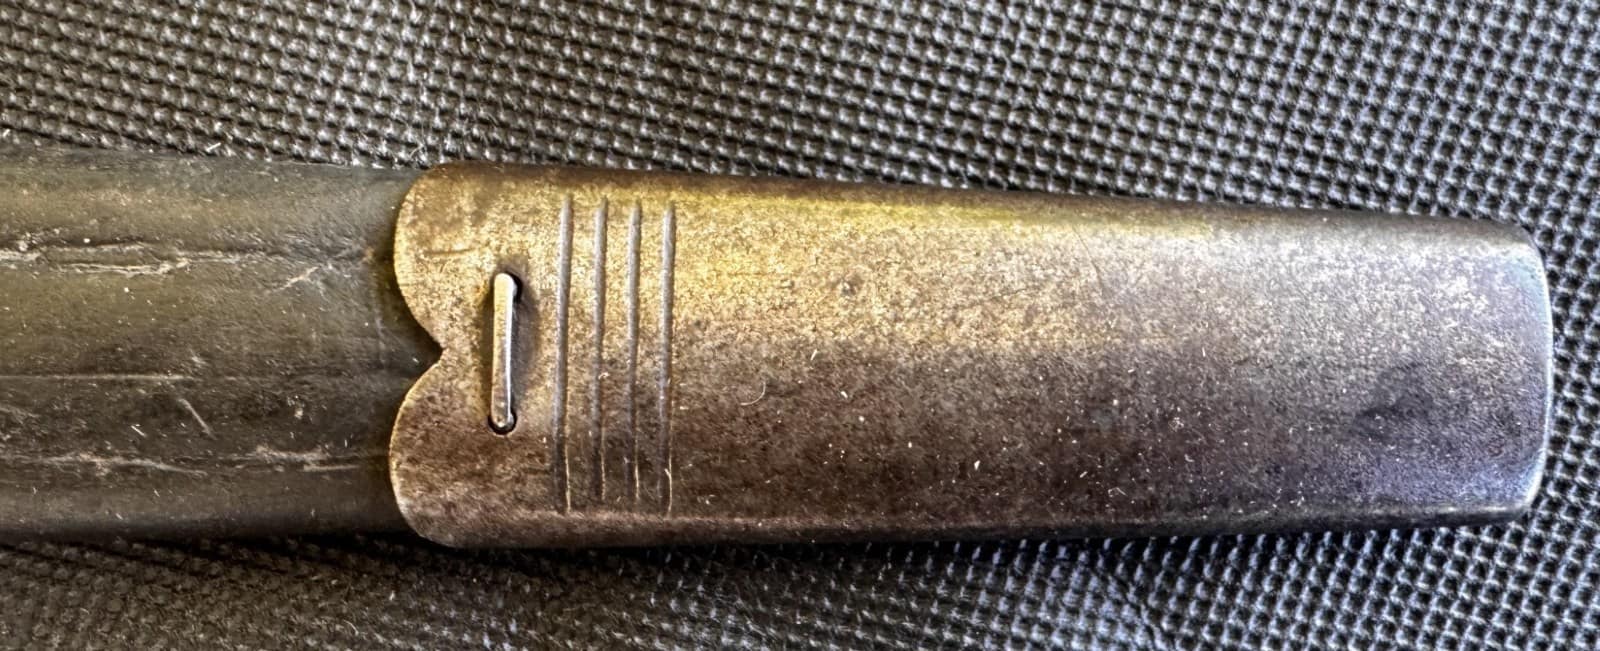
WW1 Ottoman Model 1893 Mauser bayonet. From my personal collection.
WW1 Ottoman Model 1893 Mauser bayonet
WW1 Ottoman Enlisted soldier belt. From my personal collection.
WW1 Ottoman Enlisted soldier belt, made to a similar pattern as the German soldier’s belt.
Found this useful? Buy me a coffee — it helps fund future battlefield research
Authored by Mick Prictor, a retired military officer with 40 years’ service, and a military historian specialising in terrain-focused analysis of tactics, doctrine, and command decision-making in land warfare. His work draws on extensive battlefield fieldwork—more than 280 sites worldwide—and one of the world’s largest private collections of historic military arms, uniforms, and equipment. About me
What weapons were most commonly used during the First World War?
Infantry soldiers were primarily armed with bolt-action rifles such as the Lee-Enfield, Mauser, Mosin-Nagant, and Lebel. These were supported by machine guns, grenades, and bayonets. Artillery was the dominant weapon of the war, while new technologies such as tanks, aircraft, and chemical weapons transformed the battlefield.
Why was artillery so important in the First World War?
Artillery caused the majority of battlefield casualties and shaped operations across all fronts. Heavy guns, field artillery, and howitzers were used for bombardment, counter-battery fire, and defensive barrages. The scale of artillery firepower reflected the industrial nature of the conflict and the importance of fire support in trench warfare.
What role did machine guns play?
Machine guns such as the German MG08 and British Vickers provided sustained automatic fire and made frontal assaults extremely costly. Machine guns were sited to employ enfliade (along teh long axis of the target) grazing fire (close to teh ground so any human in the beaten zone will be hit) from a defilade position (covered from view and fire). Machine guns could also be fired from predictive tables, much like artillery is fired.
Why were steel helmets introduced?
Steel helmets were adopted to protect soldiers from shell fragments and debris, which became major causes of injury in trench warfare. Designs such as the French Adrian, British Brodie, and German Stahlhelm reflected different national approaches to battlefield protection.
What uniforms were worn during the war?
Uniforms evolved rapidly as armies adapted to modern warfare. Bright pre-war uniforms were replaced by more practical field dress in subdued colours such as khaki, feldgrau, and horizon blue. Uniforms reflected both national traditions and the need for concealment on the battlefield.
How did equipment change during the war?
Soldiers’ equipment evolved to meet the demands of trench warfare, including the introduction of steel helmets, improved webbing systems, gas masks, and specialised tools. These changes reflect the adaptation of armies to industrialised, high-intensity conflict.
Are the artefacts shown on this page original items?
All artefacts shown are from my personal collection and photographed firsthand. They represent original weapons and equipment used by soldiers during the First World War.
Subscribe to Battlefield Travels and receive a free E-Book Battlefield Guide
Unlock expert battlefield analysis, campaign reconstructions, and historical insights drawn from firsthand exploration and primary sources.
🗺️ You’ll receive:
🎖️ Exclusive historical insights you won’t find elsewhere
📘 A free eBook: 10 Tips for Exploring Historic Battlefields
📰 New battlefield studies straight to your inbox as they are published
Claim Your Free Battlefield Travel Guide
Get your free e-book, exclusive tips, and updates on new battlefield studies.
Thank you!
You have successfully joined our subscriber list.
⚔️ Go deeper — Members get exclusive access to the Deep Research Collection, Field Notes, and monthly Research Dispatches. Try membership free for 7 days, cancel anytime. From $9/month.
Reconstructing Korean War battlefields through terrain analysis, primary sources and on-site research
Walking the battlefields of the Korean War (1950-1953)
The Korean War was one of the most consequential conflicts of the 20th century. Fought across the Korean Peninsula between United Nations forces, the Democratic People’s Republic of Korea, and later the Chinese People’s Volunteer Army, the war combined periods of bold manoeuvre with brutal positional warfare in terrain that often favoured the defender.
1950: Dramatic opening moves
The war opened in June 1950 with the North Korean invasion, sweeping southwards and forcing South Korean and UN forces into the Pusan Perimeter, a defensive line anchored on ridges and river lines aroun dteh southern city of Pusan. General MacArthur’s daring Inchon landings shifted the strategic balance, allowing Allied forces to retake Seoul and push north towards the Yalu River. Massive intervention by Chinese forces transformed the war again, forcing UN units into a fighting withdrawal through snow-covered mountains, narrow valleys and harsh winter conditions.
1951-53: Positional warfare
By 1951, the conflict settled into a series of attritional battles along successive defensive belts — the Kansas Line, the Jamestown Line and the approaches to the Iron Triangle. Some of the war’s most famous engagements, such as Heartbreak Ridge, Bloody Ridge, Chipyong-ni, The Hook and Hill 266, were fought for control of high points, spurs and ridgelines that offered observation, artillery dominance and control of movement corridors.
Fighting in Korea was defined by the terrain’s harsh realities. Steep slopes, knife-edged ridges and narrow valleys restricted mechanised movement and required infantry-centric tactics. Weather extremes — from humid summers to −30°C winters — added another layer of difficulty. Every position, from isolated outposts to fortified ridgeline complexes, depended on logistics, engineering, and the ability to hold or seize ground under punishing conditions.
Armistice negotiations
Armistice negotiations commenced on 10 July 1951 in the North Korean town of Kaesong. In October 1951, the talks moved to the nearby village of Panmunjom, which remains the site of formal North Korea-South Korea interactions. An armistice ending hostilities was signed on 27 July 1953, although the war has never officially ended.
Methodology
This collection of battlefield studies examines the Korean War through a terrain-focused lens, combining period maps, unit narratives, aerial photography and on-site reconnaissance. The aim is not only to recount what happened across these battlefields, but to explain why each engagement unfolded the way it did, shaped by terrain, weather, doctrine and the decisions of commanders on both sides.
Battle Studies in the Korean War
Below are all current BattlefieldTravels studies for the Korean War, covering key battles, campaign phases and associated sites. New studies are added as further battlefields are walked and analysed.
The Panmunjom negotiations ultimately led to the signing of the Korean Armistice Agreement on 27 July 1953. The agreement effectively ended the hostilities and established the DMZ, but it was not a peace treaty. Consequently, North and South Korea technically remain at war, as no formal peace treaty has been signed.
Over thousands of years of warfare, armies have sought ways to gain advantage on the battlefield. Sometimes the solution was a new weapon. Sometimes it was a radical new method. Often it was a combination of both. From the disciplined ranks of the Greek phalanx to pike-and-shot warfare to the interlocking machine-gun fire plans of the twentieth century, tactical innovations have repeatedly reshaped how battles are fought.
This article explains how machine guns are employed on the battlefield, including the key concepts of cone of fire, beaten zone, grazing fire, enfilade fire, and mutually supporting machine-gun positions. The article forms part of the Tactical Innovations in Warfare series.
Authored by Mick Prictor, a retired military officer with 40 years’ service, and a military historian specialising in terrain-focused analysis of tactics, doctrine, and command decision-making in land warfare. His work draws on extensive battlefield fieldwork—more than 280 sites worldwide—and one of the world’s largest private collections of historic military arms, uniforms, and equipment. About me
⚔️ Go deeper — Members get exclusive access to the Deep Research Collection, Field Notes, and monthly Research Dispatches. Try membership free for 7 days, cancel anytime. From $9/month.
Which phases of the Korean War are covered in this collection?
The landing page spans the North Korean invasion, the UN counteroffensive, Chinese intervention, and the static battles of 1951–53 along the central and western fronts.
Which battles are included or planned?
The collection includes Joint Security Area Panmunjom, and will expand to include Kapyong, Heartbreak Ridge, Chipyong-ni, Bloody Ridge, The Hook, the Pusan Perimeter and other major engagements.
Why is terrain so important in Korean War analysis?
Korea’s rugged mountains and steep ridges dominated manoeuvre, supply and defensive operations, making high ground and narrow corridors decisive in nearly every battle.
Did the Korean War involve trench warfare?
Yes. After 1951, the front stabilised, producing fortified lines, trench systems, outposts and repeated assaults reminiscent of WW1 but shaped by modern firepower.
Are these battlefield areas still accessible today?
Many ridgelines, memorials and preserved outposts along the DMZ and former frontlines are visitable, though some fall within restricted or heavily monitored areas.
Subscribe to Battlefield Travels and receive a free E-Book Battlefield Guide
Unlock expert battlefield analysis, campaign reconstructions, and historical insights drawn from firsthand exploration and primary sources.
🗺️ You’ll receive:
🎖️ Exclusive historical insights you won’t find elsewhere
📘 A free eBook: 10 Tips for Exploring Historic Battlefields
📰 New battlefield studies straight to your inbox as they are published
Claim Your Free Battlefield Travel Guide
Get your free e-book, exclusive tips, and updates on new battlefield studies.
Thank you!
You have successfully joined our subscriber list.
⚔️ Go deeper — Members get exclusive access to the Deep Research Collection, Field Notes, and monthly Research Dispatches. Try membership free for 7 days, cancel anytime. From $9/month.
Reconstructing World War One battles through terrain analysis, primary sources and on-site research
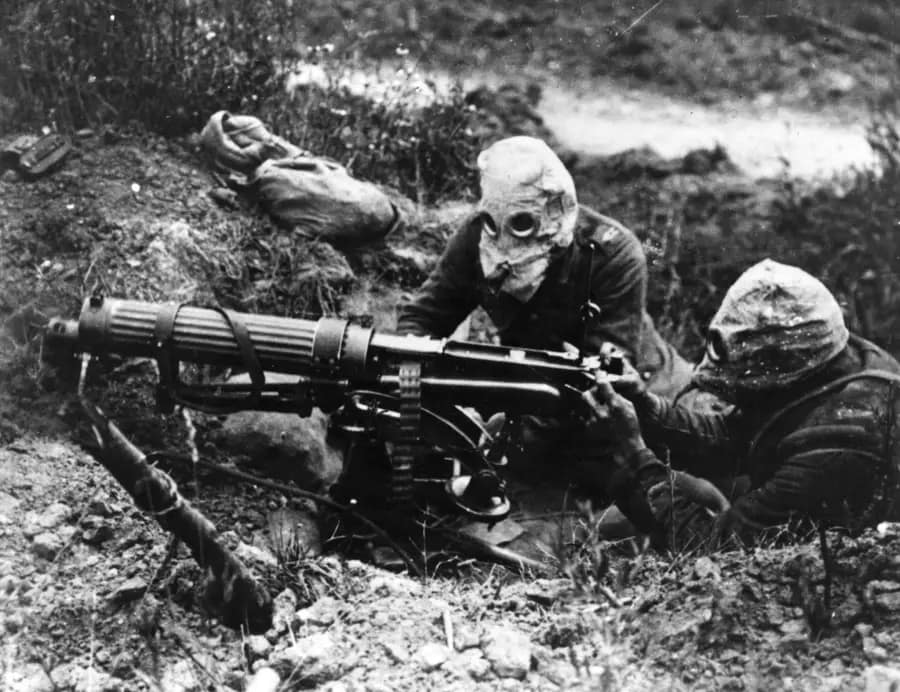
World War One. British machine gun team manning their Vickers water-cooled machine gun, and wearing PH-type anti-gas helmets near Ovillers, July 1916
Walking the battlefields of the First World War
Western Front – crucible for adaptation
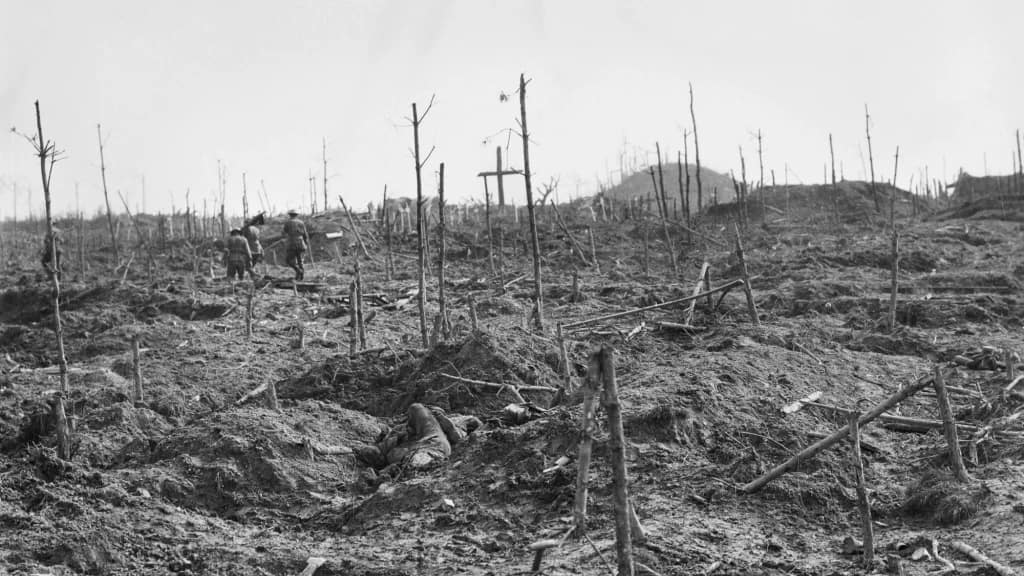
World War One (1914–1918) was a truly global conflict fought across multiple theatres, each shaped by its own terrain, climate and operational pressures. On the Western Front, the combination of immense troop density, fortified trench systems and narrow avenues for manoeuvre produced a form of attritional warfare unprecedented in scale. The colossal battles of the Somme and Verdun in 1916, the mud-choked offensives around Ypres in 1917, and the seismic shifts brought about by the German Spring Offensive and the Allied Hundred Days in 1918 all unfolded on a landscape dominated by artillery, machine guns, barbed wire, dugouts and observation posts.
Yet even in this seemingly static environment, armies were constantly adapting. The British and Dominion forces refined the set-piece, limited-objective attack seen at Polygon Wood; the Germans developed infiltration and stormtroop tactics to strike at weak points during their 1918 offensives; and the first massed combined-arms mechanised operations were trialled at Cambrai and perfected during the breakthrough at Amiens. The Western Front was not a stagnant line—it was a laboratory of tactical innovation forged under immense pressure and in the face of unforgiving ground.
Eastern Front – enormous space and never enough troops
In the East, the problem was the inverse: vast distances and too few troops to hold front lines stretching across forest, marsh and steppe. The opening campaigns in East Prussia and Galicia brought sweeping manoeuvre, catastrophic casualties and wild oscillations in momentum. The 1916 Brusilov Offensive showed how coordination, surprise and careful exploitation of terrain could rupture an entire defensive system, while the Russian Revolution in 1917 fractured the Eastern Front from within, triggering political collapse, military disintegration and Allied interventions in the north and Siberia.
The southern theatres – Italy, Gallipoli and Salonika
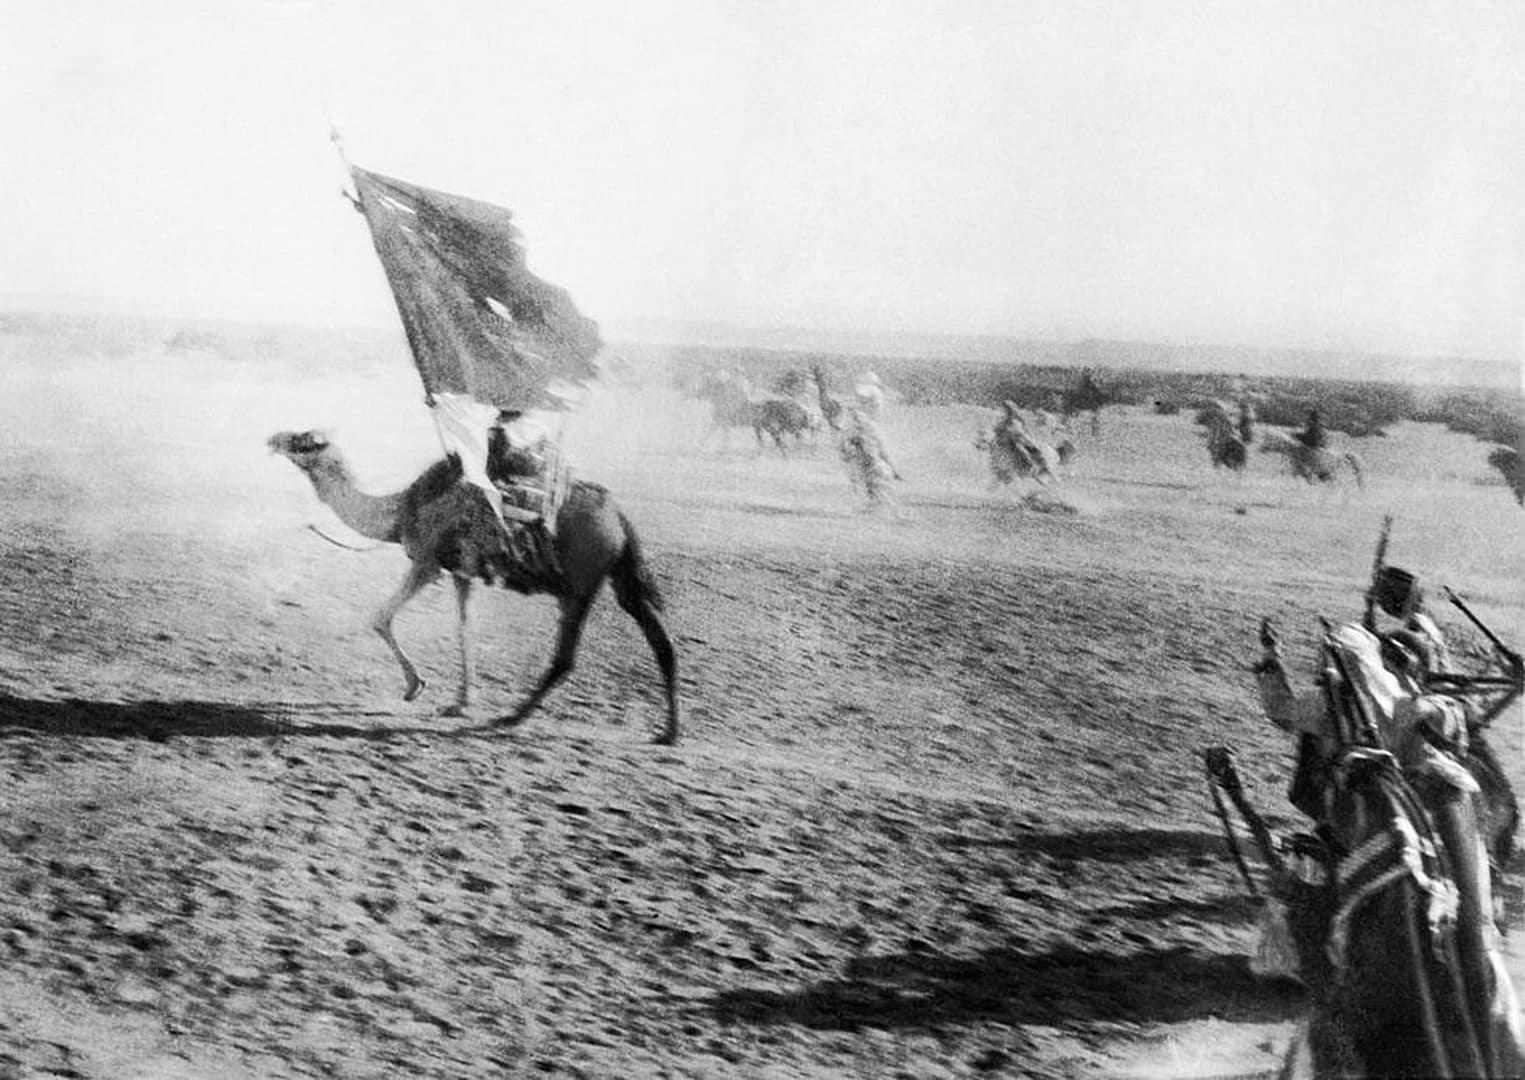
In the southern theatres, the search for a strategic “back door” led to campaigns on the Gallipoli Peninsula, through the mountains of Salonika, and across the deserts of the Sinai and Palestine, where the Arab Northern Army—supported by British advisers like T. E. Lawrence—conducted deep operations behind Ottoman lines. On the Italian Front, the narrow confines of the Isonzo valley became the setting for eleven costly Italian offensives before the dramatic collapse at Caporetto, where terrain, weather and infiltration tactics combined to shatter an entire army.
The peripheral theatres – Asia, Pacific, Middle East
Beyond Europe, the war extended into Africa, the Middle East, China, and the Pacific. German East Africa saw a mobile guerrilla campaign across mountains, rivers and savannah; Japan and Australia seized German colonies across the Pacific; and even after the 1918 armistice, fighting continued as Allied forces intervened in the Russian Civil War.
This collection of World War One battlefield studies examines these campaigns through a terrain-focused, ground-truth perspective—combining period maps, aerial photographs, personal accounts and modern field reconnaissance to explain not only what happened, but why events unfolded as they did in the landscape itself.
First World War Battlefield Studies
In-depth battlefield analyses based on terrain, primary sources, and on-the-ground exploration.
The Battle of Polygon Wood is significant to me. My grandfather served in 5th Australian Division Signal Company and fought at Polygon Wood with the Division. The Battle of Polygon Wood was fought between 26 September and 3 October 1917, as part of the Third Battle of Ypres. The aim was to seize the German-held…
By capturing Aqaba, Lawrence and the Arab Army had closed off the last Turkish-held port on the Red Sea, threatened the entire length of the Hejaz Railway, and made the many Turkish garrisons in the Hejaz vulnerable to being cut off. They had also eliminated a potential source of threat to the right flank of…
November 2024. Verdun, northeastern France. This is my second time exploring the battlefields of Verdun. The first impression is the massive scale of the fortification complex. Large and small forts with interlocking and mutually supporting fields of fire cover several hundred square kilometres. The ground is still broken by overlapping shell craters, stretching in all…
July 2012, Belleau Wood, near Château-Thierry, France. I am exploring the site of the legendary US Marine battle in June 1918. The first impression of ‘Bois Belleau’ is confinement. The ground is enclosed by dense woodland, with limited lines of sight and little sense of distance.
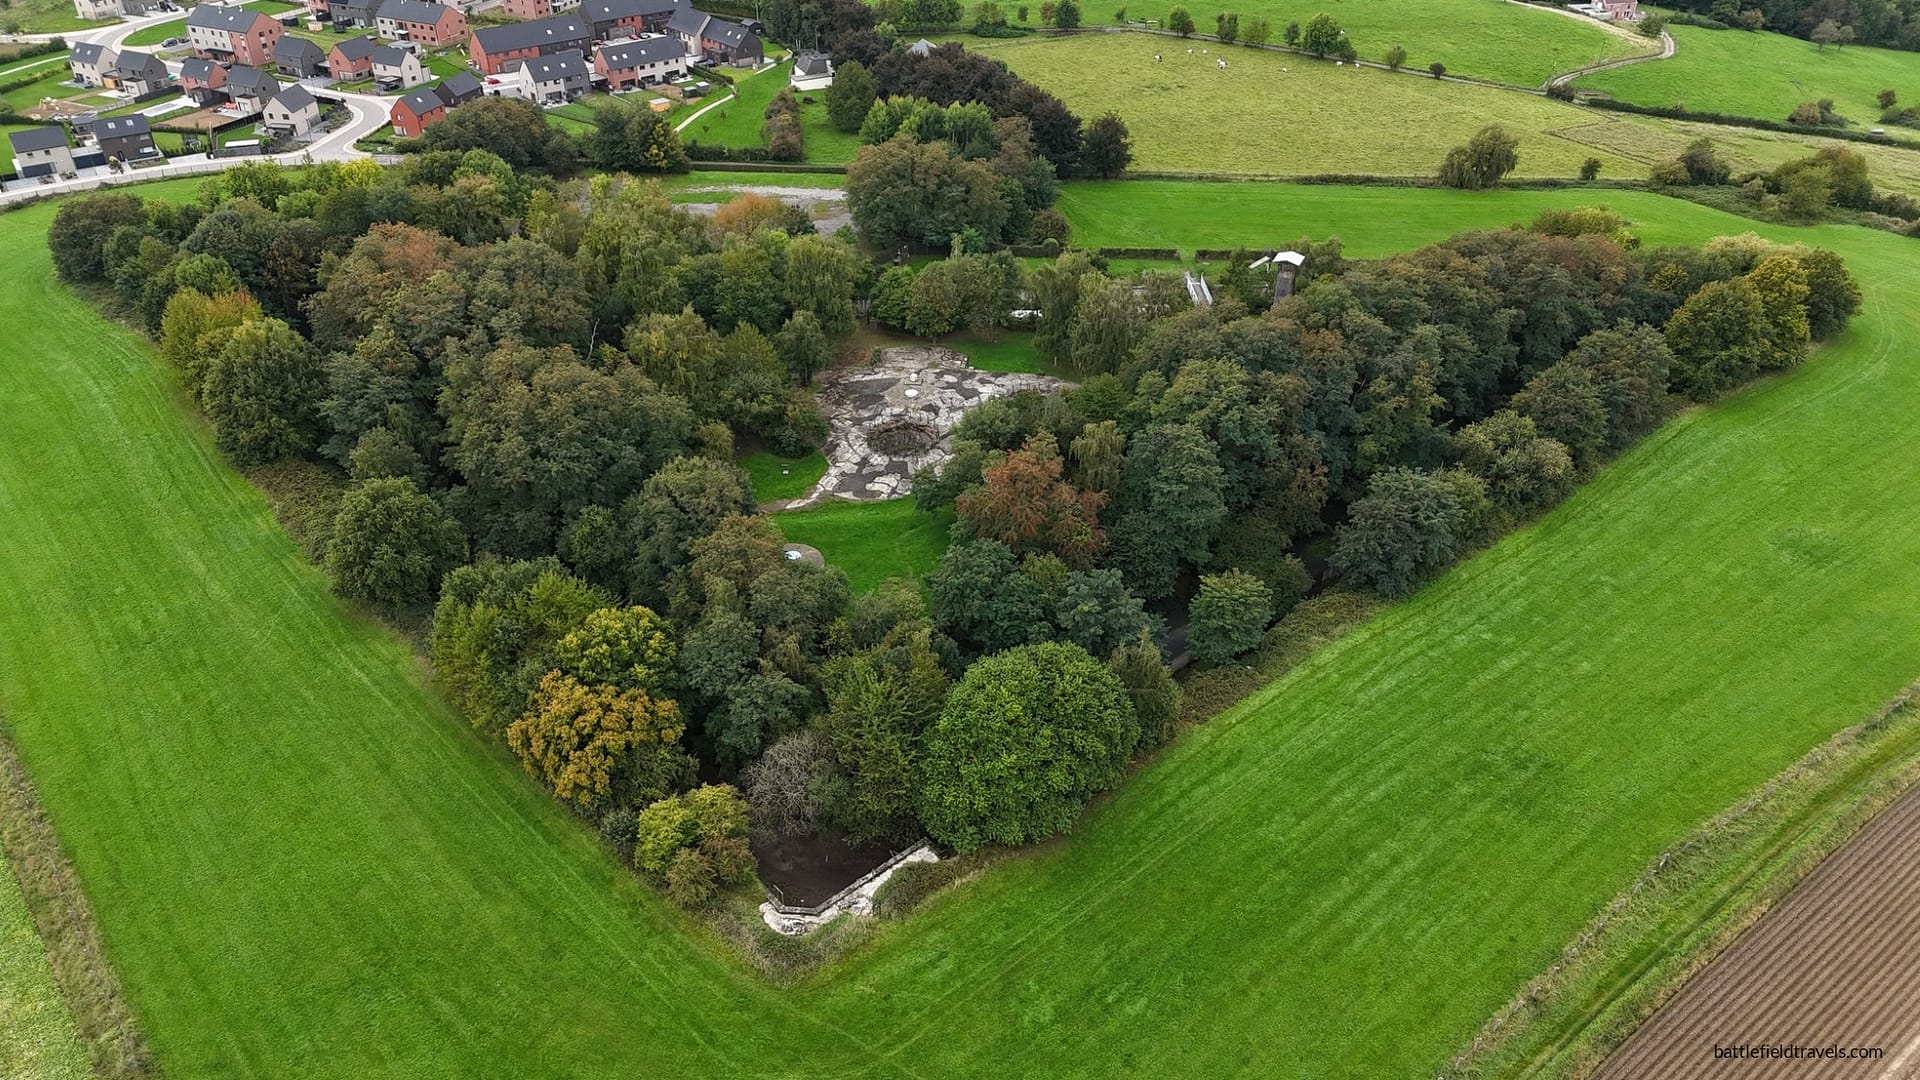
October 2025, Liege, Belgium. I am visiting the ring of great forts that once protected the Belgian city of Liège. In the 1880s, the Belgians constructed a series of forts to protect Liège against a potential German attack. The twelve forts of Liege could cover the approaches and support the neighbouring forts. The forts are:…
Over thousands of years of warfare, armies have sought ways to gain advantage on the battlefield. Sometimes the solution was a new weapon. Sometimes it was a radical new method. Often it was a combination of both. From the disciplined ranks of the Greek phalanx to pike-and-shot warfare to the interlocking machine-gun fire plans of the twentieth century, tactical innovations have repeatedly reshaped how battles are fought.
This article explains how machine guns are employed on the battlefield, including the key concepts of cone of fire, beaten zone, grazing fire, enfilade fire, and mutually supporting machine-gun positions. The article forms part of the Tactical Innovations in Warfare series.
Authored by Mick Prictor, a retired military officer with 40 years’ service, and a military historian specialising in terrain-focused analysis of tactics, doctrine, and command decision-making in land warfare. His work draws on extensive battlefield fieldwork—more than 280 sites worldwide—and one of the world’s largest private collections of historic military arms, uniforms, and equipment. About me
⚔️ Go deeper — Members get exclusive access to the Deep Research Collection, Field Notes, and monthly Research Dispatches. Try membership free for 7 days, cancel anytime. From $9/month.
What makes these World War One battlefield studies different?
Each study uses terrain analysis, period maps, aerial photographs and on-site field reconnaissance to explain how ground, movement and command decisions shaped key battles across the Western Front, Eastern Front, Gallipoli, Italy and beyond.
Which theatres of WW1 are covered in this collection?
The landing page spans all major fronts — the Western Front, Eastern Front, Italian Front, Gallipoli, the Middle Eastern campaigns and the wider global conflict in Africa and the Pacific — with individual battle studies expanding on each theatre in detail.
Does this include analysis of major battles like the Somme, Verdun and Ypres?
Yes. The page introduces the major battles and campaigns of the war, and individual studies examine selected battles through a terrain-focused, evidence-based approach.
How does terrain influence the interpretation of World War One battles?
Terrain shaped everything from trench placement and artillery positions to infiltration routes, observation points and the viability of breakthroughs. Analysing ground truth is essential for understanding why battles unfolded the way they did.
Will more WW1 battlefield studies be added?
Yes. I have personally explored dozens of WW1 battlefields, and the studies are in various states of draft. SO many more battlefield studies to come.
Subscribe to Battlefield Travels and receive a free E-Book Battlefield Guide
Unlock expert battlefield analysis, campaign reconstructions, and historical insights drawn from firsthand exploration and primary sources.
🗺️ You’ll receive:
🎖️ Exclusive historical insights you won’t find elsewhere
📘 A free eBook: 10 Tips for Exploring Historic Battlefields
📰 New battlefield studies straight to your inbox as they are published
Claim Your Free Battlefield Travel Guide
Get your free e-book, exclusive tips, and updates on new battlefield studies.
Thank you!
You have successfully joined our subscriber list.
⚔️ Go deeper — Members get exclusive access to the Deep Research Collection, Field Notes, and monthly Research Dispatches. Try membership free for 7 days, cancel anytime. From $9/month.
Reconstructing World War Two battles through terrain analysis, primary sources and on-site research
U.S. soldiers of the 55th Armoured Infantry Battalion and a tank of the 22nd Tank Battalion move through a smoke-filled street in Wernberg, Germany, April 22, 1945. US National Archives
🧭🥾 Walking the battlefields of the Second World War
There is no single World War Two landscape. I have walked battlefields ranging from the forests and frozen roads of Finland to the jungle ridges of Guadalcanal and New Guinea, the beaches and bocage of Normandy, the low country of the Netherlands, the wooded hills and villages of the Ardennes, and Hitler’s Eagle’s Nest in the Bavarian Alps. Each presents a different physical problem, and each makes aspects of the fighting apparent that can be difficult to appreciate from maps alone.
What connects these battlefields is the relationship between soldiers and terrain. A narrow road through a Finnish forest, a jungle ridge overlooking Henderson Field, a causeway across flooded Normandy fields, a bridge over a Dutch river or a road junction in the Ardennes could become disproportionately important because the surrounding terrain restricted the alternatives. Walking those places helps explain why commanders made particular decisions, why attacks developed in particular directions, and why apparently minor pieces of ground became the focus of intense fighting.
This collection brings those battlefield studies together while remaining deliberately incomplete. Every battle examined here is a battlefield I have visited. As that fieldwork expands, so too will the World War Two collection.
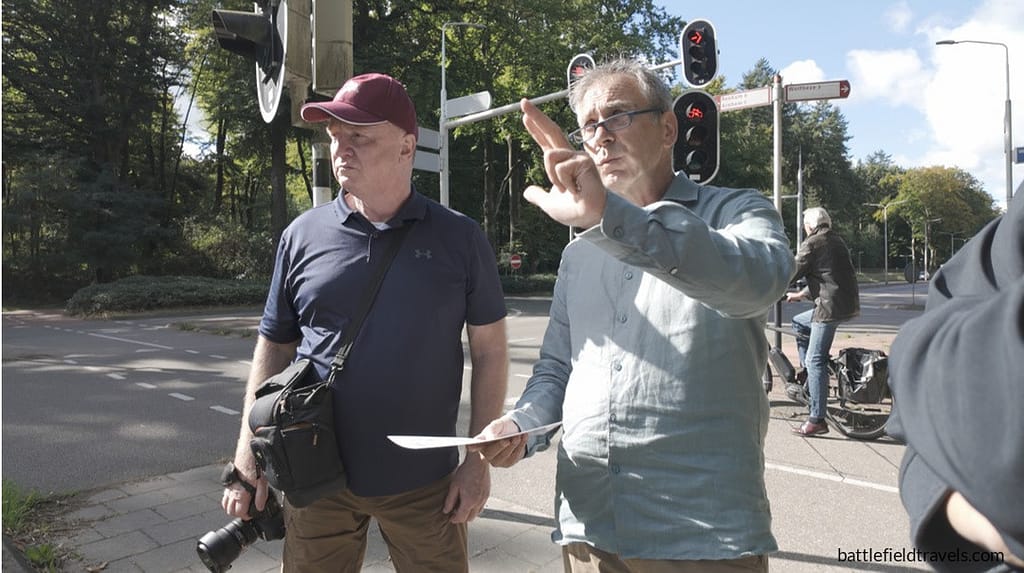
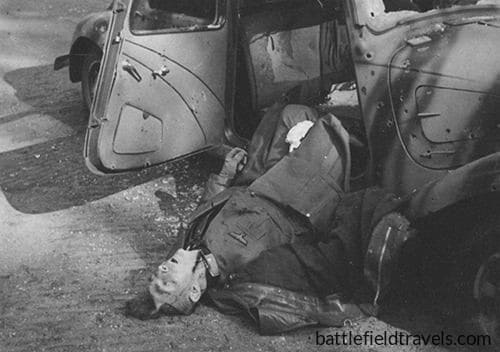
Operation Market Garden. Walking the site just west of Arnhem where 3 Para ambushed Major General Kussin on 17 September 1944. With author David Buggenum
Second World War – 1939-1945
Conflict Overview
World War Two was a global conflict fought across Europe, Africa, Asia, the Pacific and the world’s oceans between 1939 and 1945. Industrial production, logistics, air and sea power, technological change and the mobilisation of entire societies gave the war an unprecedented scale. The fighting itself took place across radically different environments, from Arctic forests and tropical jungle, to beaches, flooded lowlands, dense hedgerows, mountains and shattered towns and cities. Armies had to adapt their weapons, tactics and doctrine to the ground on which they fought.
This overview does not cover every theatre or campaign of the Second World War. I have walked the ground on every battlefield in this collection, using period maps, wartime photographs, primary and veteran accounts, GIS analysis and field reconnaissance to examine how terrain, weapons, doctrine and command decisions shaped the fighting. There are places and battlefields that I have not yet explored, so my coverage is deliberately uneven. I have researched and explored some campaigns in forensic detail, others in less detail, and some I have not visited at all. They are all on my ‘to-do’ list.
The aim is not simply to retell what happened, but to understand why it happened: how terrain channelled movement, concealed or exposed troops, became vital ground, shaped fields of fire and influenced the decisions available to commanders. Across very different theatres, the same recurring problem remained: soldiers and commanders had to understand the ground and exploit it before their opponents did.
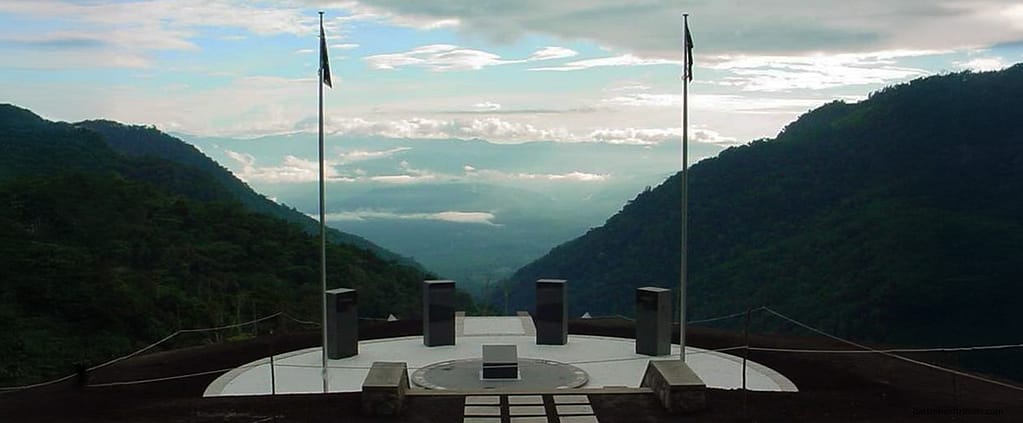
Monument at Isurava, on the Kokoda Track, Papua New Guinea, commemorating the August 1942 battle between Australian forces and the Japanese South Seas Detachment.
Finland and the Winter War, 1939–40
The Soviet invasion of Finland in November 1939 demonstrated how profoundly terrain, climate and tactical adaptation could affect the performance of opposing armies. Soviet forces crossed the frontier with overwhelming superiority in manpower, armour and artillery, but frequently found themselves restricted to narrow roads running through forests, lakes and deep snow.
In central Finland, Finnish troops exploited this environment to isolate and destroy Soviet columns. During the battles of Suomussalmi and the Raate Road, small Finnish units used mobility, local knowledge and dispersed attacks to break much larger Soviet formations into isolated pockets (motti). The campaign became an early demonstration of the importance of adapting organisation and tactics to terrain rather than relying on numerical and material superiority alone.
Winter War – destroyed Soviet vehicles on the Raate-Suomussalmi Road, January 1940
The Pacific War
The Japanese attack on Pearl Harbor in December 1941 brought the United States directly into the war and accompanied a rapid series of Japanese offensives across Southeast Asia and the Pacific. By mid-1942, however, Japanese expansion was beginning to encounter increasingly effective Allied resistance.
In August 1942, US Marines landed on Guadalcanal in the Solomon Islands, beginning the first sustained American ground offensive against Japanese forces in the Pacific. What followed was a six-month struggle on land, at sea and in the air centred on Henderson Field. The Guadalcanal Campaign examines that struggle as a connected campaign, from the initial American landings through Tenaru, Edson’s Ridge, the Matanikau, Henderson Field and Mount Austen to the Japanese evacuation in February 1943.
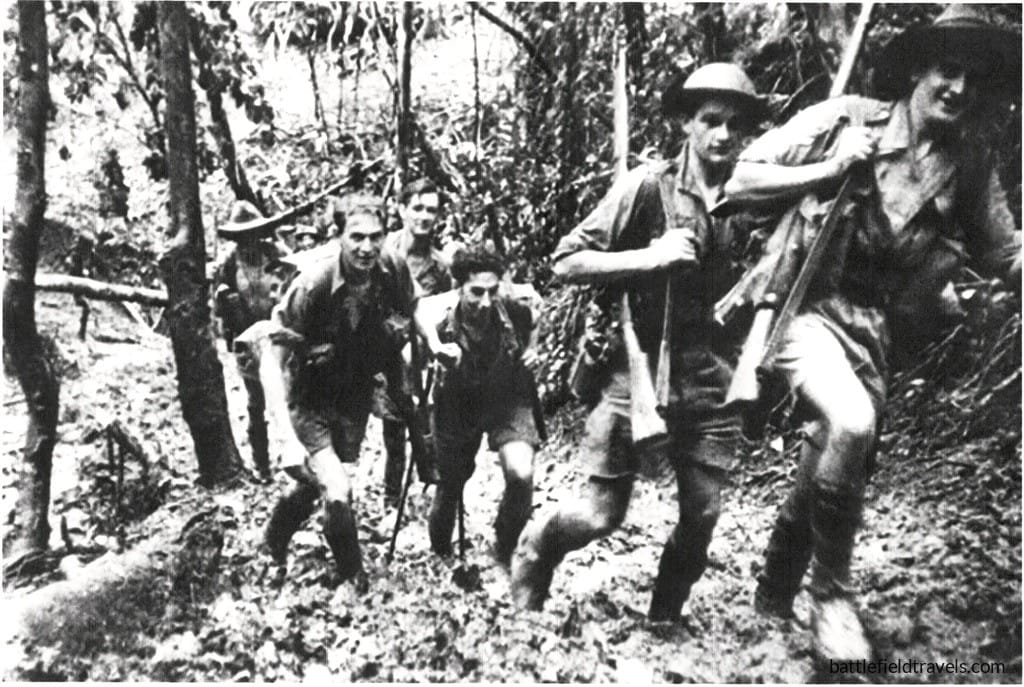
Farther west, New Guinea presented an entirely different battlefield problem. Mountains, jungle, rivers, disease and extremely limited communications imposed severe constraints on both sides. Fighting across the island repeatedly demonstrated that apparently short distances on a map could represent formidable obstacles on the ground. The fighting around Isurava and the Kokoda Track provides a particularly stark example of infantry combat shaped by narrow tracks, steep ridgelines and restricted visibility.
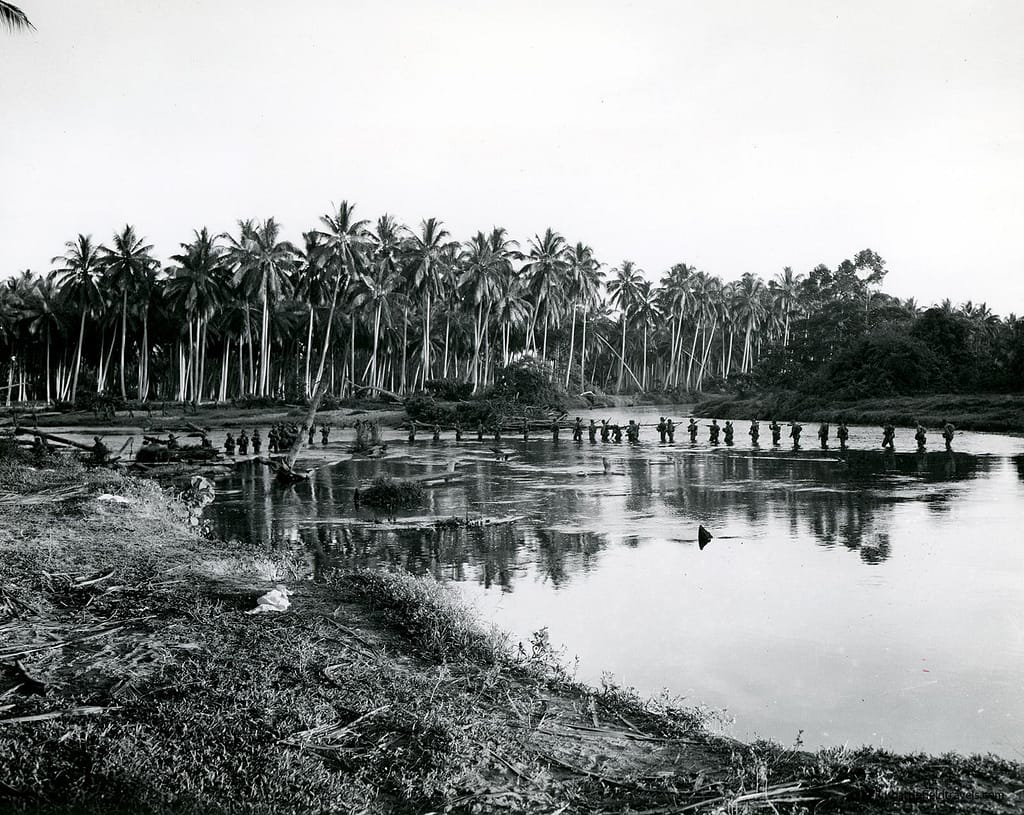
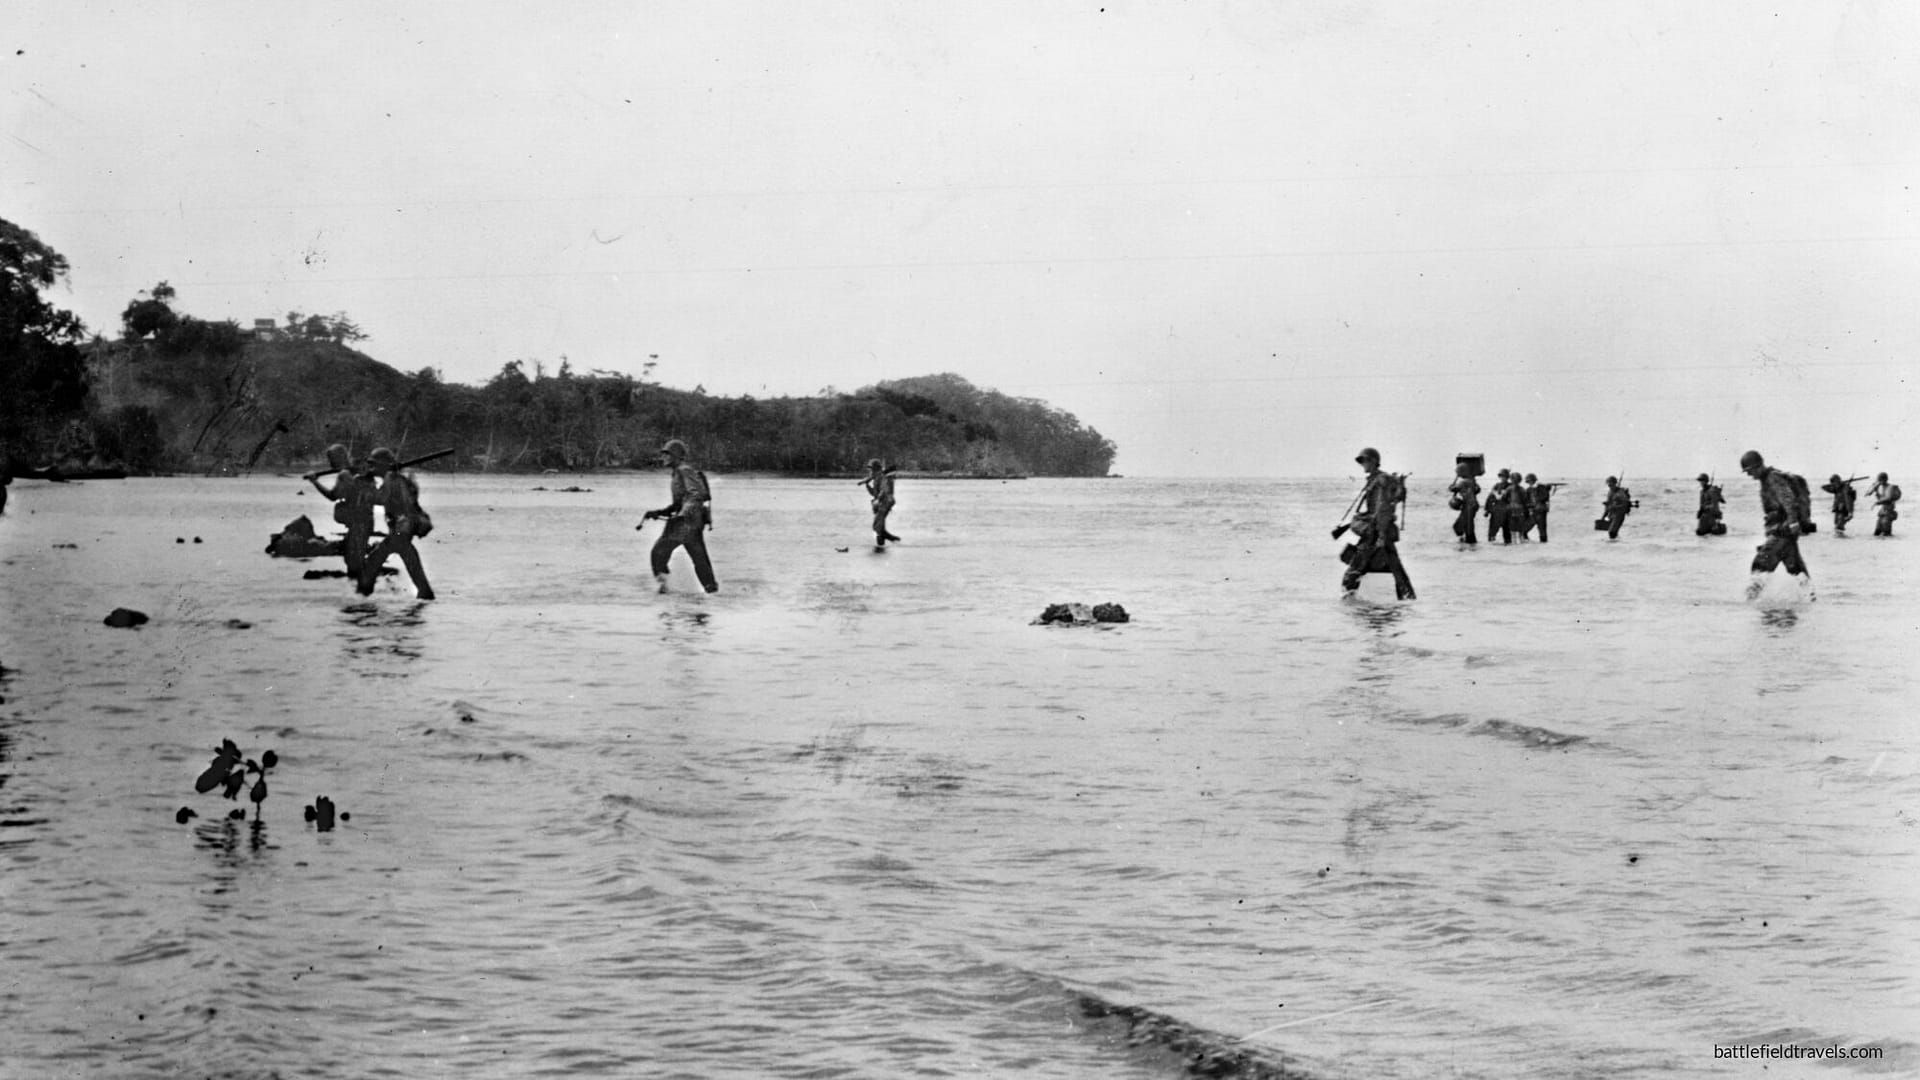
1/1 Marines Patrol Crossing Lunga River, Guadalcanal, circa Sep 1942
North-West Europe, 1944
By 1944, the Western Allies had assembled the forces required to return to occupied France. Operation Overlord combined an enormous amphibious assault with airborne operations, naval gunfire, air power and an elaborate deception campaign intended to establish a secure lodgement in Normandy.
D-Day and Normandy Landings began in the opening minutes of 6 June with British airborne operations at Pegasus Bridge and east of the Orne. American airborne divisions descended behind Utah Beach, while amphibious forces landed across Utah, Omaha, Gold, Juno and Sword Beaches. The fighting continued beyond the beaches as Allied forces struggled to connect and consolidate their lodgements around places such as Carentan.
One small-unit story also provides a continuous thread through several of these campaigns. The Easy Company battlefield series follows the 506th Parachute Infantry Regiment from the Normandy landings through Operation Market Garden, the Battle of the Bulge and the final advance into Germany and Austria.
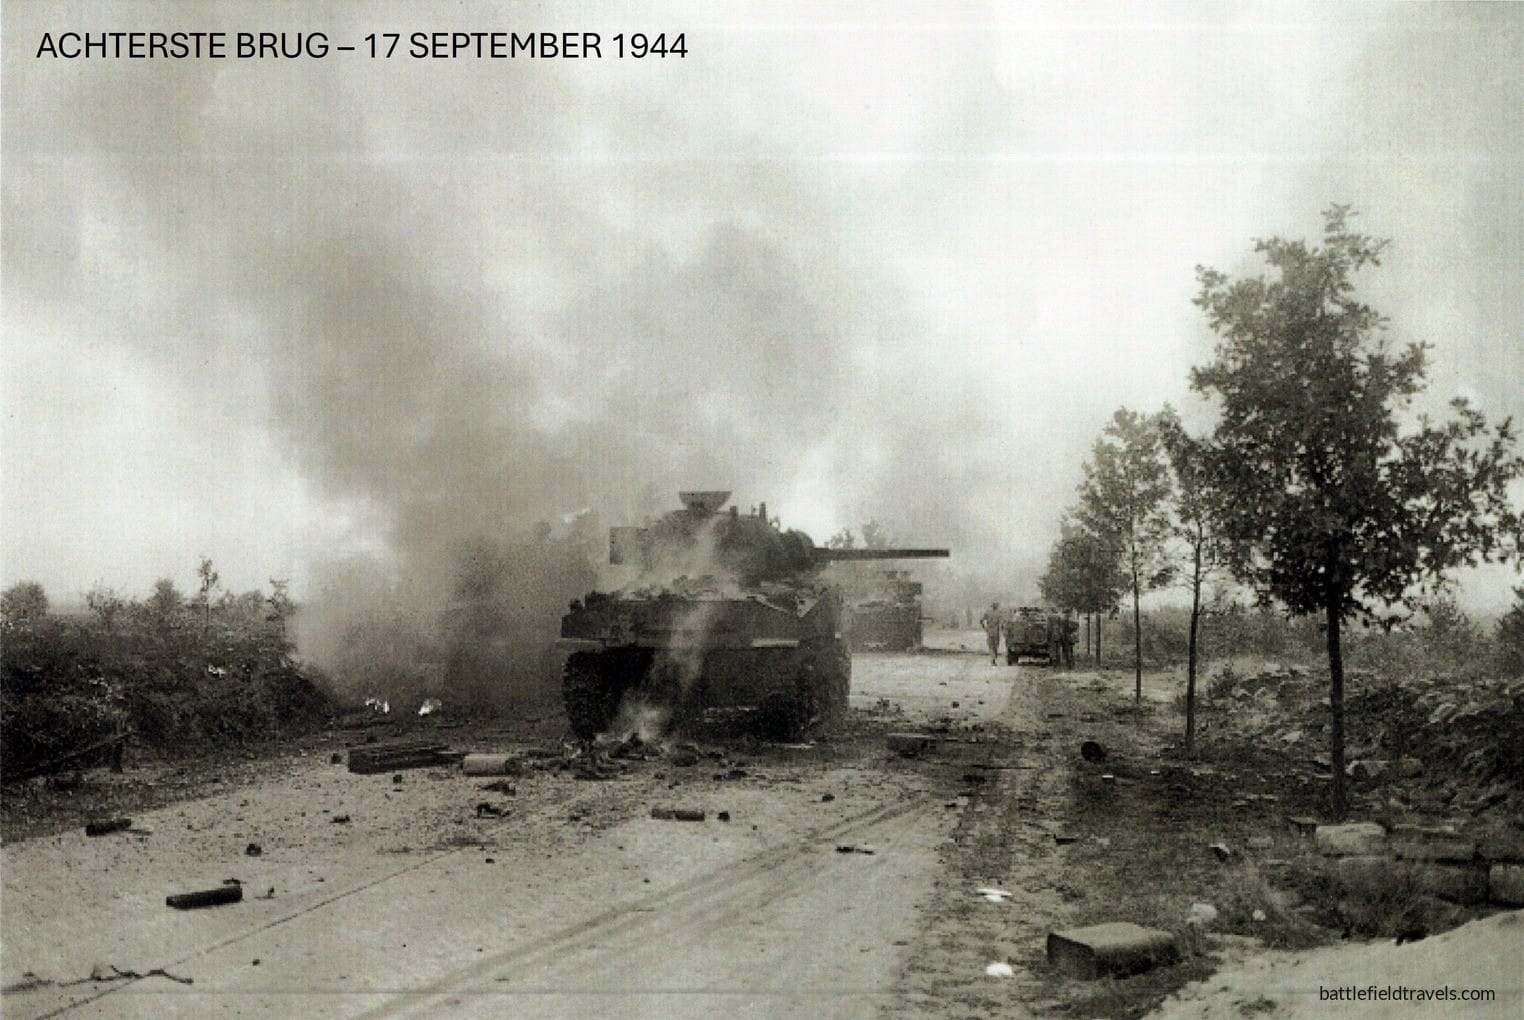
Once the Allied armies broke out of Normandy, the campaign moved rapidly across France and Belgium. In September, Operation Market Garden attempted to exploit that momentum by seizing a succession of bridges through the Netherlands and establishing a bridgehead across the Lower Rhine at Arnhem. Airborne forces fought around Eindhoven, Nijmegen and Arnhem while the ground advance struggled along a narrow corridor vulnerable to German counterattack.
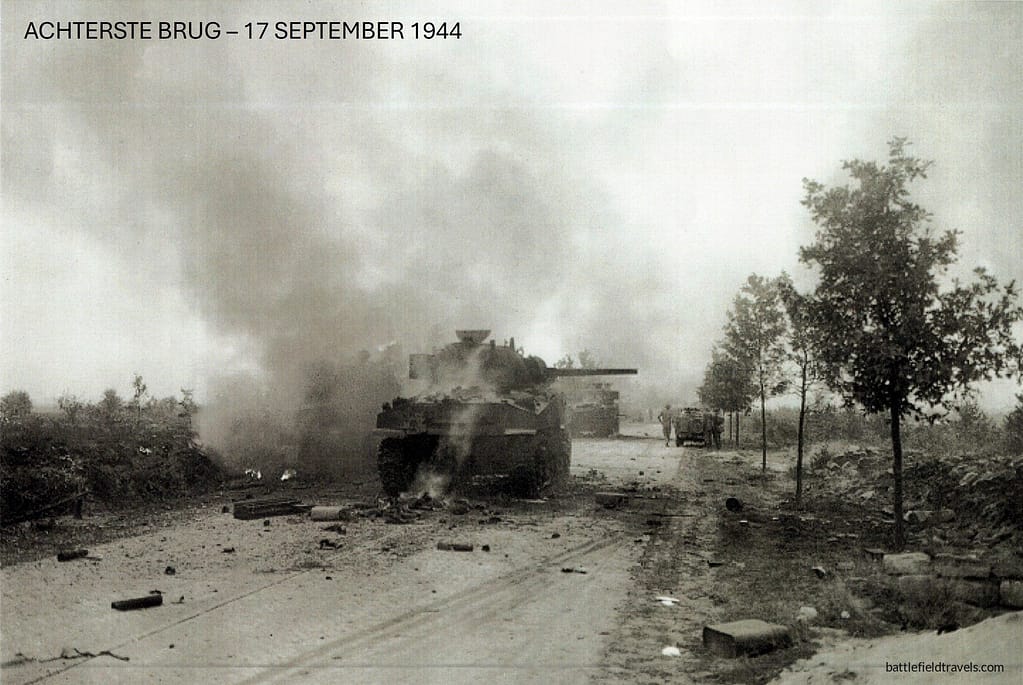
Operation Market Garden, Tanks of teh Guards Armoured Division destroyed at Achterste Brug, 17 September 1944
The German Frontier and the Battle of the Bulge
By late 1944 Allied forces had reached the approaches to Germany, but extended supply lines, difficult terrain and renewed German resistance slowed the advance. In December, Germany launched a major counteroffensive through the Ardennes in an attempt to rupture the Allied front and regain the strategic initiative in the west.
The Battle of the Bulge developed into a series of interconnected battles for roads, villages, ridgelines and communications across difficult winter terrain. Fighting around Elsenborn Ridge, St Vith, Stavelot, Stoumont and Bastogne demonstrated the importance of controlling the limited road network through the Ardennes, while smaller actions such as the fighting around Foy reveal the tactical problems confronting infantry operating in snow, forests and exposed villages.
The failure of the German offensive left Allied forces free to resume their advance into Germany. The final Nazi redoubt in the Bavarian Alps proved less formidable than expected, and Allied troops seized Hitler’s Eagles Nest on 4 May 1945. By 8 May 1945 the war in Europe was over. The Pacific War continued until August, ending a conflict that had transformed warfare and much of the international order.
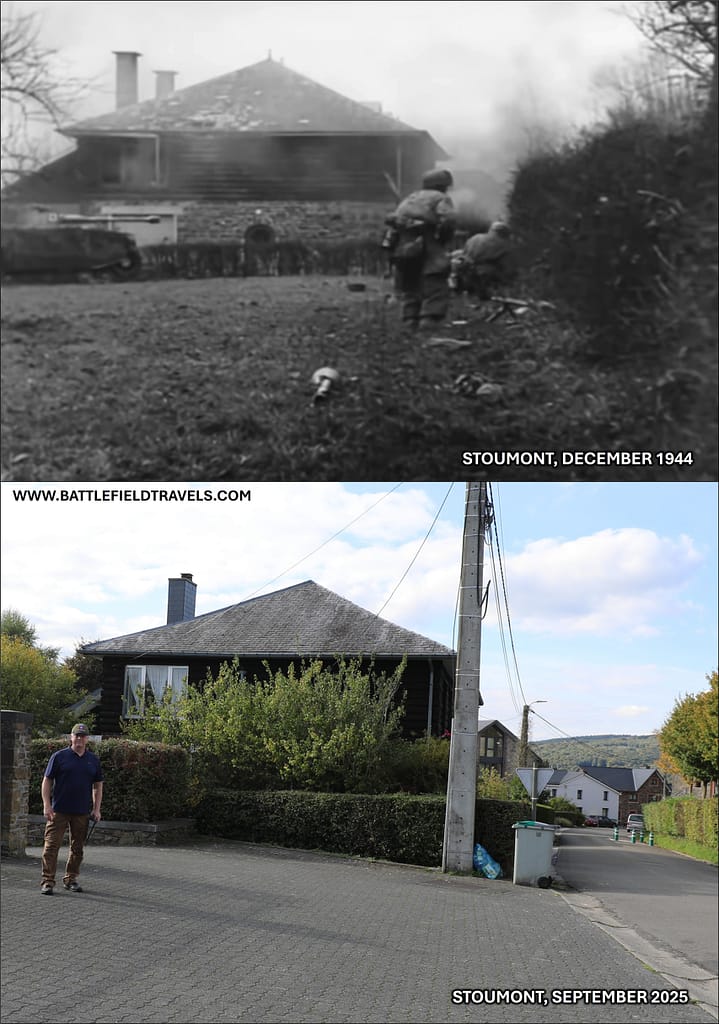
Then and Now. Battle of the Bulge, Stoumont. German paratroopers assigned to Kampfgruppe Peiper attempt to clear positions held by the US 30th Infantry Division, 9 December 1944
Second World War Battlefield Studies
In-depth battlefield analyses based on terrain, primary sources, and on-the-ground exploration.
British 6th Airborne Division’s role on D-Day was multi-faceted. In the opening minutes, glider-borne troops would seize the bridges over the Caen Canal and the River Orne. Soon afterwards, paratroopers would neutralise Merville Battery. Others would destroy key bridges over the Dives and prepare for German counterattacks. The mission was audacious, high risk, and critical…
August 2026, west of Point Cruz, Guadalcanal. I am walking the section of coast known to history as ‘Little Dunkirk’. Here, on 27 September 1942, the 1st Battalion 7th Marines was evacuated under fire by the US Navy and Coast Guard during the 2nd Battle of the Matanikau. This was the only significant American defeat…
August 2026, Edson’s Ridge, south of Henderson Field, Guadalcanal. I am exploring the sites of the 12-14 September 1942 Japanese attack against the Lunga perimeter. The long north-south ridgeline here became known as ‘Edson’s Ridge’ or ‘Bloody Ridge’ after the battle. The Japanese called it ‘The Centipede’. This is one of the best-preserved battle sites…
In the opening minutes of D-Day, British airborne troops conducted a glider-borne coup-de-main assault to seize the bridges over the Caen Canal and River Orne. Their mission was simple but dangerous: capture the bridges intact and hold them against German counterattacks, thereby securing the eastern flank of the Normandy landings.
On 6 June 1944, the British 3rd Division, supported by the 1st Special Service Brigade and 79th Armoured Brigade, stormed Sword Beach, the easternmost Allied landing sector in Normandy. Their success secured the D-Day landing Allied left flank, linked with the airborne lodgement at the Orne, and set the stage for the long struggle for…
On 6 June 1944, the 3rd Canadian Infantry Division stormed ashore at Juno Beach, facing some of the strongest German defences in Normandy. Their task was to force a landing on the narrow strip of beach between Courseulles, Bernières, and Saint-Aubin, and then drive inland to cut the Caen–Bayeux road before linking up with the…
On 6 June 1944, the British 50th (Northumbrian) Infantry Division landed at Gold Beach, facing fortified villages and determined German resistance. By nightfall, they had secured a foothold, linked with Canadian forces at Juno, and pushed inland toward Bayeux. Within days, the artificial Mulberry harbour was providing vital sustainment to the Normandy campaign.
Omaha Beach makes a powerful impression. When you visit the beach, you know that this is where Robert Capa took those famous photos of American soldiers assaulting through the obstacle belt, and where the dramatic first 20 minutes of Saving Private Ryan was set. It also becomes clear how important the five beach exits were…
Pointe du Hoc, a prominent headland between Utah and Omaha Beaches, was a critical objective on D-Day. The German position was equipped with a battery of 155mm howitzers capable of targeting the American landing beaches. The mission to assault Pointe du Hoc was assigned to the 2nd and 5th Ranger Battalions. The Rangers would scale…
In the early hours of D-Day, 6 June 1944, 13,200 paratroopers of the 82nd and 101st Airborne Divisions landed behind Utah Beach to secure the beach landing sites and prevent German interference. A few hours later, the US 4th Infantry Division stormed ashore on Utah Beach. The amphibious forces landed about 2,000 yards south of…
Here on 6 June 1944, Lieutenant Richard ‘Dick’ Winters, acting company commander for Easy Company, 506th Parachute Infantry Regiment, 101st Airborne Division, led a force of 23 paratroopers in a successful assault on a German force that outnumbered them more than 5 to 1. Easy Company’s action that day was depicted in the Steven Spielberg/Tom…
The Battle of Bloody Gulch was fought on 13 June 1944, just west of Carentan, Normandy. The battle followed immediately after 101st Airborne Division’s capture of Carentan on 12 June. Lightly armed American paratroopers from 506th (PIR) Parachute Infantry Regiment and 501st PIR faced a major armoured counterattack by the 17th SS Panzergrenadier Division and…
After the successful D-Day landings on June 6, the Allies needed to link the Utah and Omaha beachheads, build forces to cut off the Cotentin Peninsula, and be prepared for the expected German counterattack that they knew was coming. The key to all of that was the town of Carentan on the Cotentin – a…
As a former 82nd Airborne Division paratrooper, the town of Sainte-Mere Eglise in the Cotentin Peninsula of Normandy holds a special place for me. In the early hours of 6 June 1944, ahead of the Normandy Beach landings, the US 82nd and 101st Airborne Divisions parachuted into this area. The 82nd was to seize the…
The final act of Steven Spielberg’s 1998 movie ‘Saving Private Ryan’ is set in the fictional French town of Ramelles, as a mixed group of paratroopers defends a bridge over the Merderet River against German armoured counter-attacks. That scene is based on real events that happened right here at La Fiere Bridge. I was a…
When Stalin’s Red Army invaded Finland on 30 November 1939, the two main thrusts were in the south around Lake Ladoga and the Mannerheim Line, and in central Finland focussed on Suomussalmi. In central Finland, the Russian 163rd Rifle Division and an independent tank brigade crossed the border at Juntusranta, and the 44th (Ukrainian) Rifle…
Operation Anthropoid was one of the most significant acts of resistance against Hitler’s regime. Planned and executed by Czechoslovakian operatives in collaboration with the British Special Operations Executive (SOE), Operation Anthropoid targeted Reinhard Heydrich, a high-ranking Nazi official and one of the principal architects of the Holocaust.
August 2026, Ilu River (Alligator Creek). I am exploring the site of the 21 August 1942 Japanese attack against the Marines on the Lunga perimeter. The Japanese ‘Ichiki Detachment’ was a battalion-sized force from the 28th Infantry Regiment, led by the Regimental Commander, Colonel Kiyonao Ichiki. Facing them across the Ilu River was the 2nd…
Matanikau Village site, August 2026. I am exploring the site of the First Battle of the Matanikau, 18-19 August 1942. The battle was the first major battle west of the Matanikau and bears many similarities with the other five or six battles (depending on how you count them) on the Matanikau that would follow, each…
August 2026, at the mouth of the Matanikau River. I am exploring the sites associated with the ill-fated ‘Goettge Patrol’ of 12-13 August 1942. The action happened over a very small area on the beachline west of the Matanikau, near the old village of Matanikau, now overrun by urban sprawl. In 1942 the jungle extended…
Gavutu & Tanambogo Islands, 8 August 2026. I am exploring the site of some of the most bitter fighting of the entire Guadalcanal Campaign, and it happened right here over 7-9 August 1942, While the landings at Beach Red on the big island of Guadalcanal had gone ahead unopposed, the landings at Tulagi and Gavutu…
Tulagi Island, 8 August 2026. I crossed Iron Bottom Sound from Honiara to Tulagi by a dawn high-speed ferry. The trip was roughly two hours long. The date of my battlefield visit also coincided with the official 84th anniversary commemoration of the battle. The commemorative service was held on Blue Beach and was attended by…
August 2026, Beach Red, Guadalcanal, I am walking the ground at Beach Red, site of the 1st Marine Division landings on 7 August 1942. Compared to many other WW2 sites on the island, Beach Red is little changed since 1942. The beach is about four kilometres east of Henderson Field and curves from the Tenaru…
September 2025, Leopoldsburg, Belgium. I am standing on Nicolaylaan Street, on the site of the old Cinema Splendid. On the morning of 15 September 1944, one of the most consequential military briefings of the Second World War took place inside its walls. Lt Gen. Brian Horrocks stood before his subordinate commanders of XXX Corps and…
October 2025, Fort Eben-Emael, Liège, Belgium. I am exploring the great Belgian fortress of Eben-Emael. In May 1940, this was the site of one of the boldest, most dramatic actions in military history. A handful of German glider-borne assault engineers neutralised the most powerful fortress in Europe in under twenty-four hours, using a weapon no…
September 2025, Hell’s Highway, south of Eindhoven, Netherlands. I am exploring Hell’s Highway in the vicinity of Achterste Bridge with author Jack Didden. On 17 September 1944, Sherman tanks of the Guards Brigade led the XXX Corps advance from the Belgian border north towards Eindhoven, Nijmegen and, eventually, Arnhem. Lieutenant Colonel Joe Vandeleur’s Irish Guards…
September 2025, Arnhem, Netherlands. I am standing at the intersection of Wolfhezerweg and Utrechtseweg with author David Buggenum, on the site where the local German commander, Generalmajor Friedrich Kussin, was ambushed and killed by members of 3rd Battalion, The Parachute Regiment, on 17 September 1944.
September 2025, Nijmegen, Netherlands. I am standing at the site on the Waal River, where Major Julian Cook led the 504th Parachute Infantry Regiment (504 PIR) of the US 82nd Airborne Division in a dramatic assault river crossing to seize the northern end of the Waal Road Bridge at Nijmegen.
August 2002, Isurava, Papua New Guinea. I explored the Isurava battlefield in August 2002, around the 60th anniversary of the battle, during preparations to open the spectacular new memorial on the Kokoda Track. At the time, I was still serving in the Army back then, and I flew Prime Minister John Howard and veterans of…
September 2025, Randwijk, Netherlands. I am standing at the “Crossroads” made famous in Band of Brothers Episode 5: Crossroads. On 5 October 1944, a brief battle took place here, east of the village of Randwijk, in the area between the Rhine and the Waal known as “The Island.”
Over thousands of years of warfare, armies have sought ways to gain advantage on the battlefield. Sometimes the solution was a new weapon. Sometimes it was a radical new method. Often it was a combination of both. From the disciplined ranks of the Greek phalanx to pike-and-shot warfare to the interlocking machine-gun fire plans of the twentieth century, tactical innovations have repeatedly reshaped how battles are fought.
This article explains how machine guns are employed on the battlefield, including the key concepts of cone of fire, beaten zone, grazing fire, enfilade fire, and mutually supporting machine-gun positions. The article forms part of the Tactical Innovations in Warfare series.
Authored by Mick Prictor, a retired military officer with 40 years’ service, and a military historian specialising in terrain-focused analysis of tactics, doctrine, and command decision-making in land warfare. His work draws on extensive battlefield fieldwork—more than 280 sites worldwide—and one of the world’s largest private collections of historic military arms, uniforms, and equipment. About me
⚔️ Go deeper — Members get exclusive access to the Deep Research Collection, Field Notes, and monthly Research Dispatches. Try membership free for 7 days, cancel anytime. From $9/month.
What makes these World War Two battlefield studies unique?
Each study combines terrain analysis, period maps, archival accounts and on-site research to explain how ground, movement and tactical decisions shaped the battle.
Are these WW2 studies focused mainly on D-Day?
The collection includes extensive D-Day and Normandy actions, but also covers Market Garden, airborne operations and other major battles across the European theatre.
Can I visit these World War Two battlefields today?
Yes. Many sites in Normandy, including the landing beaches, remain accessible and are included with travel guidance and ground-level interpretation.
Do the articles include historical sources and maps?
Each study uses period maps, contemporary imagery, veteran testimony and modern GIS overlays to present a clear, terrain-driven view of the battle.
Subscribe to Battlefield Travels and receive a free E-Book Battlefield Guide
Unlock expert battlefield analysis, campaign reconstructions, and historical insights drawn from firsthand exploration and primary sources.
🗺️ You’ll receive:
🎖️ Exclusive historical insights you won’t find elsewhere
📘 A free eBook: 10 Tips for Exploring Historic Battlefields
📰 New battlefield studies straight to your inbox as they are published
Claim Your Free Battlefield Travel Guide
Get your free e-book, exclusive tips, and updates on new battlefield studies.
Thank you!
You have successfully joined our subscriber list.
⚔️ Go deeper — Members get exclusive access to the Deep Research Collection, Field Notes, and monthly Research Dispatches. Try membership free for 7 days, cancel anytime. From $9/month.
On 6 June 1944, the 3rd Canadian Infantry Division stormed ashore at Juno Beach, facing some of the strongest German defences in Normandy. Their task was to force a landing on the narrow strip of beach between Courseulles, Bernières, and Saint-Aubin, and then drive inland to cut the Caen–Bayeux road before linking up with the British lodgements at Gold Beach to the west and Sword Beach to the east
Selected works on the Korean War
Korean War – US Marines of the 1st Marine Division withdraw near the Chosin Reservoir, December 1950
Overview of the Korean War
The Korean War (1950–1953) was the first major conflict of the Cold War and one of the most complex campaigns of the 20th century. Fought by a multinational United Nations coalition, led by the United States, with major contributions from the UK, Australia, Canada, Turkey, and others, against North Korean and Chinese forces, the war combined an opening phase of sweeping manoeuvre and rapidly changing fortunes, followed by a brutal but largely static phase of positional warfare. Korea’s mountains, narrow valleys, and harsh winters deeply influenced operations, including logistics and armour employment, to infantry tactics and air support.
From the Pusan Perimeter to the Inchon landing, from the Chosin Reservoir to the battles along the 38th Parallel, the conflict shifted rapidly between mobile warfare and protracted positional fighting. It also marked the first large-scale use of jet aircraft, integrated air-ground operations, and coalition command structures under modern conditions. The negotiations at Panmunjom dragged out for nearly two years while the fighting went on, and the war ended only with an agreement to an armistice.
This Reading Room section brings together the most authoritative books on the war’s strategy, operations, and individuals — from high-level decision-making in Washington, Beijing, and Moscow, to the experience of soldiers on the ground.
The Amazon links on the Reading Room pages are powered by AAWP
Reading
The reference collection below includes the key books and references I have used in preparing for and undertaking Korean War battlefield studies.
It was the first war we could not win. At no other time since World War II have two superpowers met in battle. Now Max Hastings, preeminent military historian, takes us back to the bloody, bitter, struggle to restore South Korean independence after the Communist invasion of June 1950. Using personal accounts from interviews with more than 200 vets – including the Chinese – Hasting follows real officers and soldiers through the battles. He brilliantly captures the Cold War crisis at home – the strategies and politics of Truman, Acheson, Marshall, MacArthur, Ridgeway, and Bradley – and shows what we should have learned in the war that was the prelude to Vietnam
In December 1950 General Matthew B. Ridgway replaced General Walton Walker as commander of the Eighth Army, and in April 1951 he succeeded Douglas MacArthur as supreme commander of the United Nations forces in Korea and supreme commander of the United States Far East Command. In this spirited book, General Ridgway describes how he took a dispirited army and rebuilt it in a few short months, leading it into battle against the Chinese and North Korean forces, forcing them back over the 38th parallel and ”victory.” It is a book that takes a close look at MacArthur, his failings and brilliance, and a hard look at the idea of limited war. Infused with a humane leader’s appreciation for the ordinary fighting soldier, Ridgway’s history also teaches important lessons about Vietnam and any future conflict. Above all, he emphasizes: We should not involve ourselves in escalating warfare without a specific and attainable goal.
This is one of the few books in the Reading Room that I don’t own. It will be fascinating to hear the perspectives from the CHinese side.
Through the use of recently released Chinese documents, conversations with People’s Republic of China scholars, and in-depth interviews with people who were present at key decision-making meetings, this book aims to discover China and the USSR’s roles in the outbreak of the Korean conflict.
On the night of 22 April 1951, Chinese forces launched a major offensive against United Nations forces defending the South Korean capital, Seoul, and positions further east. Next morning the 27th British Commonwealth Brigade (including the 3rd Battalion, Royal Australian Regiment) was ordered to the valley of the Kapyong River about 60 kilometres north-east of Seoul, where South Korean forces were being driven back.
During a night of fierce fighting and throughout the daylight hours of 24 April the Australians and a Canadian battalion, supported by a New Zealand artillery regiment, stalled the Chinese advance before eventually withdrawing after dark. At a cost of 32 men killed, 59 wounded and three missing (taken prisoner), the Australians had helped hold up the Chinese 60th Division and inflicted heavy casualties which totalled more than 500 killed alone. For their contribution to this action, 3 RAR was awarded a US Presidential Citation.
Authored by Mick Prictor, a retired military officer with 40 years’ service, and a military historian specialising in terrain-focused analysis of tactics, doctrine, and command decision-making in land warfare. His work draws on extensive battlefield fieldwork—more than 280 sites worldwide—and one of the world’s largest private collections of historic military arms, uniforms, and equipment. About me
How were the books in this Korean War reading list selected?
This reading list is curated to prioritise works that examine the Korean War through operational analysis, command decision-making, terrain, and logistics. Preference is given to studies grounded in primary sources and campaign-level or tactical analysis rather than purely political or diplomatic histories.
Does this reading list focus only on major campaigns such as Inchon or the Chosin Reservoir?
While major campaigns are represented, the list also includes works that address less well-known actions, prolonged positional fighting, and the day-to-day realities of warfare in Korea’s mountainous and climatically severe terrain.
How important was terrain in the Korean War?
Terrain was a central factor. Korea’s rugged mountains, narrow valleys, river crossings, and limited road networks constrained movement, shaped logistics, and heavily influenced command decisions at every level, often overriding technological advantages.
Are these books suitable for readers new to the Korean War?
The list includes both accessible overviews and more specialised studies. Readers new to the conflict may wish to begin with the general histories before moving on to campaign- or unit-level analyses.
Is this intended to be a complete bibliography of the Korean War?
No. This is a selective reading list intended to guide serious study rather than provide exhaustive coverage. Additional works may be added as research interests and available scholarship evolve.
Subscribe to Battlefield Travels and receive a free E-Book Battlefield Guide
Unlock expert battlefield analysis, campaign reconstructions, and historical insights drawn from firsthand exploration and primary sources.
🗺️ You’ll receive:
🎖️ Exclusive historical insights you won’t find elsewhere
📘 A free eBook: 10 Tips for Exploring Historic Battlefields
📰 New battlefield studies straight to your inbox as they are published
Claim Your Free Battlefield Travel Guide
Get your free e-book, exclusive tips, and updates on new battlefield studies.
Thank you!
You have successfully joined our subscriber list.
⚔️ Go deeper — Members get exclusive access to the Deep Research Collection, Field Notes, and monthly Research Dispatches. Try membership free for 7 days, cancel anytime. From $9/month.
World War One – Australian troops of the 5th Division at Polygon Wood, September 1917
Overview of World War One
The First World War was the defining industrial conflict of the early twentieth century, fought between the Central Powers led by Germany and Austria-Hungary and the Allied Powers led by Britain, France, and later the United States. Triggered by the assassination of Archduke Franz Ferdinand at Sarajevo in June 1914, it rapidly escalated through the rigid system of European alliances.
Initial manoeuvre campaigns in 1914 gave way to entrenched stalemate on the Western Front, where artillery, machine guns, and barbed wire created killing zones of unprecedented scale. Battles at Verdun, the Somme, and Ypres epitomised attritional warfare, while on the Eastern Front and in the Middle East the fighting remained fluid with T.E. Lawrence and the Arab Army providing some glimpses into future manouevre warfare. At sea, the Royal Navy’s blockade and the German U-boat campaign reshaped global logistics and civilian life.
By 1917, exhaustion was widespread. Revolution forced Russia’s withdrawal, and the entry of the United States tipped the balance. The German offensives of spring 1918 failed to break the Allied line, and the counter-attacks of the Hundred Days drove the Central Powers to collapse. The Armistice of 11 November 1918 ended the fighting but not the turmoil: the peace settlements redrew borders, created new states, and set the conditions for another world war.
The First World War transformed strategy, technology, and society. It introduced air power, armour, and modern staff systems, marking the actual birth of industrialised warfare.
The Amazon links on the Reading Room pages are powered by AAWP
Reading
The reference collection below includes the key books and references I have used in preparing for and undertaking World War One battlefield studies.
PULITZER PRIZE WINNER • “A brilliant piece of military history which proves up to the hilt the force of Winston Churchill’s statement that the first month of World War I was ‘a drama never surpassed.’”—Newsweek
In this landmark account, renowned historian Barbara W. Tuchman re-creates the first month of World War I: thirty days in the summer of 1914 that determined the course of the conflict, the century, and ultimately our present world. Beginning with the funeral of Edward VII, Tuchman traces each step that led to the inevitable clash. And inevitable it was, with all sides plotting their war for a generation.
In May 1915, Italy declared war on the Habsburg Empire. Nearly 750,000 Italian troops were killed in savage, hopeless fighting on the stony hills north of Trieste and in the snows of the Dolomites. To maintain discipline, General Luigi Cadorna restored the Roman practice of decimation, executing random members of units that retreated or rebelled. Historian Mark Thompson relates the saga of the Italian front, the nationalist frenzy and political intrigues that preceded the conflict, and the towering personalities of the statesmen, generals, and writers drawn into the heart of the chaos.
In May 1915, Italy declared war on the Habsburg Empire. Nearly 750,000 Italian troops were killed in savage, hopeless fighting on the stony hills north of Trieste and in the snows of the Dolomites. To maintain discipline, General Luigi Cadorna restored the Roman practice of decimation, executing random members of units that retreated or rebelled. Historian Mark Thompson relates the saga of the Italian front, the nationalist frenzy and political intrigues that preceded the conflict, and the towering personalities of the statesmen, generals, and writers drawn into the heart of the chaos.
This is the first account in English of a much-overlooked, but important, First World War battlefront located in the mountains astride the border between Italy and the Austro-Hungarian Empire. Not well known in the West, the battles of Isonzo were nevertheless ferocious, and compiled a record of bloodletting that totaled over 1.75 million for both sides. In sharp contrast to claims that neither the Italian nor the Austrian armies were viable fighting forces, Schindler aims to bring the terrible sacrifices endured by both armies back to their rightful place in the history of 20th century Europe. The Habsburg Empire, he contends, lost the war for military and economic reasons rather than for political or ethnic ones.
Gallipoli remains one of the most poignant battlefronts of the First World War and Les Carlyon”s monumental account of that campaign has been rightfully acclaimed and a massive bestseller in Australia. Brilliantly told, supremely readable and deeply moving, Gallipoli brings this epic tragedy to life and stands as both a landmark chapter in the history of the war and a salutary reminder of all that is fine and all that is foolish in the human condition.
Language: – English, About the Book: Seven Pillars of Wisdom is the autobiographical account of the experiences of British Army Colonel T. E. Lawrence (“Lawrence of Arabia”), of serving as a military advisor to Bedouin forces during the Arab Revolt against the Ottoman Turks of 1916 to 1918. The title comes from the Book of Proverbs (Proverbs 9:1): “Wisdom hath builded her house, she hath hewn out her seven pillars” (King James Version). Prior to the First World War, Lawrence had begun work on a scholarly book about seven great cities of the Middle East, to be titled Seven Pillars of Wisdom. When war broke out, it was still incomplete and Lawrence stated that he ultimately destroyed the manuscript although he remained keen on using his original title Seven Pillars of Wisdom for his later work. The book had to be rewritten three times. About the Author:- Thomas Edward Lawrence CB DSO (16 August 1888 – 19 May 1935) was a British archaeologist, army officer, diplomat, and writer, who became renowned for his role in the Arab Revolt (1916–1918) and the Sinai and Palestine Campaign (1915–1918) against the Ottoman Empire during the First World War.
This radically new perspective on T. E. Lawrence, the Arab Revolt, and WWI in the Middle East provides essential insight into today’s violent conflicts.
Archaeologist and historian Neil Faulkner draws on ten years of field research in the Middle East to offer the first truly multidisciplinary history of the conflicts that raged in Sinai, Arabia, Palestine, and Syria during the First World War. Rarely is a book published that revises our understanding of an entire world region and the history that has defined it. This groundbreaking volume makes just such a contribution.
In Lawrence of Arabia’s War, Faulkner sheds new light on British intelligence officer T. E. Lawrence and his legendary military campaigns. He explores the intersections among the declining Ottoman Empire, the Bedouin tribes, rising Arab nationalism, and Western imperial ambition. Faulkner arrives at a provocative new analysis of Ottoman resilience in the face of modern industrialized warfare. This analysis leads him to reassesses the relative weight of conventional operations in Palestine and irregular warfare in Syria—and thus the historic roots of today’s divided, fractious, war-torn Middle East.
NATIONAL BESTSELLER • A New York Times Notable Book • Finalist for the National Book Critics Circle Award in Biography • From the author of King of Kings comes a thrilling and revelatory narrative of one of the most epic and consequential periods in 20th century history – the Arab Revolt and the secret “great game” to control the Middle East, including the infamous Sykes-Picot Agreement, that set the stage for decades of conflict.
“A fascinating book, the best work of military history in recent memory and an illuminating analysis of issues that still loom large today.”—The New York Times
“Brilliant. . . . A dazzling accomplishment that combines superb historical research with a compelling narrative.”—The Seattle Times
The Arab Revolt against the Turks in World War I was, in the words of T. E. Lawrence, “a sideshow of a sideshow.” As a result, the conflict was shaped to a remarkable degree by a small handful of adventurers and low-level officers far removed from the corridors of power.
The Turkish General Staff Work on the War in Arabia ( Hicaz, Asir, Yemen Cepheleri / Ankara 1978 )
Infantry Attacks is a classic text in the field of military strategy and tactics. Written by Erwin Rommel, who would later become a Field Marshal, it was first published in 1937 as a narrative chronicle of the author’s experiences in World War I, and the lessons he learned there. He provides detailed accounts of a variety of tactical approaches he used against the French, British, Romanians and Italians, that refined his views on the relationship between firepower, mass, speed and initiative.
‘As though walking through a deep dream, I saw steel helmets approaching through the craters. They seemed to sprout from the fire-harrowed soil like some iron harvest …’
Storm of Steel is one of the greatest works to emerge from the catastrophe of the First World War. A memoir of astonishing power, savagery and ashen lyricism, it illuminates like no other book the horrors but also the fascination of total war, presenting the conflict through the eyes of an ordinary German soldier. Storm of Steel has no equal.
Somme Mud recounts the experiences of Edward Lynch, a young Australian private (18 when he enlisted) during the First World War. Lynch served with the 45th Battalion of the Australian Imperial Forces on the Western Front. He served at the Somme, and in the great battles of 1918. The original edition of twenty chapters, was written in pencil in twenty school exercise books in 1921, probably to help exorcise the horrendous experiences Private Lynch had witnessed during his three years at war from mid-1916 until his repatriation home in mid-1919.
Gibbs’s harrowing 1915 account of the British offensives at Neuve-Chapelle and Loos provides vivid insights into the hell of trench warfare. What Gibbs couldn’t know was that it would get worse in 1916 and 1917. A compelling addition to any collection of World War I literature, this book serves as a lasting testament to the strength and resilience of the human spirit in the face of unimaginable adversity.
The journal of an American soldier from Michigan who enlists in the 339th Infantry to fight in France, but his unit is diverted to Archangel in northern Russia to protect allied war stocks following the Bolshevik Revolution. The combined Anglo-American force then gets drawn into the Russian Civil War and the fighting along the Dvina against the Bolsheviks. The war continues long after the war in Europe has ended.
Authored by Mick Prictor, a retired military officer with 40 years’ service, and a military historian specialising in terrain-focused analysis of tactics, doctrine, and command decision-making in land warfare. His work draws on extensive battlefield fieldwork—more than 280 sites worldwide—and one of the world’s largest private collections of historic military arms, uniforms, and equipment. About me
How were the books in this First World War reading list selected?
This reading list is curated to prioritise works that examine the First World War through operational analysis, command decision-making, terrain, and adaptation over time. Emphasis is placed on studies that engage with primary sources and explain how armies learned to fight under industrial-scale conditions.
Does this reading list focus only on trench warfare?
No. While trench warfare is a central feature, the list also includes works on mobile operations, combined arms, artillery, infiltration tactics, and the differing character of warfare on the Western, Eastern, Italian, and Middle Eastern fronts.
How important was terrain in the First World War?
Terrain was fundamental. Slight variations in ground, drainage, elevation, and cover often determined survivability, movement, and tactical feasibility. Micro-terrain—frequently measured in metres—shaped decision-making in an environment dominated by artillery and machine-gun fire.
Are these books suitable for readers new to the First World War?
The list includes a mix of accessible overviews and more specialised studies. Readers new to the war may wish to begin with the general works before exploring campaign- or theme-specific analyses.
Is this intended to be a complete bibliography of the First World War?
No. This is a selective reading list intended to guide serious study rather than provide exhaustive coverage. Additional works may be added as research interests and available scholarship evolve.
Subscribe to Battlefield Travels and receive a free E-Book Battlefield Guide
Unlock expert battlefield analysis, campaign reconstructions, and historical insights drawn from firsthand exploration and primary sources.
🗺️ You’ll receive:
🎖️ Exclusive historical insights you won’t find elsewhere
📘 A free eBook: 10 Tips for Exploring Historic Battlefields
📰 New battlefield studies straight to your inbox as they are published
Claim Your Free Battlefield Travel Guide
Get your free e-book, exclusive tips, and updates on new battlefield studies.
Thank you!
You have successfully joined our subscriber list.
⚔️ Go deeper — Members get exclusive access to the Deep Research Collection, Field Notes, and monthly Research Dispatches. Try membership free for 7 days, cancel anytime. From $9/month.
World War Two – Omaha Beach – Fox Red Sector, 6 June 1944
Overview of the Second World War
The Second World War was the largest and most destructive conflict in human history, fought across every continent and ocean between the Axis and Allied powers. It began with Germany’s invasion of Poland on 1 September 1939 and the subsequent declarations of war by Britain and France. Within two years, Axis forces under Hitler, Mussolini, and Imperial Japan had overrun most of Europe, North Africa, and large parts of East Asia.
German blitzkrieg operations brought rapid victories in 1940–41, but the failure to defeat Britain and the invasion of the Soviet Union in June 1941 fatally overstretched the Reich. Japan’s attack on Pearl Harbor in December 1941 drew the United States into a global alliance with Britain, the Soviet Union, and China. From 1942 onwards, the tide turned: the Soviet victory at Stalingrad, Allied success in North Africa, and the destruction of Japanese carrier power at Midway marked the beginning of Axis decline.
Allied strategy combined industrial mobilisation, air and sea control, and coordinated offensives on multiple fronts. Italy collapsed in 1943, France was liberated following the D-Day landings in June 1944, and Germany surrendered unconditionally in May 1945. Behind enemy lines, resistance groups struck back at the occupying powers. The Pacific war ended after the atomic bombings of Hiroshima and Nagasaki and Japan’s capitulation in August.
The war claimed over 60 million lives, redrew national borders, and ushered in the nuclear age and the bipolar world order of the Cold War. Its military, political, and moral consequences continue to shape international relations today.
The Amazon links on the Reading Room pages are powered by AAWP
Reading
The reference collection below includes the key books and references I have used in preparing for and undertaking Second World War battlefield studies. I will update this list as I continue to explore further campains and battles.
From the acclaimed author of A Bridge Too Far comes the unparalleled, classic work of history that vividly recreates the battle that changed World War II—the Allied invasion of Normandy.
The Longest Day is Cornelius Ryan’s unsurpassed account of D-Day, a book that endures as a masterpiece of military history. In this compelling tale of courage and heroism, glory and tragedy, Ryan painstakingly recreates the fateful hours that preceded and followed the massive invasion of Normandy to retell the story of an epic battle that would turn the tide against world fascism and free Europe from the grip of Nazi Germany.
This book, first published in 1959, is a must for anyone who loves history, as well as for anyone who wants to better understand how free nations prevailed at a time when darkness enshrouded the earth.
The author of Eisenhower chronicles the events, politics, and personalities of this pivotal day in World War II, shedding light on the strategies of commanders on both sides and the ramifications of the battle. 100,000 first printing. BOMC & History Main. Reader’s Digest Cond Bks.
On June 6, 1944, American and British troops staged the greatest amphibious landing in history to begin Operation Overlord, the battle to liberate Europe from the scourge of the Third Reich. With gut-wrenching realism and immediacy, Hastings reveals the terrible human cost that this battle exacted.
Moving beyond just the storming of Omaha beach and D-Day, he explores the Alliesâ push inward, with many British and American infantry units suffering near 100 percent casualties during the course of that awful summer. Far from a gauzy romanticized remembrance, Hastings details a grueling ten week battle to overpower the superbly trained, geographically entrenched German Wehrmacht. Uncompromising and powerful in its depiction of wartime, this is the definitive book on D-Day and the Battle of Normandy.
Renowned historian Antony Beevor, author of Stalingrad and The Battle of Arnhem, and the man who “single-handedly transformed the reputation of military history” (The Guardian) presents the first major account in more than twenty years of the Normandy invasion and the liberation of Paris. This is the first book to describe not only the experiences of the American, British, Canadian, and German soldiers, but also the terrible suffering of the French caught up in the fighting. Beevor draws upon his research in more than thirty archives in six countries, going back to original accounts and interviews conducted by combat historians just after the action. D-Day is the consummate account of the invasion and the ferocious offensive that led to Paris’s liberation.
Stephen E. Ambrose’s classic New York Times bestseller and inspiration for the acclaimed HBO series about Easy Company, the ordinary men who became the World War II’s most extraordinary soldiers at the frontlines of the war’s most critical moments. Featuring a foreword from Tom Hanks.
They came together, citizen soldiers, in the summer of 1942, drawn to Airborne by the $50 monthly bonus and a desire to be better than the other guy. And at its peak—in Holland and the Ardennes—Easy Company was as good a rifle company as any in the world.
From the rigorous training in Georgia in 1942 to the disbanding in 1945, Stephen E. Ambrose tells the story of this remarkable company. In combat, the reward for a job well done is the next tough assignment, and as they advanced through Europe, the men of Easy kept getting the tough assignments.
“Tells the tales left untold by Stephen Ambrose, whose Band of Brothers was the inspiration for the HBO miniseries…laced with Winters’s soldierly exaltations of pride in his comrades’ bravery.”—Publishers Weekly
Look for the Band of Brothers miniseries, now available to stream on Netflix!
They were called Easy Company—but their mission was never easy. Immortalized as the Band of Brothers, they suffered 150% casualties while liberating Europe—an unparalleled record of bravery under fire. Winner of the Distinguished Service Cross, Dick Winters was their legendary commander. This is his story—told in his own words for the first time.
On D-Day, Winters assumed leadership of the Band of Brothers when its commander was killed and led them through the Battle of the Bulge and into Germany—by which time each member had been wounded. Based on Winters’s wartime diary, Beyond Band of Brothers also includes his comrades’ untold stories. Virtually none of this material appeared in Stephen Ambrose’s Band of Brothers. Neither a protest against nor a glamorization of war, this is a moving memoir by the man who earned the love and respect of the men of Easy Company—and who is a hero to new generations worldwide.
Includes photos
Tom Hanks introduces the “remarkable” (Publishers Weekly) true story of two inseparable friends and soldiers portrayed in the HBO® miniseries Band of Brothers.
Look for the Band of Brothers miniseries, now available to stream on Netflix!
William “Wild Bill” Guarnere and Edward “Babe” Heffron were among the first paratroopers of the U.S. Army—members of an elite unit of the 101st Airborne Division called Easy Company. The crack unit was called upon for every high-risk operation of the war, including D-Day, Operation Market Garden in Holland, the Battle of the Bulge, and the capture of Hitler’s Eagle’s Nest in Berchtesgaden.
In his own words, Guarnere gives a gripping account of D-Day from the paratrooper’s perspective. Both men vividly re-create dropping into Holland to capture the roads and bridges between Eindhoven and Arnhem, known as Hell’s Highway. Through much of 1944 both friends fought side by side—until Guarnere lost his right leg in the Battle of the Bulge and was sent home. Heffron went on to liberate slave labor and concentration camps and capture Hitler’s Eagle’s Nest hideout.
United by their experience, the two reconnected at the war’s end and were inseparable up until their deaths. Brothers in Battle, Best of Friends is a tribute to the lasting bond forged between comrades in arms under fire and to all the brave men who fought fearlessly for freedom.
Includes photographs
Currahee! A Screaming Eagle at Normandy. Donald R. Burgett is a real Screaming Eagle, who jumped with that famed division at Normandy and survived to tell the tale. His memoir vividly portrays the tragic chaos of war: the blood and sweat, the glory and tears of one of the greatest battles of all time. Currahee! (this was the battle cry and motto of his regiment) begins with jump training and explodes in drama as they are parachuted into Normandy with orders to take and hold the high ground behind the beaches. It contains unforgettable incidents. The author’s almost dispassionate tone goes a long way toward explaining a particular set of psychological defenses which enabled these men to do their duty and-for some of them-to survive with their sanity intact. Currahee! is the only book on World War II that General Dwight D. Eisenhower ever endorsed, calling it “a fascinating tale of personal combat” that “portrays the courage, endurance, initiative and fighting qualities of an American soldier on a European battlefield of World War II.” Currahee! was originally published to critical acclaim in 1967. Donald R. Burgett holds the title of being the first enlisted man to write and publish on the Airborne.
From the author of Fire and Fortitude and Island Infernos, a white-knuckle account of the 1st Infantry Division’s harrowing D-Day assault on the eastern sector of Omaha Beach—acclaimed historian John C. McManus has written a gripping history that will stand as the last word on this titanic World War II battle.
Nicknamed the Big Red One, 1st Division had fought from North Africa to Sicily, earning a reputation as stalwart warriors on the front lines and rabble-rousers in the rear. Yet on D-Day, these jaded combat veterans melded with fresh-faced replacements to accomplish one of the most challenging and deadly missions ever. As the men hit the beach, their equipment destroyed or washed away, soldiers cut down by the dozens, courageous heroes emerged: men such as Sergeant Raymond Strojny, who grabbed a bazooka and engaged in a death duel with a fortified German antitank gun; T/5 Joe Pinder, a former minor-league pitcher who braved enemy fire to save a vital radio; Lieutenant John Spalding, a former sportswriter, and Sergeant Phil Streczyk, a truck driver, who together demolished a German strong point overlooking Easy Red, where hundreds of Americans had landed.
The you-are-there story of one of the most ferocious small-unit combats in US history . . .
As part of the massive Allied invasion of Normandy, three airborne divisions were dropped behind enemy lines to sow confusion in the German rear and prevent panzer reinforcements from reaching the beaches. In the dark early hours of D-Day, this confusion was achieved well enough, as nearly every airborne unit missed its drop zone, creating a kaleidoscope of small-unit combat.
Fortunately for the Allies, the 505th Regimental Combat Team of the 82nd Airborne Division hit on or near its drop zone. Its task was to seize the vital crossroads of Ste Mère Eglise, and to hold the bridge over the Merderet River at nearby La Fière. Benefiting from dynamic battlefield leadership, the paratroopers reached the bridge, only to be met by wave after wave of German tanks and infantry desperate to force the crossing.
The delivery of entire divisions to battlefields behind enemy lines by parachute and glider was a unique feature of World War II.
Failures at D-Day landings necessitated that, in order to avoid severe dispersion of paratroopers, US tactics be rethought and daylight airdrops be implemented.
The new tactics were first put to the test in September 1944, with the landings by the 82d and 101st Airborne divisions as part of Operation Market Garden. Although the US landings were successful, the operation as a whole failed to secure its objectives. Nevertheless, both divisions subsequently played a vital defensive role withstanding the German Ardennes offensive.
Written by one of the world’s leading experts on D-Day, Smashing Hitler’s Guns is a ground-breaking new history of the legendary Rangers’ attack on Pointe-du-Hoc.
The Ranger attack on the German gun batteries at Pointe-du-Hoc in the early morning hours of D-Day is the stuff of legend. The gun batteries were strategically positioned between the two American D-Day landing beaches, and were considered the main threat to the Operation Neptune landings. In spite of the confusion and chaos of the June 6, 1944 mission, the Rangers succeeded in scaling the 100-foot cliffs, but the guns were nowhere to be found.
Spreading out in all directions, a Ranger team managed to find and spike the guns at their hidden location south of Pointe-du-Hoc. For two days, this small force fought off repeated German attacks, until an American relief force finally arrived on 8 June, by which time more than half the Rangers were casualties.
Historian John Buckley offers a radical reappraisal of Great Britain’s fighting forces during World War Two, challenging the common belief that the British Army was no match for the forces of Hitler’s Germany. Following Britain’s military commanders and troops across the battlefields of Europe, from D-Day to VE-Day, from the Normandy beaches to Arnhem and the Rhine, and, ultimately, to the Baltic, Buckley’s provocative history demonstrates that the British Army was more than a match for the vaunted Nazi war machine. This fascinating revisionist study of the campaign to liberate Northern Europe in the war’s final years features a large cast of colorful unknowns and grand historical personages alike, including Field Marshal Sir Bernard Montgomery and the prime minister, Sir Winston Churchill. By integrating detailed military history with personal accounts, it evokes the vivid reality of men at war while putting long-held misconceptions finally to rest.
The first of two books in the 18-volume official British History of the Second World War dealing with D-Day and its consequences: the liberation of German-occupied western Europe in 1944-45. This volume begins by describing the origins and development of Operation ‘Overlord’ – the ambitious Anglo-American plan to invade Normandy. With subsidiary sections on such subjects as the French Resistance, attempts to assassinate Hitler, and new technology, – including the artificial ‘Mulberry’ harbours, – the authors describe D-Day itself with its airborne assaults, naval bombardment and seaborne landings on Gold, Juno, Sword, Utah and Omaha beaches. They narrate the hard fighting as the Allies secure their bridgehead and push inland, capturing Cherbourg and Caen, and enveloping the main German defending armies at the battle of the Falaise Gap. The book culminates with the liberation of Paris at the end of August, and ends with Eisenhower and Montgomery poised to cross the Rhine. Supported by ten appendices on the forces engaged, the book is lavishly illustrated with 5 general maps, 20 situation maps, 26 sketch maps and diagrams, and 63 photographs.
The fourth title in Osprey’s survey of the D-Day landings of World War II (1939-1945). Operation Overlord, the Allied invasion of Normandy, was the greatest sea-borne military operation in history. At the heart of the invasion and key to its success were the landings of British 50th Division on Gold Beach and Canadian 3rd Division on Juno Beach. Not only did they provide the vital link between the landings of British 3rd Division on Sword Beach and the Americans to the west on Omaha, they would be crucial to the securing of the beachhead and the drive inland to Bayeux and Caen. In the fourth D-Day volume Ken Ford details the assault that began the liberation of Nazi-occupied Europe.
With Fields of Fire, Terry Copp challenges the conventional view that the Canadian contribution to the Battle of Normandy was a “failure” – that the allies won only through the use of brute force, and that the Canadian soldiers and commanding officers were essentially incompetent. His detailed and impeccably researched analysis of what actually happened on the battlefield portrays a flexible, innovative army that made a major, and successful, contribution to the defeat of the German forces in just seventy-six days.
Challenging both existing interpretations of the campaign and current approaches to military history, Copp examines the Battle of Normandy, tracking the soldiers over the battlefield terrain and providing an account of each operation carried out by the Canadian army. In so doing, he illustrates the valour, skill, and commitment of the Allied citizen-soldier in the face of a well-entrenched and well-equipped enemy army.
D-Day before dawn. Minute by minute, hour by hour the danger grows…
In the early morning hours of June 6, 1944, a small detachment of British airborne troops stormed the German defence forces and paved the way for the Allied invasion of Europe. Pegasus Bridge was the first engagement of D-Day, the turning point of World War II. This gripping account by acclaimed author Stephen E. Ambrose brings to life a daring mission so crucial that, had it been unsuccessful, the entire Normandy invasion might have failed. Ambrose traces each step of the preparations over many months to the minute-by-minute excitement of the hand-to-hand confrontations on the bridge. This is a story of heroism and cowardice, kindness and brutality – the stuff of all great adventures.
”With his wealth of knowledge and exacting eye for detail, [Fisher”s] book on D-Day is sure to impress a vast audience” Dan Snow
”Stephen Fisher… is a very rare beast – a man who can bring stunning research and scholarship hand-in-glove with the gifts of a fine storyteller” James Holland
”Written with verve and panache… It’s a brilliant evocation of one of the greatest days in history, and Fisher has done it proud. Bravo!” Robert Lyman, author of Victory to Defeat: The British Army 1918-1940
_________
6th June 1944 saw the largest seaborne assault in human history: D-Day. The landings on the five Normandy beaches, Utah, Omaha, Gold, Juno and Sword, will go down in legend as the first footsteps on the journey to end the war in northern Europe.
This spectacular, large format, full color, new book is quite simply the most impressive book of its type we have seen. Packed with over 200 photographs, maps and charts, the book is divided into the sectors associated with the Normandy landings in 1944. What’s more it is extremely reasonably priced.
limited 1,000 copy reprint of an extremely rare WWII memoir. This one of the few memoirs ever written by a former German paratrooper. The Baron was in command of a battalion of paratroopers in Crete, being dropped at zero hour near Canea and seven days later received the surrender of the town. This book is the full exciting account of preparation, landing and seven days of terrifying battle. This is an excellent read and the Baron has a flair with the pen. Captured in 1945 in the Ardennes the Baron was bitterly attacked for his anti-Hitler sentiments as a P.O.W., after the war he became a professor of law at the University of Wurzburg. This book does have a small photo section. Bound in full cloth using an exact copy of original dust jacket published originally in 1958!
At last, a single-source reference book which accurately details the German field forces employed in Normandy in 1944 and their losses. Chapters include: German Combat Organization (overview); Number of Soldiers Employed; Effects of Allied Air Power; German Armor in Normandy; German Losses in Normandy; Combat Efficiency; and, Unit Movements. In addition, there is a capsule history of every major formation employed in Normandy: infantry and Panzer divisions and separate formations; artillery and Werfer (rocket) units; corps and field-army formations and miscellaneous elements which could bring combat power to bear. Dr. Zetterling provides a sobering analysis of the subject matter and debunks a number of popular myths concerning the campaign (the effectiveness of Allied air power; the preferential treatment of Waffen-SS formations in comparison to their army counterparts; etc.). He supports his text with exhaustive footnoting and provides an organizational chart for most of the formations covered in the book. Includes numerous organizational diagrams, charts, tables and graphs.
Before the Germans invade France in 1940, they need to take out a bunker fortress in Belgium. Daring paratroopers are send in by gliders, and you follow them almost minute by minute as they complete their mission. Thoroughly executed attack. The Belgians don’t even see it coming.
In the early morning of 10 May 1940, the sky literally fell on the heads of the defenders of Fort Eben-Emael, considered to be Belgium’s most powerful fortress. This huge structure, with its powerful artillery and infantry weapons, was the key to the Meuse and Albert Canal defences. In the darkness of the pre-dawn, German DFS 230 gliders drifted silently over the southern Netherlands, landing one by one on top of Eben-Emael. Within minutes German Special Forces troops destroyed most of the fort’s weapons and observation capabilities. The following day, the garrison surrendered, and the door to Belgium and France was open.
The source material for HBO series ‘The Pacific’. With the Old Breed and Helmet for My Pillow. Robert Leckie’s classic account of Guadalcanal, Cape Gloucester and Peleliu, and Eugene Sledge’s diary from Peleliu and Okinawa.
This volume, ten years in the writing, recounts the full story of the critical campaign for Guadalcanal and is based on first-time translations of official Japanese Defense Agency accounts and recently declassified U.S. radio intelligence, Guadalcanal recreates the battle—on land, at sea, and in the air—as never before: it examines the feelings of both American and Japanese soldiers, the strategies and conflicts of their commanders, and the strengths and weaknesses of various fighting units.
The Matanikau battles proved to be the critical turning points in the land campaign for Guadalcanal—the campaign’s longest and bloodiest ground fight. A five-month conflict raged along the river and its basin. The real importance of this area has long remained unrecognized, yet the American and Japanese forces that fought over it knew that it was the key to the ultimate prize of Henderson Airfield. In this mile-long bloody tug-of-war from the river across to the hills and ravines were fought seven major battles and countless smaller skirmishes.
When the name Guadalcanal is mentioned, most picture Marines desperately fighting in the dense jungles and the U.S. Navy in dramatic surface battles. That story, though true, tells only part of the campaign. Less well known is the role played by the United States Army. While the Marines landed and fought off several Japanese counterattacks it was the Army’s soldiers who followed and bore a large share of the brutal ground fighting that stretched on for months. These fights were not “mopping up” actions normally associated with the Army, but brutal battles against a determined enemy.
The Battle of Guadalcanal has long been heralded as a Marine victory. Now, with his powerful portrait of the Navy’s sacrifice, James D. Hornfischer tells for the first time the full story of the men who fought in destroyers, cruisers, and battleships in the narrow, deadly waters of “Ironbottom Sound.” Here, in stunning cinematic detail, are the seven major naval actions that began in August 1942, a time when the war seemed unwinnable and America fought on a shoestring,
Richard F. Newcomb is one of the true masters of military storytelling. The Battle of Savo Island is the story of the opening engagement of the Solomon Islands campaign, a unique chapter in naval history. It was the first surface encounter for a coordinated American force in nearly half a century and a very bad start. Courage and will were never lacking, but the Imperial Japanese Navy was about to hand the U.S. Navy the bitterest defeat in its history.
James Jones’ classic novel of the Guadalcanal campaign. Jones himself was a soldier in 2nd Battalion, 27th Infantry and fought in the Battle for Galloping Horse Ridge, depicted in the movie ‘Thin Red Line’.
The Marine Corps is known for its heroes, and Lieutenant General Lewis B. Puller has long been considered the greatest of them all. His assignments and activities covered an extraordinary spectrum of warfare. Puller mastered small unit guerrilla warfare as a lieutenant in Haiti in the 1920s, and at the end of his career commanded a division in Korea. In between, he chased Sandino in Nicaragua and fought at Guadalcanal, Cape Gloucester, and Peleliu.
Unlike some of those on Guadalcanal in the fall of 1942, Richard Tregaskis volunteered to be there. An on-location news correspondent (at the time, one of only two on Guadalcanal), he lived alongside the soldiers: sleeping on the ground, only to be awoken by air raids; eating the sometimes meager rations; and braving some of the most dangerous battlefields of World War II. He more than once narrowly escaped the enemy’s fire, and so we have this incisive and exciting inside account of the groundbreaking initial landing of U.S. troops on Guadalcanal.
Authored by Mick Prictor, a retired military officer with 40 years’ service, and a military historian specialising in terrain-focused analysis of tactics, doctrine, and command decision-making in land warfare. His work draws on extensive battlefield fieldwork—more than 280 sites worldwide—and one of the world’s largest private collections of historic military arms, uniforms, and equipment. About me
How were the books in this Second World War reading list selected?
A: This reading list is curated to prioritise works that examine the Second World War through operational analysis, command decision-making, terrain, logistics, and doctrine. Emphasis is placed on studies that engage with primary sources and explain how armies fought, adapted, and made decisions under varying conditions.
Does this reading list focus on any particular theatre of war?
No single theatre dominates the list. The selection spans multiple theatres and types of warfare in order to reflect the diversity of terrain, forces, and operational problems encountered during the war.
How important was terrain in the Second World War?
Terrain remained a decisive factor despite advances in mechanisation and airpower. Mountains, rivers, urban areas, forests, and infrastructure frequently constrained movement, shaped logistics, and influenced command decisions at tactical and operational levels.
Are these books suitable for readers new to the Second World War?
The list includes a mix of accessible overviews and more specialised studies. Readers new to the subject may wish to begin with the general works before exploring theatre- or campaign-specific titles.
Is this intended to be a complete bibliography of the Second World War?
No. This is a selective reading list designed to guide serious study rather than provide exhaustive coverage. Titles may be added as new scholarship and perspectives emerge.
Subscribe to Battlefield Travels and receive a free E-Book Battlefield Guide
Unlock expert battlefield analysis, campaign reconstructions, and historical insights drawn from firsthand exploration and primary sources.
🗺️ You’ll receive:
🎖️ Exclusive historical insights you won’t find elsewhere
📘 A free eBook: 10 Tips for Exploring Historic Battlefields
📰 New battlefield studies straight to your inbox as they are published
Claim Your Free Battlefield Travel Guide
Get your free e-book, exclusive tips, and updates on new battlefield studies.
Thank you!
You have successfully joined our subscriber list.
⚔️ Go deeper — Members get exclusive access to the Deep Research Collection, Field Notes, and monthly Research Dispatches. Try membership free for 7 days, cancel anytime. From $9/month.
American paratrooper Helmet MC1 front seam, swivel- bail. Late WW2/Korea
Overview of the Korean War
The Korean War (1950–1953) began with North Korea’s invasion of the South on 25 June 1950, triggering a United Nations response led by the United States. Early North Korean successes were halted at the Pusan Perimeter before UN forces counter-attacked, landing at Inchon and advancing to the Yalu River. China’s massive intervention in late 1950 reversed these gains, leading to a bitter, attritional campaign fought across mountainous terrain and extreme climates.
Key battles—Kapyong, the Imjin River, the Chosin Reservoir, and the Hook—demonstrated the importance of infantry firepower, artillery support, and defensive fortification in a war dominated by ridgelines, frost, and close combat. Commonwealth units, including Australia’s 3 RAR, Canada’s PPCLI, British 29 Brigade, and New Zealand gunners, played decisive roles in halting major Chinese offensives. The front stabilised near the 38th Parallel, where trench-line warfare and aggressive patrolling continued until the Panmunjom armistice agreement of July 1953.
The war reshaped Cold War geopolitics, solidified the U.S.–ROK alliance, and established the Demilitarised Zone (DMZ), one of the world’s most fortified boundaries. For participating nations, including Australia, it marked a transition into post-WW2 operational commitments and modern combined-arms warfare.
Australian Army Slouch Hat, Northcote Hats, 1953
This Australian slouch hat, manufactured by Northcote Hats in 1953, represents the standard headdress worn by 3 RAR and supporting Australian units during the Korean War. Constructed from khaki fur felt with a reinforced brim and puggaree, it carried the brass Rising Sun badge on the left-turned brim. Although steel helmets were worn in combat, the slouch hat remained the principal dress and parade item, symbolising Australian identity across operations from Kapyong and Maryang San to the static-line battles along the Jamestown Line.
🧭 From Weapons to Battlefield Use
This page shows weapons and equipment of the Korean War. All items are from my personal collection.
But what images and data don’t show is how these weapons were actually used on the ground—how weapon characteristics, tactics, innovation, terrain, and movement shaped their effectiveness in battle.
US MC1 Paratrooper Helmet. Front seam, Swivel Bail. Late WW2 or Korea
This airborne-pattern M1 helmet features the early front-seam rim and later swivel-bail chinstrap loops adopted from 1943. Used by U.S. airborne and specialist infantry units during the Korean War, the helmet provided improved ballistic protection and a stable platform for winter covers, camouflage nets, and cold-weather liners. It was worn in operations from the Naktong Bulge to the Chosin Reservoir and throughout the fluid manoeuvre phase of 1950–51, remaining a standard U.S. helmet well into the 1960s.
French Model 1951 Combat Helmet Korea/Algeria
The French Model 1951 helmet, based closely on the U.S. M1 pattern, was adopted after WW2 and issued to French forces serving in Korea (1950–1953) as part of the UN contingent. Featuring a double-shell system with a steel outer shell and composite liner, it offered improved comfort and ballistic protection. The M51 later equipped airborne, Foreign Legion, and colonial units in Algeria. Its dual service in Korea and North Africa makes it one of France’s most recognisable post-war combat helmets.
Found this useful? Buy me a coffee — it helps fund future battlefield research
Authored by Mick Prictor, a retired military officer with 40 years’ service, and a military historian specialising in terrain-focused analysis of tactics, doctrine, and command decision-making in land warfare. His work draws on extensive battlefield fieldwork—more than 280 sites worldwide—and one of the world’s largest private collections of historic military arms, uniforms, and equipment. About me
Subscribe to Battlefield Travels and receive a free E-Book Battlefield Guide
Unlock expert battlefield analysis, campaign reconstructions, and historical insights drawn from firsthand exploration and primary sources.
🗺️ You’ll receive:
🎖️ Exclusive historical insights you won’t find elsewhere
📘 A free eBook: 10 Tips for Exploring Historic Battlefields
📰 New battlefield studies straight to your inbox as they are published
Claim Your Free Battlefield Travel Guide
Get your free e-book, exclusive tips, and updates on new battlefield studies.
Thank you!
You have successfully joined our subscriber list.
⚔️ Go deeper — Members get exclusive access to the Deep Research Collection, Field Notes, and monthly Research Dispatches. Try membership free for 7 days, cancel anytime. From $9/month.