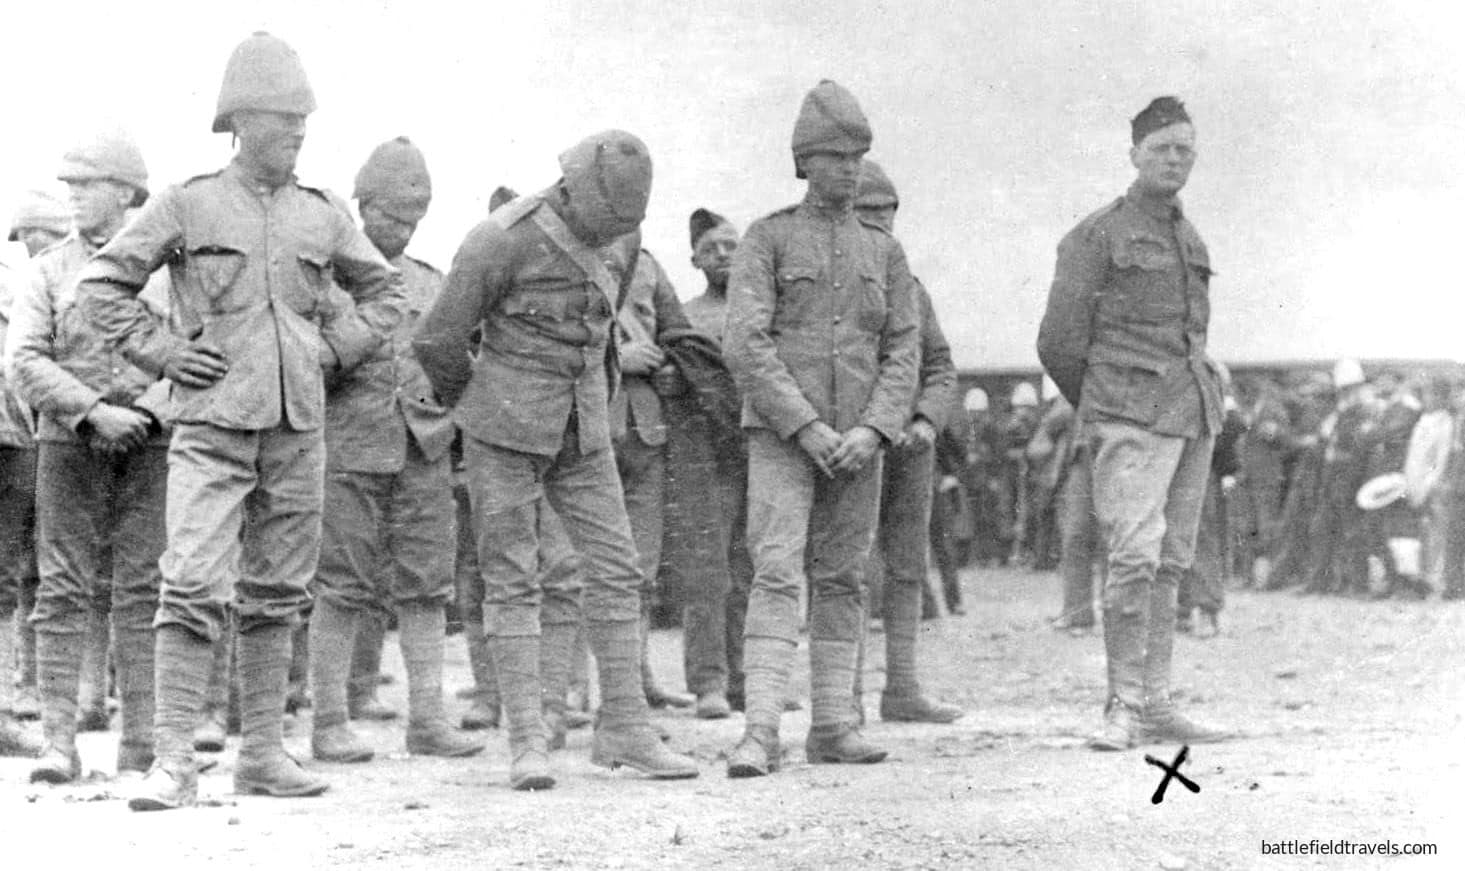
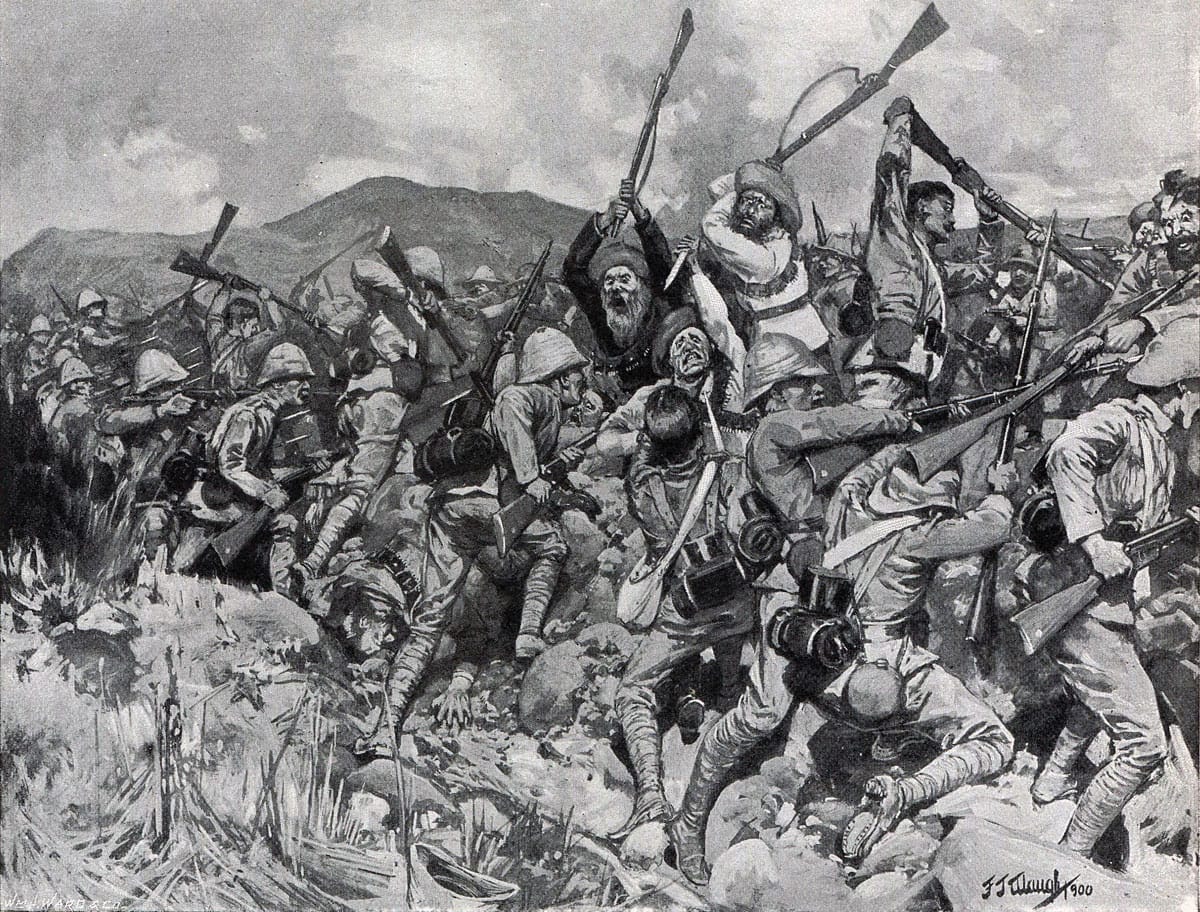
On 15 November 1899, just south of Chieveley Station in Natal, a Boer force lured a British armoured train patrol into a well-placed ambush. On board was 24-year-old war correspondent Winston Churchill, along with about 120 British troops under Captain Aylmer Haldane. Churchill subsequently escaped from captivity and evaded Boer security forces in an extraordinary journey of some 400 kilometres.
A bold plan and a day of disaster on the Tugela Heights! At the Battle of Spion Kop, 23-24 January 1900, a bold British night attack seized a key Boer position overlooking the Tugela River. By dawn, the British realised they had halted short of the crest and were exposed to converging Boer fire from… Read More »⚔️🔒Battle of Spion Kop, Natal, 23-24 January 1900
Selected works on the Anglo-Zulu War
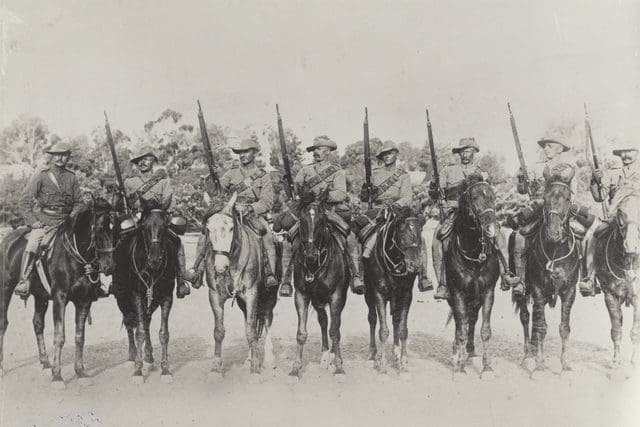
Anglo-Boer War – Captain (Capt) Edward Richman, and seven men of the 2nd South Australian (Mounted Rifles) Contingent. Image @ Australian War Memorial
Second Boer War – Recommended Reading
Understanding the conflict through contemporary and modern historians
The literature of the Second Boer War is unusually rich, drawing together eyewitness accounts, early narrative histories, and modern scholarly reassessments of strategy, politics and terrain. For anyone seeking to understand the war in depth — whether as a historian, battlefield traveller, or student of small-unit evolution — the works of the major commentators form an indispensable foundation.
Among the contemporary voices, Bennett Burleigh’s The Natal Campaign offers one of the clearest frontline perspectives from a seasoned war correspondent, capturing both the friction of operations and the landscape in which they were fought. Winston Churchill’s London to Ladysmith provides a vivid account of movement, captivity and escape, as well as early reflections on British operational shortcomings. Arthur Conan Doyle’s The Great Boer War, though occasionally coloured by patriotic sentiment, remains a remarkably detailed and readable overview of the conflict’s opening phases.
Twentieth-century historians broadened the scale and sharpened the analysis. Byron Farwell brought narrative clarity; Thomas Pakenham produced a sweeping, meticulously researched synthesis that remains the standard single-volume account; and John Laband’s The Transvaal Rebellion provides one of the most terrain-aware examinations of the Natal theatre. More recently, Bill Nasson’s The War for South Africa stands out for its balanced treatment of Boer, British, and African experiences, situating the war within a larger regional and social context.
Taken together, these authors illuminate different dimensions of the conflict: the lived experience of battle, the political stakes, the evolution of tactics, and the enduring importance of ground — from the Tugela River crossings to the Ladysmith approaches and the exposed summit of Spion Kop. Their works complement the battlefield studies presented on this site, offering readers essential background, critical perspectives, and a deeper understanding of how this war shaped the transition from Victorian to modern combat.
The Amazon links on the Reading Room pages are powered by AAWP
Reading
The reference collection below includes the key books and references I have used in preparing for and undertaking studies of the Anglo-Zulu War battlefields.
Anglo-Boer War
Note that many of the early works are also available for download via Gutenburg, Internet Archive or other sources listed on the Primary Sources page.
Bennet Burleigh’s The Natal Campaign is a riveting account of the 1879 Anglo-Zulu war in South Africa. From the Battle of Isandlwana to the siege of Eshowe, Burleigh’s reporting brings to life the heroism and tragedy of this brutal conflict. Drawing upon interviews with soldiers and eyewitnesses, Burleigh delivers a vivid and unforgettable portrait of war in colonial Africa.
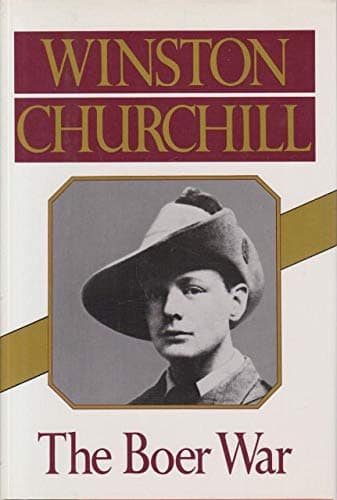
Like almost everything Churchill wrote, the style makes for compelling reading. Churchill was in the thick of it. He survived the armoured train ambush at Chieveley, was imprisoned by the Boers, and made a daring escape across the border into what is now Mozambique. A month later he was back at the fron t with Redvers Buller at the Battle of Spion Kop, personally reconnoitring the situation on the summit and reporting it to General Warren. A brilliant account!!
The Great Boer War by Arthur Conan Doyle is a detailed and compelling account of the South African conflict between the British Empire and the Boer Republics (1899–1902). Drawing from firsthand observations and thorough research, Doyle provides a vivid narrative of military strategies, key battles, and the broader political implications of the war. This historical work stands as an essential read for those interested in military history and British imperialism.
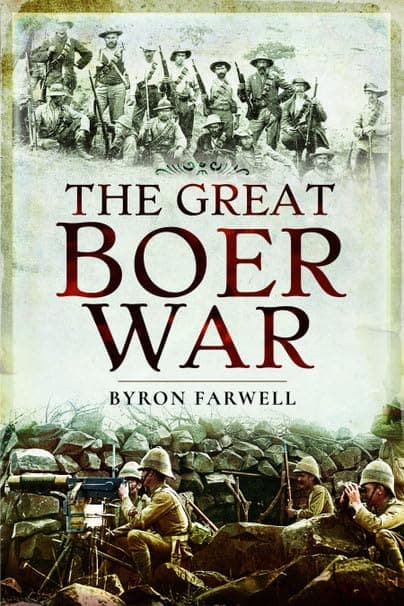
Byron Farwell traces the war’s origins, the slow mounting of the British efforts to overthrow the Afrikaners, the bungling and bickering of the British command, the remarkable series of bloody battles that almost consistently ended in victory for the Boers over the much more numerous British forces, political developments in London and Pretoria, the sieges of Ladysmith, Mafeking and Kimberley, the concentration camps into which Boer families were herded and the exhausting guerrilla warfare of the last few years when the Boer armies were finally driven from the field.
Thomas Pakenham, whose narrative is based on firsthand but largely unpublished sources, has written the first full-scale documentary history of the war to be attempted since 1910. He has combed the original British documents in the Public Record Office and the material in South African archives, and has traced the private papers of most of the principals (for example, he found the letters of Sir Redvers Buller—the British commander-in-chief in 1899—hidden under the billiard table at Buller’s house in Devon). He also unearthed new material from the trunkloads of Lord Roberts’s papers, discovered a massive secret journal of the war compiled by the War Office Intelligence Department, and found the private letters from the War Minister, Lord Lansdowne, and other members of the Cabinet.
Authored by Mick Prictor, a retired military officer with 40 years’ service, and a military historian specialising in terrain-focused analysis of tactics, doctrine, and command decision-making in land warfare. His work draws on extensive battlefield fieldwork—more than 280 sites worldwide—and one of the world’s largest private collections of historic military arms, uniforms, and equipment. About me
What are the best introductory books on the Second Boer War?
Excellent starting points include Byron Farwell’s The Great Anglo-Boer War and Thomas Pakenham’s The Boer War. Both offer clear narrative overviews and accessible analysis of strategy, politics and the evolution of the conflict.
Which modern historians provide the most comprehensive analysis?
Bill Nasson’s The War for South Africa is widely regarded as one of the most balanced and authoritative modern studies, offering perspectives from British, Boer and African sources. John Laband also provides detailed, terrain-aware work on the campaigns in Natal.
Are contemporary accounts still useful for understanding the war?
Yes. Eyewitness works by Bennett Burleigh, Winston Churchill and Arthur Conan Doyle remain valuable for their immediacy and detail. While coloured by the biases of their time, these books provide first-hand impressions of mobility, morale and battlefield conditions.
Why do historians disagree about the causes and conduct of the Boer War?
Interpretations differ because the war sits at the intersection of imperial ambition, regional politics, race, economics and emerging modern military practice. Historians place different weight on these factors, leading to varied conclusions about British strategy and Boer resistance.
How has modern scholarship changed our understanding of the conflict?
Recent work incorporates a broader range of sources, including African perspectives, guerrilla warfare studies, social history and environmental factors. This has deepened understanding of logistics, rural devastation, and the transition from conventional to guerrilla fighting.
Subscribe to Battlefield Travels and receive a free E-Book Battlefield Guide
Unlock expert battlefield analysis, campaign reconstructions, and historical insights drawn from firsthand exploration and primary sources.
🗺️ You’ll receive:
🎖️ Exclusive historical insights you won’t find elsewhere
📘 A free eBook: 10 Tips for Exploring Historic Battlefields
📰 New battlefield studies straight to your inbox as they are published
Claim Your Free Battlefield Travel Guide
Get your free e-book, exclusive tips, and updates on new battlefield studies.
Thank you!
You have successfully joined our subscriber list.
⚔️ Go deeper — Members get exclusive access to the Deep Research Collection, Field Notes, and monthly Research Dispatches. Try membership free for 7 days, cancel anytime. From $9/month.
Reconstructing Anglo-Boer War battlefields through terrain analysis, primary sources and on-site research
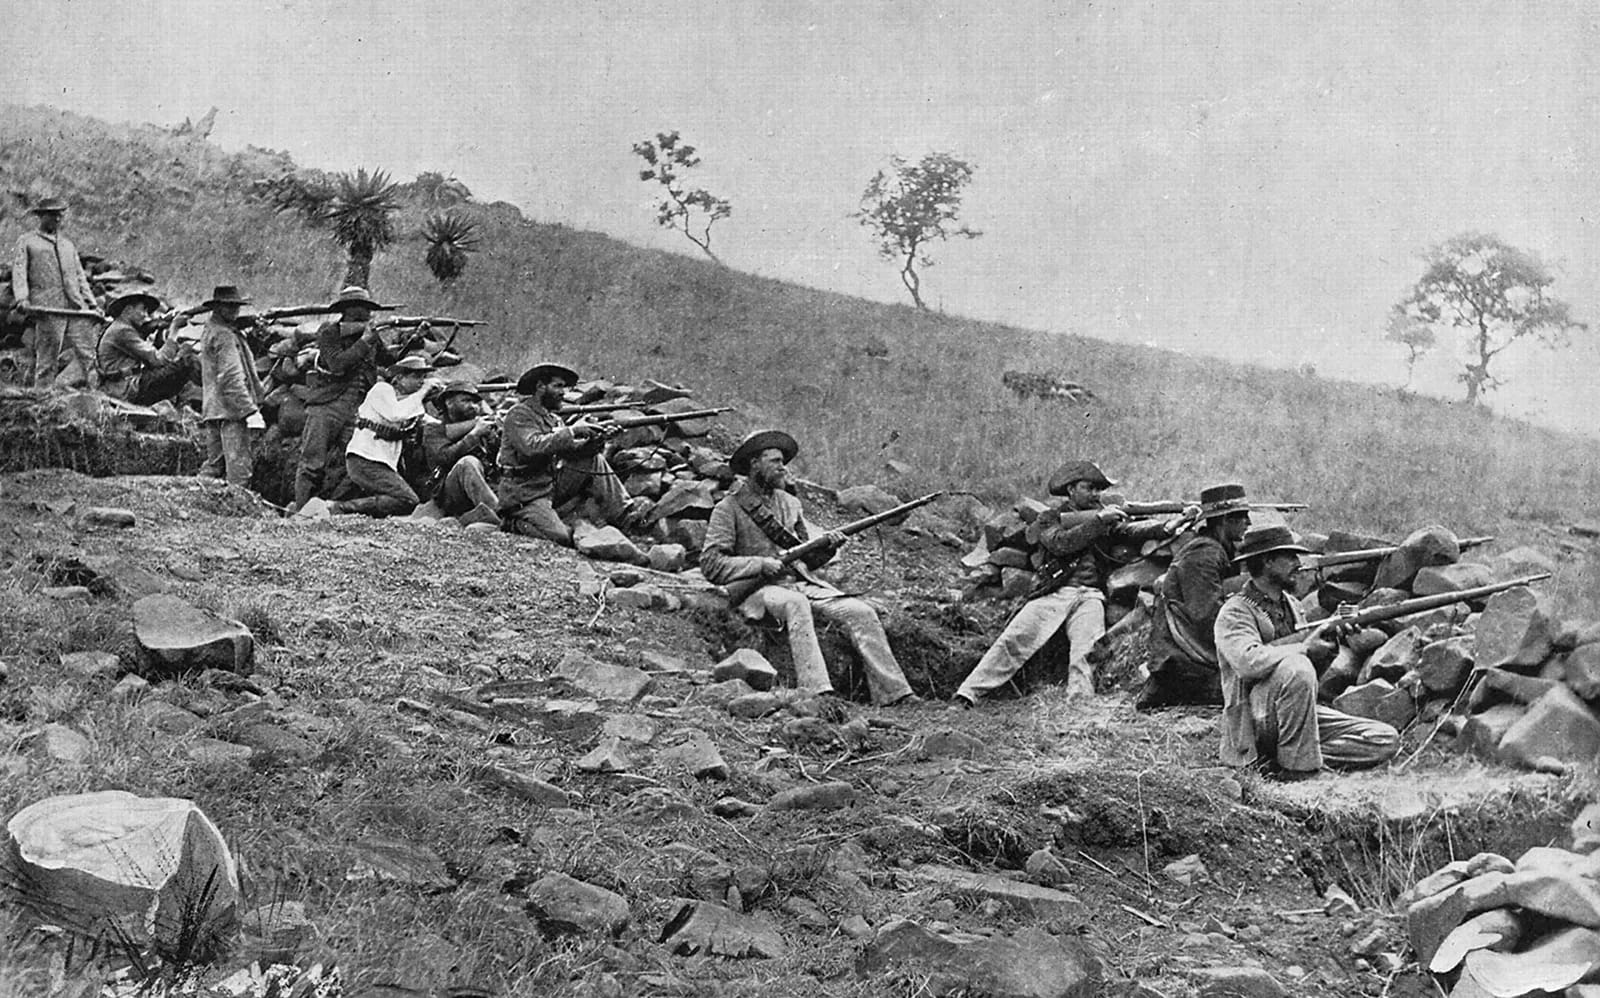
Boer defensive position, Transvaal, c1900. The Boers were tough, resourceful fighters, with a command-and-control system based on merit, trust, and mutual agreement.
Walking the battlefields of the 2nd Anglo-Boer War, 1899-1902
Origins of the conflict
The Second Boer War erupted in October 1899 after years of tension between the British Empire and the Boer republics of the Transvaal and Orange Free State. Disputes over political rights, imperial influence, and control of the region’s gold resources spiralled into a conflict fought across some of the world’s most distinctive military terrain. Over nearly three years, armies manoeuvred through the high veldt, basalt-topped kopjes, deeply cut river lines, and dominating ridgelines that shaped every operational choice and tactical fight.
How the war unfolded
The war progressed in three broad phases. In the opening months, Boer forces seized the initiative by invading the adjacent British colonies of Natal and the Cape. Boer commandos advanced on the major garrison at Ladysmith, as well as the smaller British-held towns of Mafeking and Kimberley. By mid-October 1899, all three were under siege. A series of smaller clashes characterised the early war, including the British vitory at Elandslaagte, and a Boer ambush of a British armoured train near Chieveley that resulted in the capture of young Winston Churchill. Early British attempts to break these sieges met with costly reverses at Stormberg, Magersfontein, Colenso and Spion Kop— defeats defined by the Boers’ well-sited trenches, smokeless Mauser rifle fire, and exceptional use of dead ground and concealment. With the arrival of major reinforcements and a new commander, the British launched a counter-offensive in early 1900: relieving Ladysmith, Kimberley and Mafeking, and advancing into the Boer republics. The final phase, from late 1900 to 1902, saw the war evolve into a wide-ranging guerrilla struggle, answered by British blockhouse lines, mobile columns, and scorched-earth measures that reshaped both strategy and landscape.
Studying the Boer War battlefields
For the battlefield historian, this is a war where the terrain still speaks with remarkable clarity. The Tugela River crossings preserve the obstacles that constrained British manoeuvre; the summit of Spion Kop offers an unbroken panoramic view of the fight; the Ladysmith approaches retain their tight defiles and dominating high ground; and the open veldt around Elandslaagte and Colenso still conveys the depth and exposure that shaped Boer mobility and British deployments. Each study in this collection draws on period maps, British and Boer primary accounts, contemporary photographs, modern GIS terrain analysis, and firsthand fieldwork to reconstruct how ground, firepower, and command interacted to define each engagement.
These battles mark a watershed between Victorian colonial methods and the small-unit, fire-and-movement tactics that would define the 20th century. The insights gained from walking these fields — at Colenso, Ladysmith, Spion Kop, Elandslaagte, Chieveley and beyond — help illuminate that transition. This collection aims to provide a clear, terrain-focused understanding of how the war was fought, why decisions succeeded or failed, and what the ground still reveals today.
Anglo-Boer War Battlefield Studies
In-depth battlefield analyses based on terrain, primary sources, and on-the-ground exploration.
On 15 November 1899, just south of Chieveley Station in Natal, a Boer force lured a British armoured train patrol into a well-placed ambush. On board was 24-year-old war correspondent Winston Churchill, along with about 120 British troops under Captain Aylmer Haldane. Churchill subsequently escaped from captivity and evaded Boer security forces in an extraordinary…
A bold plan and a day of disaster on the Tugela Heights! At the Battle of Spion Kop, 23-24 January 1900, a bold British night attack seized a key Boer position overlooking the Tugela River. By dawn, the British realised they had halted short of the crest and were exposed to converging Boer fire from…
Authored by Mick Prictor, a retired military officer with 40 years’ service, and a military historian specialising in terrain-focused analysis of tactics, doctrine, and command decision-making in land warfare. His work draws on extensive battlefield fieldwork—more than 280 sites worldwide—and one of the world’s largest private collections of historic military arms, uniforms, and equipment. About me
⚔️ Go deeper — Members get exclusive access to the Deep Research Collection, Field Notes, and monthly Research Dispatches. Try membership free for 7 days, cancel anytime. From $9/month.
The war arose from long-standing tensions between the British Empire and the Boer republics of the Transvaal and Orange Free State. Disputes over political rights for foreign settlers, imperial influence in southern Africa, and control of gold-rich territories escalated into open conflict in 1899.
Why did the British suffer early defeats?
Early British operations underestimated the mobility, marksmanship, and defensive skill of Boer commandos. Well-sited trenches, smokeless Mauser rifles, and clever use of dead ground allowed the Boers to dominate key battles such as Stormberg, Magersfontein, Colenso and Spion Kop.
How did the war change after 1900?
Following major reinforcements and new leadership, the British relieved the besieged towns and advanced into the Boer republics. From late 1900, however, the war shifted into a guerrilla phase, prompting the British to build blockhouse lines, form mobile columns and adopt scorched-earth tactics.
What makes Boer War battlefields valuable for study today?
Many Boer War battlefields remain remarkably intact. Features such as the Tugela River crossings, the summit of Spion Kop, and the Ladysmith approaches still display the ground constraints, fields of fire, and dominant ridgelines that shaped historical decisions.
Which Boer War battlefields have been studied on Battlefield Travels?
I have personally explored the battlefields of Colenso, Ladysmith, Spion Kop, Elandslaagte, and Chieveley, with additional sites to be added as further fieldwork is undertaken.
Subscribe to Battlefield Travels and receive a free E-Book Battlefield Guide
Unlock expert battlefield analysis, campaign reconstructions, and historical insights drawn from firsthand exploration and primary sources.
🗺️ You’ll receive:
🎖️ Exclusive historical insights you won’t find elsewhere
📘 A free eBook: 10 Tips for Exploring Historic Battlefields
📰 New battlefield studies straight to your inbox as they are published
Claim Your Free Battlefield Travel Guide
Get your free e-book, exclusive tips, and updates on new battlefield studies.
Thank you!
You have successfully joined our subscriber list.
⚔️ Go deeper — Members get exclusive access to the Deep Research Collection, Field Notes, and monthly Research Dispatches. Try membership free for 7 days, cancel anytime. From $9/month.
The Anglo–Boer War (1899–1902) was fought between the British Empire and the two Boer republics—the South African Republic (Transvaal) and the Orange Free State—for control of the Highveld and its strategic goldfields. The war opened with Boer offensives into Natal and the Cape Colony, followed by a series of British reverses during “Black Week” in December 1899. After the arrival of large British reinforcements, a counter-offensive relieved the besieged towns of Ladysmith, Kimberley, and Mafeking, followed by the capture of Bloemfontein and Pretoria in 1900.
Conventional warfare then gave way to a long, attritional guerrilla phase. Boer commandos, operating in mobile mounted groups, targeted rail lines, garrisons, and supply depots. In response, the British implemented a wide-ranging counter-insurgency campaign involving blockhouse lines, armoured trains, scorched-earth operations, and the controversial concentration camp system for civilians.
By 1902, sustained pressure, loss of mobility, and destruction of resources forced the Boer leadership to negotiate the Treaty of Vereeniging, ending the conflict and placing both republics under British sovereignty. The war marked a turning point in British imperial military practice, influencing later doctrine, field organisation, and mounted infantry development, and left a lasting political legacy in South Africa.
Weapons of the Second Anglo-Boer War
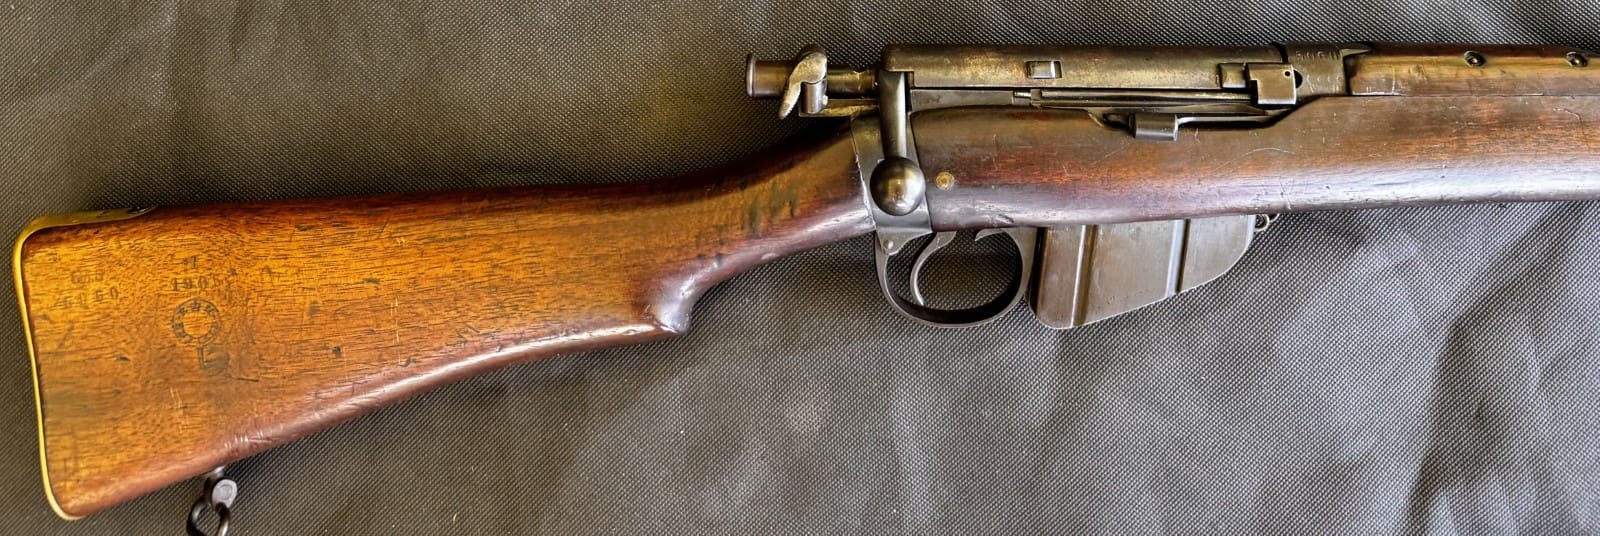
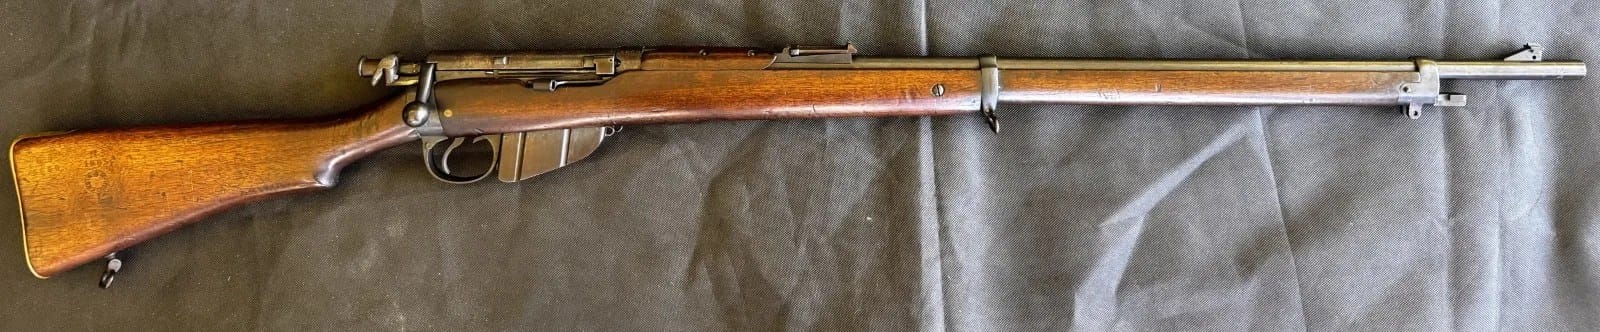
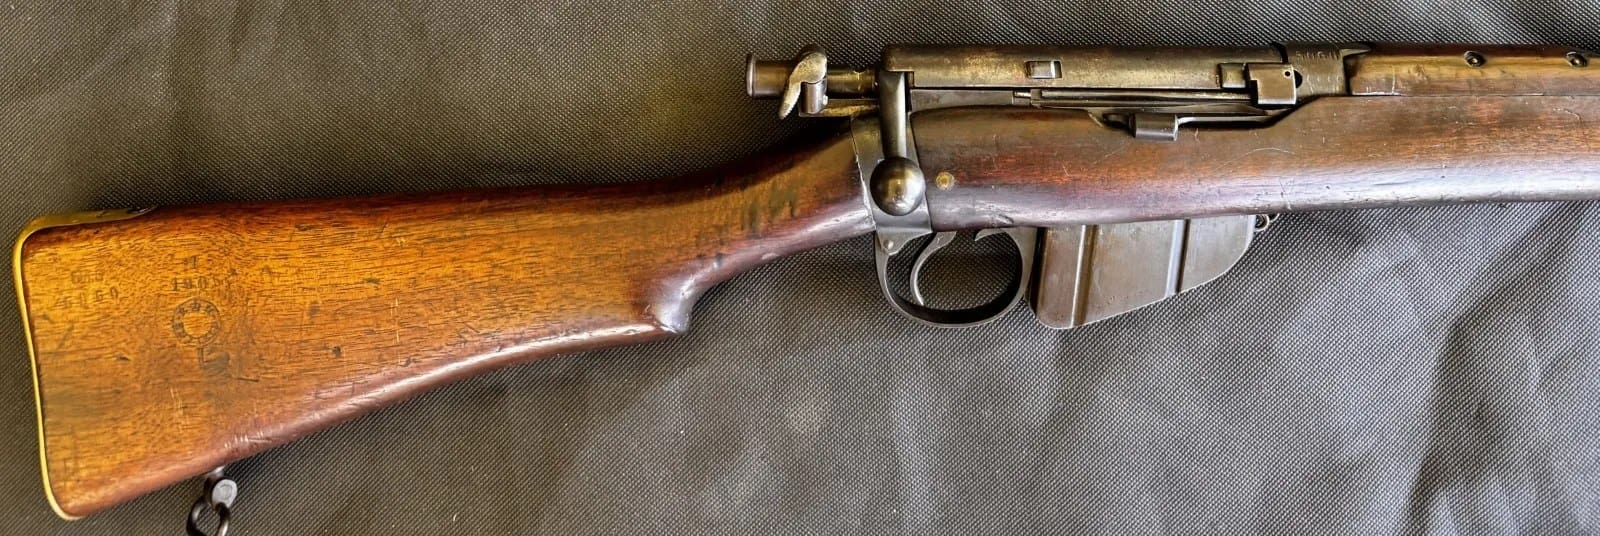
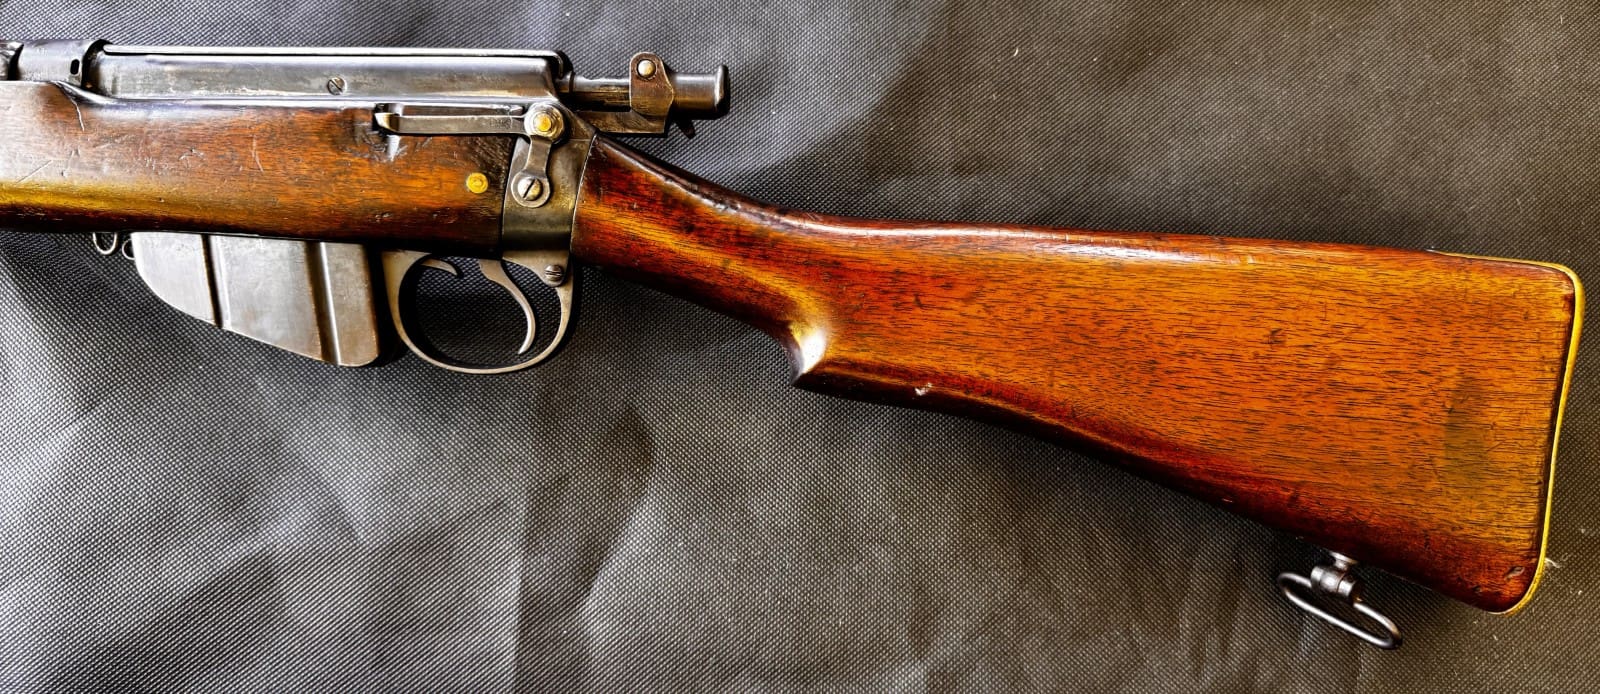
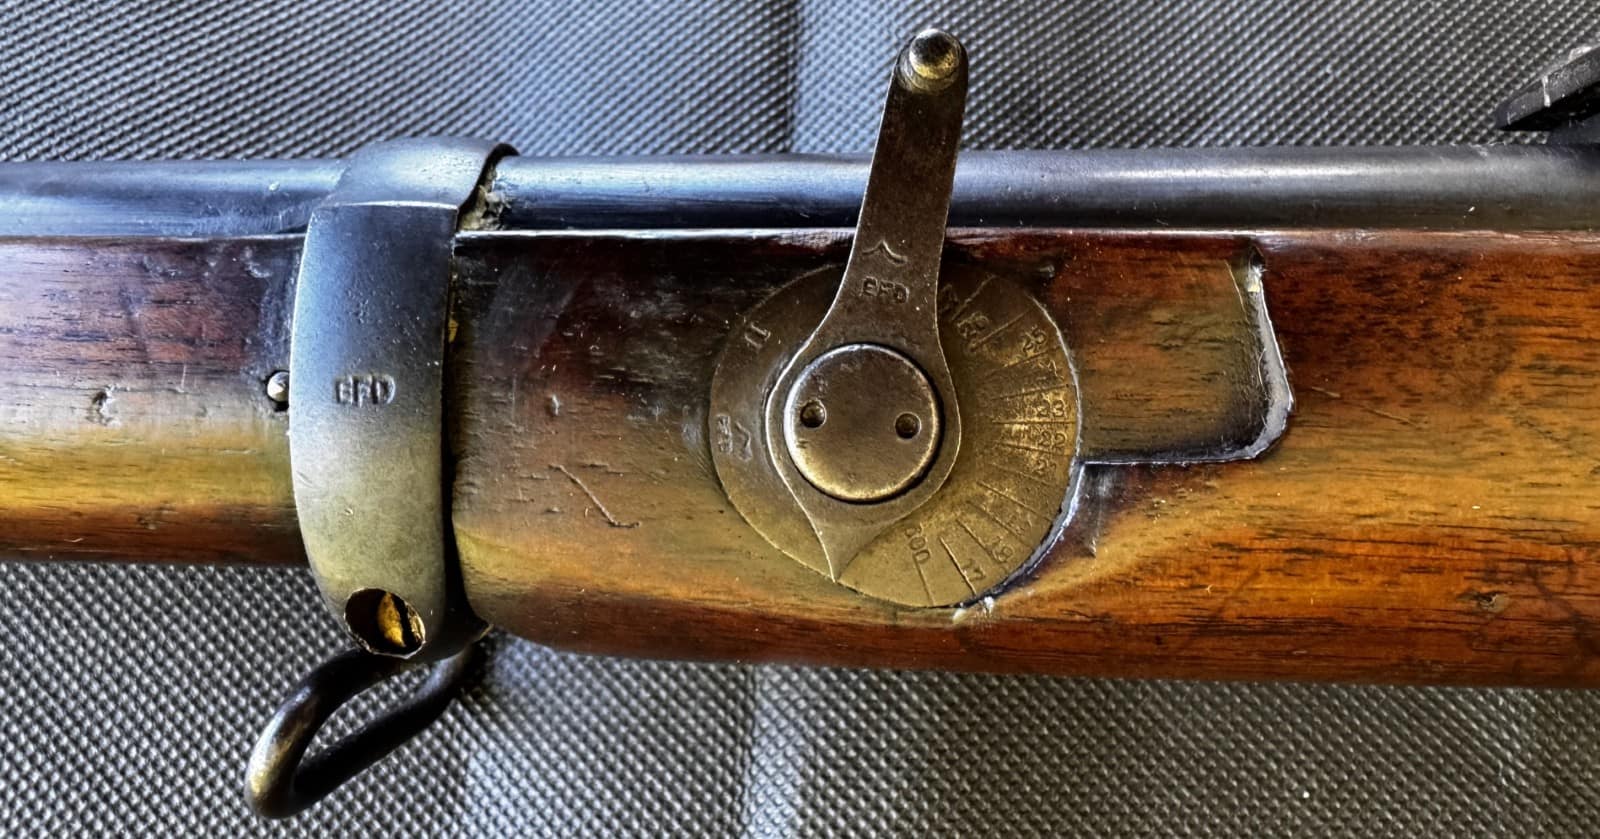
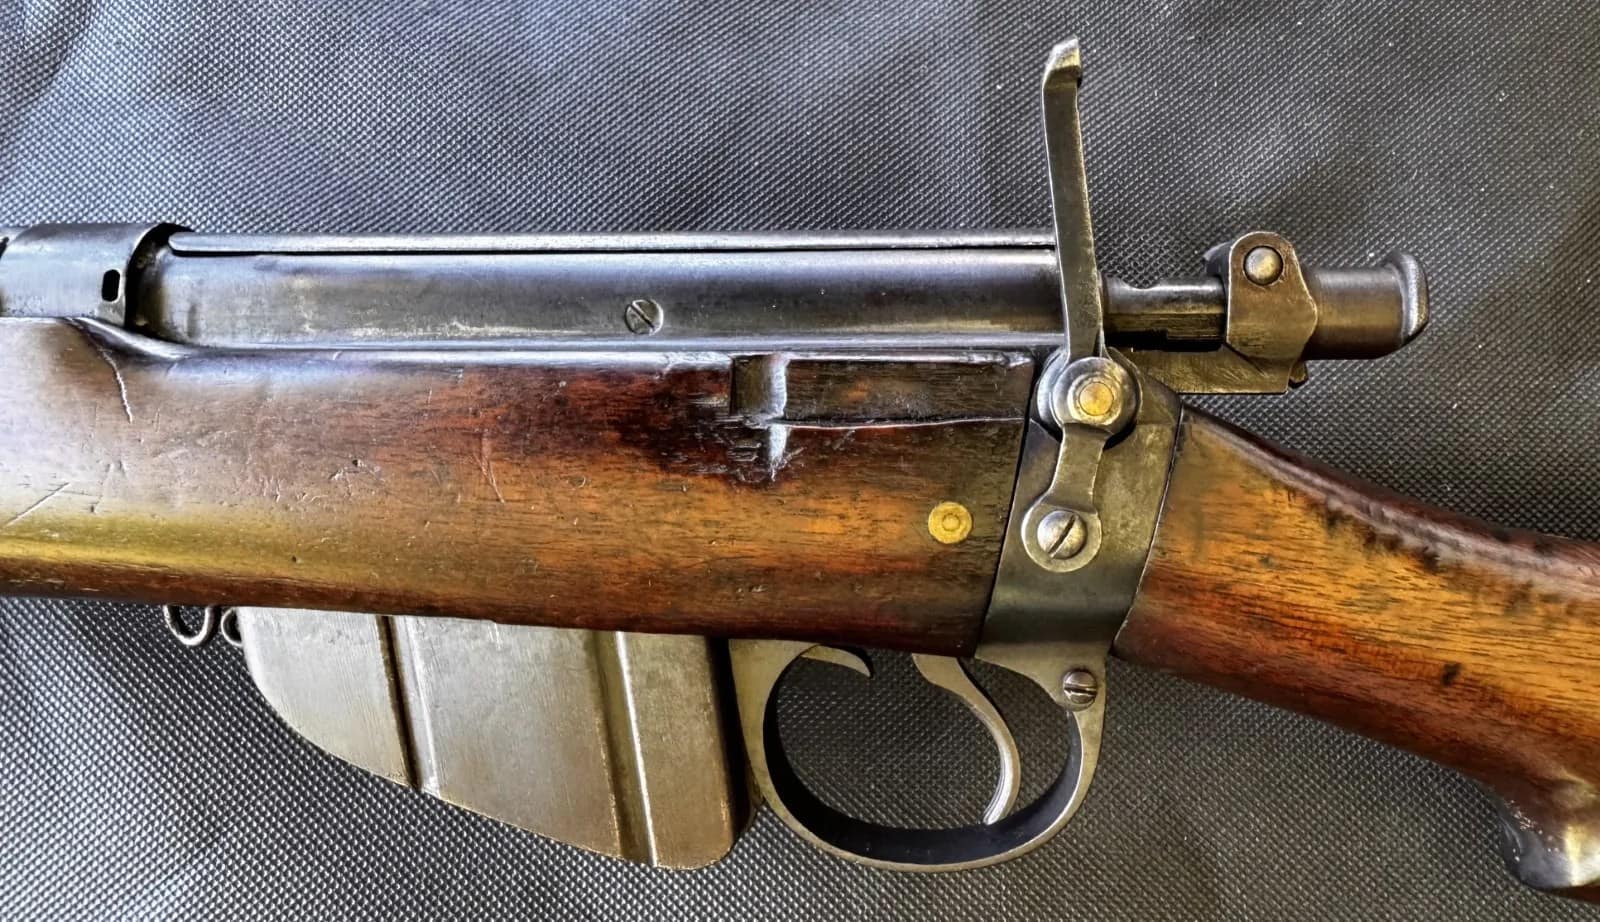
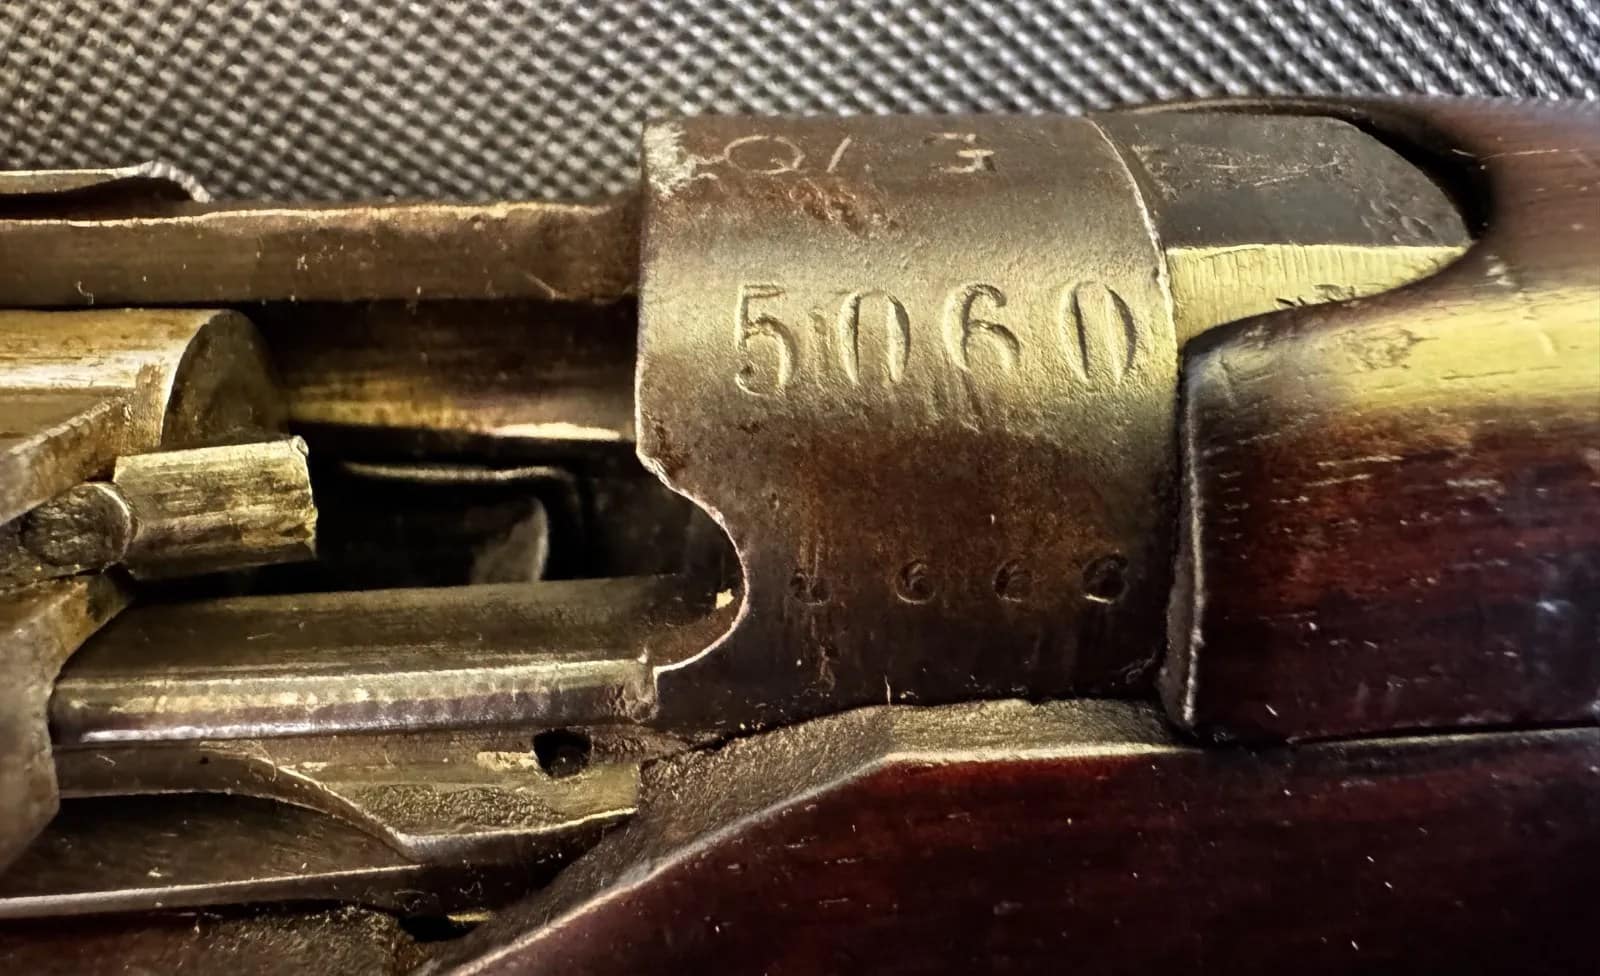
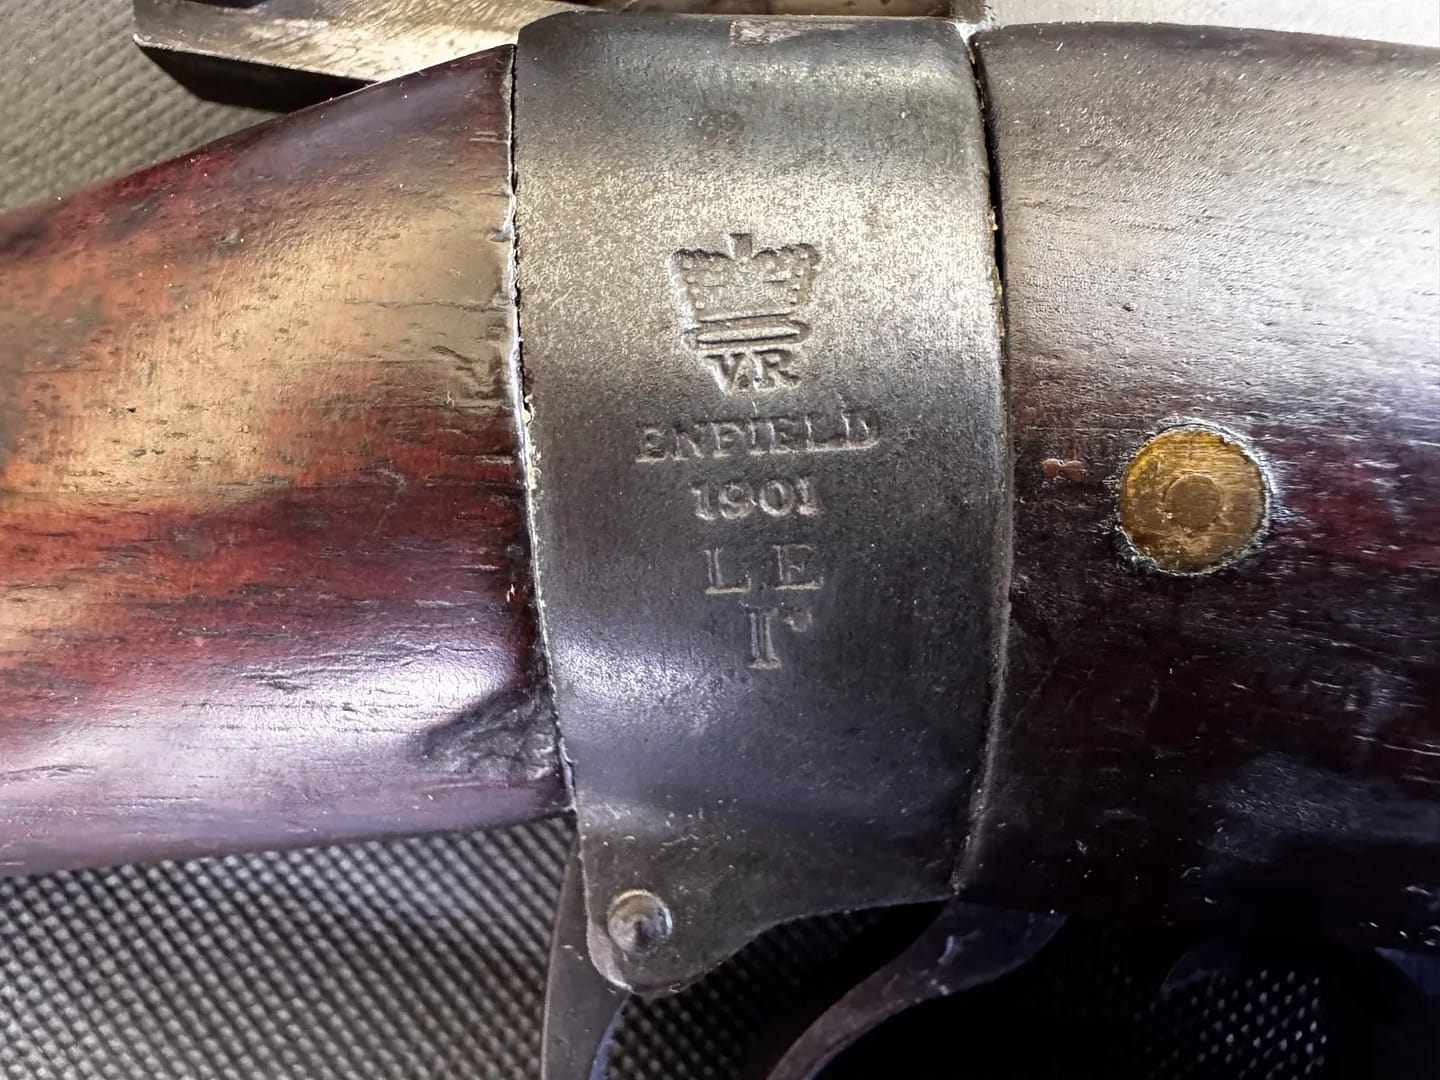
Lee Enfield Mk 1 1901, dated 1901, from my personal collection.
This Lee–Enfield Mk I rifle, dated 1901, represents the improved magazine-fed bolt-action rifle introduced during the latter stages of the Boer War. Chambered in .303 British and fitted with the early long-range volley sights, it offered rapid fire and reliability in harsh field conditions. Although many British units still carried the earlier Lee–Metford or converted rifles in 1899–1900, the Mk I Lee–Enfield increasingly equipped regular and colonial infantry from 1901 onward, reflecting the shift toward modern magazine rifles during the conflict.
🧭 From Weapons to Battlefield Use
This page shows weapons and equipment of the 2nd Anglo-Boer War. All items are from my personal collection.
But what images and data don’t show is how these weapons were actually used on the ground—how weapon characteristics, tactics, innovation, terrain, and movement shaped their effectiveness in battle.
Boer War Pattern 1888 Mk.I Type II Lee-Metford Bayonet. From my personal collection.
The Pattern 1888 Mk.I Type II bayonet was introduced for the British Army’s Lee-Metford rifle, reflecting the late-Victorian shift toward smaller calibre magazine rifles and modern infantry equipment. Featuring a double-edged blade with a distinctive narrow fuller and steel crossguard, it replaced earlier sword bayonets with a lighter, more practical design suited to the new style of infantry combat. The Type I can be distinguished by the single large brass rivet and two smaller brass rivets securing the wood grips. Manufactured by several British contractors from the late 1880s, it remained in service into the early twentieth century, including the early years of the Boer War and the transition to the Lee-Enfield system.
Boer War Pattern 1888 Mk.I Type II Lee-Metford Bayonet. From my personal collection.
The Pattern 1888 Mk.I Type II bayonet was introduced for the British Army’s Lee-Metford rifle, reflecting the late-Victorian shift toward smaller calibre magazine rifles and modern infantry equipment. Featuring a double-edged blade with a distinctive narrow fuller and steel crossguard, it replaced earlier sword bayonets with a lighter, more practical design suited to the new style of infantry combat. The Type II can be distinguished by the two large brass rivets securing the wood grips. Manufactured by several British contractors from the late 1880s, it remained in service into the early twentieth century, including the early years of the Boer War and the transition to the Lee-Enfield system.
Headgear and uniforms
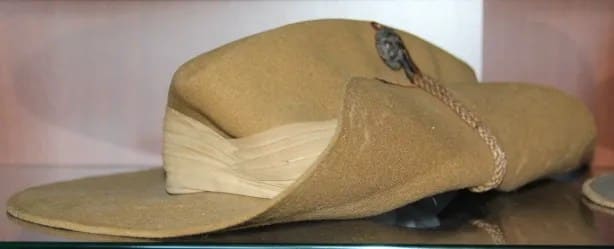
Boer War-era Australian slouch hat – Victorian Mounted Rifles, from my personal collection.
This Boer War–era Australian slouch hat belonged to a trooper of the Victorian Mounted Rifles. Made from khaki felt with the left brim turned up, it features the distinctive lion-head side clip used by Victorian colonial forces before Federation. Worn in South Africa between 1899 and 1902, these hats were paired with khaki uniforms and regimental badges. The slouch hat became a symbol of Australian mounted infantry service in the war, preceding its later adoption across the Commonwealth.
Boer War-era British Tropical Helmet, from my personal collection.
The British tropical helmet of the Boer War period was a sun helmet made of cork or pith covered in khaki cloth, designed for service in the hot, dry climate of the South African veldt. Issued widely to British and colonial troops, it offered shade and limited impact protection but was unsuitable for mounted action, where many soldiers preferred slouch hats or felt field caps. The tropical helmet remains closely associated with early-war British uniforms prior to the adoption of more practical campaign dress.
Accoutrements
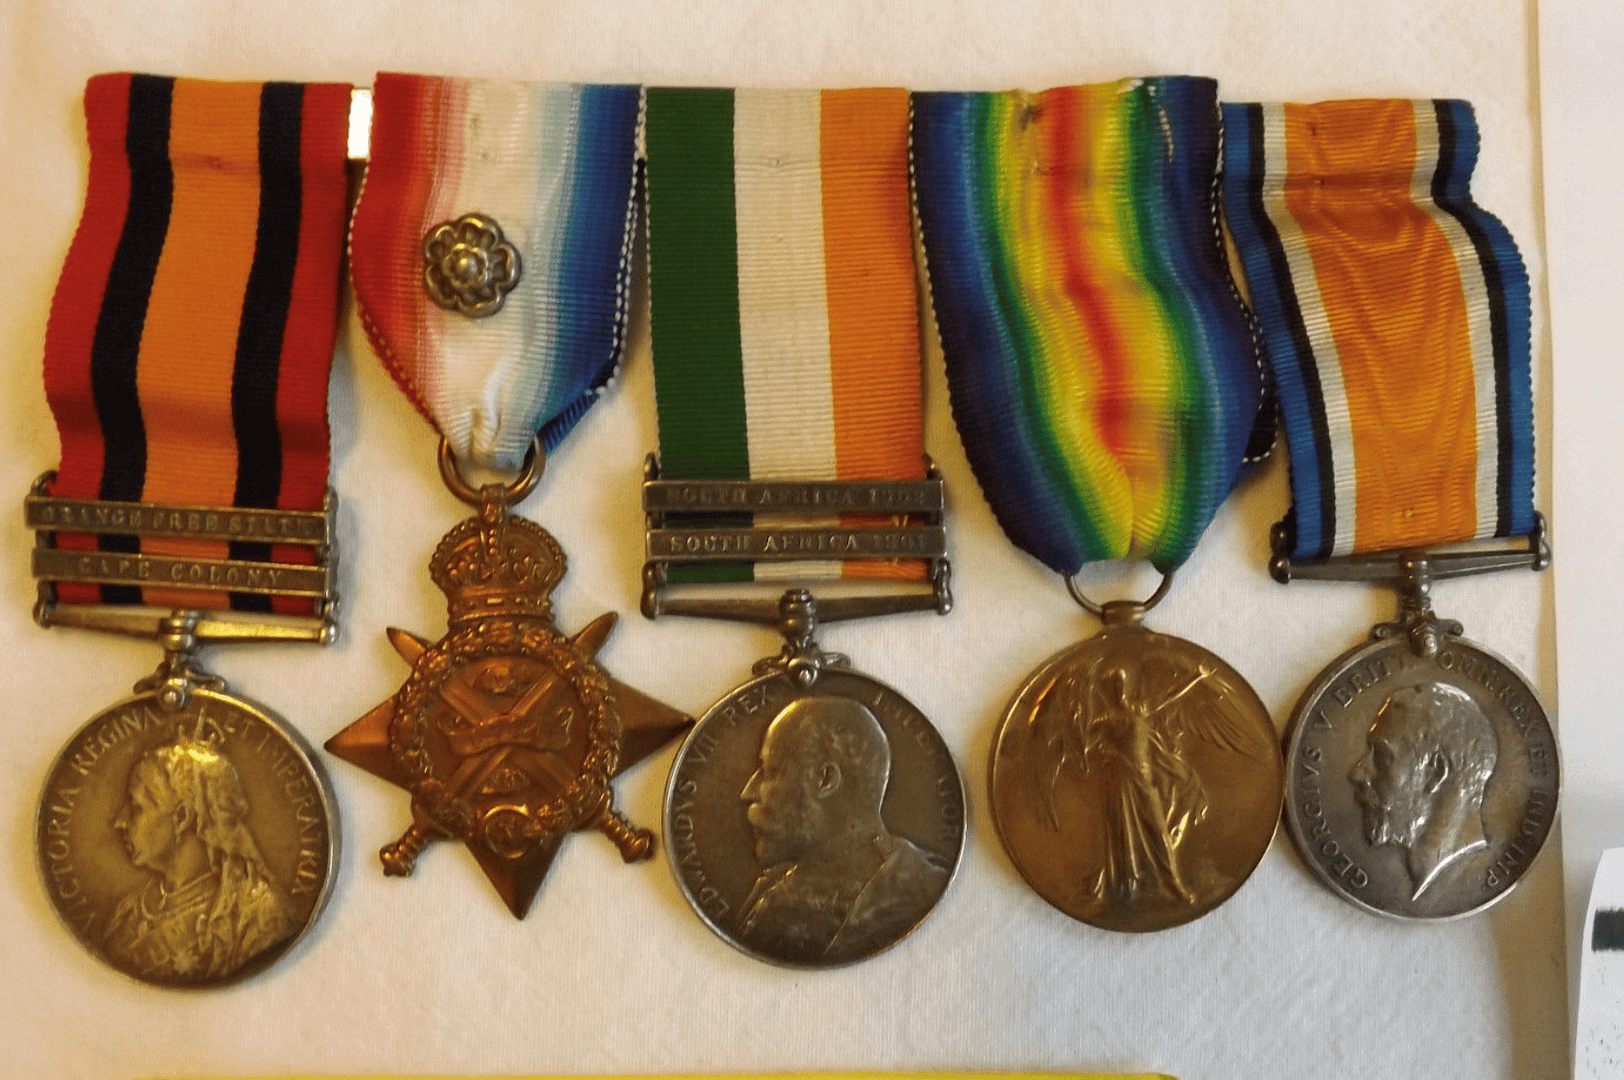
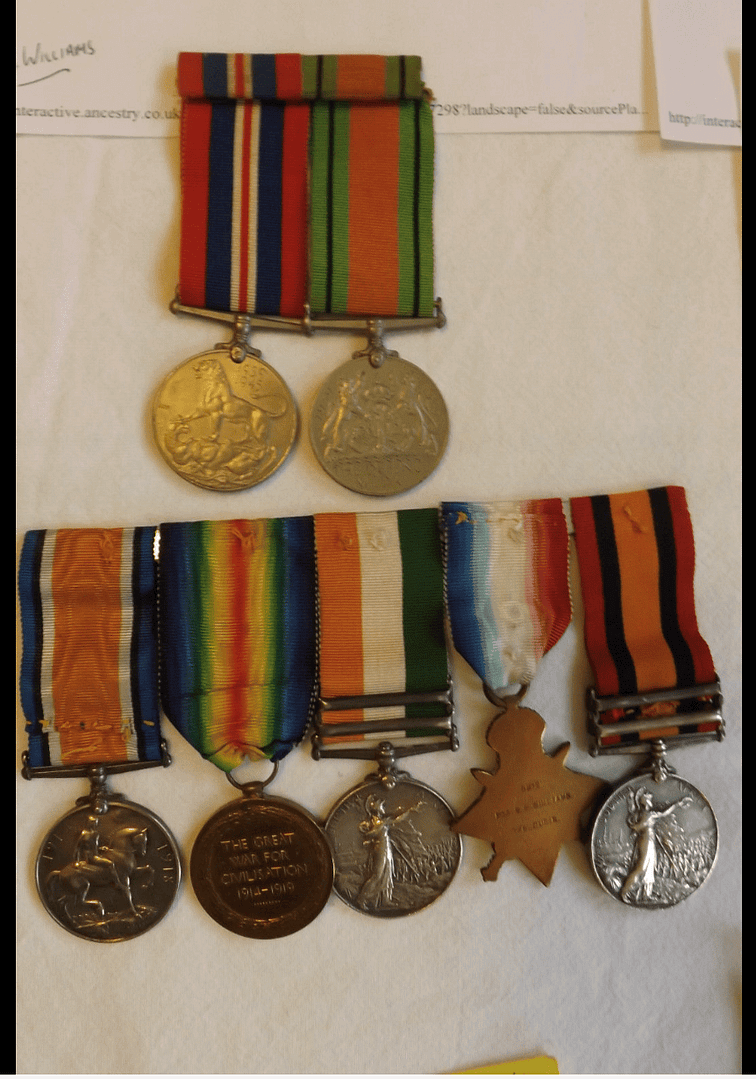
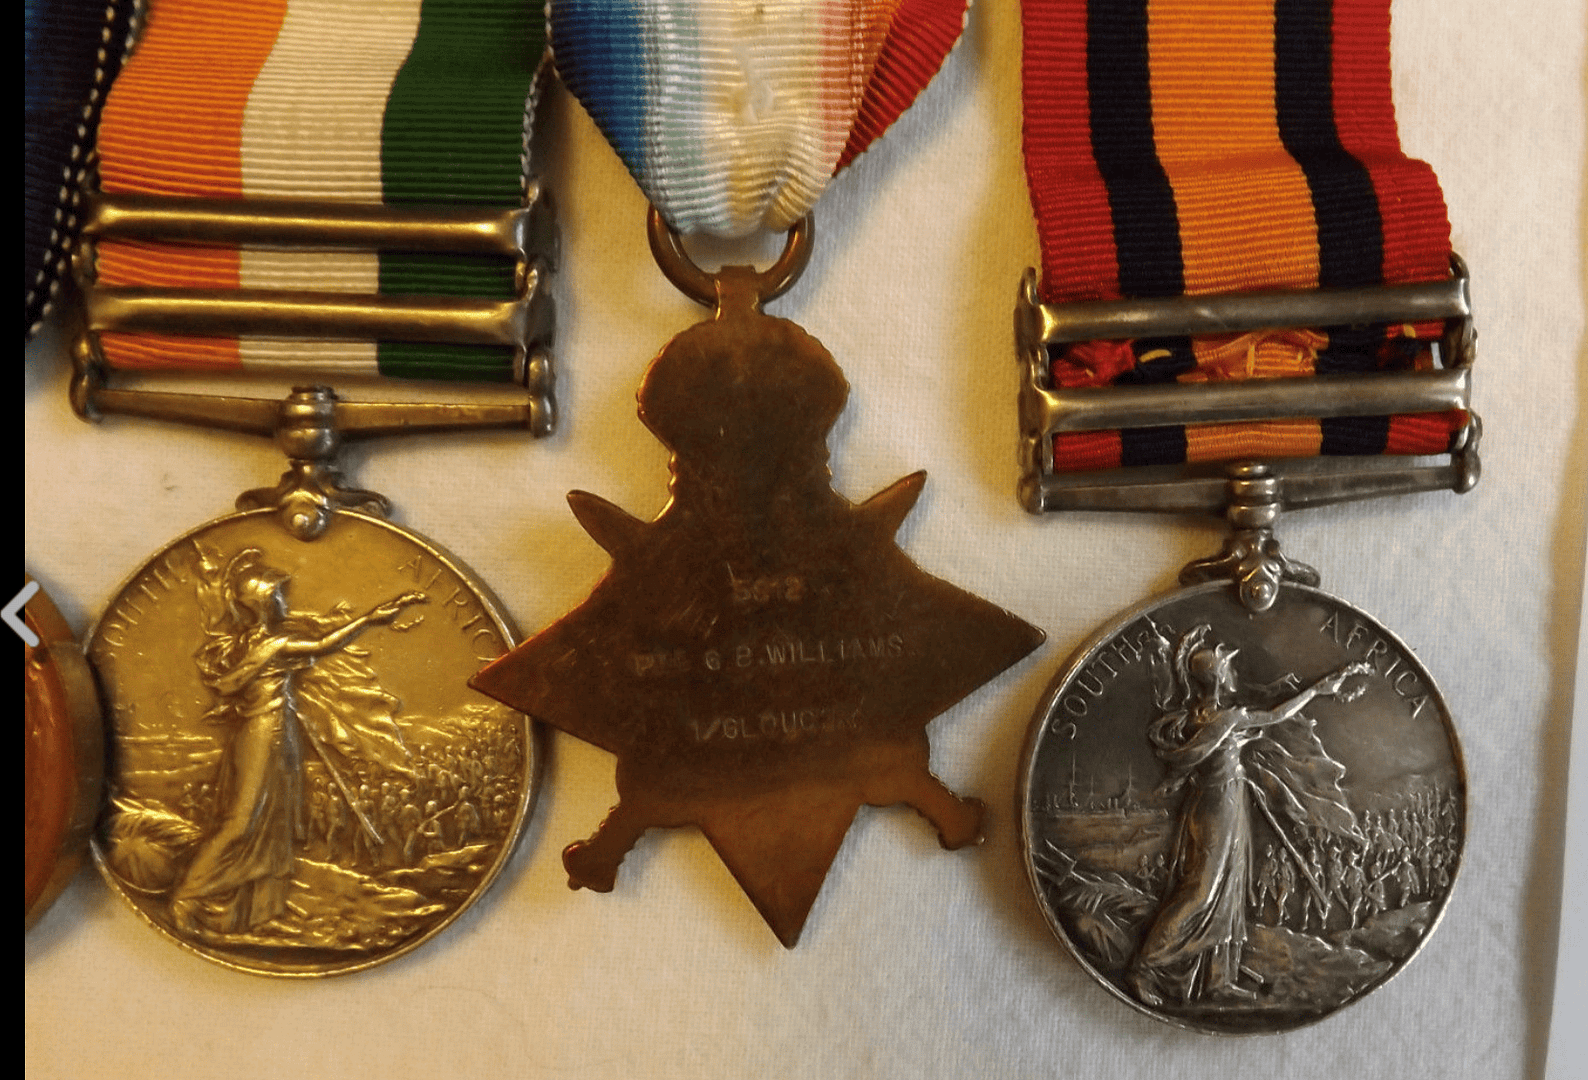
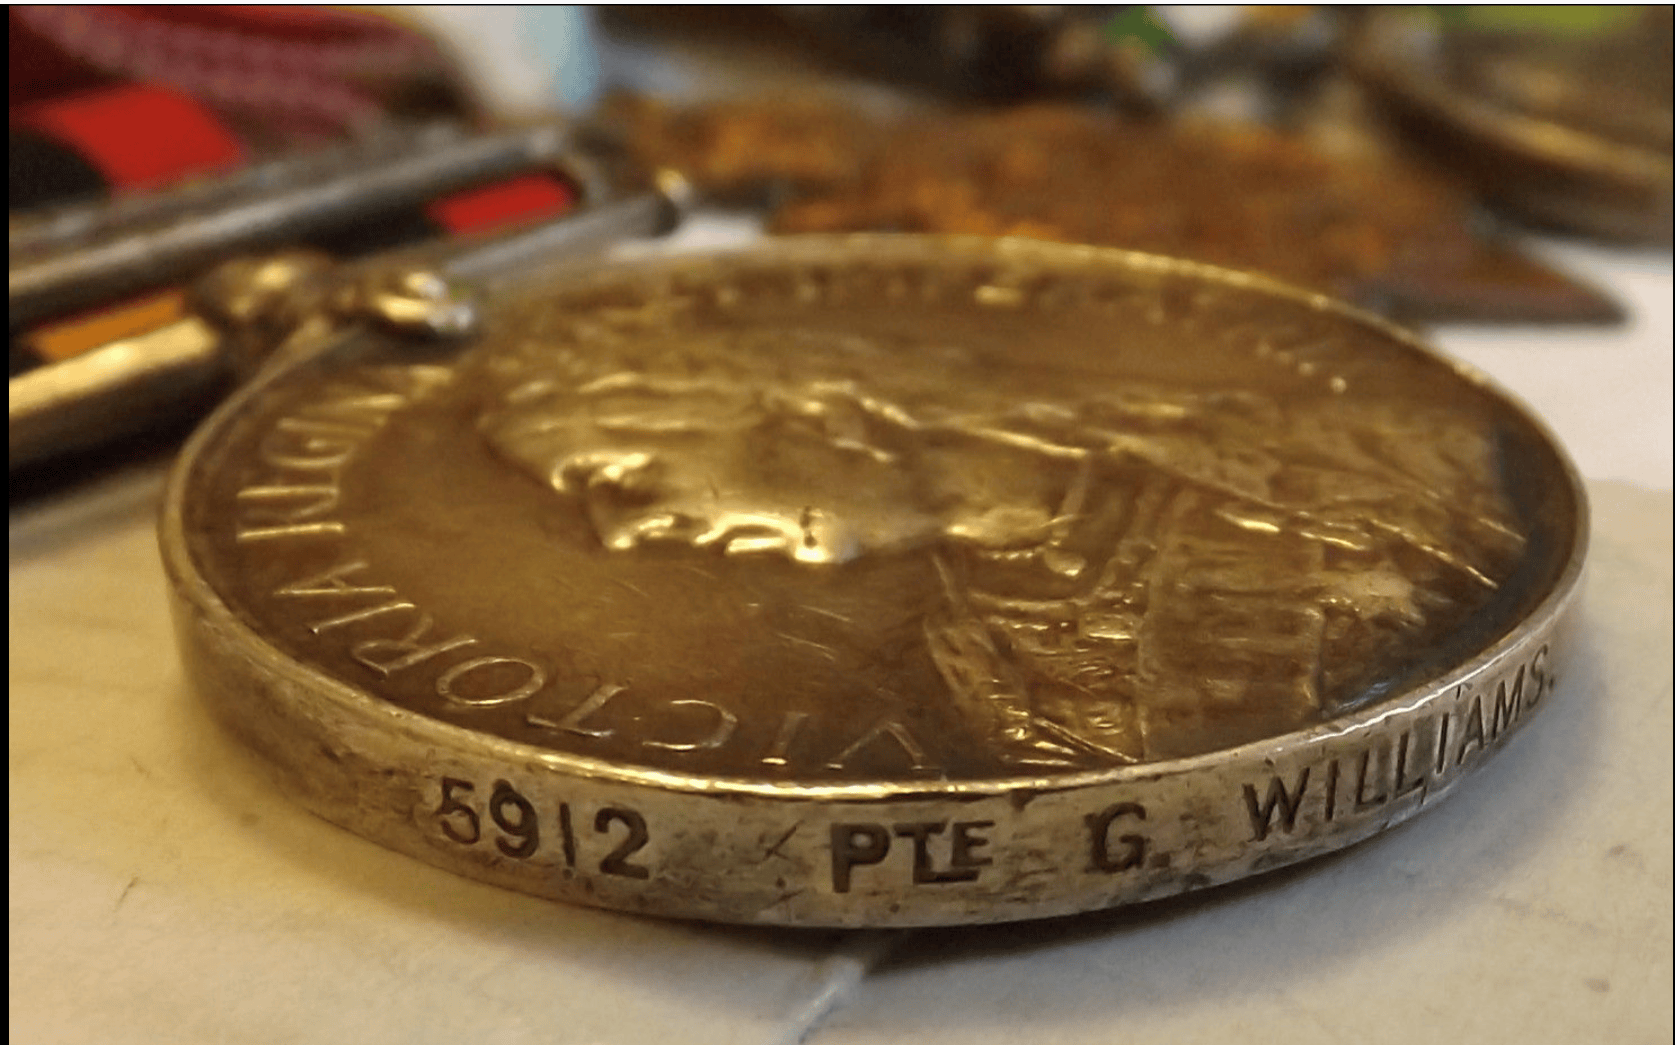
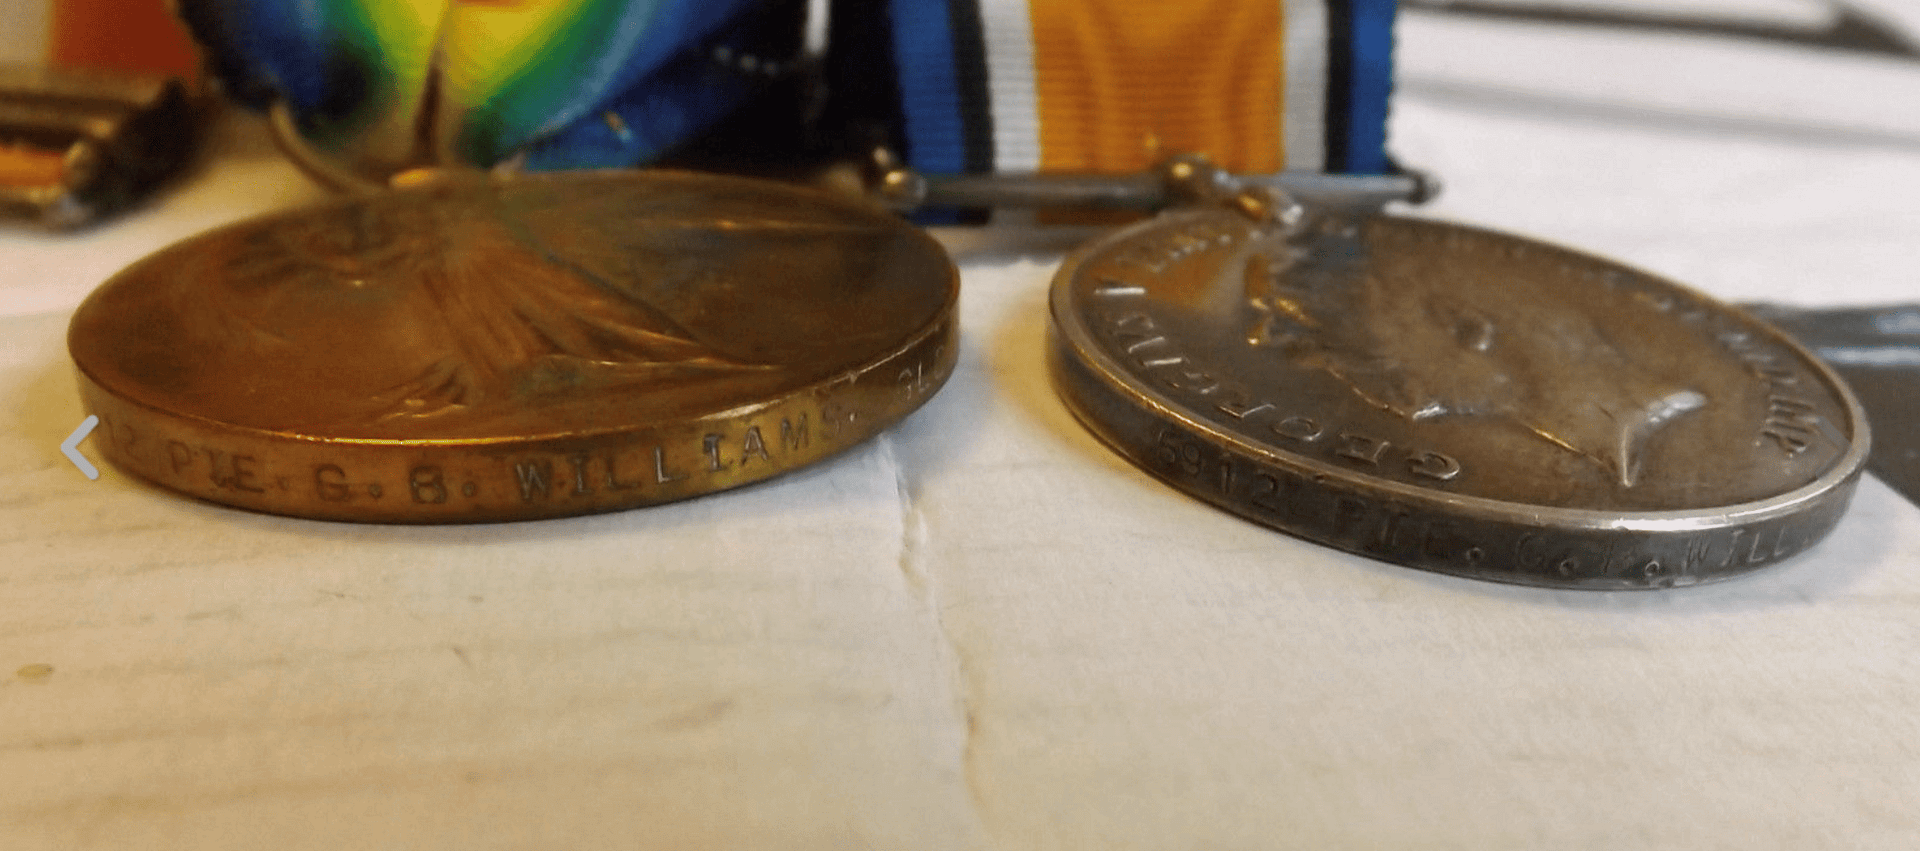
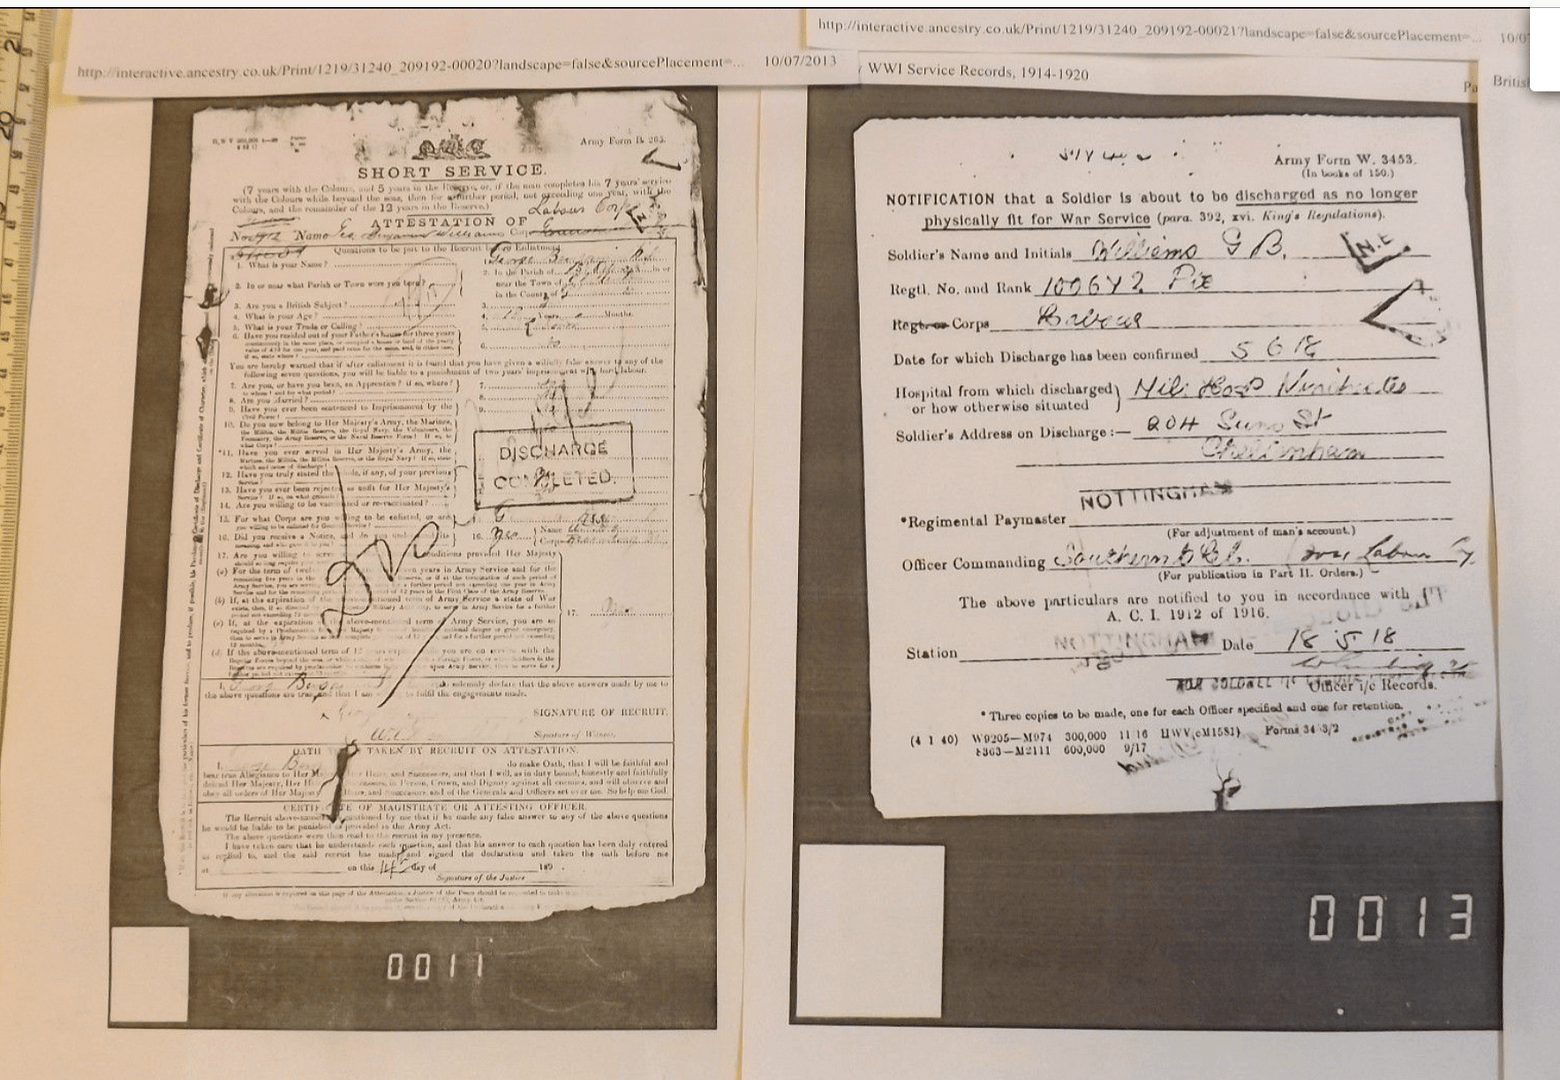
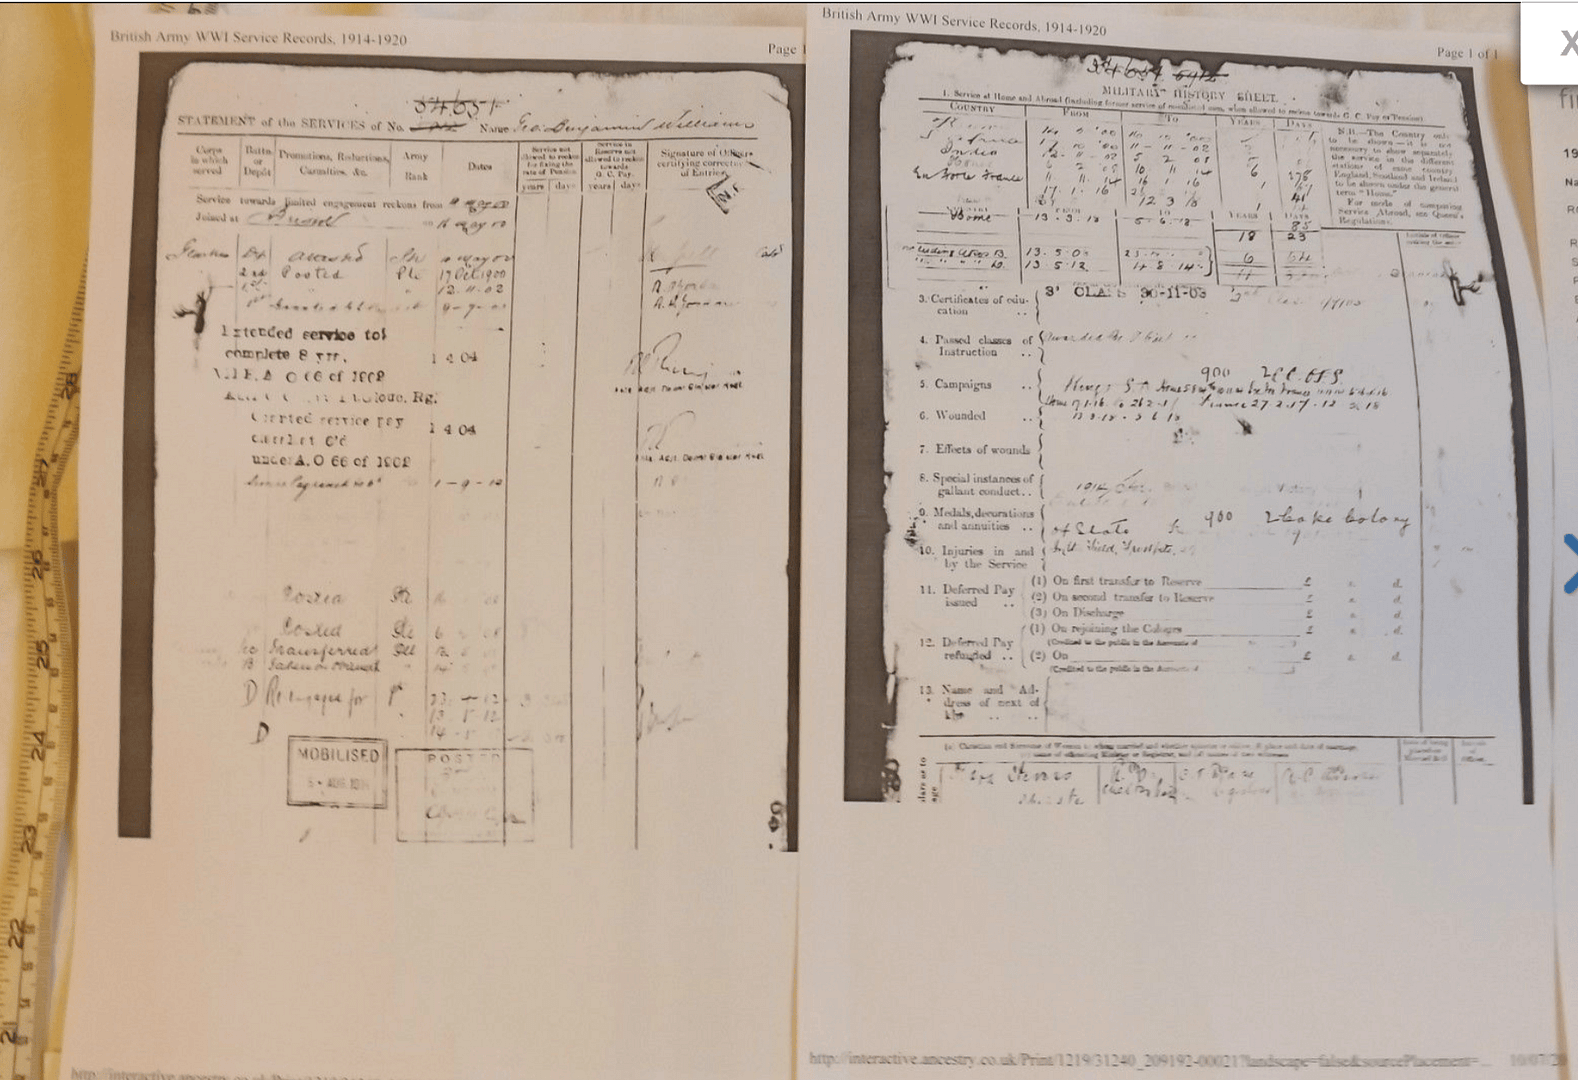
PTE Williams Glosters WW1 trio plus QSA with clasps Orange Free State & Cape Colony, and KSA with clasps 1901 & 1902. From my personal collection.
An Original Full Size Military Boer War & WWI Medal Group.
Queens South Africa, Medal With Two Bars/Clasps: Transvaal. Orange Free State. Cape Colony. 2nd Type With Ghost Dates.
Kings South Africa, with clasps 1901 and 1902
Mons Star With 5th Aug-22nd Nov Clasp,
WWI British War Medal
Victory Medal
(QSA)
Named to “5701 Pte J.Crossman Glouc: Regt.” Mons 1914 Star Named 2399 Pte J.Crossman 1/Glouc:R. British War & Victory Medals Named “2399 Pte J.Crossman Glouc. R”. (1st Battalion Gloucester Regiment). With Private James Crossman Copied Index Card.
Found this useful? Buy me a coffee — it helps fund future battlefield research
Authored by Mick Prictor, a retired military officer with 40 years’ service, and a military historian specialising in terrain-focused analysis of tactics, doctrine, and command decision-making in land warfare. His work draws on extensive battlefield fieldwork—more than 280 sites worldwide—and one of the world’s largest private collections of historic military arms, uniforms, and equipment. About me
Subscribe to Battlefield Travels and receive a free E-Book Battlefield Guide
Unlock expert battlefield analysis, campaign reconstructions, and historical insights drawn from firsthand exploration and primary sources.
🗺️ You’ll receive:
🎖️ Exclusive historical insights you won’t find elsewhere
📘 A free eBook: 10 Tips for Exploring Historic Battlefields
📰 New battlefield studies straight to your inbox as they are published
Claim Your Free Battlefield Travel Guide
Get your free e-book, exclusive tips, and updates on new battlefield studies.
Thank you!
You have successfully joined our subscriber list.
⚔️ Go deeper — Members get exclusive access to the Deep Research Collection, Field Notes, and monthly Research Dispatches. Try membership free for 7 days, cancel anytime. From $9/month.